# Medblocks Platform Docs
Need help? Running into an issue or have a question the docs do not answer? Get support from the Medblocks team through https://forms.gle/dtVxkmfL6Yimp6SBA and we will get back to you.
---
# Auth event history
Read the audit trail of authorization attempts to see where a connection failed.
Source URL: /docs/auth-event-history
# Auth event history
Read the audit trail of authorization attempts to see where a connection failed.
When a patient reports that connecting did not work, auth event history is the dashboard trail for the authorization attempt. It shows the steps around portal redirect, consent, OAuth callback, token exchange, and later token refresh.
## When to use it [#when-to-use-it]
Reach for auth event history when you need to answer questions like these.
* Did the patient reach the portal?
* Did they sign in?
* Did they approve access?
* Did the token exchange succeed?
* Did a later refresh fail?
Use [Pull monitoring](/docs/pull-monitoring) when authorization worked but records are not available yet. Use auth event history when the question is whether access was granted in the first place.
## Open the patient [#open-the-patient]
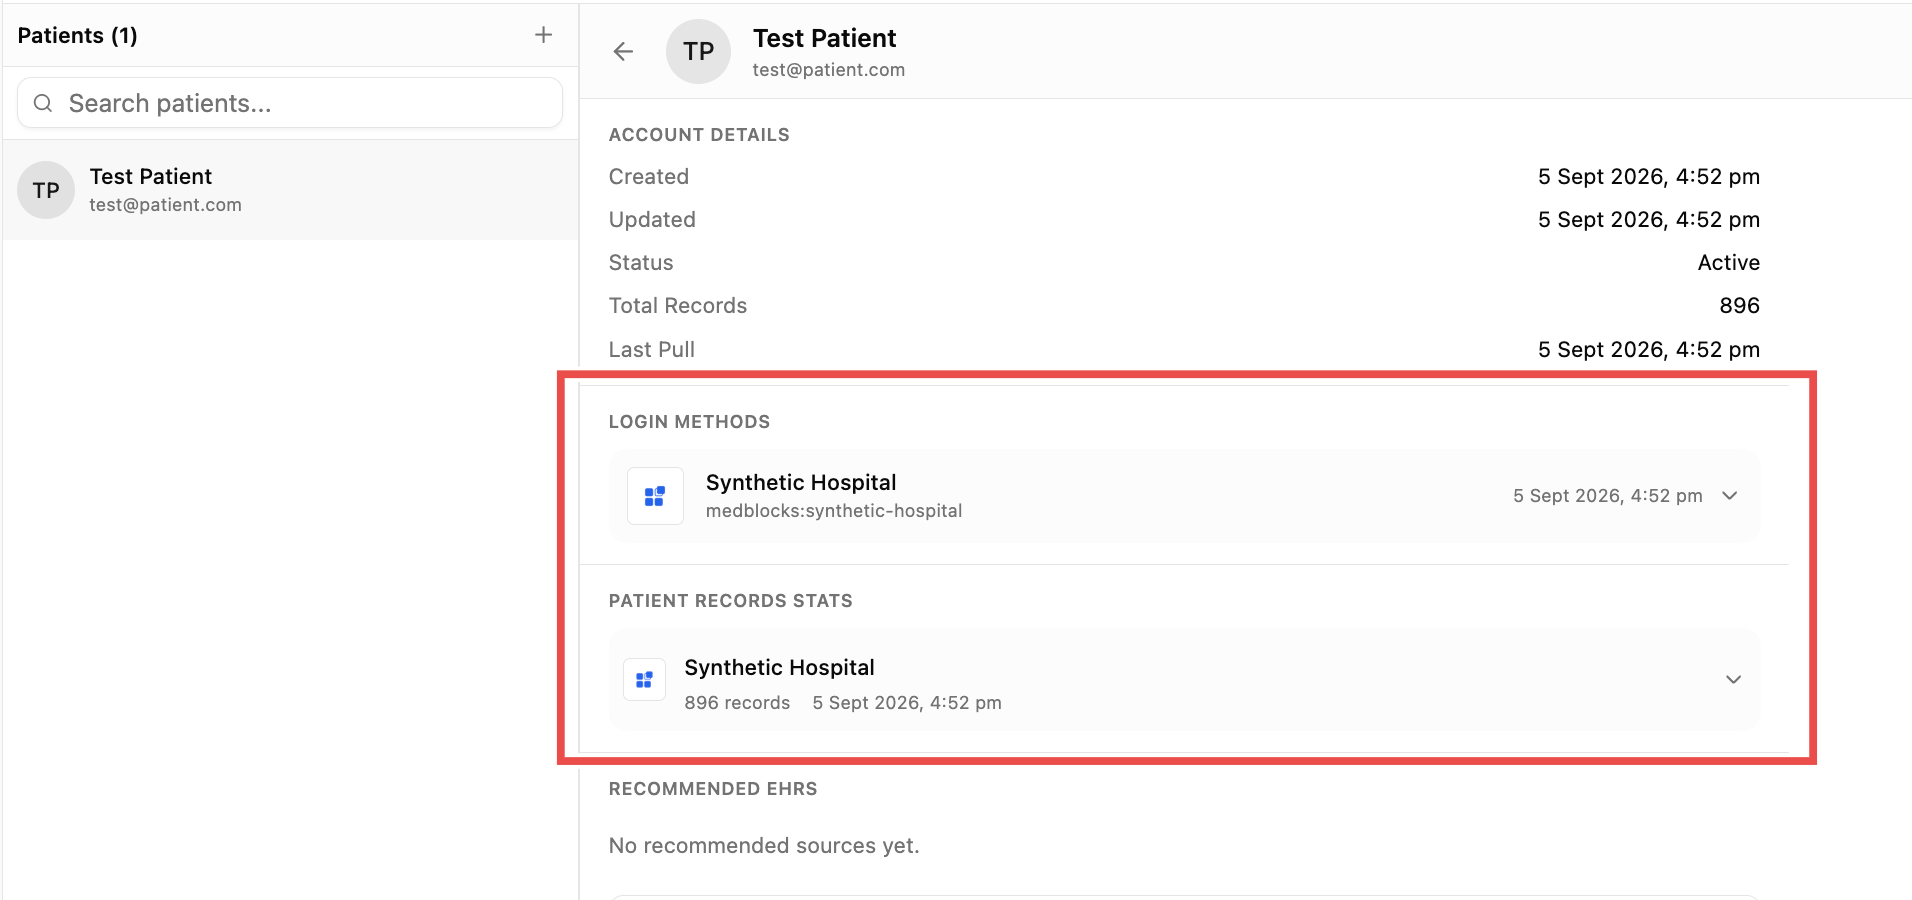
In the dashboard, go to Patients, select the patient, and look at the connection and login history.
## What to look for [#what-to-look-for]
| Field | What it tells you |
| ----------------- | ----------------------------------------------------------- |
| Source name | Which EHR or payer the attempt was against |
| Event status | Whether the attempt succeeded or which failure state it hit |
| Error code | A stable code you can quote to support |
| Error description | The human-readable detail |
| Timestamp | When the attempt happened |
Quote the stable error code and timestamp when you contact support. The human-readable description is useful for operators, but the code is what makes the event searchable.
## Common outcomes [#common-outcomes]
| Scenario | Interpretation |
| ---------------------------------------- | --------------------------------------------------------------------- |
| Success with an active connection | The patient authorized and Medblocks stored usable access |
| The patient denied consent at the portal | The patient reached the portal but declined to approve access |
| The portal returned an OAuth error | The source rejected the request during authorization |
| A later refresh-token failure | A previously active connection lost its access and needs reconnecting |
## How this differs from pull history [#how-this-differs-from-pull-history]
Auth event history answers “what happened during authorization?” Pull history answers “what happened while retrieving records after authorization?”
| Dashboard view | Best for |
| ------------------ | ----------------------------------------------------------------- |
| Auth event history | Sign-in, consent, OAuth, token exchange, refresh-token issues. |
| Pull history | FHIR retrieval, pagination, resource errors, record availability. |
## What your app should log [#what-your-app-should-log]
Log these fields so your application logs line up with what the dashboard shows.
* `session_id`
* `connection_id`
* `success`
* `error`
* `error_description`
* the Medblocks `request_id` for any failed API call
## See also [#see-also]
* [Authorization](/docs/patient-access/authorization)
* [Your own UI](/docs/patient-access/create-patient-session/your-own-ui)
* [Pull monitoring](/docs/pull-monitoring)
---
# Overview
Server-to-server FHIR, bulk import, and HL7v2-over-HTTP that run unattended.
Source URL: /docs/backend
# Overview
Server-to-server FHIR, bulk import, and HL7v2-over-HTTP that run unattended.
These Backend docs are a work in progress. Use them as orientation while we expand the implementation guides.
Backend integrations are for data movement that should run without a patient or clinician sitting in the browser. A provider organization authorizes server-to-server access, and Medblocks uses that relationship to pull, sync, and export records in the background.
Use this when your product needs organization-scoped data for cohorts, operations, analytics, registries, or downstream systems that stay current over time.
## What backend access is for [#what-backend-access-is-for]
Backend access fits workflows such as:
* Nightly or scheduled sync for a patient panel.
* Population-level export into your warehouse or FHIR server.
* Operational dashboards that should update without a user launching an app.
* Bulk retrieval from an organization that has approved your integration.
The important difference from patient access is who grants the relationship. Patient access starts with a patient approving your app. Backend access starts with an organization authorizing your server.
## How Medblocks fits [#how-medblocks-fits]
Medblocks handles the connection setup, credential storage, source-specific authentication, and operational monitoring around the pull. Once records land, you can export them, listen to events, or inspect status through the API.
For Epic, backend setup centers on SMART Backend Services, organization selection, and FHIR Group IDs.
## Configure the connection [#configure-the-connection]
Start with [Configure Backend](/docs/configure-connections/backend). That guide shows where to add backend credentials, organizations, and Group IDs for Epic.
## See also [#see-also]
* [Configure Backend](/docs/configure-connections/backend)
* [Export to FHIR server](/docs/export-to-fhir-server)
* [Export to S3](/docs/export-to-s3)
* [Pull monitoring](/docs/pull-monitoring)
---
# Cerner
Register a Cerner (Oracle Health) System app for population-level data extraction via SMART Backend Services.
Source URL: /docs/backend/cerner
# Cerner
Register a Cerner (Oracle Health) System app for population-level data extraction via SMART Backend Services.
Cerner (Oracle Health) Millennium exposes a SMART Backend Services surface for system-level access, no clinician, no patient consent at request time. You authenticate with a JWT client assertion signed by your private key and exchange it for an access token scoped to a tenant. Use this for population-level pulls, Group-based bulk export, and scheduled extracts. For in-PowerChart clinician launches, see the [Cerner Practitioner](../clinician-workflow/cerner) guide instead.
This is a step-by-step guide to registering a System-type app on the [Cerner Code Console](https://code.cerner.com/), pre-registering Medblocks’ JWKS on Cerner Central, wiring the Client ID into Medblocks, and validating an end-to-end token exchange against the public Cerner code sandbox.
For Oracle’s reference on the auth flow, see the [Authorization Framework](https://docs.oracle.com/en/industries/health/millennium-platform-apis/authorization-framework/) overview and specifically [Requesting Authorization on Behalf of a System](https://docs.oracle.com/en/industries/health/millennium-platform-apis/authorization-framework/#requesting-authorization-on-behalf-of-a-system).
### Sign in to Cerner Code Console [#1-sign-in-to-cerner-code-console]
Go to [code.cerner.com/developer/smart-on-fhir/apps](https://code.cerner.com/developer/smart-on-fhir/apps) and sign in with your Cerner Code account. You will land on **My Applications**.
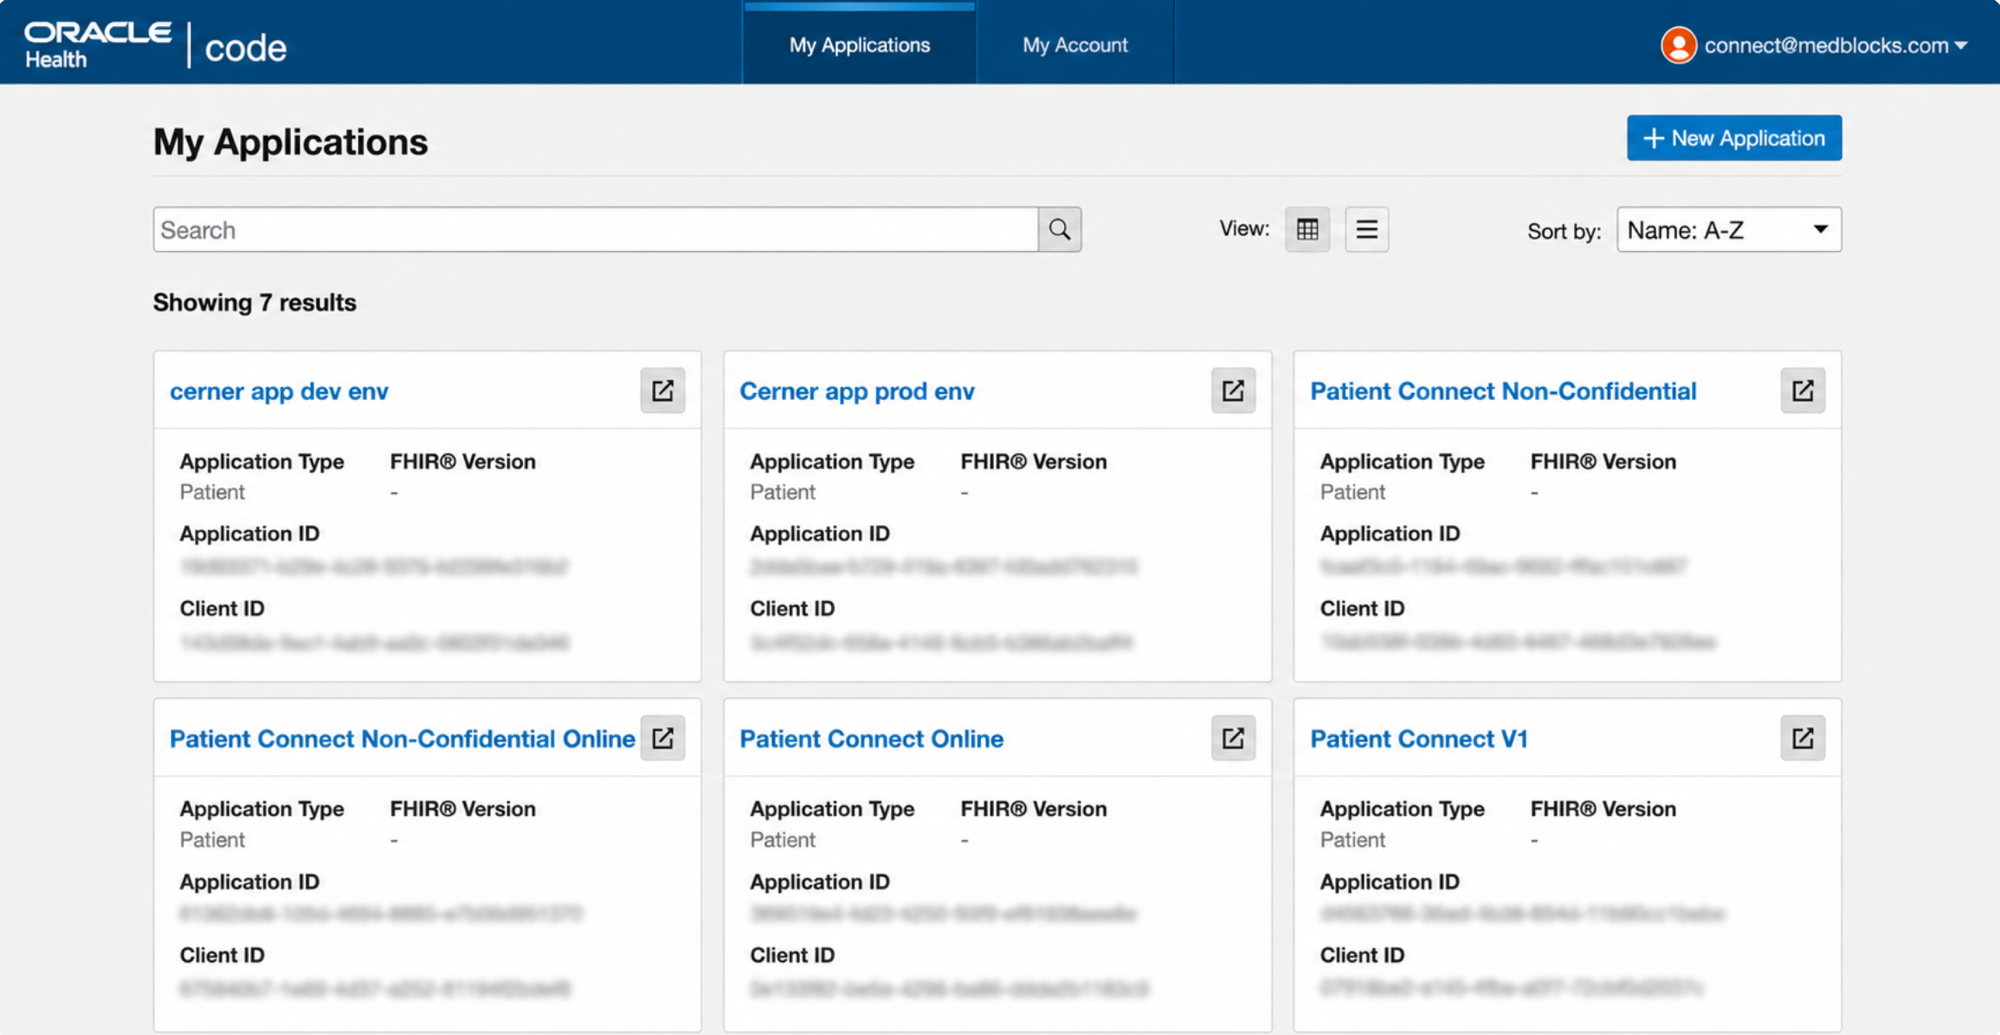
Click **+ New Application** in the top right to start a new registration.
### Basic Information and Application Type [#2-basic-information-and-application-type]
The first step of the wizard captures the basic details that determine which products and scopes appear on the later screens. System apps are configured differently from Provider apps, follow these exact selections.
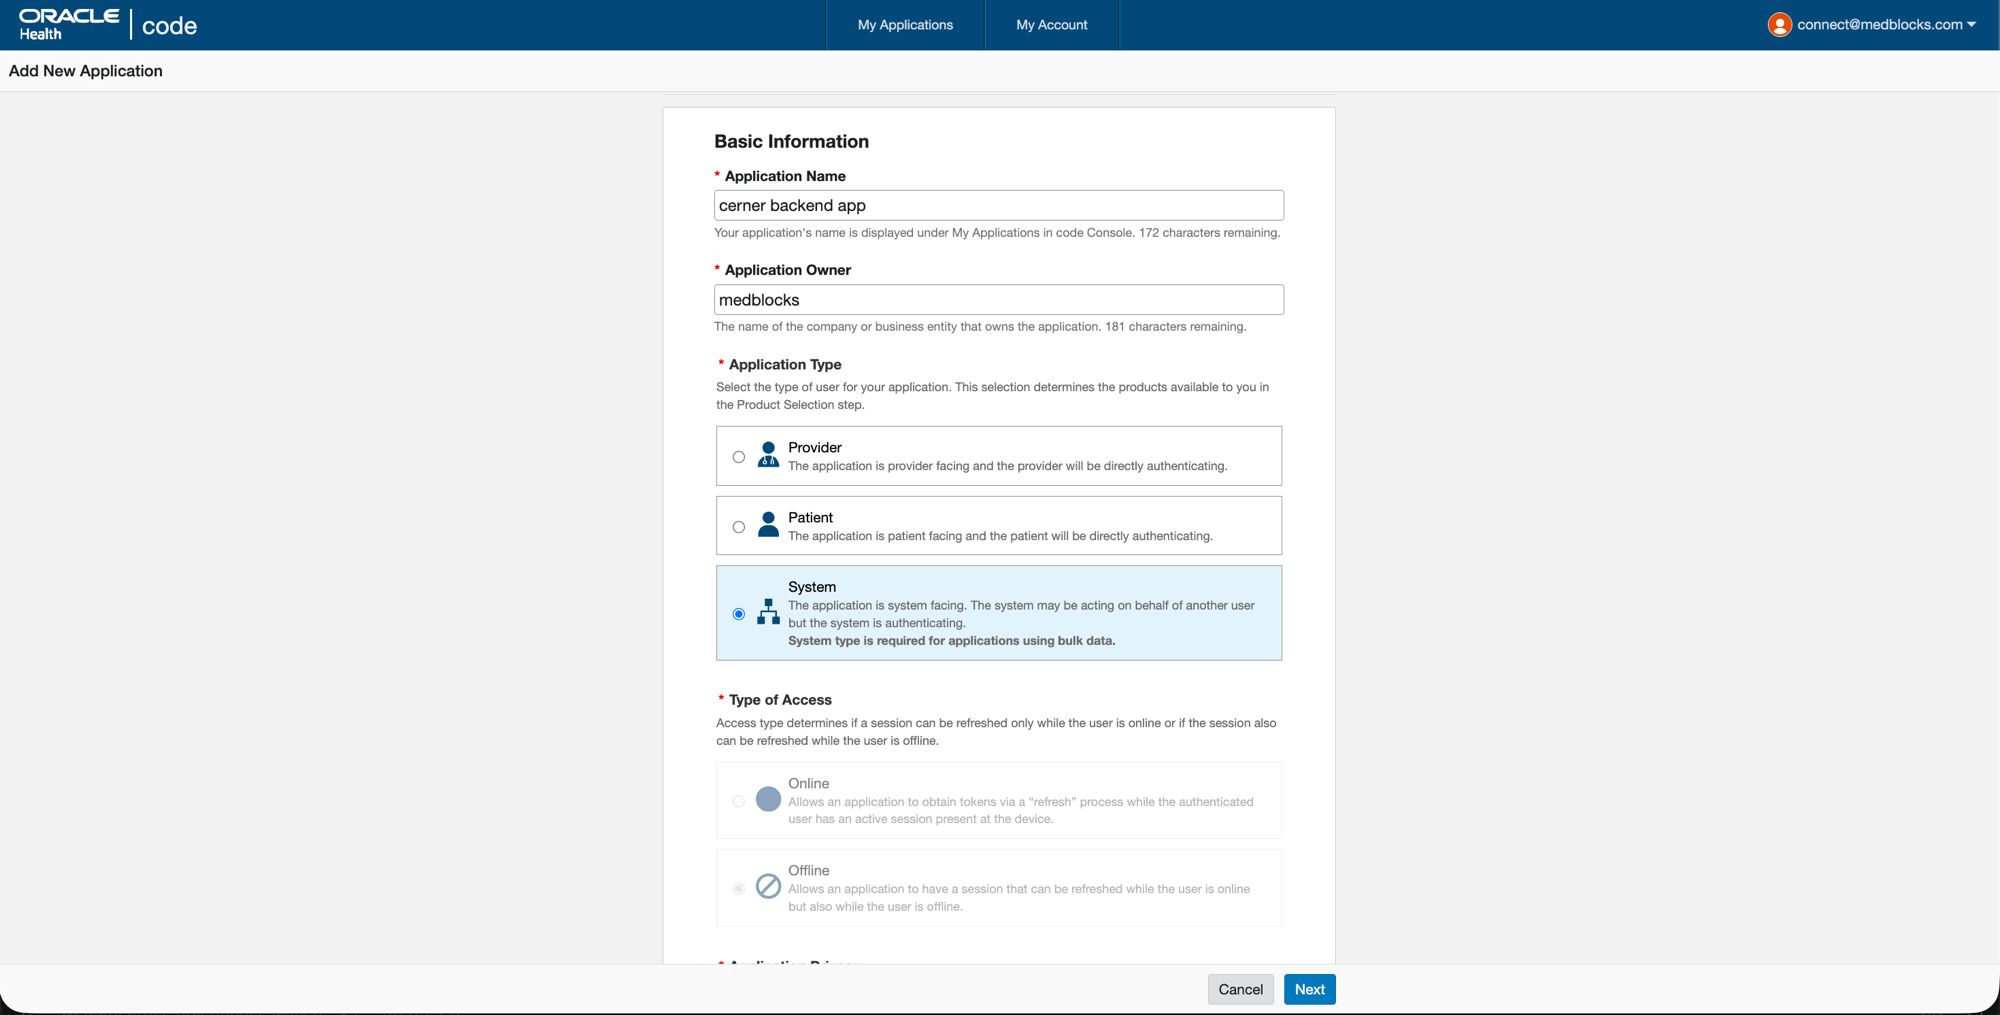
* **Application Name**: anything descriptive, this is the name shown for the app inside Cerner Central.
* **Application Owner**: your company name (Medblocks for our case).
* **Application Type**: **System**, this is the SMART persona for backend services running without a clinician or patient context.
* **Type of Access**: **Offline**, the only option Cerner offers for System apps.
### SMART Version, and Intended Audience [#3-smart-version-and-intended-audience]
Scroll down for the rest of the first step.
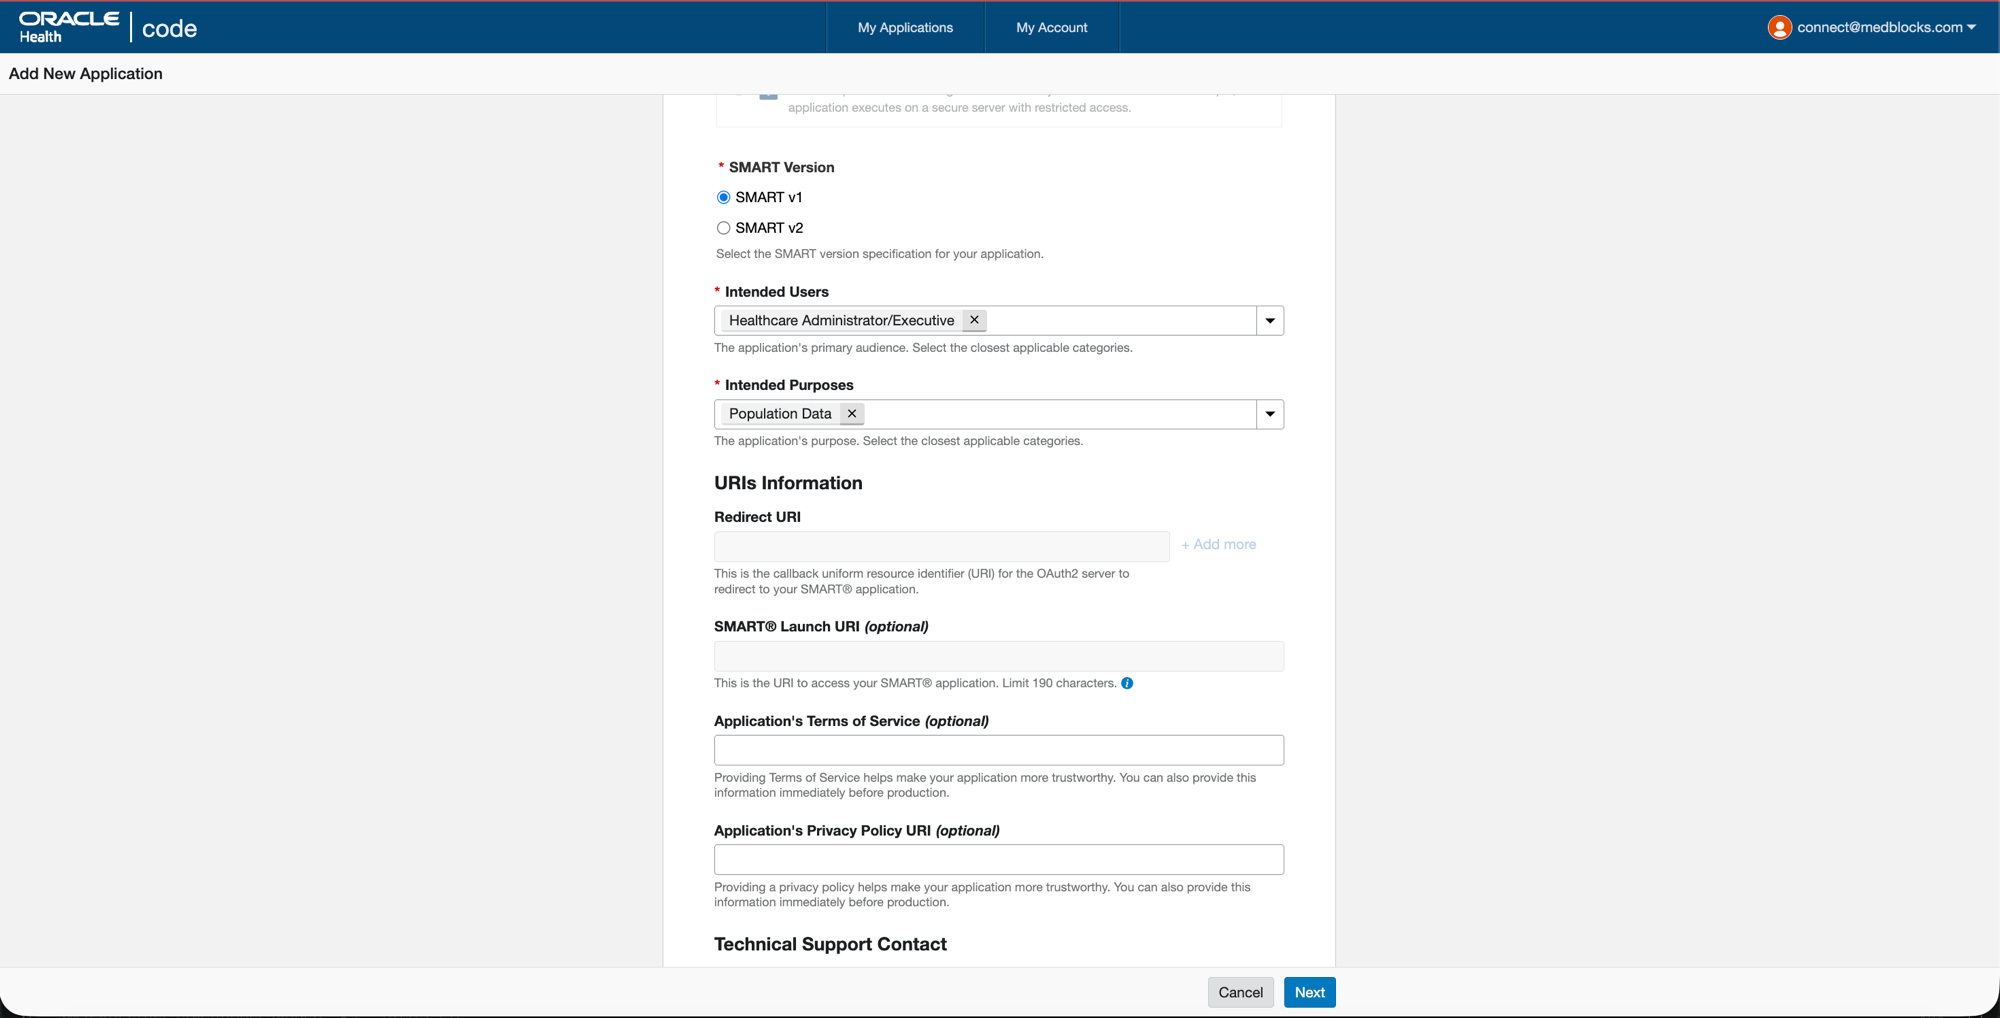
* **SMART Version**: **SMART v1**, Cerner sandbox and most production tenants are on v1.
* **Intended Users**: **Healthcare Administrator/Executive**. System services are not user-facing, this is the closest match.
* **Intended Purposes**: **Population Data**.
* **Redirect URI**: blank. There is no user redirect in the `client_credentials` flow.
* **SMART Launch URI**: blank. System apps are not launched from PowerChart.
* **Privacy Policy / Terms of Service / Technical Support**: blank for sandbox, recommended for production.
Click **Next**.
### Product Selection [#4-product-selection]
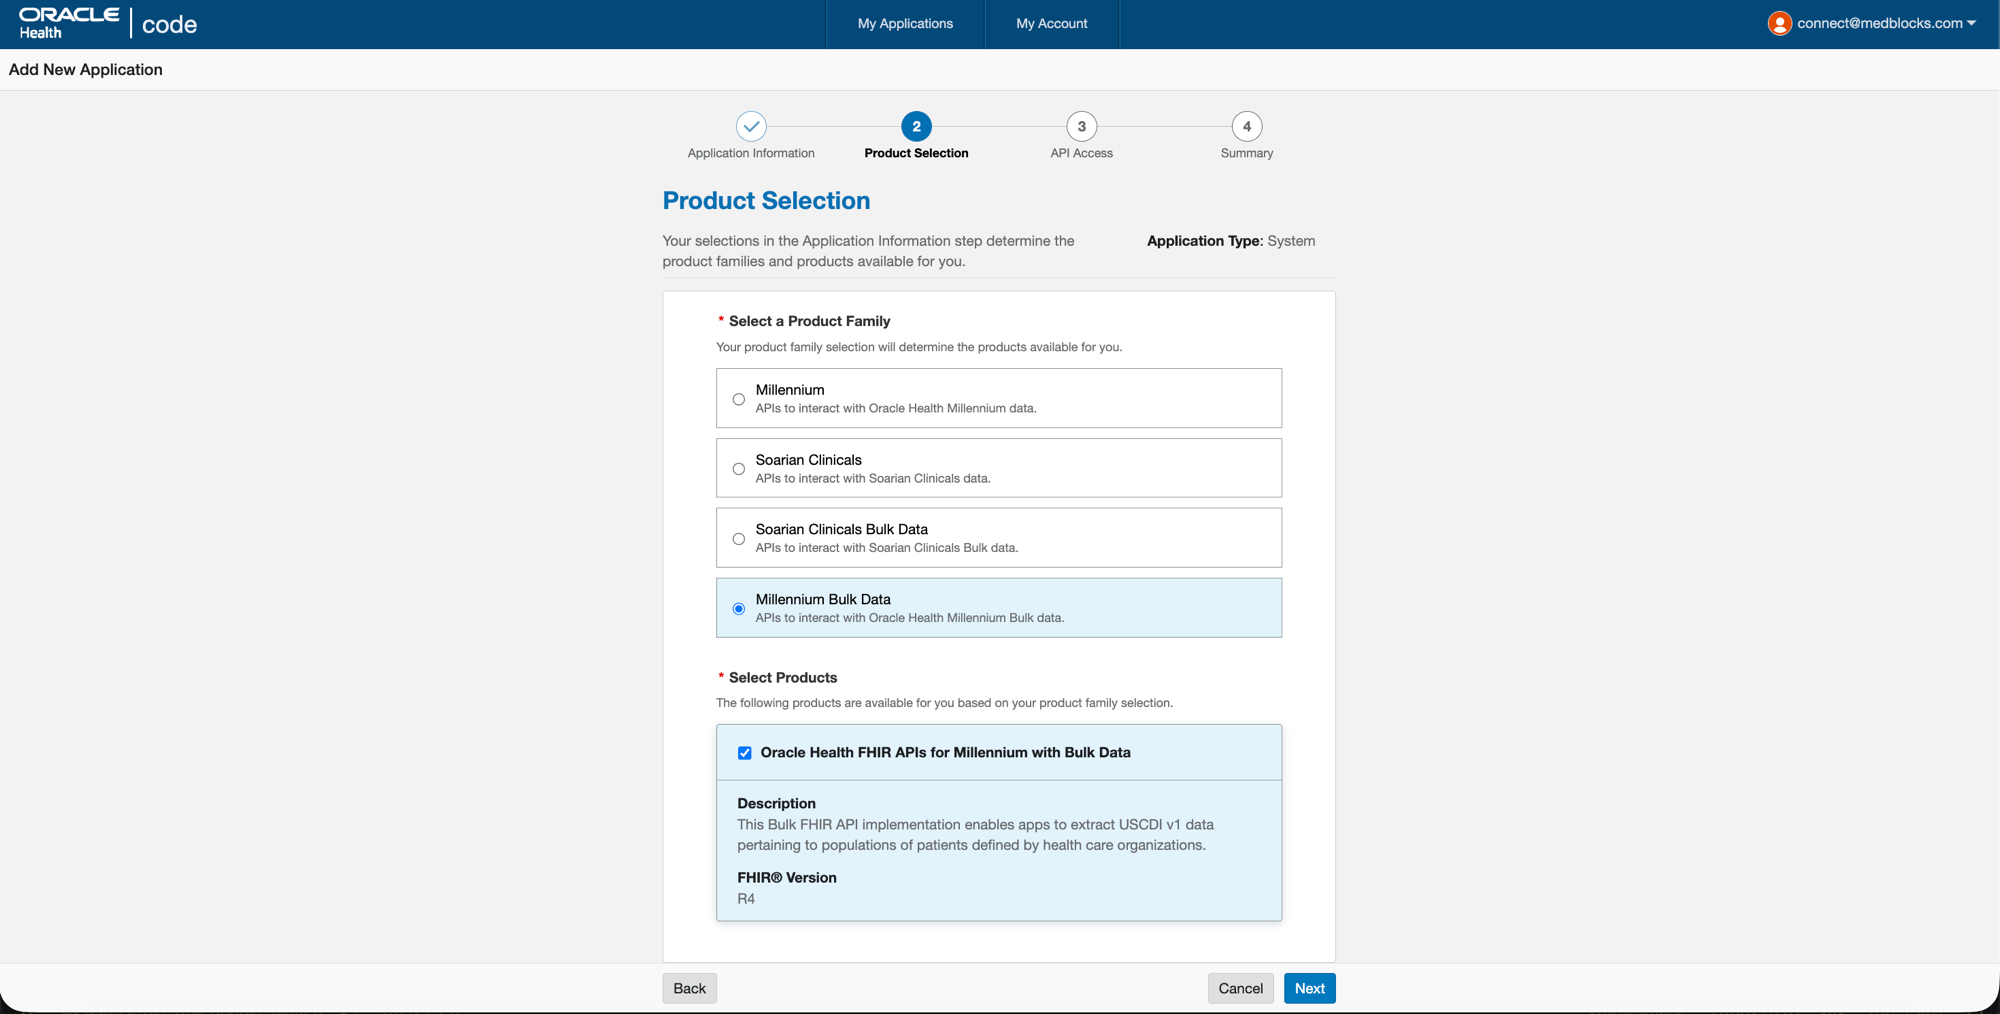
* **Product Family**: **Millennium Bulk Data**, this is the SMART Backend Services product (Group-level `$export`, system-level reads). The plain **Millennium** family is for user-context FHIR.
* **Select Products**: tick **Oracle Health FHIR APIs for Millennium with Bulk Data, FHIR R4**.
If Cerner allows multiple selections, also tick **Millennium** so you can issue single-resource system reads in addition to bulk exports. If the picker is radio-style, **Millennium Bulk Data** alone is the right choice for the typical backend pull.
Click **Next**.
### API Access (Scopes) [#5-api-access-scopes]
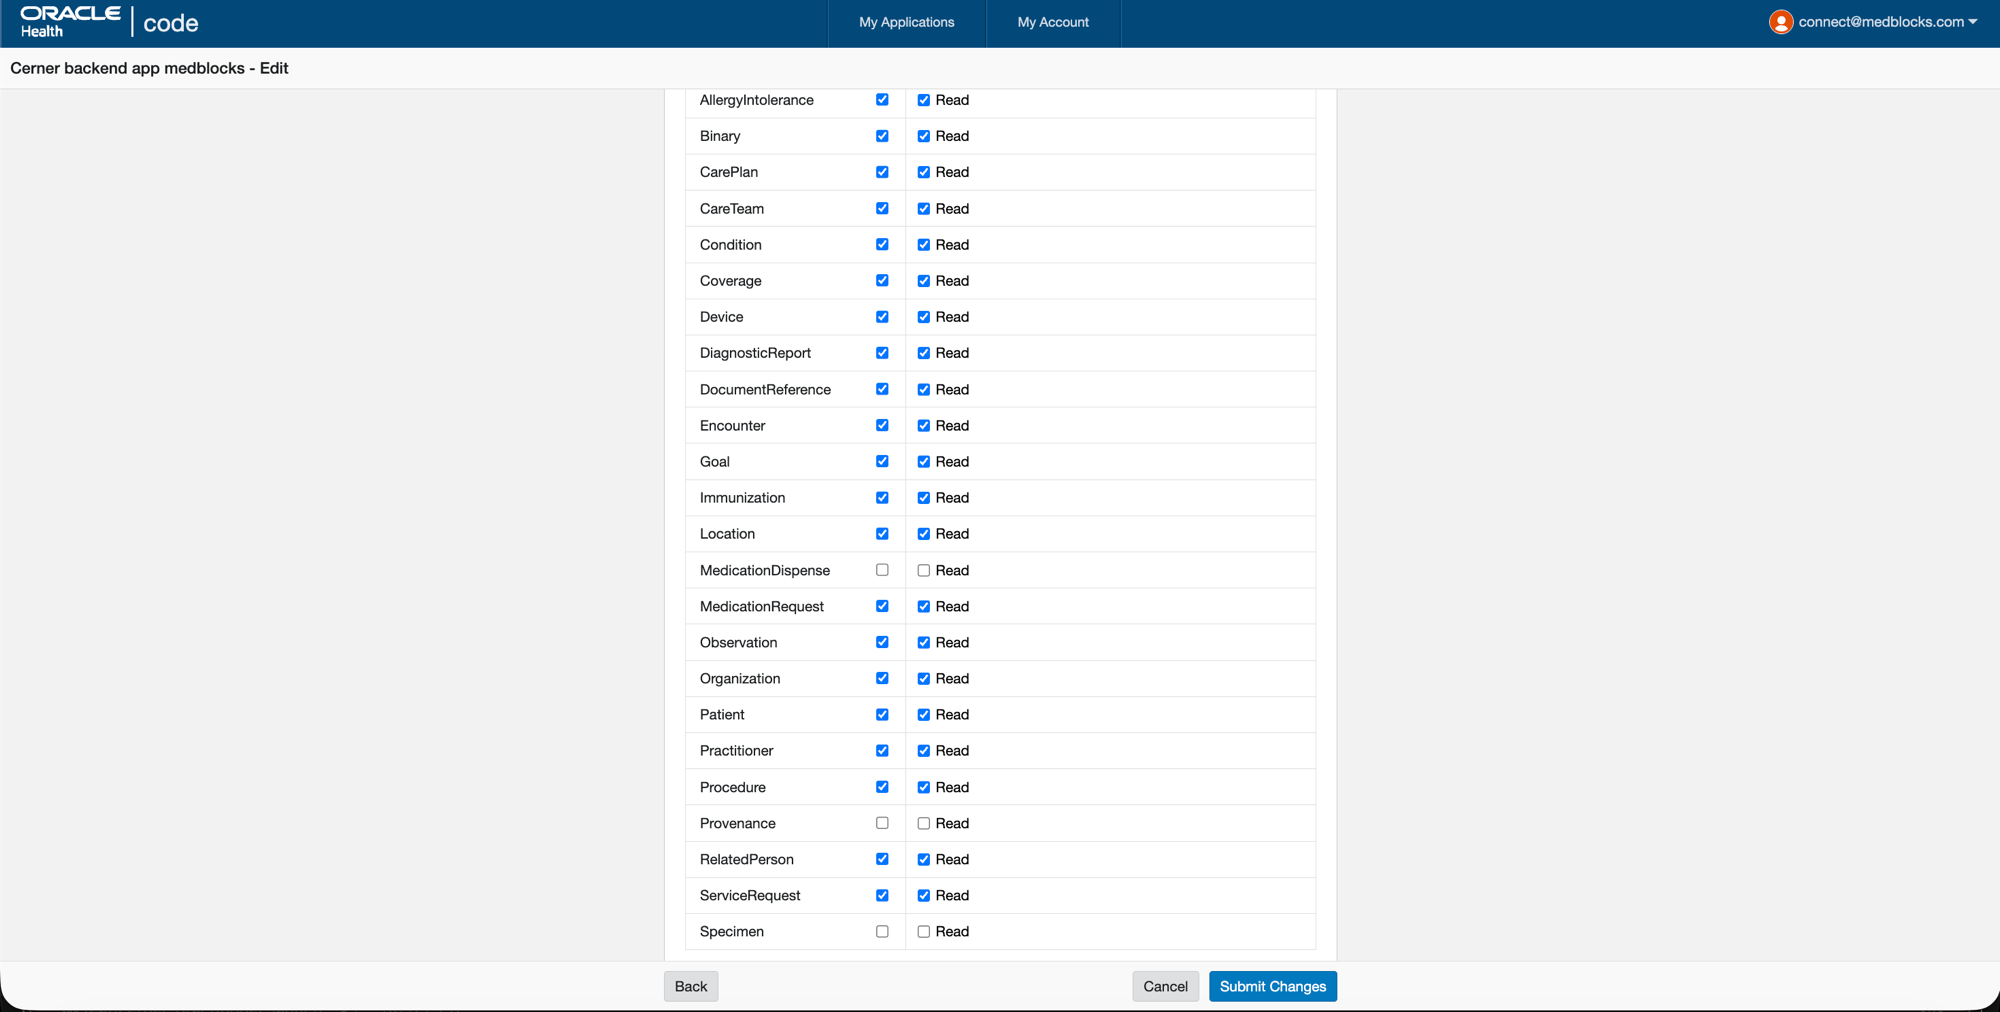
The **System Product APIs** table maps to `system/*` scopes.
Request only what your worker actually reads plus what its references resolve to — Cerner production review scrutinizes scope inflation and will bounce apps requesting more than they use. Medblocks’ backend worker issues the USCDI v1 + v3 resource set from [`src/server/jobs/fhir/queries/cerner.ts`](https://github.com/medblocks/connect/blob/main/src/server/jobs/fhir/queries/cerner.ts), then follows references (Practitioner, Organization, Location, Binary, RelatedPerson) from those responses. Each has a `system/.read` scope in Oracle’s [R4 API catalogue](https://docs.oracle.com/en/industries/health/millennium-platform-apis/mfrap/r4_overview.html). Tick **Read** on:
* **AllergyIntolerance**
* **Binary**
* **CarePlan**
* **CareTeam**
* **Condition**
* **Coverage**
* **Device**
* **DiagnosticReport**
* **DocumentReference**
* **Encounter**
* **Goal**
* **Immunization**
* **Location**
* **MedicationRequest**
* **Observation**
* **Organization**
* **Patient**
* **Practitioner**
* **Procedure**
* **RelatedPerson**
* **ServiceRequest**
Leave MedicationDispense, Provenance, and Specimen unticked — the worker doesn’t read them and they’d flag the review. If the query set expands later, come back and tick the added resources.
Click **Next**, review the summary, and **Submit**.
### Application Details Page [#6-application-details-page]
After submission you land on the application detail page. The layout is the same as the Provider app version covered in the [Cerner Practitioner guide](../clinician-workflow/cerner#6-application-details-page), the differences for the System app are:
* **Application Type** reads **System** (not Provider) and **Type of Access** reads **Offline**.
* **Redirect URI** and **SMART Launch URI** are empty, system apps don’t use them.
* **Product** is **Oracle Health FHIR APIs for Millennium with Bulk Data**.
* The **System Product APIs** scopes you ticked in Step 5 appear at the bottom — verify all twenty-one resources are listed.
Copy the **Client ID** for Medblocks, then click **Cerner Central System Account Details** to continue on Cerner Central.
### Cerner Central System Account and JWKS [#7-cerner-central-system-account-and-jwks]
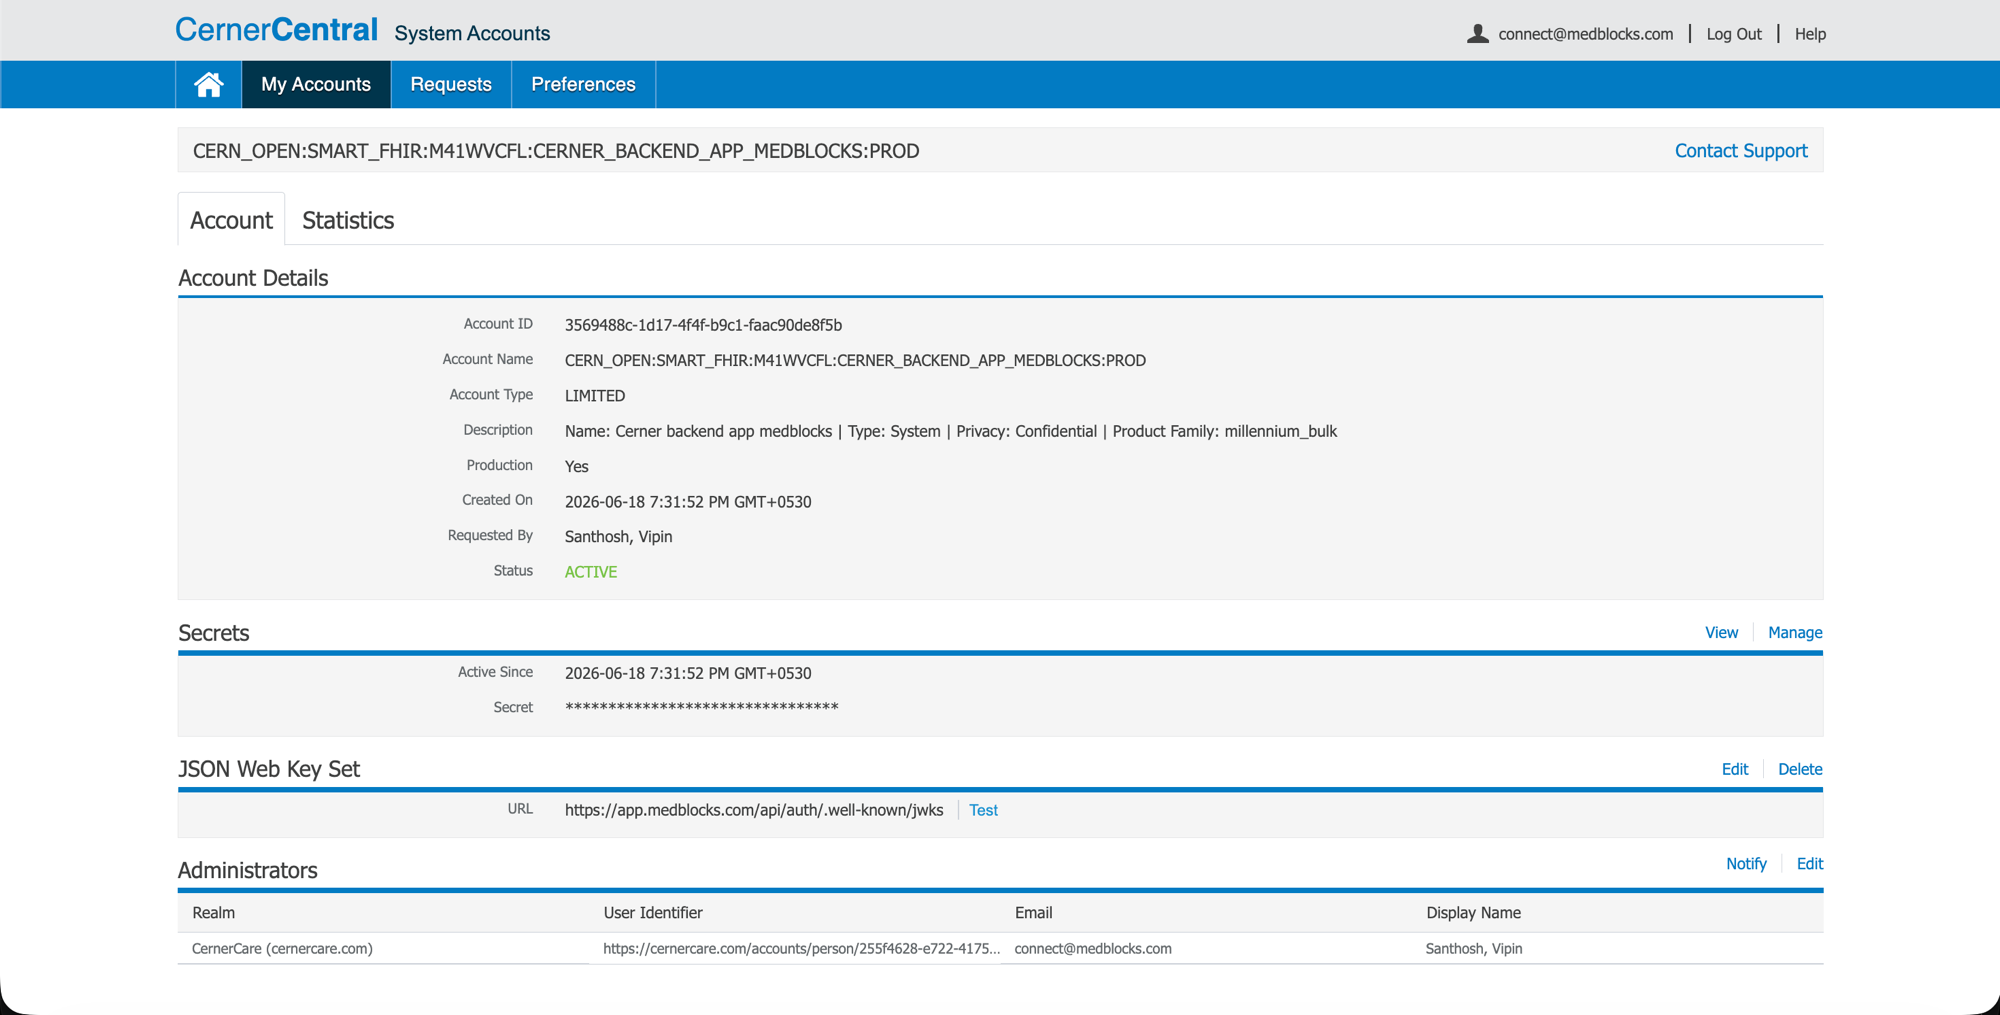
System apps authenticate with a JWT signed by Medblocks’ private key. Cerner needs to fetch your public key (JWKS) at runtime to validate the signature. The JWKS URL is pre-registered on the System Account in Cerner Central, not on the Code Console itself.
The flow is identical to the Provider app’s JWKS setup, see the [Cerner Practitioner guide](../clinician-workflow/cerner#7-cerner-central-system-account) for the System Account page and the success-state screenshots.
From the Code Console application detail page, click **Cerner Central System Account Details** to open the System Account. You’ll land on a page with Account Details, Secrets, and JSON Web Key Set sections:
Then:
* Copy the **Account ID** (this is your Client ID for Medblocks).
* Click **Edit** next to **JSON Web Key Set**.
* Select the **URL (Strongly Recommended)** radio.
* Paste: `https://app.medblocks.com/api/auth/.well-known/jwks`
* Click **Save**.
* Back on the account page, click **Test** next to the JWKS URL.
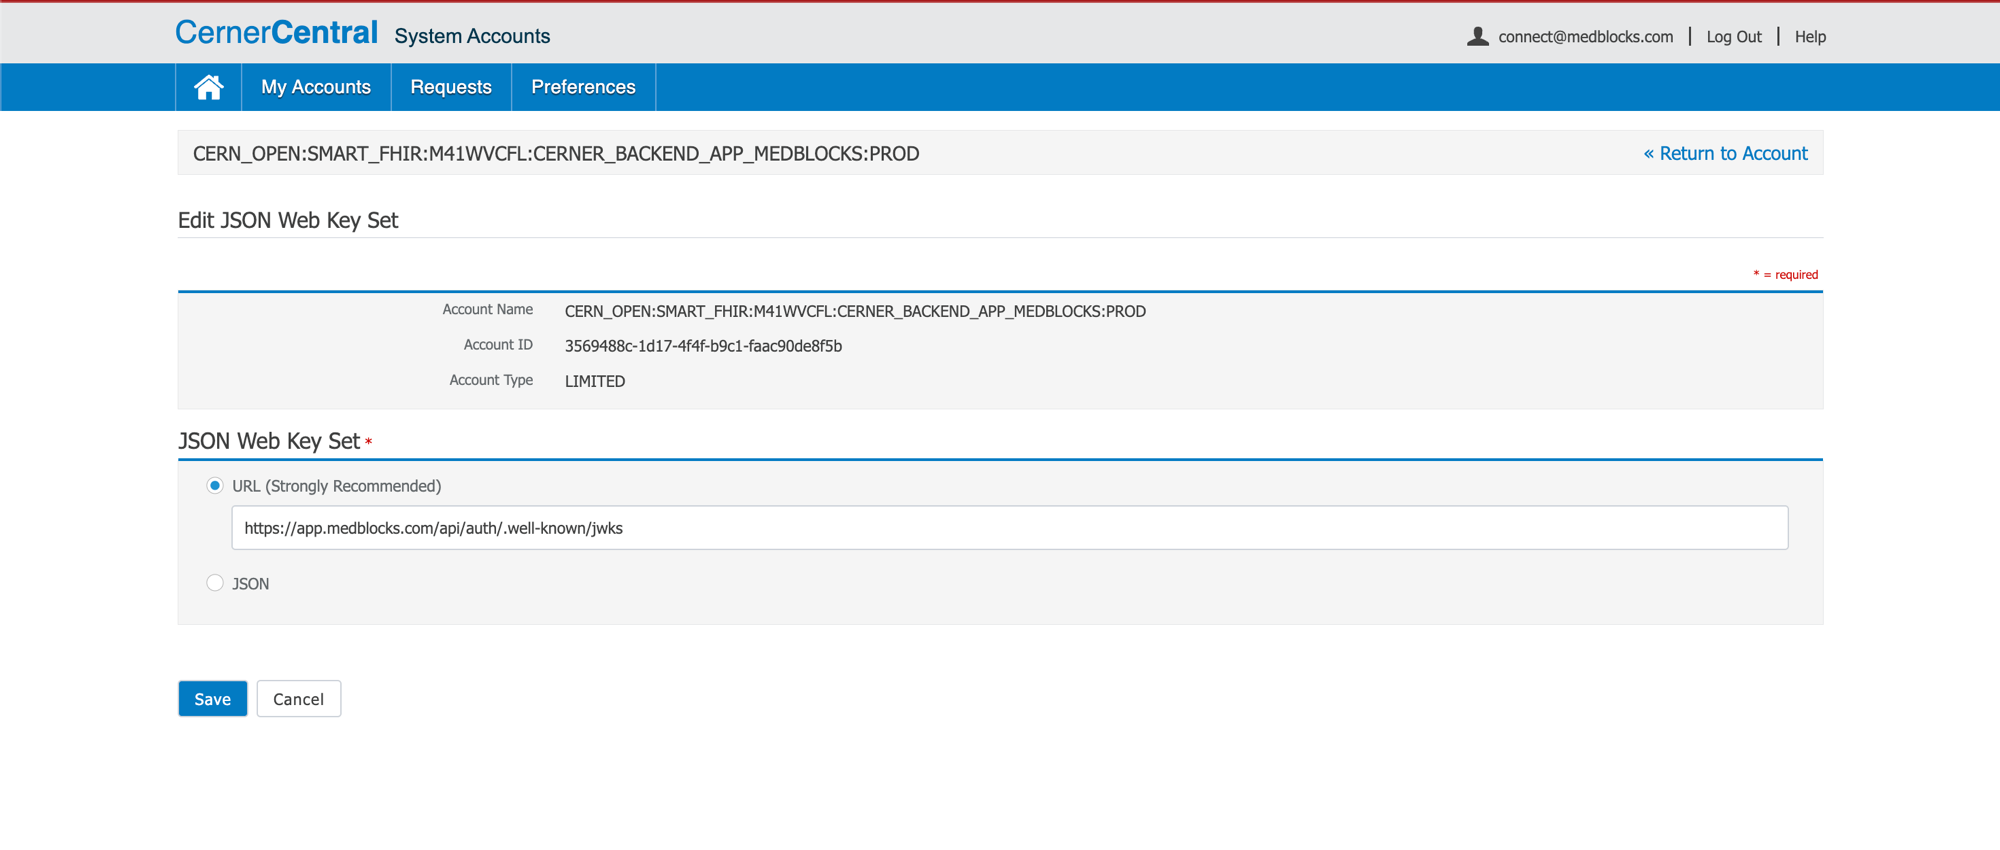
Medblocks serves the same JWKS from production, dev, and local environments (the underlying keypair is shared), so this single URL works regardless of where the JWT is signed. The **Test** action confirms Cerner can fetch your key and will accept the JWT assertions Medblocks signs.
### Configure Medblocks [#8-configure-medblocks]
* Go to **Settings**.
* Select **Connections**.
* Find **Cerner Backend** and open it.
* Paste the Client ID (the Account ID from Cerner Central), and **Save**.
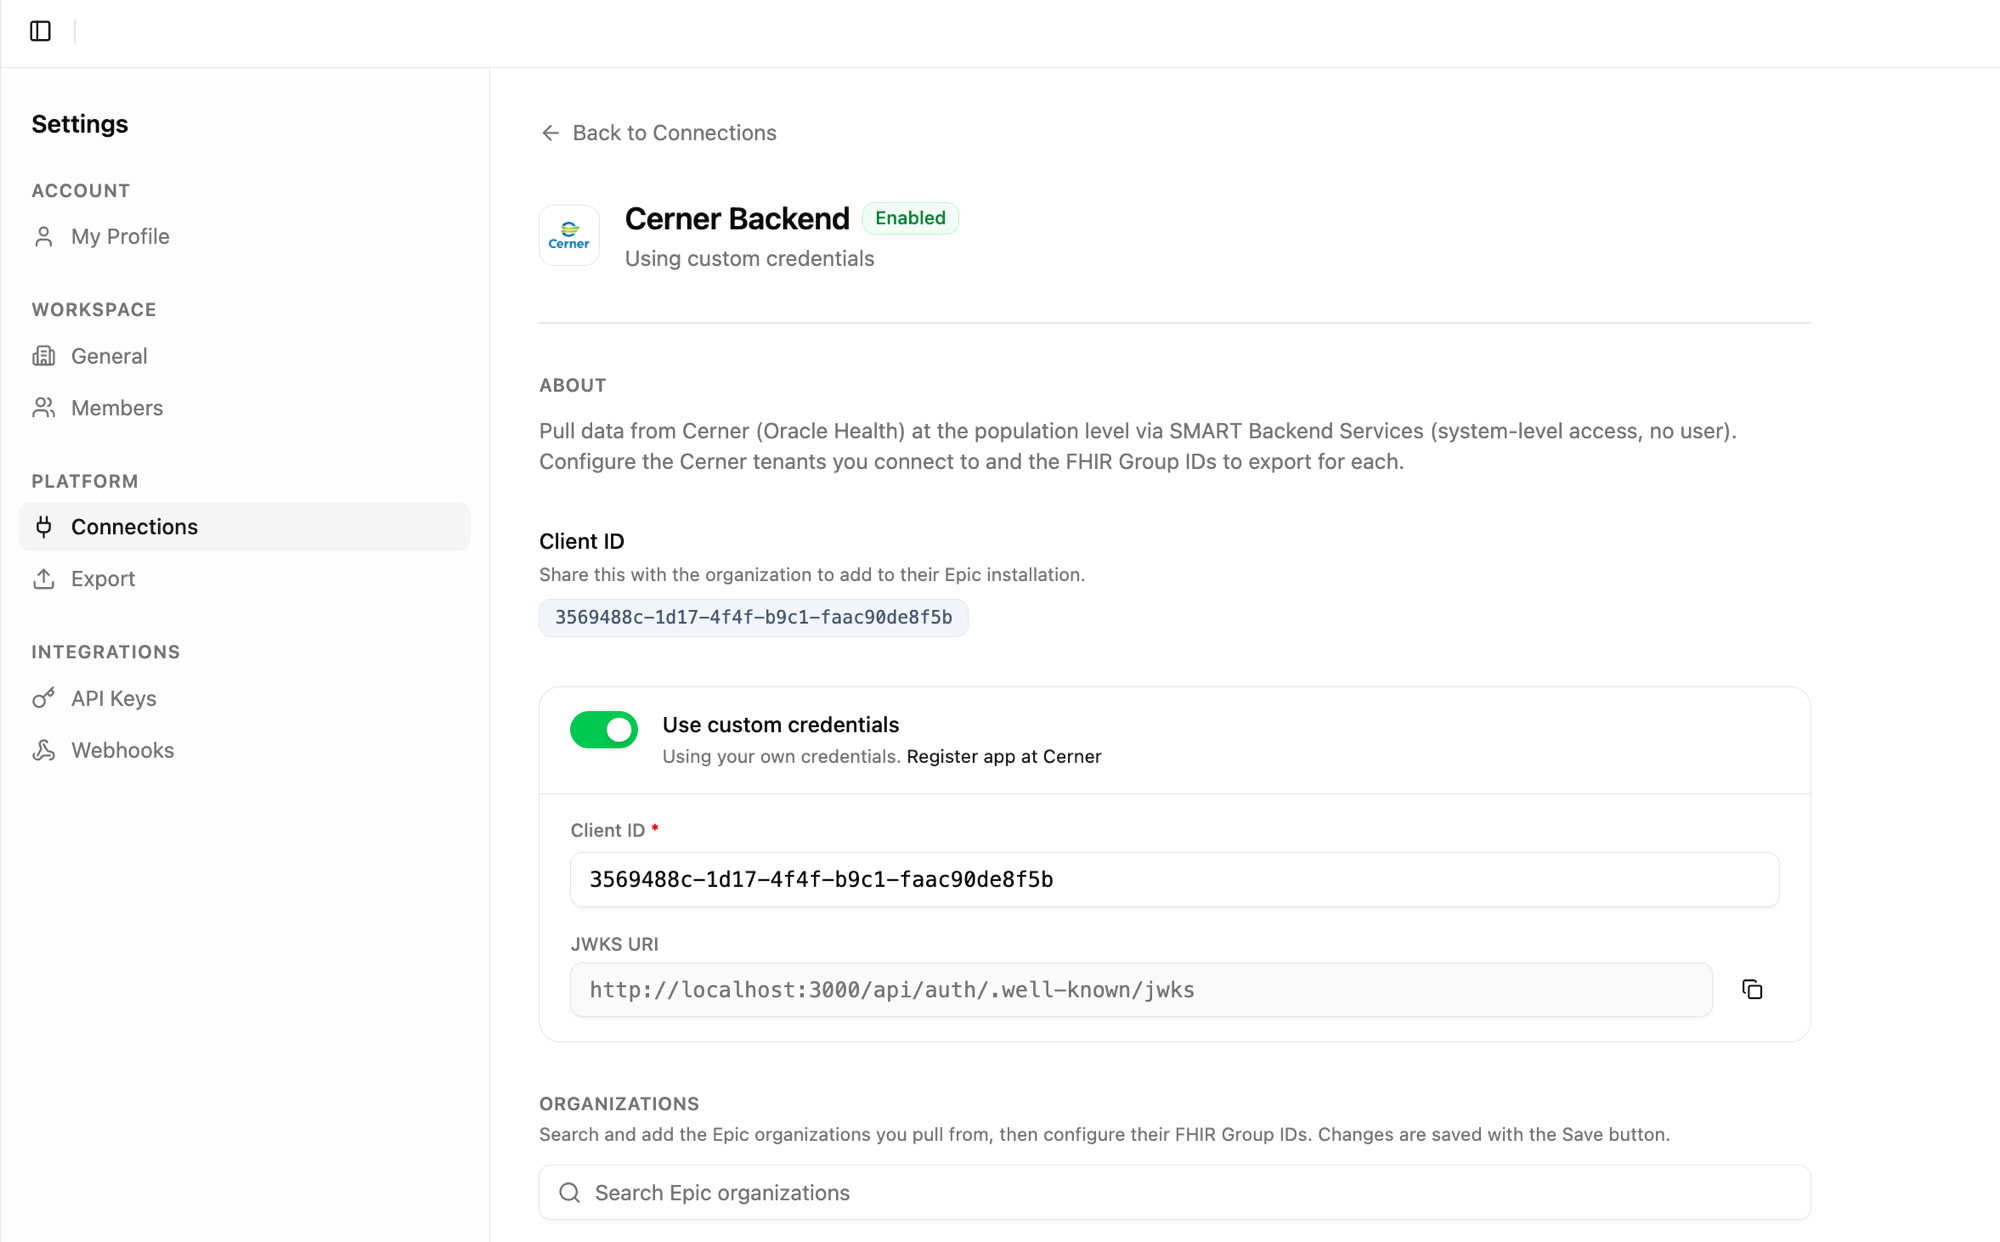
You do not need to paste a client secret, system JWT auth uses asymmetric keys signed with Medblocks’ global private key, not a shared symmetric secret.
### Test against the Cerner Code Sandbox [#9-test-against-the-cerner-code-sandbox]
Backend services have no UI to click through, the sandbox test is just two HTTP calls. Cerner’s code sandbox tenant `ec2458f2-1e24-41c8-b71b-0e701af7583d` accepts your System app’s JWT and serves synthetic FHIR resources, so the full chain (JWKS fetch, JWT validation, token issuance, FHIR read) can be exercised from a single script.
A minimal Bun script using Medblocks’ helpers:
```ts
import fs from "fs";
import * as jose from "jose";
import { generateClientAssertion } from "@/server/auth/utils/jwt";
import { exchangeClientCredentialsWithJwtAssertion } from "@/server/auth/utils/token-exchange";
import { JWT_KID } from "@/server/config";
const CLIENT_ID = "";
const TENANT = "ec2458f2-1e24-41c8-b71b-0e701af7583d";
const TOKEN_ENDPOINT = `https://authorization.cerner.com/tenants/${TENANT}/protocols/oauth2/profiles/smart-v1/token`;
const FHIR_BASE = `https://fhir-ehr-code.cerner.com/r4/${TENANT}`;
// Minimal smoke-test scope — the app is registered with the full 16-resource set (Step 5),
// but a Patient read is enough to prove the JWKS → token → FHIR chain works.
const SCOPE = "system/Patient.read";
const pem = fs.readFileSync(process.env.JWT_PRIVATE_KEY_PATH!, "utf8");
const privateKey = await jose.importPKCS8(pem, "RS384");
const assertion = await generateClientAssertion(CLIENT_ID, TOKEN_ENDPOINT, privateKey, JWT_KID);
// 1. Exchange JWT for a system access token.
const token = await exchangeClientCredentialsWithJwtAssertion({
tokenEndpoint: TOKEN_ENDPOINT,
clientAssertion: assertion,
scope: SCOPE,
});
console.log({ scope: token.scope, expires_in: token.expires_in });
// 2. Read a synthetic Patient with the Bearer token.
const res = await fetch(`${FHIR_BASE}/Patient/12724065`, {
headers: { Authorization: `Bearer ${token.access_token}`, Accept: "application/fhir+json" },
});
console.log(await res.json());
```
What success looks like:
* Step 1 returns `{ scope: "system/Condition.read system/Observation.read system/Patient.read", expires_in: 570, access_token: "eyJraWQiOi..." }`.
* Step 2 returns a Patient resource for `SMART, WILMA` (DOB 1990-09-15, Active).
If step 1 returns `invalid_client`, the JWKS URL on Cerner Central is wrong or Cerner can’t reach it, retry **Test** on the System Account page. If step 2 returns 400 `at least one of _id, identifier...`, the token is valid, you’re hitting a Cerner search restriction, hit a specific resource id (`/Patient/12724065`) instead of a search.
### Going to Production [#10-going-to-production]
Cerner production tenants are per-customer. Each hospital’s IT team must explicitly authorize your System app for their tenant before any token requests will succeed against real PHI.
1. Your customer’s Cerner administrator adds your Client ID (Account ID) to their tenant via Cerner Central.
2. You add their tenant’s FHIR base URL as a `fhir_source` row with `environment=production`.
3. The customer’s Medblocks org points at that tenant for the backend section.
Cerner production access for a System app is gated by per-tenant onboarding plus an Oracle Health review of your scope set, there is no self-serve “go live” button on the Code Console itself.
---
# Billing & Plans
Plan tiers, patient quota, and how paid features are enabled per workspace.
Source URL: /docs/billing
# Billing & Plans
Plan tiers, patient quota, and how paid features are enabled per workspace.
Medblocks Connect has two plans.
| Plan | Price | Patient limit | Notable features |
| -------------- | -------------- | --------------------- | ---------------------------------------------------------------------------------------------------------------------------------- |
| **Free** | $0 | 1,000 active patients | Patient-mediated exchange, synthetic sandboxes, full API access, wearable device sync, export destinations, custom EHR client IDs. |
| **Enterprise** | $60,000 / year | Uncapped | Everything in Free, plus Backend Services, Clinical Workflows, OCR, and data structuring. |
Contact `support@medblocks.com` to upgrade your plan.
## Patient quota [#patient-quota]
The Free plan includes 1,000 active patients. A patient counts as “active” the first time we successfully pull FHIR data for them, so simply creating a patient record does not draw against the quota.
## Handling `billing_error` in your code [#handling-billing_error-in-your-code]
Requests that the workspace’s plan doesn’t cover come back with HTTP `402` and `error.type = "billing_error"`. The credentials are valid, the workspace just needs an upgrade. Catch the error and surface an upgrade CTA in your UI, or point the user at Medblocks support.
```ts
try {
await medblocks("/webhooks", { method: "POST", body });
} catch (error) {
if (error instanceof MedblocksError && error.body?.error?.type === "billing_error") {
showUpgradeDialog();
return;
}
throw error;
}
```
## Common errors [#common-errors]
Every `billing_error` uses the shared envelope described in [API Errors](/docs/reference/errors). Two codes cover the two situations, and clients should branch on `error.code`.
The `feature_not_enabled` code fires when the workspace’s plan doesn’t include the requested feature.
```json
{
"error": {
"type": "billing_error",
"code": "feature_not_enabled",
"message": "This feature isn't part of your plan. Contact support to enable it.",
"param": null,
"doc_url": "https://medblocks.com/docs/reference/errors",
"request_id": "9c9b6f7a-8e4f-4a3b-9c1e-6f3a2d8b7c4d"
}
}
```
The `quota_exceeded` code fires when a Free-tier workspace has hit its active-patient limit and a new patient tries to sync.
```json
{
"error": {
"type": "billing_error",
"code": "quota_exceeded",
"message": "You've hit your patient limit. Contact support to increase it.",
"param": null,
"doc_url": "https://medblocks.com/docs/reference/errors",
"request_id": "9c9b6f7a-8e4f-4a3b-9c1e-6f3a2d8b7c4d"
}
}
```
The full status-code catalog and envelope reference lives in [API Errors](/docs/reference/errors).
---
# Build with AI
Set up AI coding agents and assistants to build with Medblocks.
Source URL: /docs/build-with-ai
# Build with AI
Set up AI coding agents and assistants to build with Medblocks.
> **Give your AI agent the same context you would give a new engineer.**
Most integrations get built with an AI agent in the loop now, and the difference between a good build and a bad one is what the agent knows before it starts. Brief it well and it writes the integration a senior engineer would. Leave it guessing and it invents SDK methods that never shipped, puts secrets in browser code, and hands you an afternoon of debugging code that merely looked plausible.
So we packaged that context for you. A [skill](#install-the-skill-for-your-coding-agent) that teaches coding agents our integration flows. An [MCP server](/docs/mcp) that turns an assistant into a hands-on operator of your live workspace. [Ready-made prompts](#start-from-a-ready-made-prompt) and clean Markdown exports for everything else. Set up whichever matches how you build.
## Install the skill for your coding agent [#install-the-skill-for-your-coding-agent]
The Medblocks skill teaches agents such as Claude Code, Cursor, and Codex the Patient Access flow, record export, and the security rules that go with them. It also tells the agent to read the live docs and generated API reference instead of relying on memory.
```bash
# Adds the Medblocks marketplace, then installs the skills as a plugin with automatic updates
claude plugin marketplace add medblocks/skills
claude plugin install medblocks-skills@medblocks
```
```bash
# Installs the skills to .agents/skills in your repo, which Codex reads natively
npx skills add medblocks/skills -a codex
```
```bash
# Installs the skills to .agents/skills in your repo, which Cursor reads natively
npx skills add medblocks/skills -a cursor
```
```bash
# One command installs the skills for every agent the skills CLI supports
npx skills add medblocks/skills
```
Skills do not read your local files by themselves. They guide the coding agent that is already running in your editor or terminal.
## Connect an assistant to your workspace [#connect-an-assistant-to-your-workspace]
The MCP server does something different from the skill. Where the skill helps an agent write code, the MCP server needs no code at all. Connect it and an assistant such as Claude or ChatGPT can look up who is set up in your workspace, search for hospitals, start portal connections, and read the records that come back, all behind a consent screen where you choose exactly what to grant.
Follow [MCP server](/docs/mcp) to connect Claude Code, Codex, ChatGPT, or claude.ai.
## Start from a ready-made prompt [#start-from-a-ready-made-prompt]
These prompts point an agent at the right docs and give it a work order. Copy one into your tool, or open it directly in Cursor, Claude, or ChatGPT.
## Hand your agent the right docs [#hand-your-agent-the-right-docs]
Every docs page has a Markdown version behind the **Copy Markdown** action at the top of the page, and the docs expose `/docs/llms.txt` as a compact index and `/docs/llms-full.txt` as a full export. Markdown beats copied HTML because tabs, callouts, and code blocks stay parseable.
Which pages to hand over depends on what you are building.
| Building | Give the agent |
| ------------------ | ------------------------------------------------------------------------------------------------------------------------------------------------------------------------------------------------------------------------------------------------------- |
| Patient access | [Patient access overview](/docs/patient-access/overview), [Create patients](/docs/patient-access/create-patients), [Create a patient session](/docs/patient-access/create-patient-session), [Handle the return](/docs/patient-access/handle-the-return) |
| A webhook receiver | [Webhooks](/docs/webhooks), [Signatures](/docs/webhooks/signatures), [Events](/docs/webhooks/events) |
| Raw REST calls | [API Reference](/docs/reference/api), [API errors](/docs/reference/errors) |
For patient access work, also say whether Medblocks hosts the source search page or you are building source search into your own UI. For TypeScript projects, prefer the SDK. For other stacks, keep the Medblocks API key on the server and treat the reference as the source of truth for request and response shapes.
## Ground rules for any agent [#ground-rules-for-any-agent]
Whichever tool you use, hold the agent to these rules.
* Keep `MEDBLOCKS_API_KEY` on the server, never in browser code.
* Verify webhook signatures before trusting event payloads.
* Use the API Reference as the source of truth for wire shapes.
* Log Medblocks error codes and request IDs on the server.
* Treat the patient return URL as UI state. Confirm record availability with server-side reads or webhooks.
## See also [#see-also]
* [Our approach](/docs/our-approach)
* [MCP server](/docs/mcp)
* [API Reference](/docs/reference/api)
* [Patient access quickstart](/docs/patient-access/quickstart)
* [Webhooks](/docs/webhooks)
---
# Clinical Domain Models
How Medblocks turns connected clinical data into domain-shaped concepts your product can use.
Source URL: /docs/clinical-data-models
# Clinical Domain Models
How Medblocks turns connected clinical data into domain-shaped concepts your product can use.
Clinical Domain Models are product-facing shapes Medblocks builds on top of connected healthcare data. They let your application work with clinical ideas such as medications, labs, conditions, allergies, visits, and documents without forcing every screen or workflow to understand every source-specific representation.
## Why models matter [#why-models-matter]
FHIR is the transport format, but source data still varies. The same product question can cross several resources, code systems, units, references, and document formats.
Clinical Domain Models give your product a domain vocabulary for concepts such as medications, labs, conditions, allergies, visits, and documents while preserving the source context you need for auditability.
For example, your app might ask for the latest BMI for a patient or the latest HbA1c for a cohort. The model has to know which patients are in scope, which clinical concept is being resolved, which FHIR resources and coded fields can contain that concept, how to normalize units and codes, and whether the result should use the latest value, an average, a minimum, or another rule.
That lets Medblocks return a product-friendly answer while still showing how the answer was resolved.
```json
[
{
"subject": "Patient/1",
"code": "bmi",
"value": 24.6,
"unit": "kg/m2",
"status": "hasValue",
"resolved_by": "direct",
"provenance": [
{
"reference": "Observation/bmi-1",
"system": "epic-org-a",
"performer": "Clinic A",
"effective": "2024-01-10",
"value": 24.1,
"coding": { "system": "LOINC", "code": "39156-5" }
},
{
"reference": "Observation/bmi-2",
"system": "epic-org-a",
"performer": "Clinic A",
"effective": "2024-05-02",
"value": 25.1,
"coding": { "system": "LOINC", "code": "39156-5" }
}
]
}
]
```
In that shape, `value` is what your product can render, and `provenance` is what lets a reviewer trace the answer back to the original source records.
## What a model gives you [#what-a-model-gives-you]
A useful model is more than a cleaned-up JSON shape.
* **Clinical meaning.** A medication, lab, diagnosis, or document is represented as the thing your product cares about, not just the FHIR resource it arrived in.
* **Queryable fields.** Common filters and display fields are lifted into a consistent shape.
* **Source awareness.** The model keeps enough source context to explain where the fact came from.
* **Provenance.** Medblocks preserves source identity, resource references, timestamps, and supporting context so downstream systems can audit the chain back to the original record.
## What they are for [#what-they-are-for]
Use Clinical Domain Models when your product needs to render patient-facing or clinician-facing summaries, search and filter by clinical concepts, or power workflows that should not care which source produced the raw record.
## Raw records still matter [#raw-records-still-matter]
Domain models do not replace the original record trail. They sit on top of it. Medblocks keeps the connected source data and provenance so your team can inspect the original context whenever precision, auditability, or clinical review requires it.
For record delivery today, use [Data out](/docs/data-out). For source setup, start with [Sources and connections](/docs/sources-and-connections).
## See also [#see-also]
* [Data out](/docs/data-out)
* [Sources and connections](/docs/sources-and-connections)
* [How Medblocks works](/docs/how-medblocks-works)
---
# Overview
Put your app inside the EHR with CDS Hooks and SMART App Launch.
Source URL: /docs/clinician-workflow
# Overview
Put your app inside the EHR with CDS Hooks and SMART App Launch.
These Clinician Workflow docs are a work in progress. Use them as orientation while we expand the implementation guides.
Clinician workflow integrations put your product inside the place where clinicians already work. Instead of asking a provider to leave the EHR, search for the patient again, and copy context into another tool, Medblocks helps launch your app with the chart context already attached.
This surface is unlocked by an organizational relationship. The health system or clinic chooses to make your app available to its clinicians, and the EHR launch gives you the patient, encounter, user, and organization context your workflow needs.
## What you can build [#what-you-can-build]
Use clinician workflow when your product needs to appear during care delivery:
* A full embedded app launched from the patient’s chart.
* A decision-support card shown at a specific point in the workflow.
* A chart-aware experience that opens with the right patient already selected.
* A handoff from the EHR into your application without asking the clinician to repeat context.
Medblocks focuses on the launch, context, authorization, and downstream data layer so your app can focus on the clinical experience.
## Two common patterns [#two-common-patterns]
## Configure the connection [#configure-the-connection]
Clinician workflow setup starts in your workspace’s Connections area. For Epic, Medblocks gives you the launch URLs, callback URLs, CDS Hooks discovery URL, and credential settings you need to share with the EHR administrator.
[Configure Clinical Workflows](/docs/configure-connections/clinical-workflows)
## See also [#see-also]
* [Integration patterns](/docs/integration-patterns)
* [Configure Clinical Workflows](/docs/configure-connections/clinical-workflows)
* [Security and compliance](/docs/security-and-compliance)
---
# CDS Hooks
Surface guidance as a native card at the right moment in the clinician's workflow.
Source URL: /docs/clinician-workflow/cds-hooks
# CDS Hooks
Surface guidance as a native card at the right moment in the clinician's workflow.
These Clinician Workflow docs are a work in progress. Use them as orientation while we expand the implementation guides.
CDS Hooks is the pattern for returning concise, contextual cards into the EHR workflow. Instead of launching a full app first, your service can respond when the clinician opens a chart, signs an order, or reaches another supported moment in the EHR.
Use it when the best experience is a short recommendation, status, warning, or next action shown in the clinician’s existing screen.
## What a card can do [#what-a-card-can-do]
A CDS card can point to relevant information, summarize a model output, open a SMART app for deeper review, or suggest an action for the clinician to consider. The EHR owns the final presentation, but your service owns the logic behind the recommendation.
Medblocks helps with the connection setup and the EHR-facing URLs. Your service can stay focused on deciding what to return for the patient and workflow context.
## How the flow works [#how-the-flow-works]
1. The EHR calls the CDS Hooks URL configured for your workspace.
2. Medblocks receives the request with the patient and workflow context.
3. Medblocks forwards the request to your CDS endpoint when your connection is configured to do so.
4. Your service returns CDS cards.
5. The EHR renders those cards inside the clinician workflow.
If the recommendation needs a richer interface, the card can link into a SMART App Launch experience.
## What to configure [#what-to-configure]
In [Configure Clinical Workflows](/docs/configure-connections/clinical-workflows), add your CDS endpoint and share the generated CDS Hooks URL with the EHR administrator. For Epic, the same connection page also keeps the SMART launch values close by, since most products use the two patterns together.
## See also [#see-also]
* [Configure Clinical Workflows](/docs/configure-connections/clinical-workflows)
* [SMART App Launch](/docs/clinician-workflow/smart-app-launch)
* [Integration patterns](/docs/integration-patterns)
---
# Cerner
Register a Cerner (Oracle Health) Provider app for in-PowerChart SMART on FHIR launch.
Source URL: /docs/clinician-workflow/cerner
# Cerner
Register a Cerner (Oracle Health) Provider app for in-PowerChart SMART on FHIR launch.
Cerner (Oracle Health) Millennium exposes a SMART on FHIR R4 surface that lets a clinician open a third-party app embedded inside PowerChart from a patient’s chart. The app receives a launch context with the current patient and encounter, plus an access token scoped to that clinician. Use this for in-workflow clinical tools, not population-level extracts (see the [Cerner Backend](../backend/cerner) guide for that).
This is a step-by-step guide to registering a Provider-type SMART on FHIR app on the [Cerner Code Console](https://code.cerner.com/), wiring it into Medblocks, and testing the EHR launch against the public Cerner code sandbox.
For Oracle’s reference on the auth flow, see the [Authorization Framework](https://docs.oracle.com/en/industries/health/millennium-platform-apis/authorization-framework/).
### Sign in to Cerner Code Console [#1-sign-in-to-cerner-code-console]
Go to [code.cerner.com/developer/smart-on-fhir/apps](https://code.cerner.com/developer/smart-on-fhir/apps) and sign in with your Cerner Code account. You will land on **My Applications**.
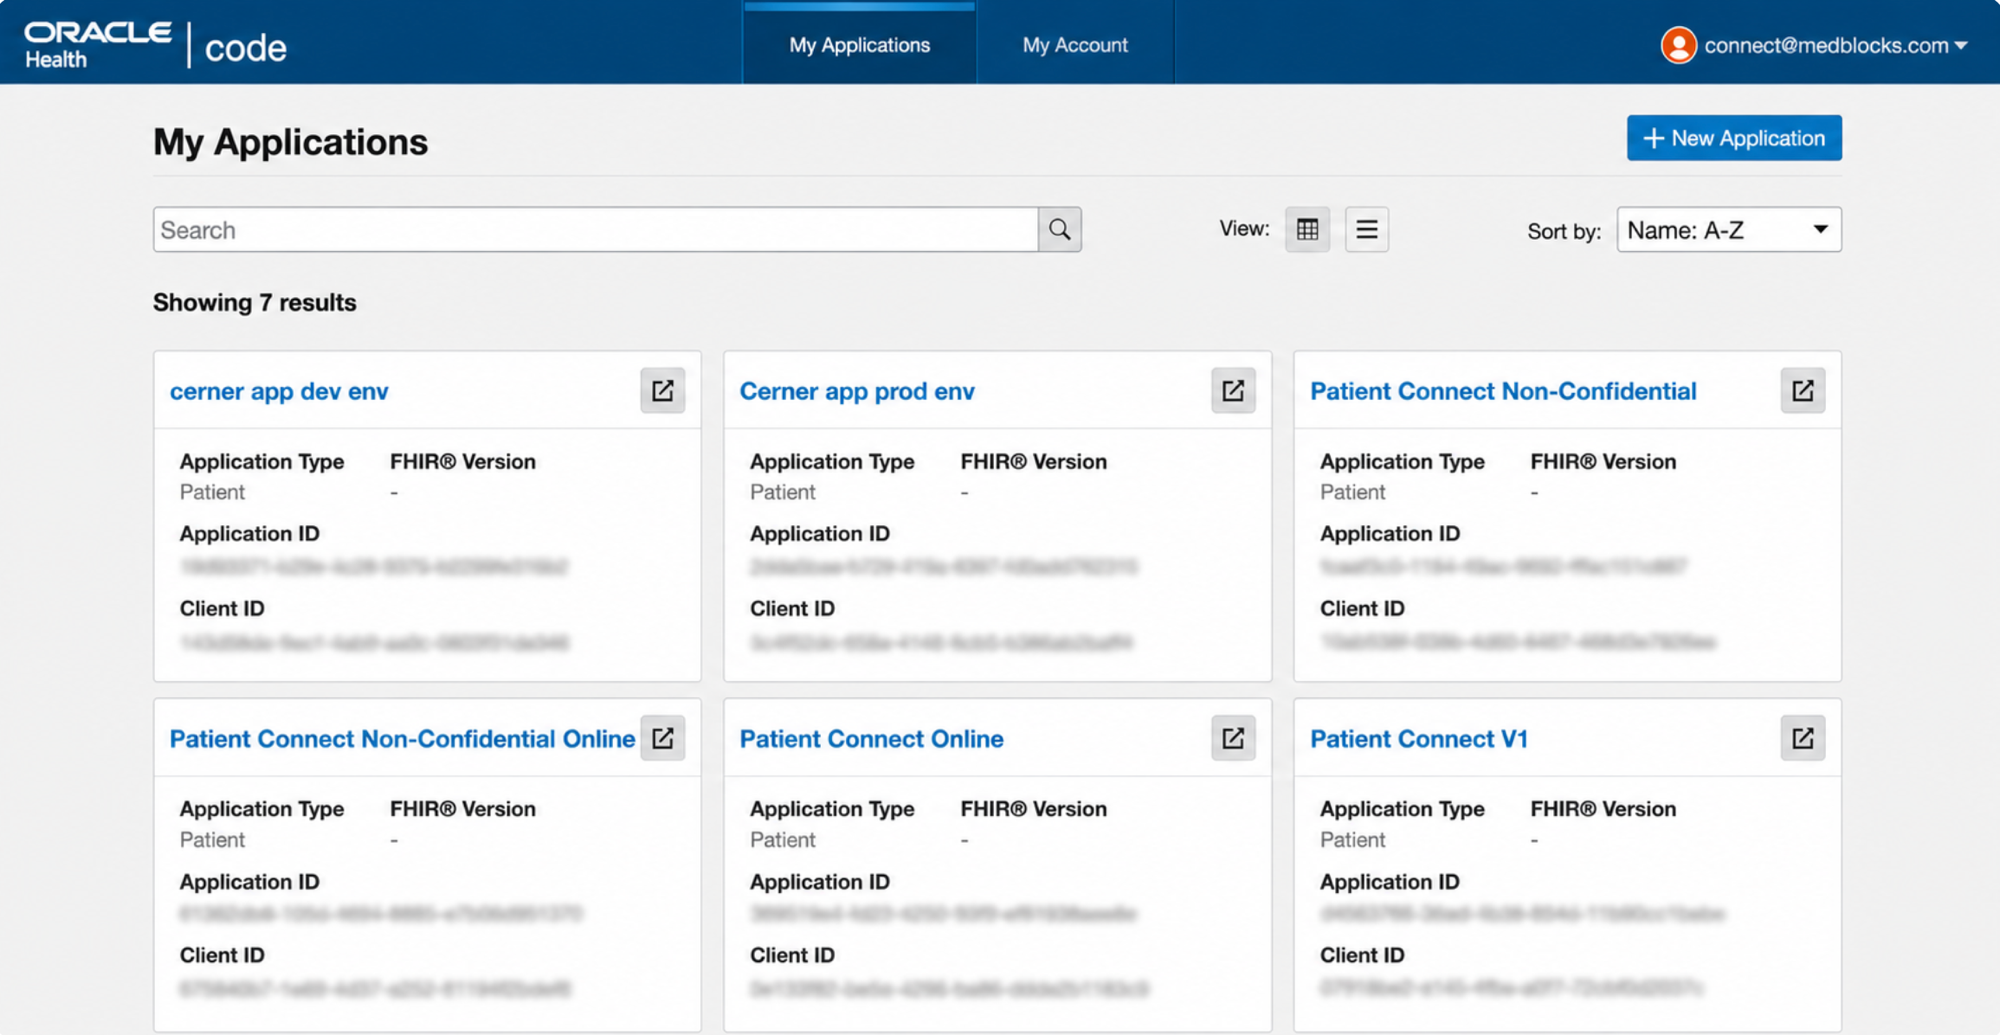
Click **+ New Application** in the top right to start a new registration.
### Basic Information and Application Type [#2-basic-information-and-application-type]
The first step of the wizard captures the basic details that determine which products and scopes appear on the later screens.
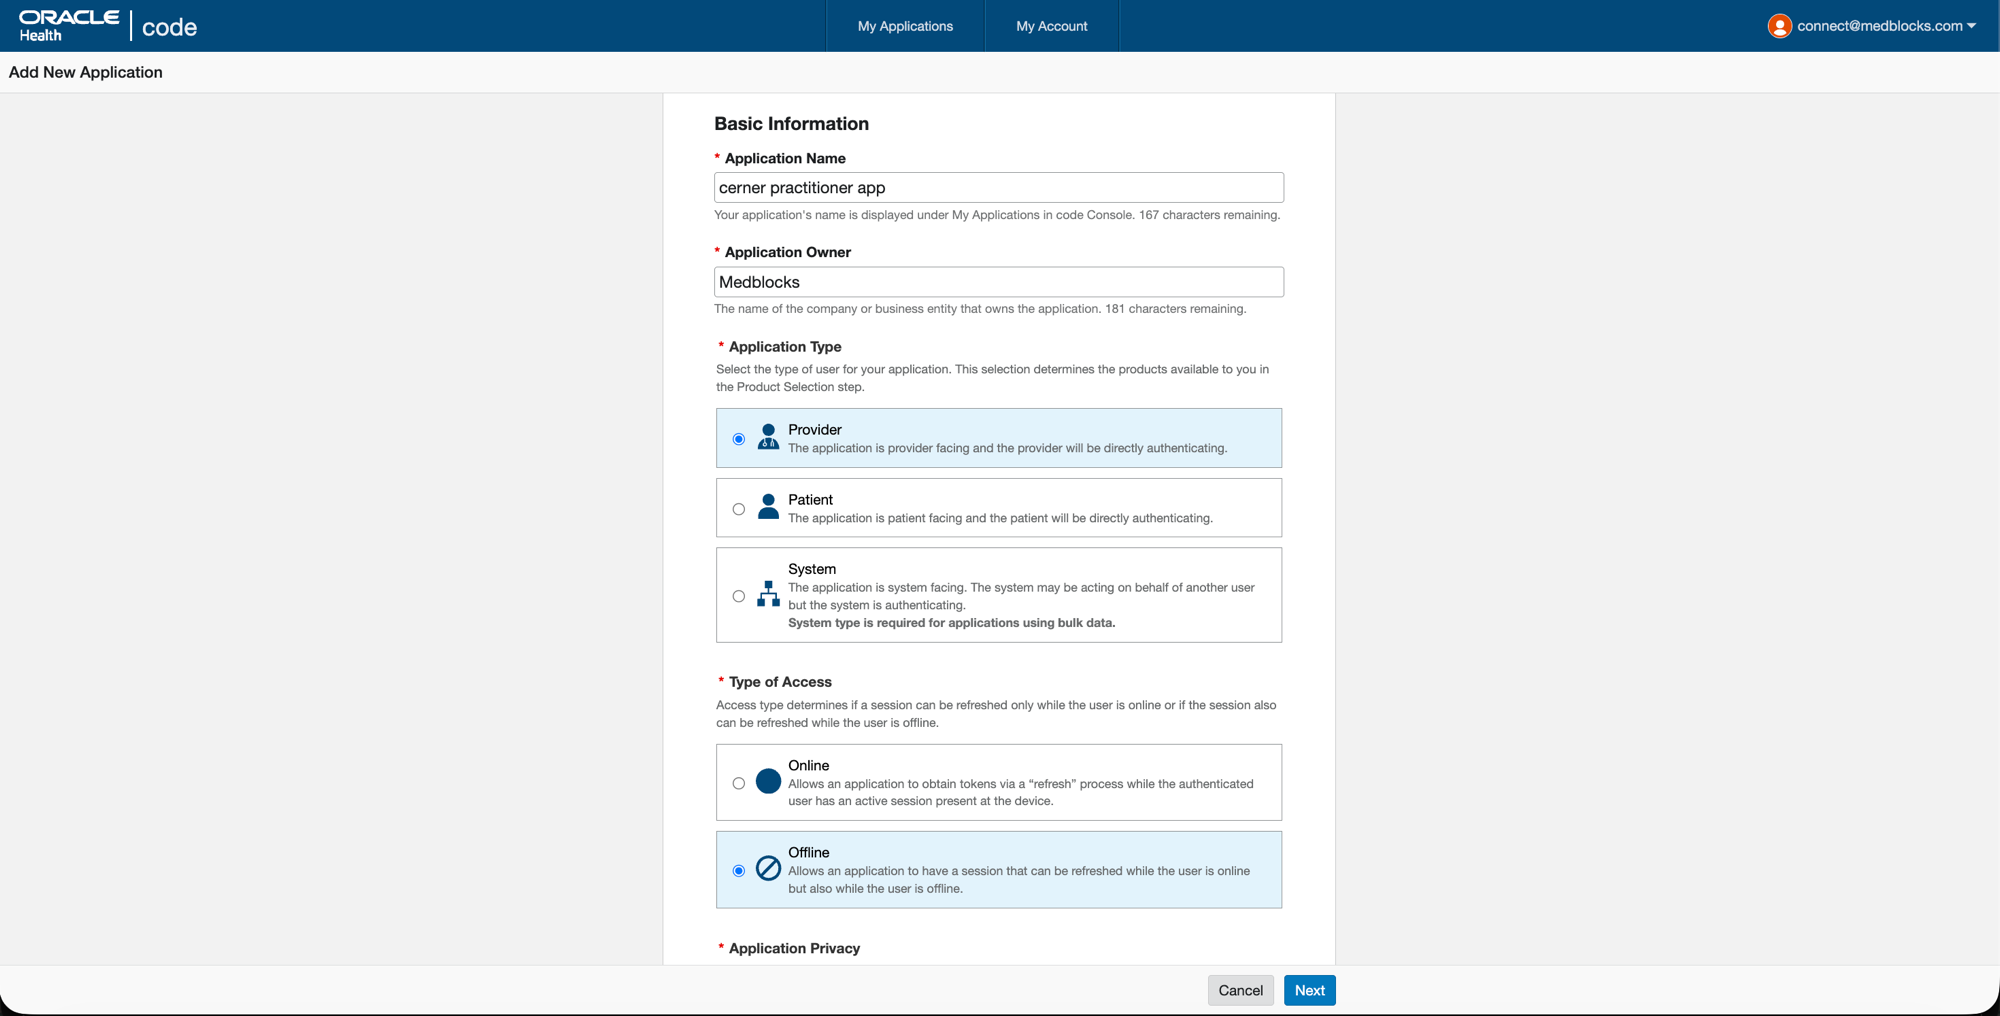
* **Application Name**: anything descriptive, this is the name shown to clinicians on the consent screen and inside My Applications.
* **Application Owner**: your company name (Medblocks for our case).
* **Application Type**: **Provider**, this is the SMART persona for a clinician launching the app in-context.
* **Type of Access**: **Offline**, gives the app `offline_access` so the launch session can be refreshed without the clinician re-authorizing each time. Pick Online instead only if you have a hard policy against refresh tokens.
### Privacy, SMART Version, and URIs [#3-privacy-smart-version-and-uris]
Scroll down for the rest of the first step.
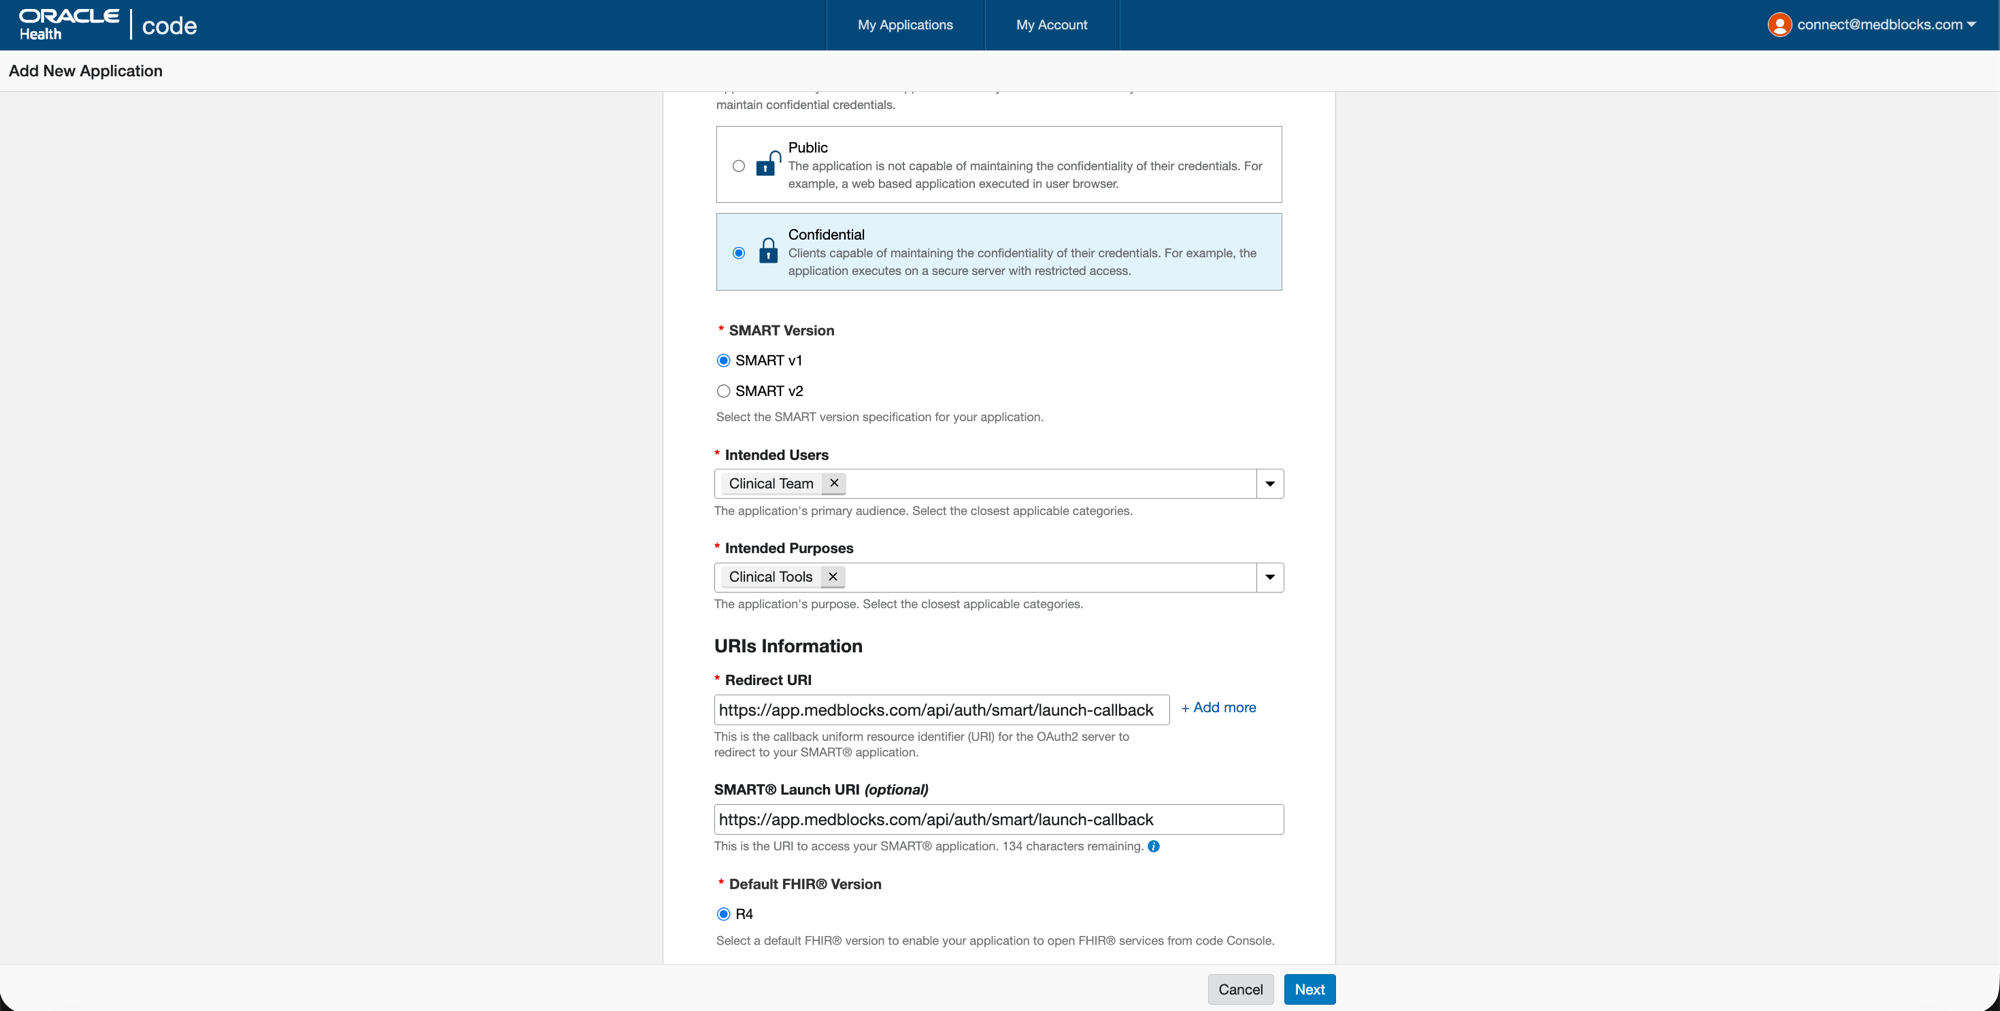
* **Application Privacy**: **Confidential**, Cerner will issue a client\_secret you pair with PKCE.
* **SMART Version**: **SMART v1**, Cerner sandbox and most production tenants are on v1.
* **Intended Users**: **Clinical Team**.
* **Intended Purposes**: **Clinical Tools**. Add **Patient-Provider Communication** too if your app sends messages to patients.
* **Redirect URI** (the OAuth callback after authorize): primary is `https://app.medblocks.com/api/auth/smart/launch-callback`. Use **+ Add more** for additional environments:
* `https://dev.app.medblocks.com/api/auth/smart/launch-callback`
* `http://localhost:3000/api/auth/smart/launch-callback` (for sandbox testing)
* **SMART Launch URI** (the URL Cerner opens when the clinician launches the app from PowerChart):
* `https://app.medblocks.com/api/auth/smart/launch/` for production.
* For sandbox testing from your machine, use `http://localhost:3000/api/auth/smart/launch/` instead. Cerner only accepts one Launch URI per app, so swap this value between sandbox and prod tests.
* Replace `` with the org id shown in Medblocks at **Settings, Connections, Cerner Clinical Workflow**.
* **Default FHIR Version**: **R4**.
Click **Next**.
### Product Selection [#4-product-selection]
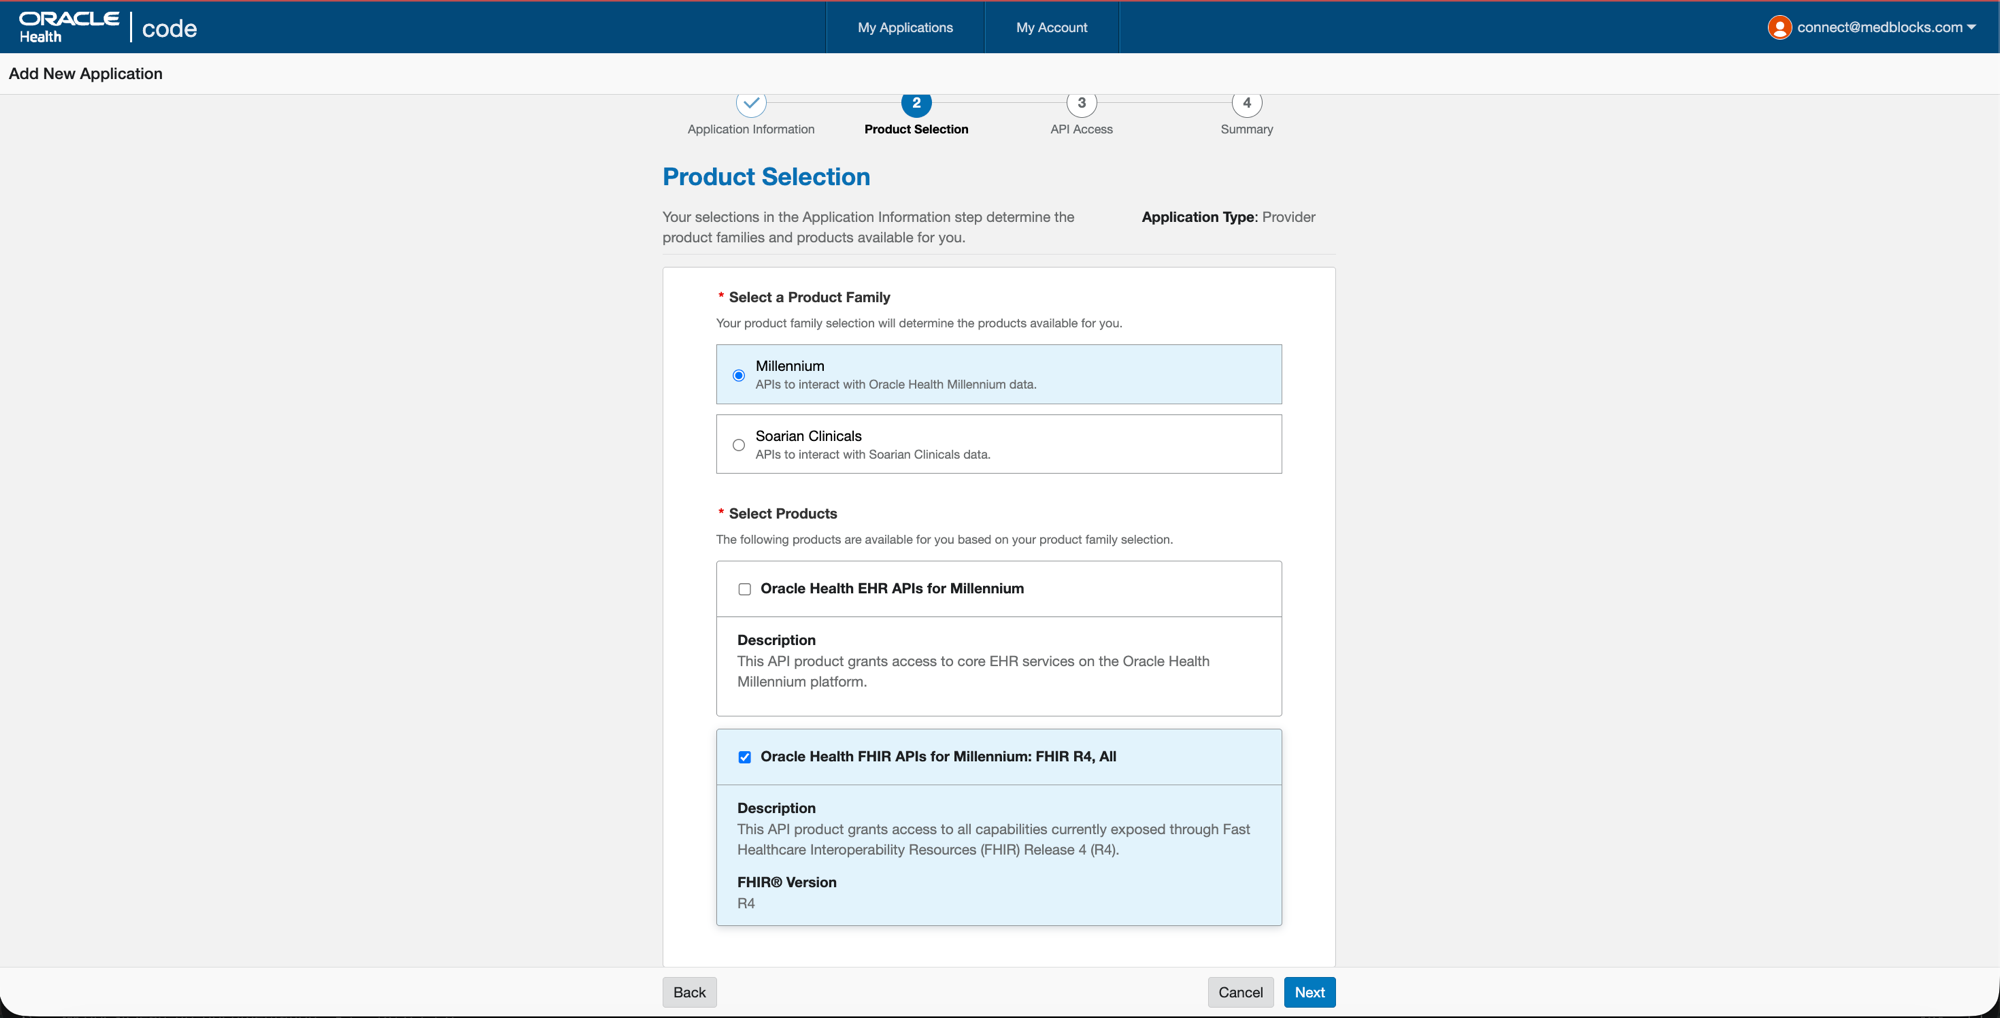
* **Product Family**: **Millennium**, this is the main Oracle Health EHR platform that 99% of customer hospitals run, and what the public sandbox uses. Soarian is a legacy platform you can ignore.
* **Select Products**: tick **Oracle Health FHIR APIs for Millennium: FHIR R4, All**, this is the FHIR R4 surface Medblocks queries. Leave **Oracle Health EHR APIs for Millennium** unticked, that’s Cerner’s proprietary non-FHIR APIs (CCL, MPages) and Medblocks does not use them.
Click **Next**.
### API Access (Scopes) [#5-api-access-scopes]
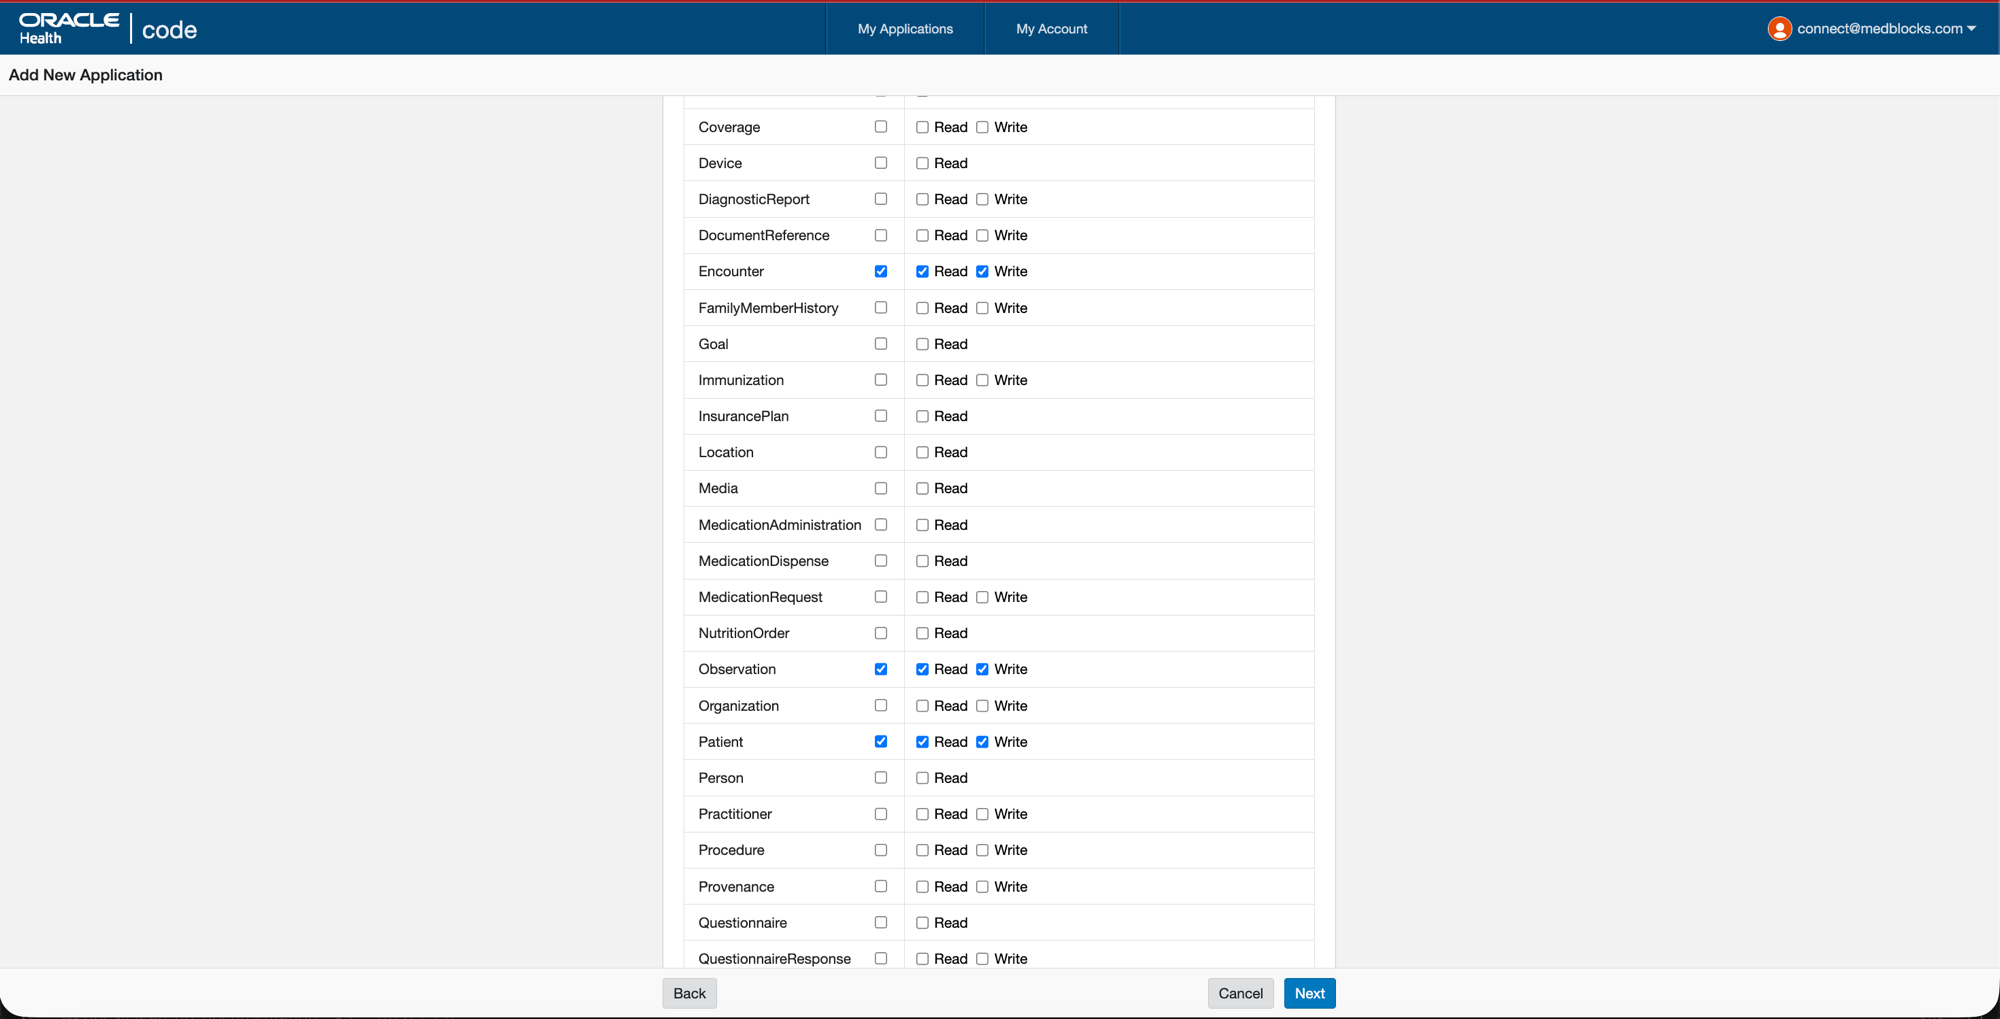
Two scope tables appear, **User Product APIs** (clinician scopes, `user/*`) and **Patient Product APIs** (patient scopes, `patient/*`).
In the **User Product APIs** table, tick **Read** (and **Write** if your app needs to push data back) on:
* **Patient**
* **Encounter**
* **Observation**
Leave everything else, including the entire **Patient Product APIs** table, unticked. You are launching as a provider, not a patient app. Cerner reviews any scope inflation, so request only the resources Medblocks actually uses, real production tenants typically grant only Read.
Click **Next**, review the summary, and **Submit**.
### Application Details Page [#6-application-details-page]
After submission you land on the application detail page. This is the canonical view of everything you just registered plus the Client ID and Client Secret you need to plug into Medblocks.
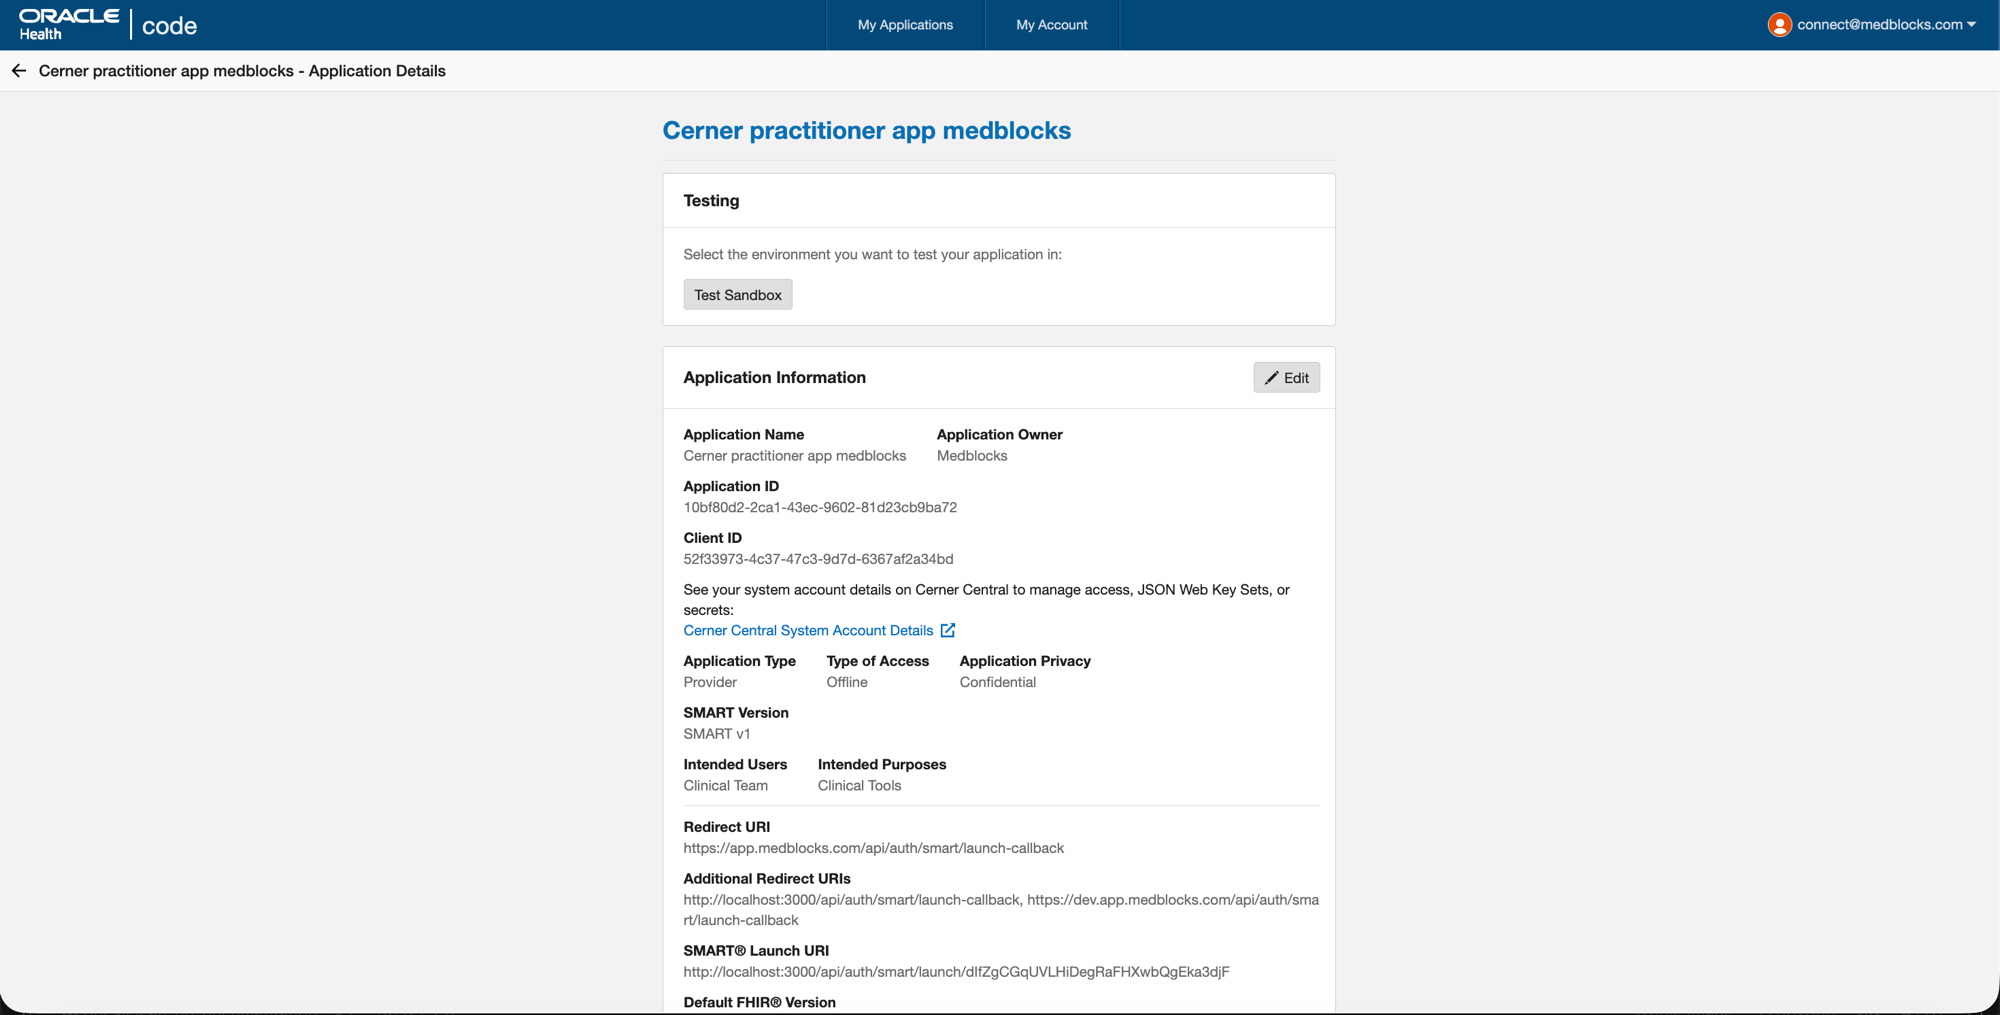
* **Client ID** is shown on the detail page (e.g. `52f33973-…`).
* **Client Secret** is on Cerner Central rather than the Code Console itself, follow the **Cerner Central System Account Details** link to view or rotate it.
The detail page also confirms the resolved Redirect URI, additional Redirect URIs, and SMART Launch URI Cerner has on file. Confirm they match what you registered, especially the Launch URI (it should end with `/api/auth/smart/launch/`, not the callback path).
### Cerner Central System Account [#7-cerner-central-system-account]
Each Cerner Code Console app has a paired System Account on **Cerner Central** where the client secret is managed and, for confidential apps, the JWKS URL is registered. Click the **Cerner Central System Account Details** link from the Application Details page above.
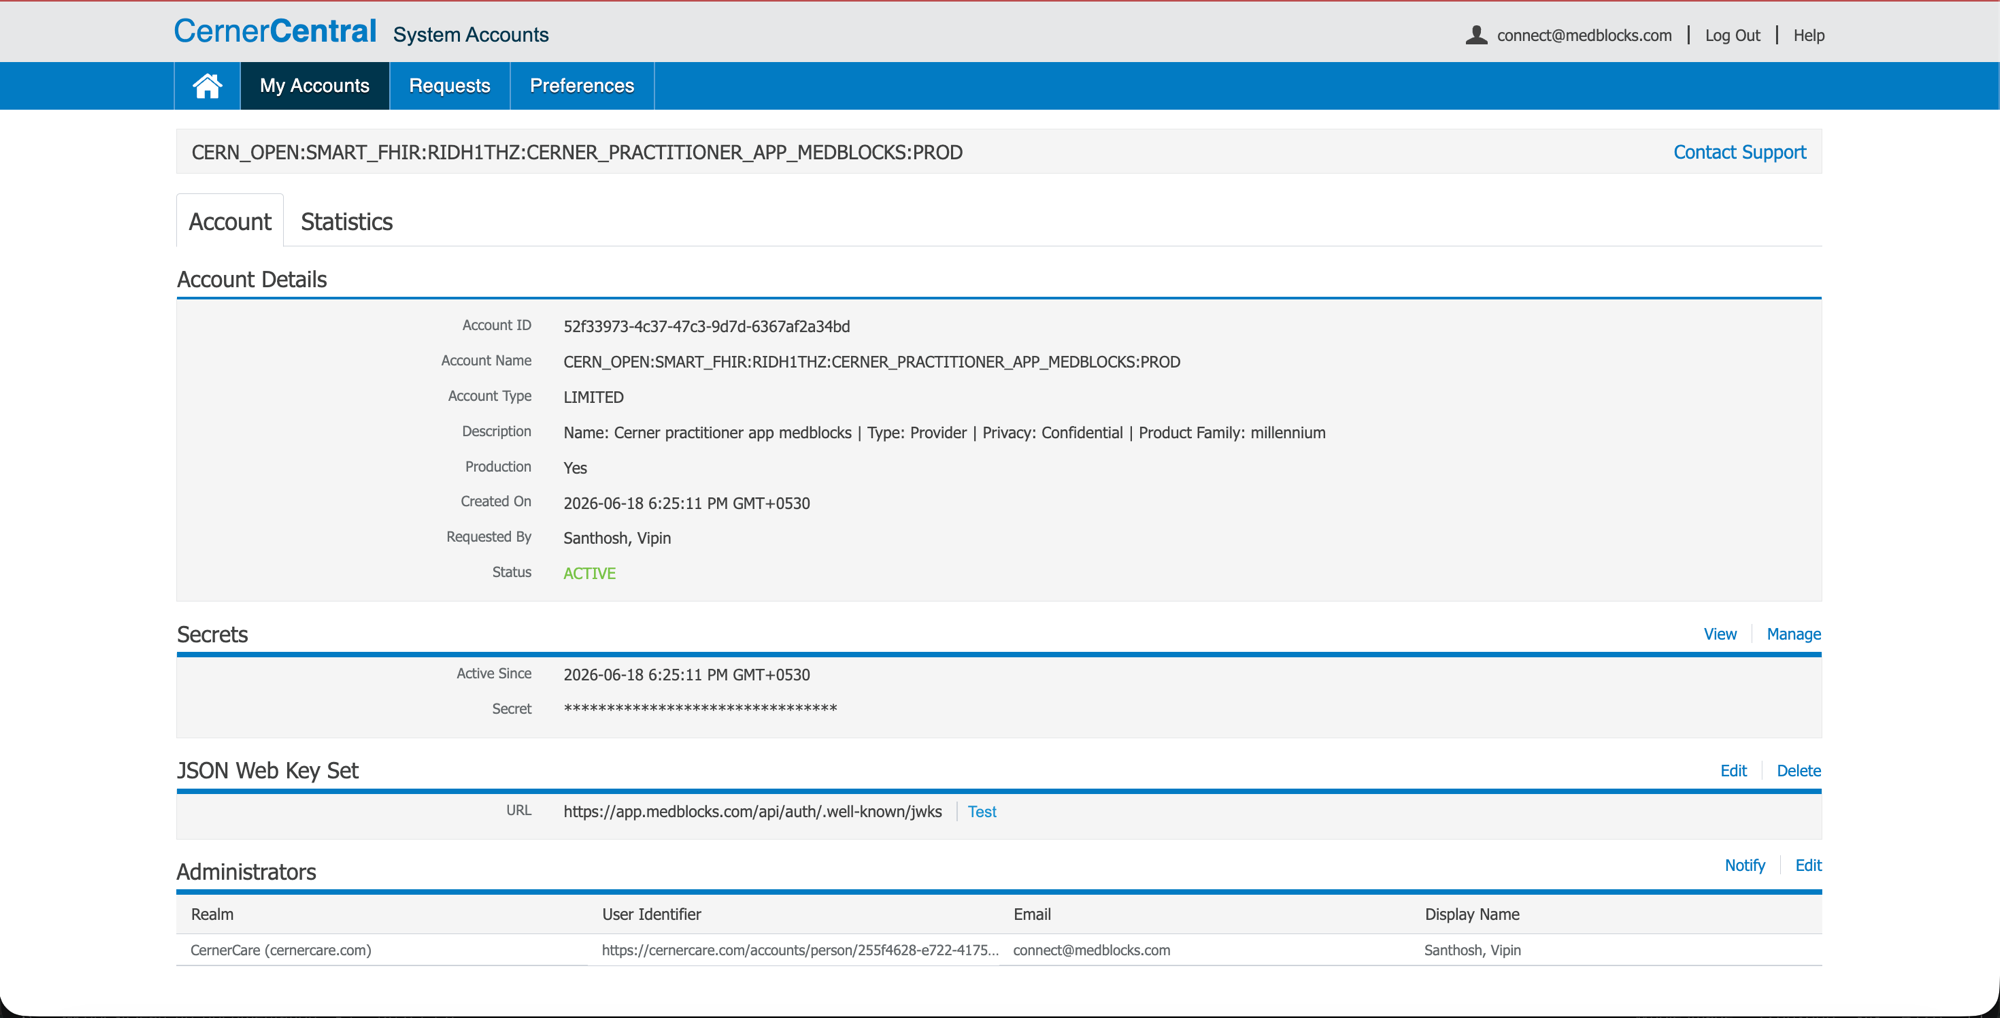
What to confirm here:
* **Account ID** matches the Client ID from the Code Console.
* **Production**: **Yes**.
* **Status**: **ACTIVE**.
* **Secret**: present (click **Manage** or **View** to copy the value for Medblocks).
* **JSON Web Key Set URL**: `https://app.medblocks.com/api/auth/.well-known/jwks`. This is the public-key endpoint Cerner fetches to validate Medblocks’ JWT client assertions. The same JWKS serves all environments (prod, dev, local) because the keypair is shared, so this single URL is correct everywhere.
If the JWKS field is empty or pointing somewhere else, click **Edit** to the right of the **JSON Web Key Set** header.
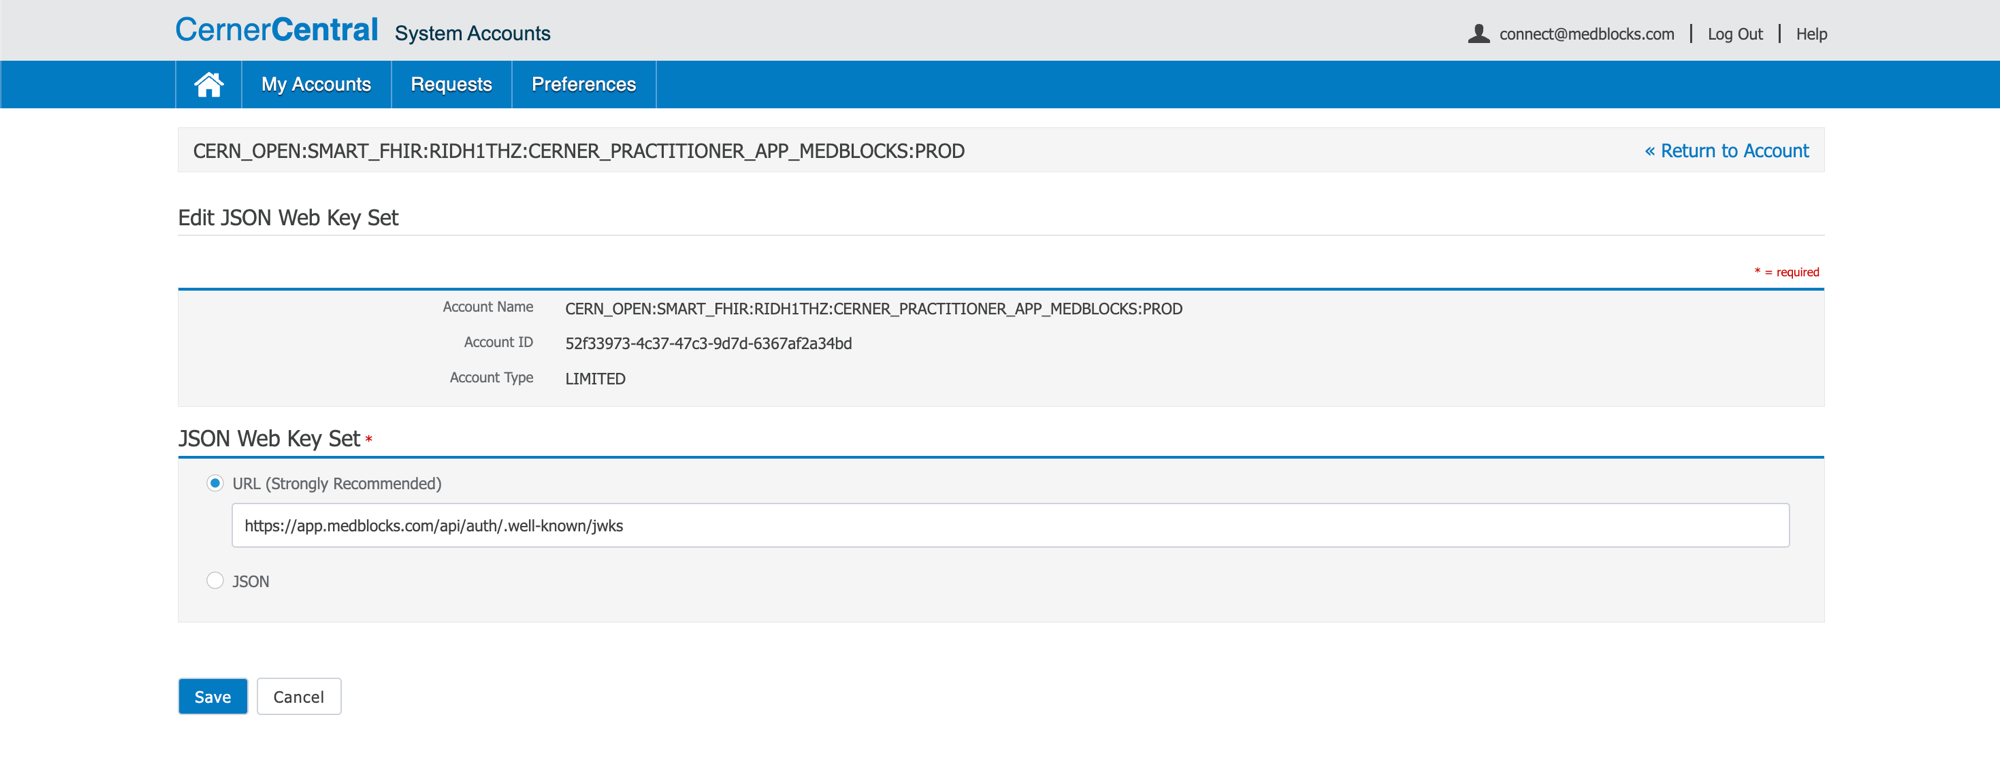
* Select the **URL (Strongly Recommended)** radio.
* Paste: `https://app.medblocks.com/api/auth/.well-known/jwks`
* Click **Save**.
Then back on the System Account page, click **Test** next to the JWKS URL to confirm Cerner can fetch it. A successful test means Cerner will accept JWT client assertions Medblocks signs.
### Configure Medblocks [#8-configure-medblocks]
* Go to **Settings**.
* Select **Connections**.
* Find **Cerner** and open it.
The top of the page has the app-side settings — the **App launch URL** Medblocks redirects to after an EHR launch completes, and the **CDS endpoint** (if you’re serving CDS Hooks). CDS caching stays off unless you know you need it.
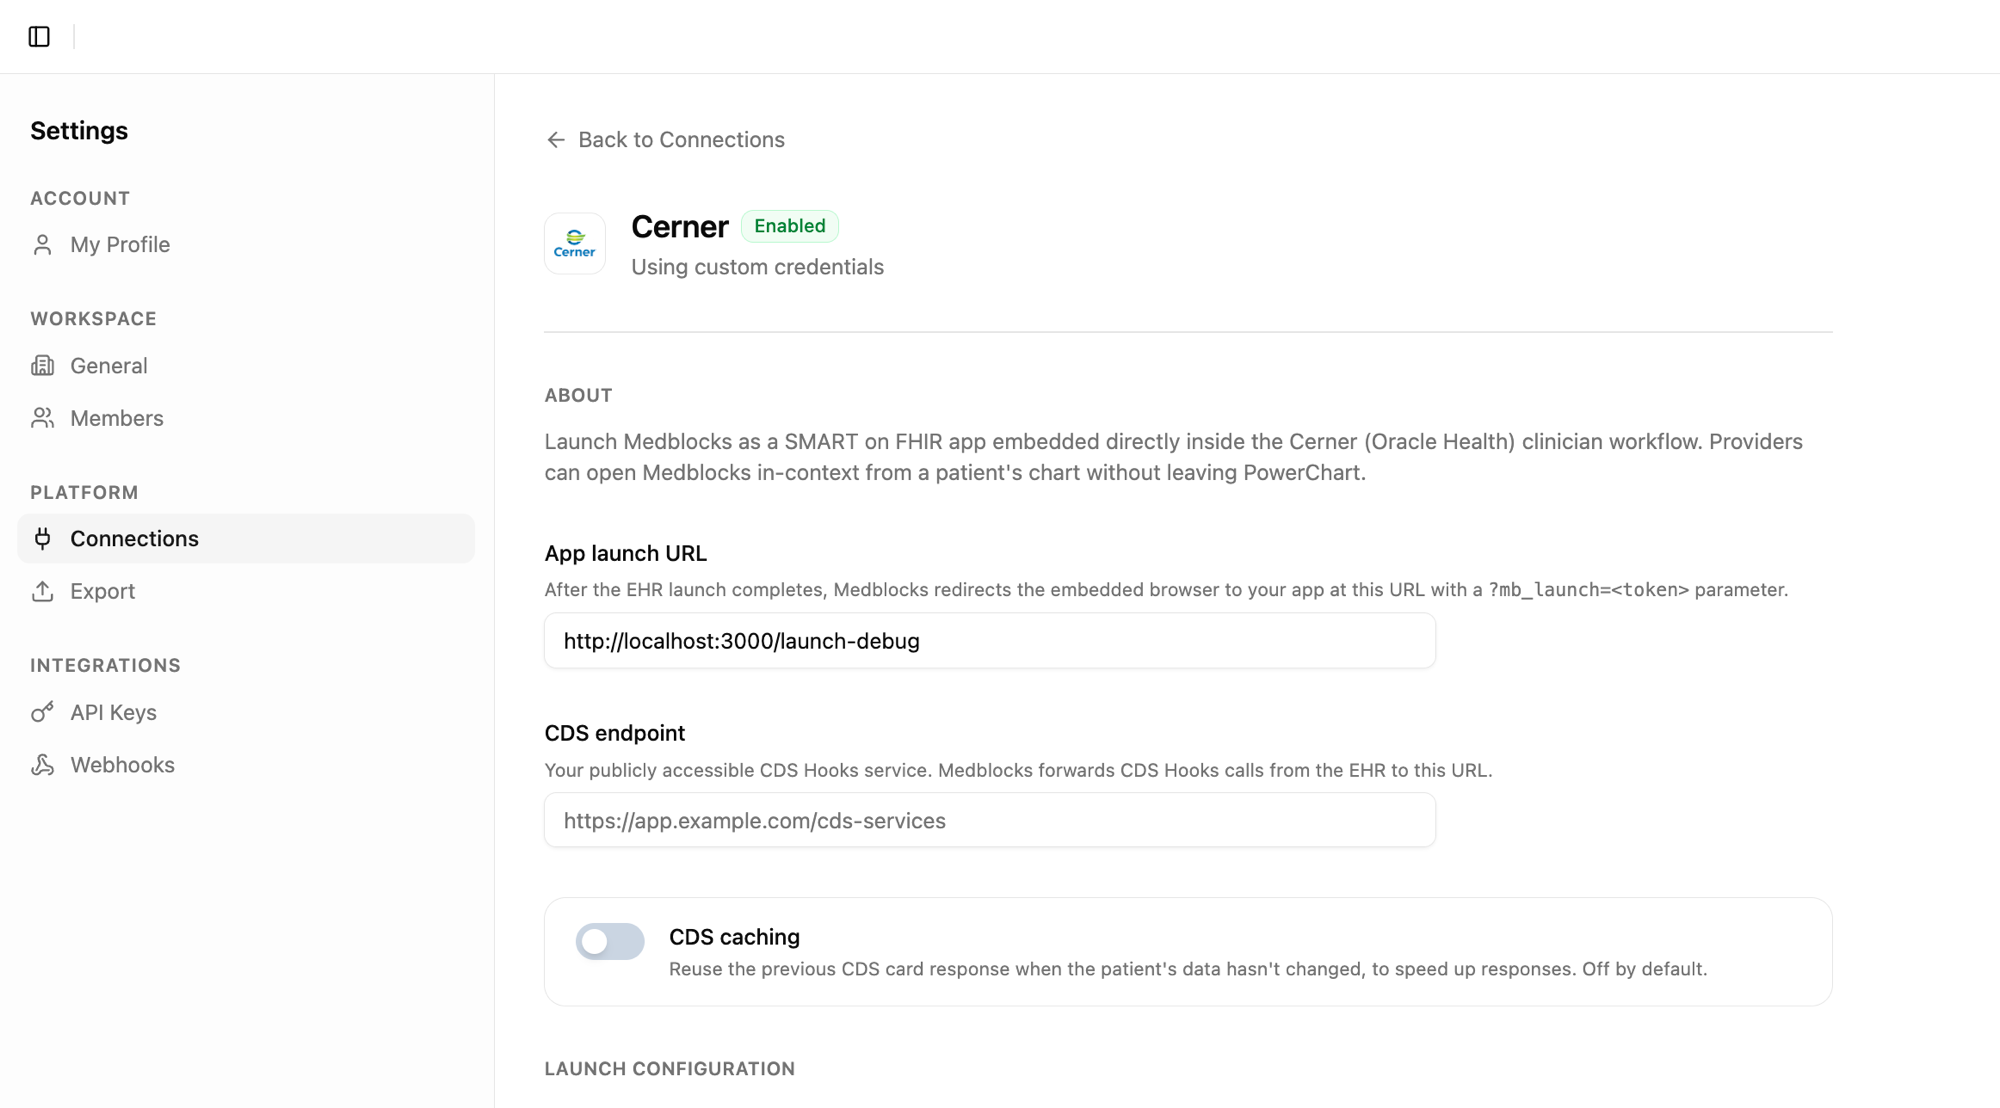
Scroll down for the org-scoped Launch URL + CDS Hooks URL that Cerner needs, and the credentials block:
* Toggle **Use custom credentials**.
* Paste the **Client ID** from Cerner Central.
* Copy the **Redirect URI** and **JWKS URI** shown here into the corresponding fields on the Cerner Code Console (if you haven’t already).
* Save.
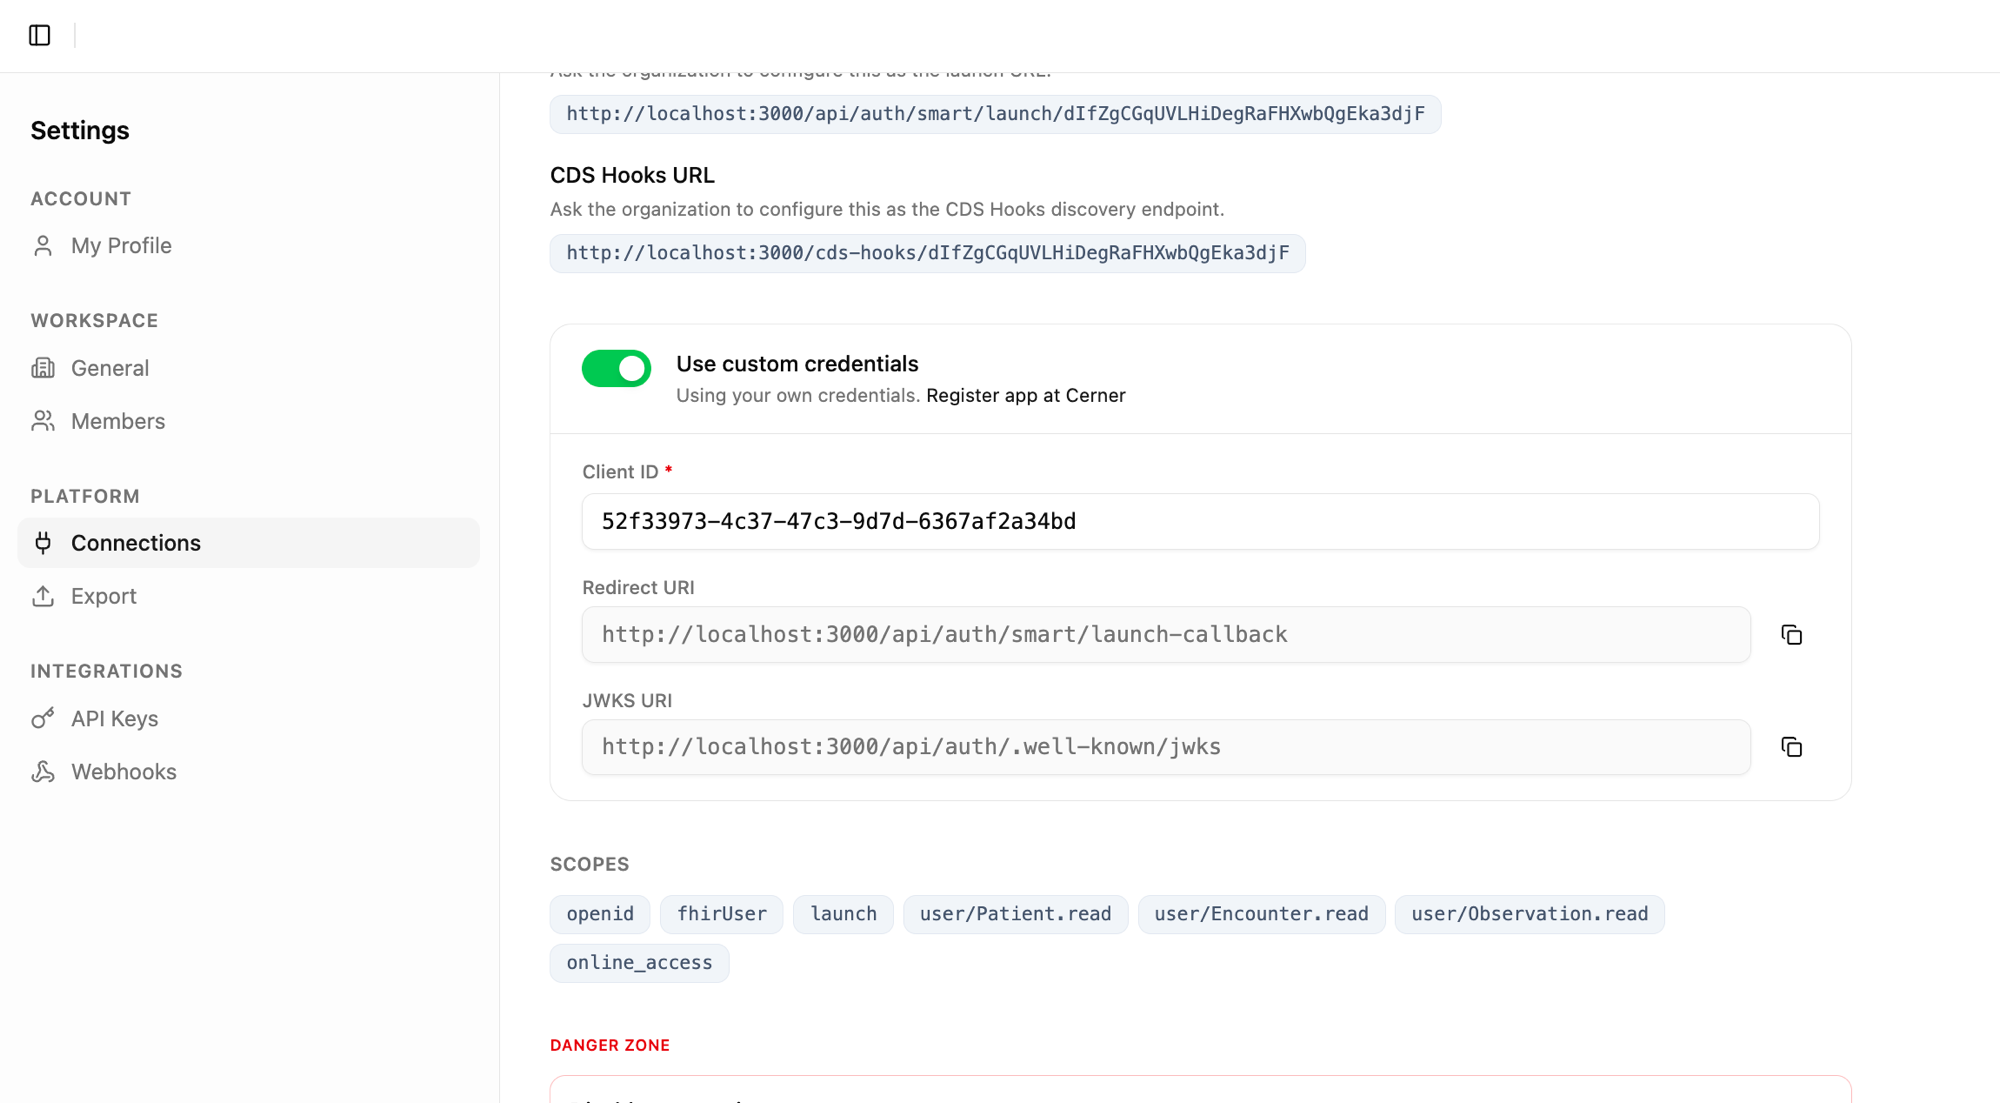
The **Scopes** row shows what Medblocks will request on every launch — confirm it matches what you ticked on the Code Console API Access screen.
### Test in the Cerner Code Sandbox [#9-test-in-the-cerner-code-sandbox]
Cerner provides a public sandbox tenant `ec2458f2-1e24-41c8-b71b-0e701af7583d` with synthetic patients and a built-in launcher.
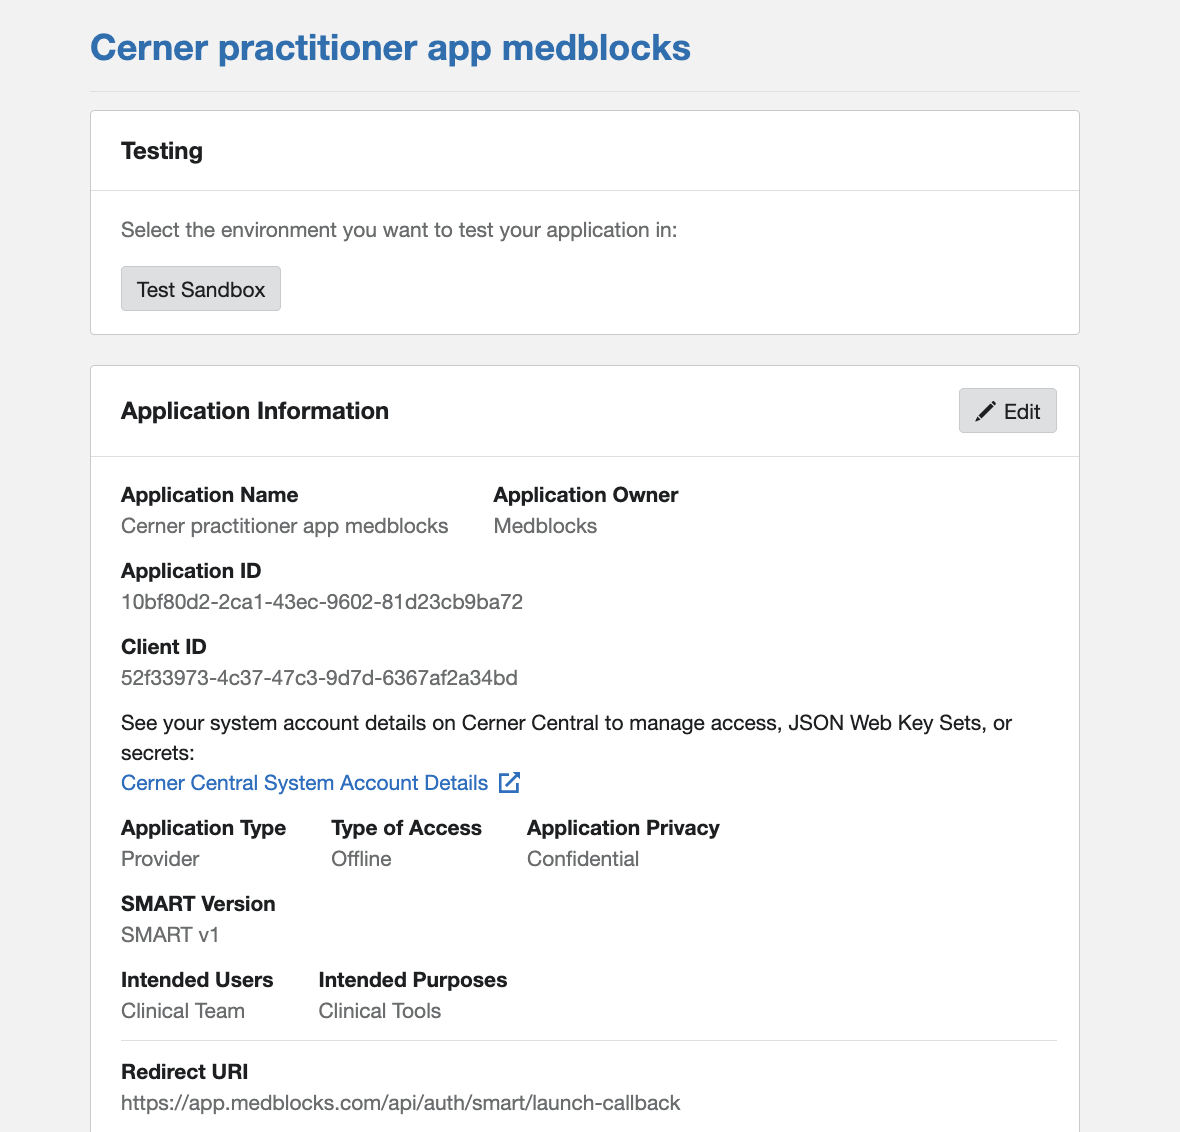
1. From the application detail page click **Test Sandbox** in the Testing panel.
2. **Pick a synthetic patient.** Cerner opens a Testing Details dialog with the sandbox tenant’s pre-populated patients. Each row describes the data shape (cancer staging observations, ICU vitals, pregnancy conditions, allergies, etc.) so you can pick whichever scenario fits what you want to test.
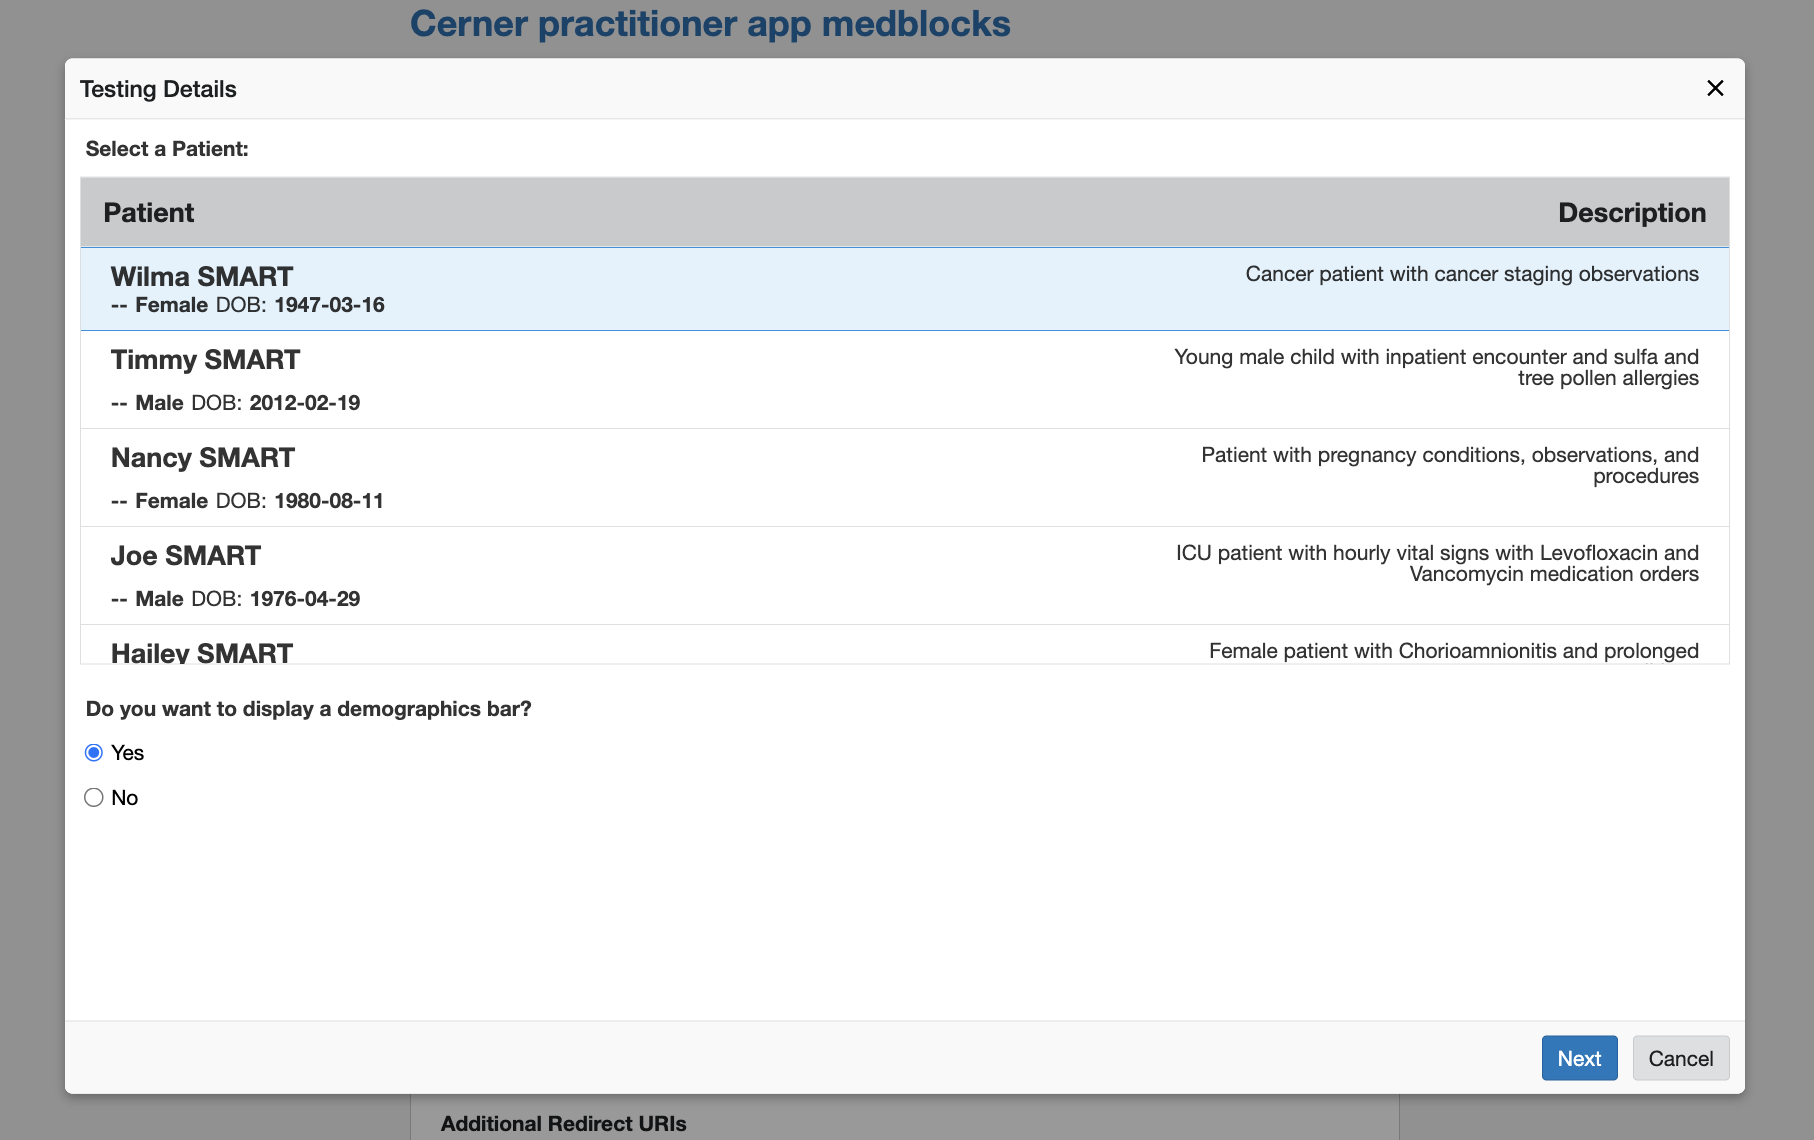
Leave **Do you want to display a demographics bar** on **Yes** unless you want to test what the banner-less behavior looks like. Click **Next**.
3. **Launch the testing environment.** Cerner shows the sandbox provider credentials you’ll use on the login screen.
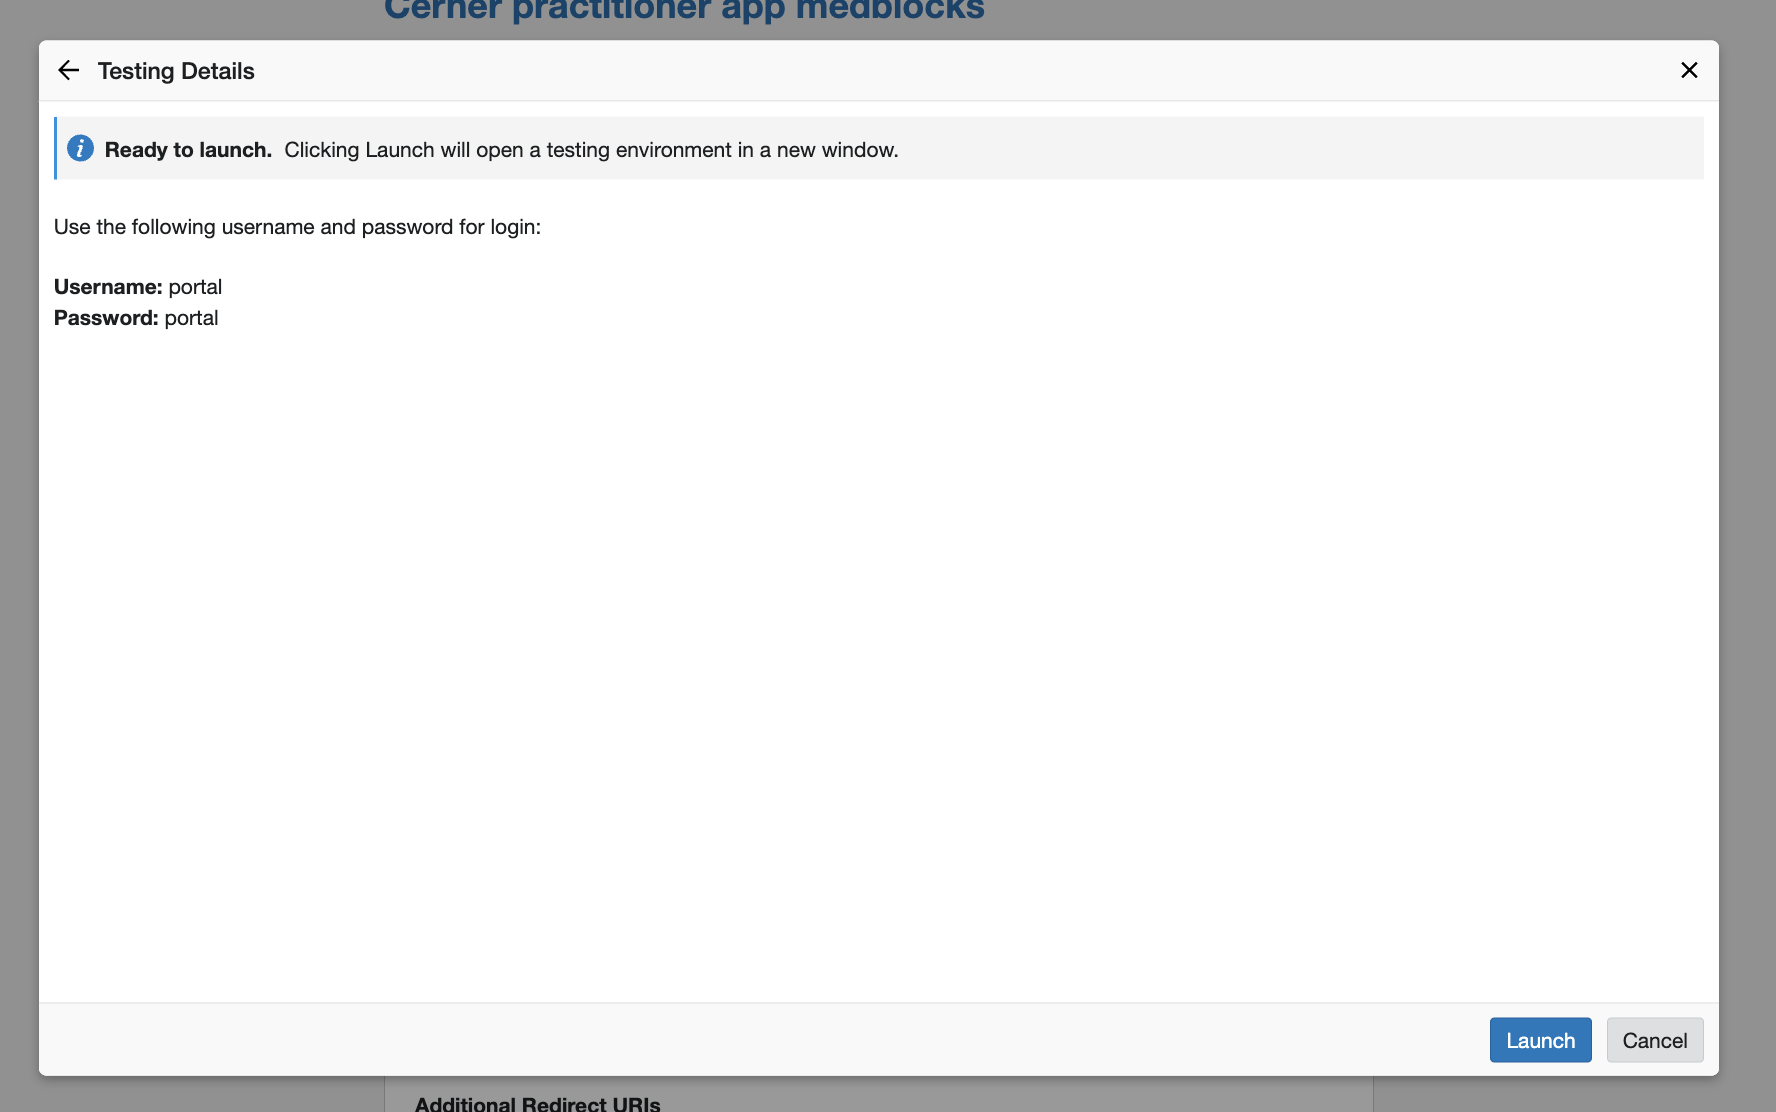
Note the credentials (`portal` / `portal` for this sandbox), then click **Launch**. A new window opens.
4. **Sign in.** A new window opens to the Oracle Health login. Use the credentials from the previous step (`portal` / `portal`), leave the third field as it is, and click **Log In**.
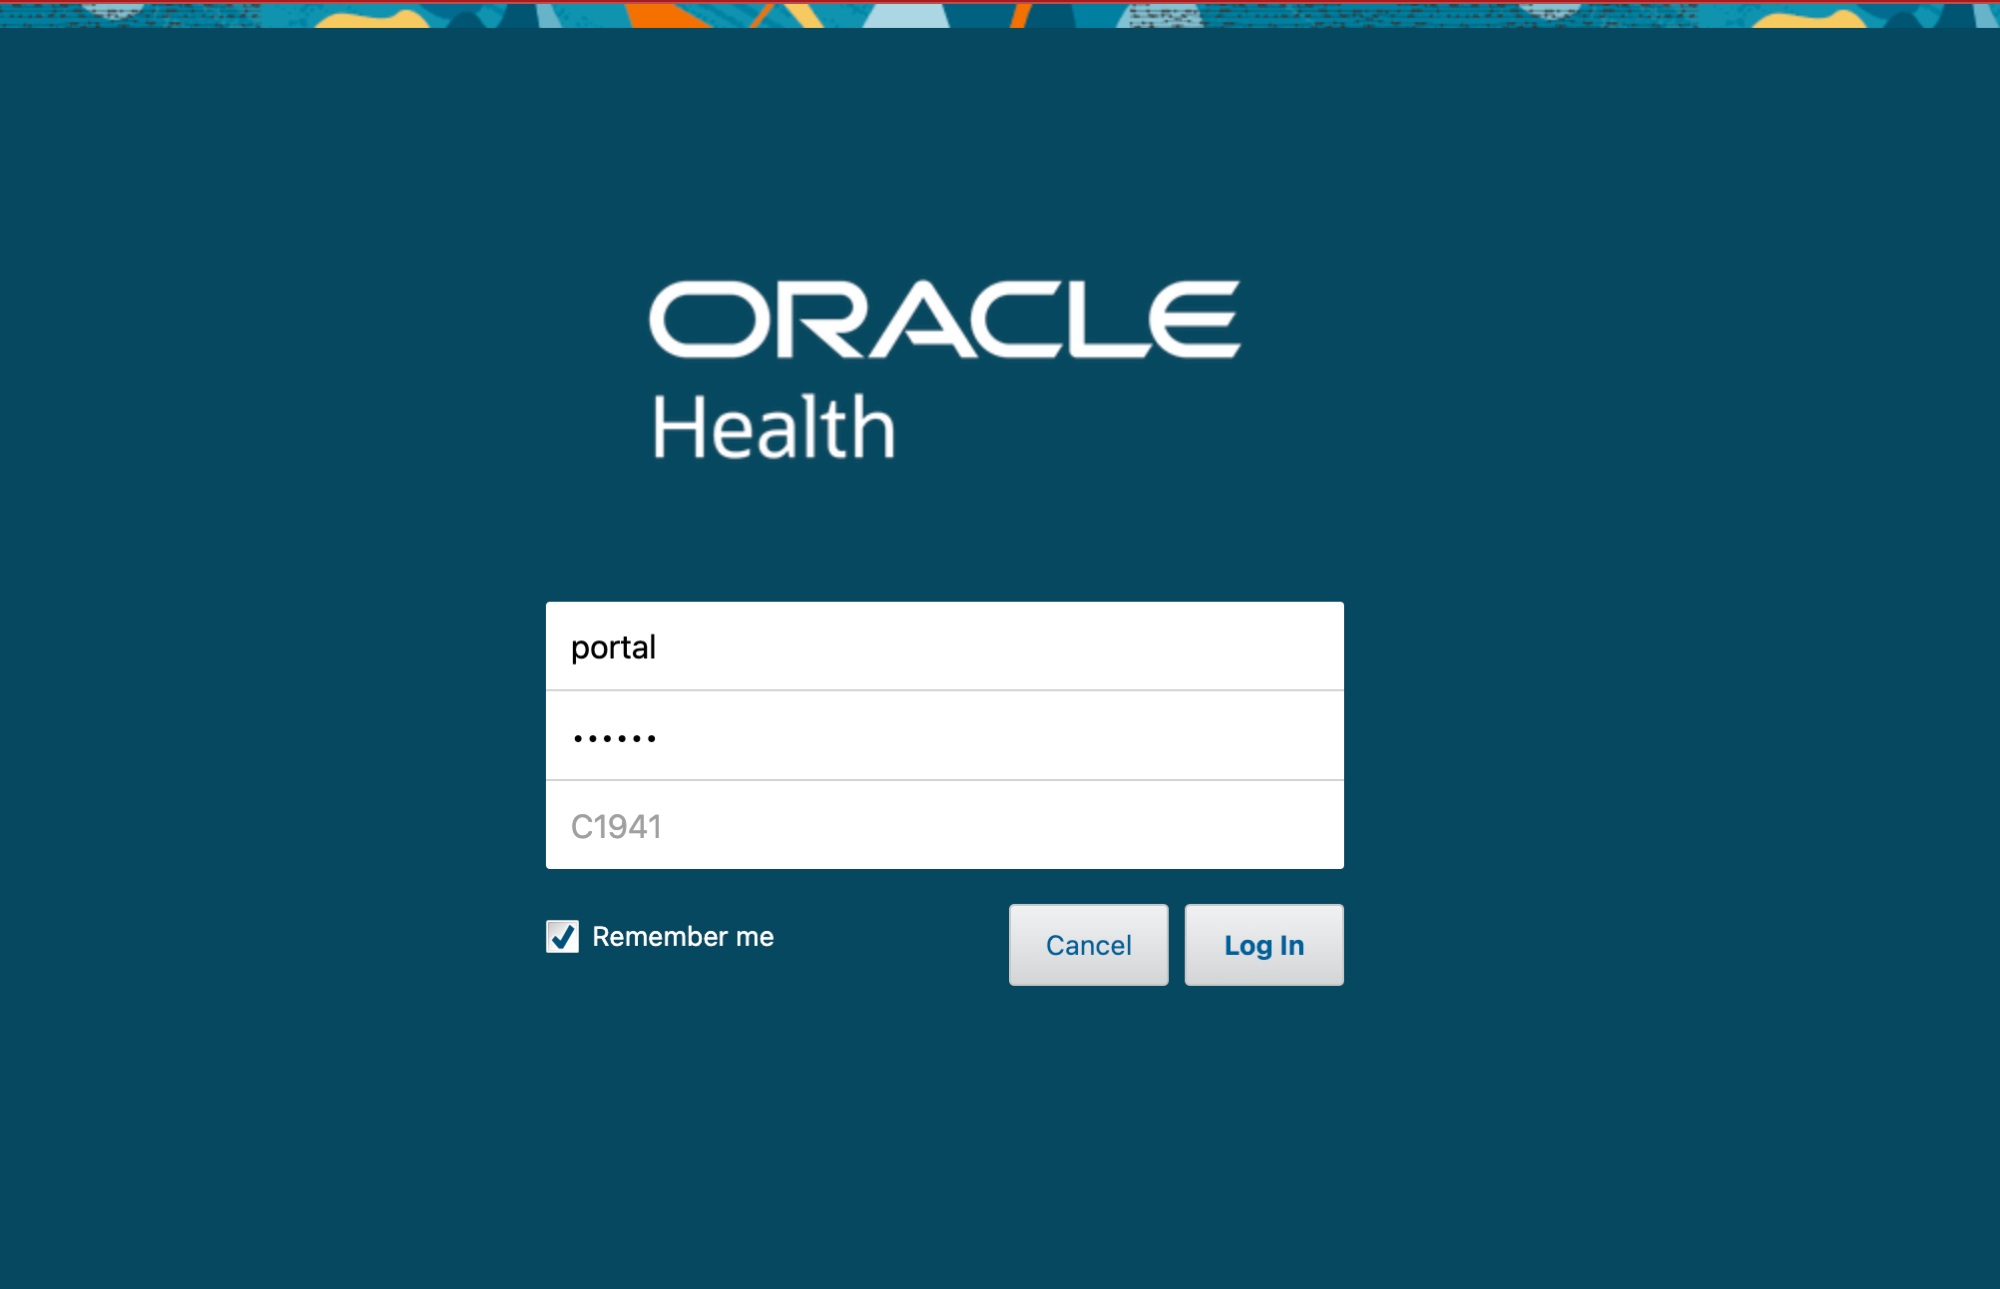
5. **Approve the connection.** Cerner shows the SMART consent prompt summarising what data the app will access on the patient’s behalf. Click **Approve Connection**.
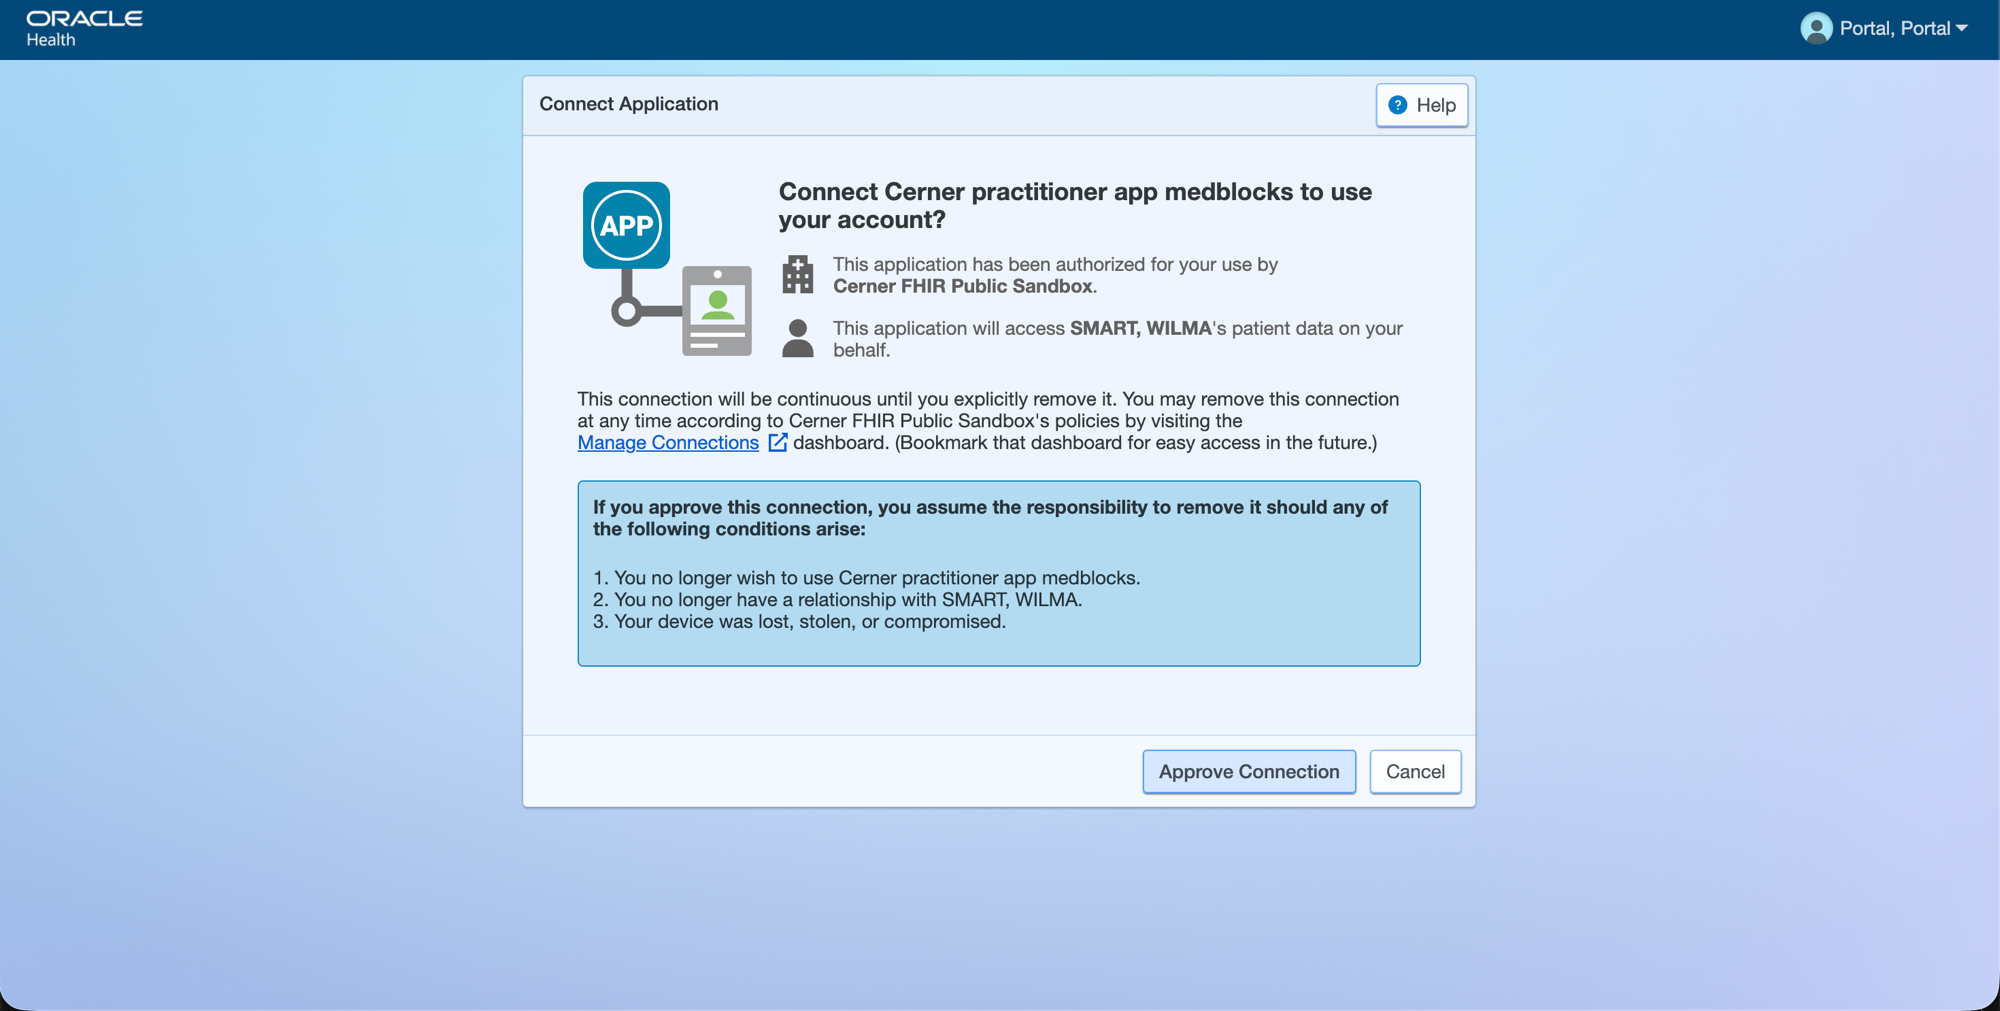
6. **Cerner redirects to your SMART Launch URI** with `?iss=&launch=` appended. Medblocks then hits Cerner’s authorize endpoint, the launched patient is persisted as a scoped account, and Medblocks bounces to your configured App Launch URL with `?mb_launch=` appended. Your app exchanges that handle for the launch context (patient FHIR id, encounter id, fhirUser) via Medblocks’ API.
> **Seeing a “Not Found” page after approval?** That’s expected if the **App launch URL** you configured under **Settings, Connections, Cerner Clinical Workflow** points at a placeholder like `http://localhost:3000/launch-debug` (no route serves it). The launch itself succeeded, your app will be created at that URL in real deployments. To confirm the launch worked, check the `ehr_launch` table for a row with `access_token`, `patient_fhir_id`, `encounter_fhir_id`, and `fhir_user` populated.
If you hit `FHIR source not found for iss`, the sandbox tenant’s FHIR base URL is missing from `fhir_source`. Add the sandbox row with `environment=sandbox` and try again.
### Going to Production [#10-going-to-production]
Cerner production tenants are per-customer. Each hospital’s IT team must explicitly authorize your Client ID for their tenant before launches will succeed against real PHI. The flow:
1. Your customer’s Cerner administrator adds your Client ID to their tenant’s allowlist via Cerner Central.
2. You add their tenant’s FHIR base URL as a `fhir_source` row with `environment=production`.
3. The customer’s Medblocks org points at that tenant.
4. Edit the SMART Launch URI on the Code Console to point at the production host (`https://app.medblocks.com/api/auth/smart/launch/`).
There is no “submit for production access” button on the Code Console itself, the app you registered above is already a production-capable Provider app, what gates production access is the per-tenant allowlist plus updating the Launch URI to a production org.
---
# SMART App Launch
Open your full app embedded inside the EHR, scoped to the patient on screen.
Source URL: /docs/clinician-workflow/smart-app-launch
# SMART App Launch
Open your full app embedded inside the EHR, scoped to the patient on screen.
These Clinician Workflow docs are a work in progress. Use them as orientation while we expand the implementation guides.
SMART App Launch is the pattern for opening your application from inside an EHR. The clinician clicks your app from the chart, Medblocks handles the SMART launch, and your app receives a launch context it can use to load the right experience.
Use it when your app needs more than a small alert or recommendation. A care coordination view, trial matching workspace, prior authorization tool, specialty workflow, or documentation assistant usually wants a full application surface.
## How the flow works [#how-the-flow-works]
1. The provider organization enables your app in the EHR.
2. A clinician launches the app from the patient chart.
3. The EHR sends launch context to Medblocks.
4. Medblocks completes the SMART authorization flow and redirects to your app launch URL.
5. Your backend resolves the Medblocks launch token and loads the patient, user, organization, and encounter context.
The clinician does not need to search for the patient again, and your app does not need to implement the EHR-specific launch exchange for every source.
## What to configure [#what-to-configure]
In [Configure Clinical Workflows](/docs/configure-connections/clinical-workflows), add the URL where Medblocks should send the clinician after launch. For Epic, the same page shows the launch URL and redirect URI needed by the EHR administrator.
If your organization owns the EHR app registration, switch the connection to your own credentials and copy the Medblocks callback values into the EHR developer setup.
## See also [#see-also]
* [Configure Clinical Workflows](/docs/configure-connections/clinical-workflows)
* [CDS Hooks](/docs/clinician-workflow/cds-hooks)
* [Integration patterns](/docs/integration-patterns)
---
# Comparisons
How Medblocks compares to other healthcare integration tools, and where we differ.
Source URL: /docs/comparisons
# Comparisons
How Medblocks compares to other healthcare integration tools, and where we differ.
Healthcare integration is not new. Interface engines and connectivity vendors have been moving data between systems for decades, mostly through custom HL7v2 feeds and point-to-point interfaces built one site at a time. What is new is the standardized, regulated APIs that now expose the same data directly. A wave of vendors has grown up to use them, and the old incumbents are racing to adopt them too.
Medblocks is built natively on these APIs, and we don’t broker access. You hold the direct relationships, on your own credentials, so what you build keeps growing with you rather than locking you in. Read [our approach](/docs/our-approach) for how it works.
Here is the landscape of vendors you might be comparing us with:
The healthcare integration landscape.
The three main circles are the integration surfaces. Which one you can actually reach depends on the relationship you hold, as we cover in [pick the integrations that fit you](/docs/our-approach#pick-the-integrations-that-fit-you): a patient relationship unlocks patient access, an organizational one unlocks direct EHR integration across clinician workflows and backend, and a treatment relationship unlocks treatment-use HIE. We group the comparison the same way.
Each relationship you hold unlocks a different level of access.
The fourth circle is the data layer. After records arrive, we deduplicate them into one record per person and normalize every source into clinically vetted models, which we cover under [clinical safety](/docs/our-approach#reconciliation-as-clinical-safety).
## Capability comparison [#capability-comparison]
Coverage of each surface and the data layer, by vendor. Select a column for a full comparison, or see [capability definitions](#capability-definitions) for what each row means.
## Where Medblocks fits [#where-medblocks-fits]
Most of these tools do one thing well. The catch is who they were built for: most were built for provider organizations and an earlier era of integration, not for a healthcare tech company shipping a product. Many also bundle the access to each organization into the deal, brokering the connection on their own credentials.
Medblocks is built for builders. We use modern, standardized APIs, run roughly **10 - 12x** more affordable than a bundled integration, and never broker access for you. You connect on your own credentials and keep the direct relationships, so you are never locked in.
Each category below is represented by a single comparison.
and other EHR integrators like Vim and Leyr. Backend-mostly. We add patient access, clinician workflow, and network, on your own credentials.
and other patient-access tools like b.well, Human API, and 1up Health. Patient-consent only, often their branding. We use yours and expand into organizational and network access.
and other treatment-use networks like Particle Health, Kno2, Metriport, and Zus. Network-only and lower fidelity. We pair the network with direct integration.
and other interface engines like Mirth Connect, Cloverleaf, Iguana, and WSO2. Built for provider IT and HL7v2. We bring the modern FHIR surfaces and a maintained record.
and other FHIR CDRs like Aidbox, HAPI, and AWS HealthLake. Mostly storage, modeling left to you. We connect and normalize, and export into them.
and other analytics platforms like Innovaccer and Arcadia. Enterprise analytics, not builders. We handle connection, dedup, and normalization upstream.
If you are ready to build, the [Quickstart](/docs/patient-access/quickstart) takes you from your first connection to your first patient record in minutes.
## Capability definitions [#capability-definitions]
#### Patient access [#patient-access]
A patient connects their own records through a consented API.
#### Your branding [#your-branding]
The patient session runs under your brand, not the vendor’s, so you don’t hand users to someone else’s logo.
#### Brokered org access [#brokered-org-access]
The vendor negotiates and maintains access to each organization on your behalf.
#### Wearable and mobile [#wearable-and-mobile]
Patient-authorized device and app data, like Apple Health, wearables, and glucose monitors, through ready-made SDKs.
#### SMART EHR embed [#smart-ehr-embed]
Your app launches inside the EHR through SMART App Launch, scoped to the patient on screen.
#### CDS Hooks [#cds-hooks]
Your guidance surfaces as a native card inside the EHR at the right moment in the clinician’s workflow, like opening a chart or placing an order.
#### EHR backend [#ehr-backend]
Server-to-server access that runs unattended, with no patient or clinician logged in.
#### FHIR bulk [#fhir-bulk]
Importing a whole patient population from a source’s FHIR Bulk Data endpoint in a single job. This measures pulling bulk data in, not exposing a bulk endpoint of your own.
#### HL7v2 interfacing [#hl7v2-interfacing]
Sending and receiving legacy HL7v2 messages, still the backbone of most hospital interfaces.
#### Treatment-use HIE [#treatment-use-hie]
Reaching a patient’s records across organizations through the national networks, which require a treatment relationship.
#### Patient deduplication [#patient-deduplication]
Matching and linking records that belong to the same patient across sources, so one person stays one record.
#### Clinical data models [#clinical-data-models]
Normalizing every source into tabular, queryable models, so the same concept always looks the same.
#### Export to FHIR CDR [#export-to-fhir-cdr]
Delivering the normalized record into a FHIR server you control.
#### Export to warehouse [#export-to-warehouse]
Delivering into your own data warehouse, like Snowflake, Fabric, Databricks or BigQuery, for analytics.
#### Pricing model [#pricing-model]
The commercial shape, from published self-serve pricing to quote-based enterprise sales.
---
# Medblocks vs Flexpa
How Medblocks compares to Flexpa for patient-mediated data access, branding, and pricing.
Source URL: /docs/comparisons/flexpa
# Medblocks vs Flexpa
How Medblocks compares to Flexpa for patient-mediated data access, branding, and pricing.
[Flexpa](https://www.flexpa.com/) lets a patient connect their own records through a managed API, usually across payers and providers. It sits in the patient-access circle of the [healthcare integration landscape](/docs/comparisons), alongside other patient-access tools like [b.well](https://www.icanbwell.com/), [Fasten Connect](https://www.fastenhealth.com/), [Human API](https://humanapi.co/), and [1up Health](https://1up.health/).
**Choose Flexpa** if payer data is your priority and you are fine handing the patient authorization flow, and your branding, to another company. Its clinical data comes through TEFCA, where reach is still limited, especially for Epic: even after identity proofing through ID.me or CLEAR, patients with records in major EHRs often have to sign in to the EHR directly anyway, and data quality is uneven today. If clinical data matters more to you, [Fasten Connect](https://www.fastenhealth.com/) goes deeper there.
**Choose Medblocks** if you want the flow under your own brand and more than patient access. You get patient-mediated payer and clinical data, plus organizational, backend, and network access, all deduplicated and normalized, on your own credentials and at a fraction of the price.
## Side by side [#side-by-side]
See the [full capability matrix](/docs/comparisons#capability-comparison) for every row and the sources behind each rating.
## What Flexpa does well [#what-flexpa-does-well]
Flexpa is focused. It gives a patient a clean way to authorize access to their own records across payers and providers through a single managed API. If patient-mediated data is the whole job, that focus is a strength.
It handles the messy parts of patient authorization for you, so you do not build and maintain OAuth plumbing against every payer and provider yourself.
## Where Medblocks goes further [#where-medblocks-goes-further]
Flexpa reaches data only when a patient connects it. The moment you need organizational, backend, or network access, you start over with a different tool. Medblocks covers patient access and the other three surfaces, so the same patient base extends into facility and organization-based integration as you grow.
The authorization flow is also theirs, not yours. Their branding on the consent screen adds drop-off. With Medblocks the flow runs under your brand.
And Medblocks normalizes. Flexpa returns FHIR for you to model and deliver yourself. Medblocks deduplicates records into one per person and normalizes every source into clinically vetted models, ready to query.
## Pricing [#pricing]
Flexpa starts around $350,000 per year, roughly six times Medblocks’ flat $60,000 per year, and for a single surface rather than all four.
## Using them together [#using-them-together]
You do not have to rip out Flexpa to start. If you already use it, pipe the patient-authorized data it returns into Medblocks, where it joins every other source into one normalized record. As you need organizational, backend, or network access, you add those surfaces in Medblocks without changing your patient flow.
---
# Medblocks vs Health Gorilla
How Medblocks compares to Health Gorilla and the treatment-use network platforms, across reach, fidelity, and pricing.
Source URL: /docs/comparisons/health-gorilla
# Medblocks vs Health Gorilla
How Medblocks compares to Health Gorilla and the treatment-use network platforms, across reach, fidelity, and pricing.
[Health Gorilla](https://www.healthgorilla.com/) reaches records across organizations through the national networks, as a designated TEFCA QHIN. It sits in the treatment-use network circle of the [healthcare integration landscape](/docs/comparisons), alongside [CommonWell](https://www.commonwellalliance.org/), [Particle Health](https://www.particlehealth.com/), [Zus Health](https://zushealth.com/), and [Metriport](https://www.metriport.com/).
**Choose a network platform** if treatment-use network access is the core need, or if you need real-time ADT event feeds, which Medblocks does not offer yet. As a QHIN with reach across CommonWell and Carequality, Health Gorilla is strong at pulling a longitudinal record under a treatment relationship. If document-level network data is enough, these platforms do that well.
**Choose Medblocks** if you need more than the network. You get treatment-use HIE alongside patient access, clinician workflow, and backend, paired with higher-fidelity direct EHR integration, on your own credentials. The data arrives deduplicated and normalized into queryable models, not network-grade documents you parse yourself.
## Side by side [#side-by-side]
See the [full capability matrix](/docs/comparisons#capability-comparison) for every row and the sources behind each rating.
## What the network platforms do well [#what-the-network-platforms-do-well]
They are strong at network exchange. Under a treatment relationship, they reach a patient’s records across the organizations on the national networks, far more than you would connect to one by one. For a longitudinal record pulled through TEFCA, CommonWell, or Carequality, that breadth is real.
Each has its own emphasis. Health Gorilla and CommonWell are QHINs with broad network reach, Particle and Metriport wrap that access in a developer API, and Zus layers a curated patient record and EHR-embedded components on top.
They also run real-time ADT feeds. If you need to know the moment a patient is admitted, discharged, or transferred, these feeds surface it across organizations, which a direct EHR integration cannot, since it only sees events inside the organizations you connect to. Medblocks does not offer notification networks like this yet.
## Where Medblocks goes further [#where-medblocks-goes-further]
The networks are one surface, and a network-only tool stops there. Access usually requires a treatment relationship, so patient-mediated, clinician-workflow, and direct backend surfaces are out of reach. Medblocks treats the network as one surface among several and adds the others.
Fidelity is the second gap. Network data arrives as documents, often lower fidelity than a direct EHR integration, and reconciling it is left to you. Medblocks pairs the network with direct integration where you need higher-fidelity data, then deduplicates and normalizes every source into queryable models.
## Pricing [#pricing]
Network pricing ranges widely: CommonWell is about $25,000 per year for the under-$5M tier plus a one-time setup fee, Particle runs roughly $60,000 per year plus per-query fees, and Health Gorilla does not publish rates. Medblocks is a flat $60,000 per year that also covers the other surfaces and the data layer, and includes CommonWell and Carequality access on your own credentials, not the network alone.
## Using them together [#using-them-together]
The network is a surface Medblocks already connects to, on your own CommonWell credentials and included in the platform fee, so for most teams there is nothing extra to buy. Once an organization has sent its documents back to the network, Medblocks can pull those records from anywhere. If you already hold a separate network contract, you can keep pulling through it and feed that data into Medblocks, where it is deduplicated and normalized alongside your other sources into one record.
---
# Medblocks vs Medplum
How Medblocks compares to Medplum and the FHIR CDRs, across connectivity, modeling, and deduplication.
Source URL: /docs/comparisons/medplum
# Medblocks vs Medplum
How Medblocks compares to Medplum and the FHIR CDRs, across connectivity, modeling, and deduplication.
[Medplum](https://www.medplum.com/) is a FHIR clinical data repository, a server that stores and serves FHIR. A CDR is not an integration product, so it does not appear in the [healthcare integration landscape](/docs/comparisons) at all. We cover it here because teams still weigh CDRs against integration tools and get the two confused. Other FHIR CDRs include [Aidbox](https://www.health-samurai.io/fhir-server), [Smile CDR](https://www.smiledigitalhealth.com/), [AWS HealthLake](https://aws.amazon.com/healthlake/), [Azure FHIR](https://azure.microsoft.com/en-us/products/health-data-services), and [Google Cloud Healthcare](https://cloud.google.com/healthcare-api). They are repositories: excellent at holding FHIR, but they do not connect to sources unless you build the integration, and the modeling is yours to bring.
**Choose a FHIR CDR** if you need a compliant, scalable FHIR server to hold and serve data. Within that job they are solid, and several are battle-tested at scale.
**Choose Medblocks** if you need the data to arrive in the first place, connected, deduplicated, and modeled. A CDR is the destination, not the pipeline. In fact this is not an either-or: Medblocks connects and normalizes, then exports clean FHIR straight into the CDR you keep as your system of record.
## Side by side [#side-by-side]
See the [full capability matrix](/docs/comparisons#capability-comparison) for every row and the sources behind each rating.
## What FHIR CDRs do well [#what-fhir-cdrs-do-well]
A CDR is excellent at storing and serving FHIR. If you need a compliant, scalable FHIR server, with bulk export and SMART-based access, these are solid choices, and the cloud options (HealthLake, Azure, Google) scale with almost no operational overhead.
They differ mostly in flavor. Medplum and Aidbox lean developer-first with app tooling, Smile CDR is the commercial steward of HAPI FHIR, and the cloud CDRs are managed services inside AWS, Azure, and Google.
## Where Medblocks goes further [#where-medblocks-goes-further]
A CDR is mostly storage, and three gaps follow from that. It does not connect you to sources, so getting data in is your problem. It leaves modeling to you, so the same concept lands in many shapes inside the same repository ([tumor size can be an Observation or a Condition](https://medblocks.com/blog/ge-healthcare-x-medblocks-simplifying-cancer-care-decisions#harmonization-of-data-into-fhir-resources)). SQL on FHIR helps query it but is one more thing you build, and it is limited: modeling in a warehouse with a tool like dbt is usually more powerful. And while many offer a FHIR `$match` operation for deduplication, you configure and tune the MDM rules yourself.
Medblocks does the connecting, the deduplication, and the normalizing upstream, and delivers a clean, modeled FHIR record. The CDR holds it; we make it worth holding.
## Pricing [#pricing]
CDR pricing varies by model: the cloud services (HealthLake, Azure, Google) are pay-as-you-go on storage and requests, Aidbox is subscription with a free development tier, and Smile CDR is enterprise and quote-based. None of these includes connectivity or modeling, which you fund separately. Medblocks is a flat $60,000 per year for the connect-and-normalize layer that feeds them.
## Using them together [#using-them-together]
This is the natural fit. Keep your CDR as the system of record, and let Medblocks be the pipeline into it. We connect to your sources, deduplicate and normalize the data, then [export](/docs/data-out) clean FHIR straight into Medplum, Aidbox, HealthLake, or any FHIR server you run. You get one modeled record in the repository you already chose.
---
# Medblocks vs Redox
How Medblocks compares to Redox for EHR integration, across surfaces, write capability, and pricing.
Source URL: /docs/comparisons/redox
# Medblocks vs Redox
How Medblocks compares to Redox for EHR integration, across surfaces, write capability, and pricing.
[Redox](https://redoxengine.com/) connects your app to EHRs and has spent years building and maintaining those connections so you do not have to. It sits in the EHR-integration circle of the [healthcare integration landscape](/docs/comparisons), alongside other EHR integrators like [Vim](https://getvim.com/), [Willow](https://healthindustries.com/), [HealthJump](https://www.healthjump.com/), [Leyr](https://leyr.io/), [Keragon](https://www.keragon.com/), and [TietAI](https://tiet.ai/).
**Choose Redox** if you need the deepest possible EHR integration, including proprietary write capabilities that no standard API exposes yet, you only need backend EHR access rather than patient, wearable, or payer data, and you have the budget for it. Redox has spent years building these integrations and they are hard to match.
**Choose Medblocks** if your use case fits the standardized APIs. Their read access now rivals the proprietary APIs, and write access is growing, not yet on par but catching up fast. You also get patient access, wearables, payer data, and normalized clinical data models, all on your own credentials and at roughly 1/10th the price.
## Side by side [#side-by-side]
See the [full capability matrix](/docs/comparisons#capability-comparison) for every row and the sources behind each rating.
## What Redox does well [#what-redox-does-well]
Redox specializes in backend connectivity, the server-to-server link between your app and a provider’s EHR. Within that slice it is excellent, with years of maintained integrations across many systems.
It also reaches proprietary surfaces that standards do not. Where an EHR exposes write or workflow features only through its own non-standard interfaces, Redox has built and maintained that access. For deep write-back into a single health system, that depth is real and hard to replicate.
## Where Medblocks goes further [#where-medblocks-goes-further]
Redox owns the backend surface. Medblocks spans all four: patient access, clinician workflow, backend, and network. If you later need patient-mediated records, wearables, payer data, or broader network exchange, you do not start over with a different tool.
We connect on your own credentials, not a broker’s. Redox can broker access to organizations it does not already reach, but that setup is a months-long process you pay for, the connection is shared across Redox customers, and you lose it if you leave. With Medblocks you hold the direct relationship with each organization and are never locked in.
The honest gap is proprietary write-back. The standardized APIs we build on now read about as well as the proprietary ones, and write support is growing, but for the deepest proprietary write into a single EHR, Redox is still ahead.
## Pricing [#pricing]
Redox pricing is not public. Based on multiple public sources and industry interviews, it starts around $600,000 per year, roughly ten times Medblocks’ flat $60,000 per year. Organization connections that Redox brokers add a months-long setup you fund on top of that.
## Using them together [#using-them-together]
You do not have to choose one or the other. A common setup is Medblocks for the patient-access APIs, network exchange, and the data normalization layer, with Redox for organization-based access and the deep proprietary write integrations it does best.
Copy the data Redox returns into Medblocks through its APIs, and it deduplicates and normalizes that alongside every other source into one record across surfaces. You keep Redox where its depth matters, and Medblocks gives you the single patient record and the surfaces Redox does not reach.
---
# Medblocks vs Rhapsody
How Medblocks compares to Rhapsody and the integration engines, across surfaces, patient state, and pricing.
Source URL: /docs/comparisons/rhapsody
# Medblocks vs Rhapsody
How Medblocks compares to Rhapsody and the integration engines, across surfaces, patient state, and pricing.
[Rhapsody](https://rhapsody.health/) is a healthcare integration engine. It sits in the integration-engines circle of the [healthcare integration landscape](/docs/comparisons), alongside [Mirth Connect](https://www.nextgen.com/solutions/interoperability/mirth-integration-engine), [Cloverleaf](https://www.infor.com/products/cloverleaf), [Iguana](https://www.interfaceware.com/iguana), and [WSO2](https://wso2.com/). These tools are infrastructure: a provider IT team deploys them inside its own walls to route messages between the systems it already runs, with a lot of custom mapping and configuration. They are routing layers, not a system of record, so they do not maintain patient state.
**Choose an interface engine** if you are a provider IT team wiring your own systems together. Engines are excellent at HL7v2 transformation and routing between the applications you already operate, and within that job they are battle-tested.
**Choose Medblocks** if you are building a digital health product that needs to reach many external organizations through modern FHIR surfaces, with a maintained patient record and a data layer on top. An engine moves messages; Medblocks gives you the surfaces, the record, and normalized data, not just a pipe.
## Side by side [#side-by-side]
See the [full capability matrix](/docs/comparisons#capability-comparison) for every row and the sources behind each rating.
## What interface engines do well [#what-interface-engines-do-well]
Engines are powerful routers. Built for provider IT teams, they move messages between the systems an organization already operates and handle HL7v2 transformation and routing very well. For internal interfacing inside one organization, they are the proven tool.
Each has its own flavor, from Rhapsody and Cloverleaf at the enterprise end to Iguana’s scripting model and WSO2’s open-source platform, but the job is the same: route and transform messages between known systems.
## Where Medblocks goes further [#where-medblocks-goes-further]
They are a different tool for a different buyer. An engine is deployed inside one organization to connect its own systems; it is not built for a digital health product to reach many external organizations. Engines center on legacy HL7v2 rather than the modern FHIR surfaces, and they route messages without maintaining patient state, deduplicating, or modeling the data.
Medblocks gives you the modern surfaces, a maintained patient record, and the data layer, not just a pipe between systems. Reaching a FHIR CDR or a normalized model from an engine means heavy custom mapping that you build and maintain.
## Pricing [#pricing]
Engine pricing is mostly enterprise and license-based, rarely published. Rhapsody runs around $50,000 per year and up, Mirth (proprietary since v4.6), Cloverleaf, and Iguana are quote-based, and WSO2 is open source with paid subscriptions. Every option prices the engine itself, before the custom integration work, the external surfaces, and the data layer you would still need to build.
## Using them together [#using-them-together]
If a provider you work with already runs an engine, you do not have to replace it. Medblocks can receive HL7v2 from the engine and take it from there, deduplicating and normalizing it alongside your other sources into one patient record, while the engine keeps doing the internal routing it is good at.
---
# Medblocks vs Tuva Health
How Medblocks compares to Tuva Health and the healthcare analytics platforms, across connectivity, modeling, and who they are built for.
Source URL: /docs/comparisons/tuva-health
# Medblocks vs Tuva Health
How Medblocks compares to Tuva Health and the healthcare analytics platforms, across connectivity, modeling, and who they are built for.
[Tuva Health](https://thetuvaproject.com/) is an open-source set of warehouse-native data models and quality checks. It sits in the normalized clinical data models circle of the [healthcare integration landscape](/docs/comparisons), alongside the broader analytics platforms [Innovaccer](https://innovaccer.com/), [Arcadia](https://arcadia.io/), and [Health Catalyst](https://www.healthcatalyst.com/). These tools work on data once it is already aggregated: Tuva transforms what is already in your warehouse, and the enterprise platforms add aggregation and packaged applications on top.
**Choose Tuva** if your source data already lives in your warehouse and your team wants to transform it with open, dbt-style SQL models and quality checks. **Choose an enterprise platform** like Innovaccer, Arcadia, or Health Catalyst if you are an organization buying a population-health platform with packaged analytics and applications.
**Choose Medblocks** if you still need to get the data in the first place, connected, deduplicated, and normalized. These tools start after the data has landed; Medblocks is the layer that lands it. It is not either-or: we deliver clean, modeled data into the same warehouse for tools like Tuva to build on.
## Side by side [#side-by-side]
See the [full capability matrix](/docs/comparisons#capability-comparison) for every row and the sources behind each rating.
## What the analytics platforms do well [#what-the-analytics-platforms-do-well]
Tuva is a strong, open-source set of warehouse-native data models and quality checks. If your data is already in the warehouse and your team works in SQL, it standardizes and validates that data well, in the open.
The enterprise platforms are substantial in a different way. Innovaccer, Arcadia, and Health Catalyst combine data aggregation with analytics and packaged applications, aimed at providers and payers running population-health programs. For an enterprise standardizing its own data and buying ready-made applications, they are capable platforms.
## Where Medblocks goes further [#where-medblocks-goes-further]
Both kinds start after the data has landed. Tuva assumes the records are already in your warehouse and has no connectivity layer, so getting them there is your problem. The enterprise platforms aggregate, but they are built for the enterprise organization, not the product builder: the motion is a quote-based enterprise sale, and you adopt their platform and applications rather than composing capabilities into your own product.
Medblocks is built for builders. We handle the connection, deduplication, and normalization upstream, and expose it as APIs and SDKs you wire into your app under your own branding. We also deliver into the warehouses you already use, like Snowflake, Databricks, Redshift, Fabric, and BigQuery, in familiar shapes such as Tuva’s input layer, OMOP CDM, or openEHR models, ready for whatever processing comes next. The analytics layer is then yours to choose.
## Pricing [#pricing]
Tuva is open source, priced per data model, with paid support. The enterprise platforms are quote-based and undisclosed, typically per-member enterprise contracts. Medblocks is a flat $60,000 per year for the connect-and-normalize layer that feeds whichever analytics tool you pick.
## Using them together [#using-them-together]
This is the natural fit, especially for Tuva. Medblocks connects to your sources, deduplicates and normalizes, and delivers clean, modeled data straight into your warehouse, where Tuva’s models and quality checks build on it. You get the connectivity and reconciliation Medblocks is built for, and the open analytics layer Tuva does well, without one having to do the other’s job.
---
# Overview
Add workspace credentials for patient access, clinical workflows, backend sync, and network access.
Source URL: /docs/configure-connections
# Overview
Add workspace credentials for patient access, clinical workflows, backend sync, and network access.
Connections is the dashboard area for setting up the healthcare systems Medblocks can use for your workspace.
They are grouped by integration pattern, so you can start with one surface, such as patient access, and add others later in the same place.
## Integration patterns [#integration-patterns]
| Group | What it configures |
| ------------------ | --------------------------------------------------------------------- |
| Patient Access | Patient-facing SMART on FHIR and portal connections. |
| Clinical Workflows | SMART app launch and CDS Hooks inside an EHR workflow. |
| Backend | Server-to-server access such as SMART Backend Services and bulk data. |
| Network | Network and exchange access such as CommonWell. |
Each provider tile shows whether your workspace is using Medblocks credentials, custom credentials, or whether that provider is not configurable yet.
## Guides [#guides]
## Credentials [#credentials]
You can start with Medblocks-supplied credentials. Every configurable provider works out of the box with credentials Medblocks owns, so you can run a patient session or an EHR launch without registering your own app first. This is the fastest way to see a flow end to end.
When you are ready, switch a connection to your own credentials. They then belong to your app or organization, and Medblocks stores and uses them server-side to operate the connection, while the relationship, branding, and compliance path stay yours.
Bring your own credentials when you need your own app identity on the patient consent screen, your own branding, or a compliance path your organization owns. The setup differs per provider, so each guide above covers what to copy where.
## See also [#see-also]
* [Sources and connections](/docs/sources-and-connections)
* [Integration patterns](/docs/integration-patterns)
* [Set up your workspace](/docs/workspace)
* [Security and compliance](/docs/security-and-compliance)
---
# Backend
Configure Epic backend access, organizations, and FHIR Group IDs.
Source URL: /docs/configure-connections/backend
# Backend
Configure Epic backend access, organizations, and FHIR Group IDs.
This connection setup guide is a work in progress. It explains the current shape of the workflow while we add deeper provider-specific setup details.
Backend connections are used when a provider organization authorizes server-to-server access. There is no patient portal redirect and no clinician launch in the browser. Medblocks uses the configured backend credentials to pull or sync data in the background.
Open Connections in the dashboard, then choose **Epic** under **Backend**.
## What the page shows [#what-the-page-shows]
The credential section shows the backend services Client ID and JWKS URI used for Epic. When you bring your own Epic backend app, copy the JWKS URI from Medblocks into the EHR developer setup, then save the Epic Client ID back in Medblocks.
Organizations are the Epic sites this workspace can pull from. Add only the organizations approved for this workspace and environment.
FHIR Group IDs define the Epic groups used for population-level retrieval. They are often different between Sandbox and Production, so keep them scoped to the right workspace.
The credential mode tells you whether the connection runs with Medblocks-managed credentials or credentials owned by your organization.
## Configure Epic backend access [#configure-epic-backend-access]
1. Register or open the Epic backend app.
2. Copy the JWKS URI from Medblocks into the Epic app configuration.
3. Copy the Epic backend Client ID back into Medblocks if you are using your own credentials.
4. Search for and add the Epic organizations you pull from.
5. Add the FHIR Group IDs for each organization.
6. Save the connection.
Backend configuration feeds population-level retrieval and downstream exports. Keep Sandbox and Production workspaces separate so test Group IDs and production Group IDs do not mix.
## Next steps [#next-steps]
With backend access configured, pull and sync records server to server. The [Backend](/docs/backend) section walks through SMART Backend Services and bulk data end to end.
## See also [#see-also]
* [Backend](/docs/backend)
* [Export to FHIR server](/docs/export-to-fhir-server)
* [Export to S3](/docs/export-to-s3)
---
# Clinical Workflows
Configure Epic launch, CDS Hooks, and clinical workflow credentials.
Source URL: /docs/configure-connections/clinical-workflows
# Clinical Workflows
Configure Epic launch, CDS Hooks, and clinical workflow credentials.
This connection setup guide is a work in progress. It explains the current shape of the workflow while we add deeper provider-specific setup details.
Clinical Workflow connections are used when a provider organization wants your app available inside the EHR. For Epic, the same connection detail page brings together SMART App Launch and CDS Hooks configuration.
Open Connections in the dashboard, then choose **Epic** under **Clinical Workflows**.
## What the page shows [#what-the-page-shows]
The app launch URL is where Medblocks sends the clinician after the EHR launch succeeds. This is usually a route in your app that accepts a Medblocks launch token and loads the clinical workflow with patient context already attached.
The CDS endpoint is your service for returning CDS Hooks cards. If your product only needs a full embedded app, you can start with SMART launch. If it also needs to show recommendations inside native EHR moments, add CDS Hooks.
The Launch URL and CDS Hooks URL are the values to share with the EHR administrator. They are generated for this workspace and provider, so keep Sandbox and Production values separate.
When the connection uses your own credentials, Medblocks shows the Redirect URI, JWKS URI, and Client ID values needed by the EHR developer setup. Medblocks still handles the server-side launch exchange, but the upstream app identity belongs to your organization.
## Configure the Epic launch [#configure-the-epic-launch]
1. Add your app launch URL. This is where Medblocks sends the clinician after the EHR launch succeeds.
2. Add your CDS endpoint if you want Medblocks to forward CDS Hooks calls to your service.
3. Share the Launch URL and CDS Hooks URL with the Epic administrator.
4. Turn on custom credentials if your organization owns the Epic app registration.
5. Save the connection.
The launch returns to your app with a Medblocks launch token. Your backend can use that token to resolve the launch context and continue the clinician workflow.
## Next steps [#next-steps]
With the Epic launch configured, build the in-EHR experience. The [Clinician workflow](/docs/clinician-workflow) section walks through SMART App Launch and CDS Hooks end to end.
## See also [#see-also]
* [Clinician workflow](/docs/clinician-workflow)
* [Integration patterns](/docs/integration-patterns)
* [Webhooks](/docs/webhooks)
---
# Network
Plan network and exchange access for cross-organization records.
Source URL: /docs/configure-connections/network
# Network
Plan network and exchange access for cross-organization records.
This connection setup guide is a work in progress. It explains the current shape of the workflow while we add deeper provider-specific setup details.
Network connections are used when your product can request records through an exchange network. This setup is different from turning on a single EHR source. It depends on the network, permitted purpose, patient matching requirements, and the relationship your organization has to the patient or provider.
Open Connections in the dashboard, then review the providers under **Network**.
## What the page shows [#what-the-page-shows]
Network provider tiles show which exchange paths are available for the workspace and whether setup is self-serve, managed by Medblocks, or not yet configurable in the dashboard.
For managed network setup, Medblocks will confirm the exchange path, permitted purpose, identifiers required for patient matching, environment, and operational workflow before enabling the connection.
Because network access can reach across organizations, the setup usually needs more context than a client ID. Bring the use case, who is requesting records, why the request is permitted, what data you need, and where the records should go after retrieval.
## What to prepare [#what-to-prepare]
Before network setup, gather:
1. The clinical or operational use case.
2. The organization making the request.
3. The permitted purpose for exchange.
4. Patient identifiers available at request time.
5. The downstream destination or workflow that receives the records.
Medblocks uses this information to map the use case to the right network path and decide what needs to be configured in the workspace.
## How it relates to other patterns [#how-it-relates-to-other-patterns]
Network access complements the other connection types. Patient Access is still the fastest way for a patient-facing app to let people connect their own records. Backend access is still the right fit for organization-approved server-to-server sync. Network access is for cross-organization retrieval when the relationship and permitted purpose support it.
## See also [#see-also]
* [Network](/docs/network)
* [Integration patterns](/docs/integration-patterns)
* [Sources and connections](/docs/sources-and-connections)
* [Security and compliance](/docs/security-and-compliance)
---
# Patient Access
Configure Epic for patient-facing portal authorization.
Source URL: /docs/configure-connections/patient-access
# Patient Access
Configure Epic for patient-facing portal authorization.
Patient Access connections are used when a patient signs in to their patient portal and approves your app. For Epic, this is the SMART on FHIR patient authorization flow.
Open Connections in the dashboard, then choose **Epic** under **Patient Access**.
## What the page shows [#what-the-page-shows]
The status shows whether patients can connect to Epic from this workspace. When the connection is enabled, patient sessions can route patients to Epic portals.
The credential mode tells you whether the workspace is using Medblocks credentials or your own Epic app credentials. If you use your own credentials, the page shows the Redirect URI and JWKS URI to copy into the Epic developer configuration.
The scopes section lists the SMART scopes Medblocks requests during patient authorization. These are the permissions Epic shows as part of the patient approval flow.
## Credentials [#credentials]
By default this connection uses Medblocks-supplied credentials, so patients can connect to Epic right away without you registering an Epic app. This is the quickest way to start.
Turn on **Use custom credentials** when patients should approve your own registered Epic app instead. Use the [Epic patient access guide](/docs/patient-access/epic) for the current Epic developer setup. After the Epic app is ready, copy the Redirect URI and JWKS URI from Medblocks into the EHR developer configuration, then copy the Epic Client ID back into Medblocks and save the connection.
Patients keep using the same patient session flow after this change. The only difference is which upstream Epic app identity handles the approval.
## See also [#see-also]
* [Epic patient access guide](/docs/patient-access/epic)
* [Create a patient session](/docs/patient-access/create-patient-session)
* [Sources and connections](/docs/sources-and-connections)
---
# Data out
The ways data leaves Medblocks: SDK and API reads, exports, and webhook events.
Source URL: /docs/data-out
# Data out
The ways data leaves Medblocks: SDK and API reads, exports, and webhook events.
After records land in Medblocks, you can send them to a destination, react to events, or inspect operational state through the API. The right path depends on whether another system needs the records, your backend needs to know that something changed, or your team needs to check integration state.
## Exports [#exports]
Exports are the shipped path for moving records into downstream systems. You configure a destination in the dashboard, Medblocks tests it, and export jobs deliver records after pulls settle.
Destination types include the following.
| Destination | Use it when |
| ------------------------------------------ | ----------------------------------------------------------------------------------------------------------- |
| [FHIR server](/docs/export-to-fhir-server) | Another system should receive FHIR R4 resources. |
| [Object storage](/docs/export-to-s3) | A warehouse, lakehouse, or ingestion job reads NDJSON files from S3-compatible storage, GCS, or Azure Blob. |
Export setup is managed from the dashboard today. It is not part of the public REST API.
## Background Pull Comes First [#background-pull-comes-first]
A patient session can finish before every record is available. After a connection becomes active, Medblocks schedules retrieval jobs for the resources supported by that source. Those jobs can take time because real portals paginate slowly, return large histories, vary by resource support, and enforce different rate limits.
When the pull settles, enabled destinations can export the data. Treat the patient-facing return as “access was granted” and use [Pull monitoring](/docs/pull-monitoring) for record availability.
## Export destinations and runs [#export-destinations-and-runs]
An export destination stores where records should go and how Medblocks should authenticate to that destination.
| Field | Purpose |
| ------------------ | ------------------------------------------------ |
| Destination name | Human-readable label in the dashboard. |
| Destination type | FHIR server or object storage. |
| Credentials | Stored server-side and used only by export jobs. |
| Enabled state | Disabled destinations are skipped. |
| Last exported time | Watermark for delta exports. |
Each time Medblocks exports records, it creates an export run. A run records what destination was used, why it started, how many patients and resources were processed, when it started and finished, and any errors that happened.
## Triggers [#triggers]
Exports can start from these events.
| Trigger | Behavior |
| ----------------------- | -------------------------------------------------------- |
| Destination added | Runs a first backfill for that destination. |
| Pull completed | Sends new or changed data after patient data has landed. |
| Destination reactivated | Catches up from the previous watermark. |
| Manual retry | Reprocesses failed items from a failed or partial run. |
Each destination runs independently. One destination can fail without blocking another.
## Events [#events]
Events tell your backend that something happened. Webhooks are useful when you do not want to poll:
* A patient session completed.
* A background pull finished.
* A background pull failed.
* A connection lost access and needs the patient to reconnect.
Use [Webhooks](/docs/webhooks) to register a receiver and verify signatures.
## API And SDK Reads [#api-and-sdk-reads]
The public API and TypeScript SDK handle operational reads such as patients, patient sessions, connections, webhooks, errors, and pagination.
For patient records, call `mb.patients.records`. Medblocks returns the patient’s latest stored resources as a paginated list, and each item names the EHR source it came from. The SDK calls [`GET /patients/{id}/records`](/docs/reference/api/get-patient-records) under the hood.
```ts
import { Medblocks } from "medblocks";
const mb = new Medblocks(process.env.MEDBLOCKS_API_KEY!);
const page = await mb.patients.records("user_42", { count: 100 });
```
Use direct reads when your backend needs one patient’s current record on demand. Use exports when Medblocks should keep a destination current automatically.
## Choosing A Path [#choosing-a-path]
| Need | Use |
| ---------------------------------- | --------------------- |
| Keep another system current | Exports |
| Trigger work when records arrive | Webhooks |
| Inspect integration state | API or SDK |
| Pull a patient’s records on demand | `mb.patients.records` |
## See also [#see-also]
* [After connection](/docs/patient-access/after-connection)
* [Export to FHIR server](/docs/export-to-fhir-server)
* [Export to S3](/docs/export-to-s3)
* [Get patient records](/docs/reference/api/get-patient-records)
* [Webhooks](/docs/webhooks)
---
# Connection directory
Search every source you can connect to, and the surfaces each one supports.
Source URL: /docs/directory
# Connection directory
Search every source you can connect to, and the surfaces each one supports.
Search every source you can connect to through Medblocks. Open a source for its connection details and supported surfaces.
---
# Export to FHIR server
Push records from Medblocks to a destination FHIR R4 server.
Source URL: /docs/export-to-fhir-server
# Export to FHIR server
Push records from Medblocks to a destination FHIR R4 server.
FHIR server export pushes records from Medblocks to a destination FHIR R4 server. Use it when another system should receive FHIR resources directly instead of reading files from object storage.
This is a dashboard-managed export. Create it once for the workspace, then Medblocks runs an initial full export automatically and later delta exports when new pulls finish.
## Internal FHIR server [#internal-fhir-server]
The internal FHIR server is a Medblocks-hosted FHIR R4 destination for production and development workflows. Use it when you want Medblocks to host the FHIR endpoint that receives exported resources for the workspace.
After saving the destination, open its detail page from Settings, then Export. The detail page shows copy fields for the FHIR base URL and bearer token.
Use the copied values with any FHIR client. Send the bearer token in the `Authorization` header.
```bash
curl \
-H "Authorization: Bearer {bearer-token}" \
"{internal-fhir-base-url}/Patient?_count=10"
```
Use the Patient identifier pattern below to find the record that belongs to your app user.
## Custom FHIR server [#custom-fhir-server]
A custom FHIR server is a destination you host or control. Use it when records should land in your own FHIR store, customer tenant, data platform, or downstream clinical workflow.
Medblocks can authenticate to a custom destination with no auth, bearer token auth, or OAuth 2.0 client credentials. Medblocks validates connectivity before saving. If the test fails, fix the URL, credentials, or network allowlist before creating the destination.
## Set up the export [#set-up-the-export]
### Open export settings [#open-export-settings]
Open the dashboard, go to Settings, then Export.
### Add a FHIR server destination [#add-a-fhir-server-destination]
Click Add FHIR Server, then choose an internal FHIR server or a custom FHIR server.
### Enter destination settings [#enter-destination-settings]
Custom FHIR server destinations need these fields.
| Field | Purpose |
| -------------------- | ------------------------------------------------------- |
| Name | Label shown in the dashboard. |
| FHIR base URL | Destination R4 server base URL. |
| Auth type | No auth, bearer token, or OAuth 2.0 client credentials. |
| Bearer token | Token used when auth type is bearer token. |
| Token endpoint | OAuth 2.0 token URL when client credentials are used. |
| Client ID and secret | OAuth 2.0 client credentials. |
| Scope | Optional OAuth 2.0 scope if your server requires one. |
Internal FHIR server destinations are provisioned by Medblocks, so you do not enter a custom base URL or external credentials.
### Review internal server credentials [#review-internal-server-credentials]
When you choose Internal FHIR Server, Medblocks provisions a hosted FHIR R4 destination for the workspace. The setup screen shows the FHIR base URL and bearer token before you save.
After saving, the destination appears in Configured Export Destinations.
### Save and export [#save-and-export]
Saving starts an initial full export for existing data. After that, new patient data triggers delta exports automatically based on the destination watermark.
### Monitor runs [#monitor-runs]
Open the destination detail page for run history, progress, completion times, resource counts, and errors.
The detail page also shows copy fields for the internal FHIR server base URL and bearer token.
## Find a patient’s data on your server [#find-a-patients-data-on-your-server]
Every exported `Patient` resource carries your patient id in its `identifier` array, next to the identifiers the source EHR returned such as the MRN. On your server the Patient looks like this.
```json
{
"resourceType": "Patient",
"id": "eCB8Nuu2lGe...",
"identifier": [
{ "system": "urn:oid:1.2.840.114350...", "value": "MRN12345" },
{ "system": "urn:medblocks:patient-id", "value": "patient_123" } // [!code highlight]
]
}
```
Look the patient up by that identifier, then use standard FHIR reference searches for their clinical data.
```bash
# Find the Patient resource by your id
GET {your-fhir-server}/Patient?identifier=urn:medblocks:patient-id|patient_123
# Then query any resource type by patient reference
GET {your-fhir-server}/Observation?patient={patient-resource-id}
GET {your-fhir-server}/Condition?patient={patient-resource-id}
# Pull referenced practitioners along with the results
GET {your-fhir-server}/Observation?patient={patient-resource-id}&_include=Observation:performer
```
Some EHRs send resource ids that are not FHIR conformant. The [FHIR id rules](https://hl7.org/fhir/R4/datatypes.html#id) allow only letters, digits, hyphens, and dots, with a length of 1 to 64 characters. Medblocks replaces a non-conformant id with a stable hash so the resource is valid on your server, and rewrites references to match. Everything else is delivered as the source EHR returned it. Clinical resources point back at their Patient through `subject` and `patient` references, which FHIR servers index for the queries above.
New and changed resources flow in with each export run. Data delivered before this feature shipped gains the identifier when the Patient resource next changes at the source, and deleting and re-adding the destination forces a full export that carries it immediately.
## Delivery notes [#delivery-notes]
* Exports run per destination.
* One destination failing does not affect others.
* Disabled destinations are skipped.
* Reactivating a destination resumes from its last saved position.
* Rotate credentials in the dashboard before revoking the old credential on the destination server.
## See also [#see-also]
* [Data out](/docs/data-out)
* [Export to S3](/docs/export-to-s3)
* [Pull monitoring](/docs/pull-monitoring)
---
# Export to S3
Write records to object storage for a warehouse, lakehouse, or batch ingestion.
Source URL: /docs/export-to-s3
# Export to S3
Write records to object storage for a warehouse, lakehouse, or batch ingestion.
S3 export writes files to object storage for a warehouse, lakehouse, or downstream batch ingestion. Use it when your data platform already ingests bucket files. S3-compatible storage targets are supported.
This is a dashboard-managed export. Create it once for the workspace, then Medblocks runs a first backfill and later delta exports when new pulls finish.
### Open export settings [#open-export-settings]
Open the dashboard, go to Settings, then Export.
### Add object storage [#add-object-storage]
Click Add Object Storage, then choose AWS or an S3-compatible target.
### Enter bucket settings [#enter-bucket-settings]
The destination needs these fields.
| Field | Purpose |
| ------------------------ | ----------------------------------------------------- |
| Name | Label shown in the dashboard. |
| Cloud vendor | AWS or an S3-compatible provider. |
| Endpoint | Storage endpoint, required for S3-compatible targets. |
| Region | Bucket region. |
| Bucket | Destination bucket name. |
| Access key ID and secret | Credentials used by export jobs. |
| File type | NDJSON or zipped NDJSON. |
Medblocks tests bucket connectivity before saving. If the test fails, check bucket policy, credentials, endpoint, and region.
### Choose a file format [#choose-a-file-format]
NDJSON stores one FHIR resource JSON object per line, so downstream systems can stream files without parsing one large JSON array.
```json
{"resourceType":"Patient","id":"example-patient","identifier":[{"system":"urn:medblocks:patient-id","value":"patient_123"}]}
{"resourceType":"Observation","id":"example-observation","status":"final"}
```
### Backfill and send deltas [#backfill-and-send-deltas]
Setting up a destination exports existing data first, then later pulls send new data based on watermark tracking. Failed runs can be retried from the dashboard.
### Monitor runs [#monitor-runs]
Open the destination detail page for run history and errors.
## Match files to your patients [#match-files-to-your-patients]
Each file contains one patient’s resources from one connected EHR. The Patient line inside the file carries the `patient_id` you created the patient with, in its `identifier` array under the system `urn:medblocks:patient-id`.
```json
{
"resourceType": "Patient",
"id": "example-patient",
"identifier": [
{ "system": "urn:medblocks:patient-id", "value": "patient_123" } // [!code highlight]
]
}
```
Read the Patient line first when ingesting a file, take your patient id from the `urn:medblocks:patient-id` entry, and attach it to every row you load from that file.
## Operational notes [#operational-notes]
* Files are rewritten in full on each run.
* Update credentials after rotating storage access keys.
* Disable a destination to pause delivery without deleting records.
* Retry after fixing permission, authentication, or network issues.
* Keep downstream ingestion idempotent. A retry can write files for work that previously failed partway through.
## See also [#see-also]
* [Data out](/docs/data-out)
* [Export to FHIR server](/docs/export-to-fhir-server)
* [Pull monitoring](/docs/pull-monitoring)
---
# How Medblocks works
Source to connection to background pull to the systems where your team works.
Source URL: /docs/how-medblocks-works
# How Medblocks works
Source to connection to background pull to the systems where your team works.
Medblocks is the integration layer between your product and the healthcare systems that hold patient data. It helps you reach the systems your relationship allows, complete authorization, pull records in the background, and send those records to the systems where your team works.
The path is simple.
1. A **source** is a system you can reach, such as an EHR, payer, network, or wearable.
2. A **connection** is the authorized link between a patient, organization, or workflow and that source.
3. A **pull** brings records from the source into Medblocks.
4. Your app receives operational updates through webhooks and dashboard history.
5. Records leave Medblocks through exports, API reads, or downstream workflows.
A source and a connection are the two core ideas. [Sources and connections](/docs/sources-and-connections) defines both in full, including the source catalog, what Medblocks handles on its side, and the connection lifecycle. Each pattern is unlocked by a real relationship you already have, not one enterprise contract that bundles every surface.
## Your App [#your-app]
You can use Medblocks in code or from the dashboard.
* Pick the integration pattern that matches your relationship. Start with [Patient access](/docs/patient-access) to let patients connect their own records, launch inside the EHR with [Clinician workflow](/docs/clinician-workflow), sync server to server with [Backend](/docs/backend), or reach records across [Network](/docs/network).
* Use [Data out](/docs/data-out) to decide whether records should arrive through exports, API reads, or events.
* Use [Pull monitoring](/docs/pull-monitoring) and [Auth event history](/docs/auth-event-history) when you need to operate the connection after authorization.
* Use [Workspace](/docs/workspace) when you are ready to create an organization and API key.
## See also [#see-also]
* [Our approach](/docs/our-approach)
* [Integration patterns](/docs/integration-patterns)
* [Sources and connections](/docs/sources-and-connections)
---
# Introduction
One integration for all healthcare data.
Source URL: /docs
# Introduction
One integration for all healthcare data.
Medblocks connects your app to EHRs, networks, patient portals, and clinician workflows through the relationships your product already has.
You create the workflow in your app, Medblocks handles the healthcare-specific connection work, and records move to the systems where your team operates.
Build with the TypeScript SDK, REST APIs, dashboard workflows, exports, and webhooks.
## Features [#features]
Medblocks is built for product teams that need healthcare data access without becoming integration infrastructure teams.
## Get started [#get-started]
Ready to build? Start with [How Medblocks works](/docs/how-medblocks-works) for the product shape, then use the [Patient access quickstart](/docs/patient-access/quickstart) to connect your first source.
---
# Integration patterns
The four integration surfaces and the relationships that unlock each one.
Source URL: /docs/integration-patterns
# Integration patterns
The four integration surfaces and the relationships that unlock each one.
Medblocks is organized around integration patterns, not around SDKs or endpoints. Each pattern answers a different product question: whose relationship gives you access, what data or workflow does it unlock, and where does your app show up?
## Patient Access [#patient-access]
Use patient access when your product has a direct relationship with the patient. The patient signs in to their portal, such as MyChart, and approves your app. That consent can unlock EHR records, payer data, and eventually other patient-held data sources.
This is usually the fastest path for patient-facing products because it does not require a contract with every hospital before you launch.
[Build patient access](/docs/patient-access)
## Clinician Workflow [#clinician-workflow]
Use clinician workflow when a provider organization wants your app inside its EHR. CDS Hooks can surface guidance at the moment a clinician opens a chart or places an order. SMART App Launch can open your full app inside the EHR with the patient context already loaded.
This pattern is about usage, not just data. It puts your product where clinical work already happens.
[Clinician workflow](/docs/clinician-workflow)
## Backend [#backend]
Use backend integration when a provider organization authorizes your server to sync data without a user present. SMART Backend Services and FHIR Bulk Data support scheduled, organization-scoped data movement.
This pattern is for cohort sync, operational workflows, and systems that need to stay current in the background.
[Backend](/docs/backend)
## Network [#network]
Use network integration when you have a treatment relationship and need records across organizations. TEFCA and other exchange networks can reach data beyond the hospitals you connect to directly.
This pattern is powerful, but it depends on clinical context and permitted purpose. It is not a shortcut around the relationship rules.
[Network](/docs/network)
## Start With What You Have [#start-with-what-you-have]
Most teams do not start with every relationship. A patient-facing app might begin with patient access, later contract with clinics for workflow or backend access, and eventually add network access when it provides care. Medblocks keeps those surfaces on one platform so the record gets better as your reach grows.
## See also [#see-also]
* [Our approach](/docs/our-approach)
* [How Medblocks works](/docs/how-medblocks-works)
* [Patient access](/docs/patient-access)
---
# MCP server
Give AI assistants access to your Medblocks Platform workspace.
Source URL: /docs/mcp
# MCP server
Give AI assistants access to your Medblocks Platform workspace.
The Medblocks Platform MCP server lets an AI assistant such as Claude or ChatGPT work with your workspace on your behalf. Once you connect it, the AI assistant can see who is set up in your workspace, search for hospitals and clinics, start a secure connection to your patient portals, and read the health records that come back.
MCP, the Model Context Protocol, is an open standard that lets an AI assistant call tools on an outside service. Medblocks exposes your workspace as one of those services. The server is named `medblocks-platform`, and it lives at `https://app.medblocks.com/mcp`.
When you connect, Medblocks shows a consent screen where you choose what the AI assistant can do before you approve.
## Connect Claude Code [#connect-claude-code]
Connect the [Claude Code](https://claude.com/claude-code) CLI to your workspace.
### Add the server [#add-the-server]
```bash
claude mcp add --transport http medblocks https://app.medblocks.com/mcp
```
### Sign in [#sign-in]
Start Claude Code, run `/mcp`, choose `medblocks`, then choose Authenticate. Your browser opens a Medblocks page. Sign in with the same account you use for the dashboard. If you are new, Medblocks creates a workspace for you automatically.
### Choose what it can access [#choose-what-it-can-access]
Review the consent screen, tick the capabilities you want to grant, and click Allow. Claude Code picks up the token and the tools become available.
To connect a scripted workspace without the browser sign in, pass an API key header instead.
```bash
claude mcp add --transport http medblocks https://app.medblocks.com/mcp \
--header "Authorization: Bearer mb_sk_..."
```
## Connect Codex [#connect-codex]
Connect the [Codex](https://developers.openai.com/codex) CLI to your workspace.
### Add the server [#add-the-server-1]
```bash
codex mcp add medblocks --url https://app.medblocks.com/mcp \
--oauth-resource https://app.medblocks.com/mcp
```
The `--oauth-resource` flag matters. The server issues a signed token only when the client asks for this resource, so without the flag the connection is rejected.
### Sign in [#sign-in-1]
```bash
codex mcp login medblocks
```
Your browser opens a Medblocks page. Sign in with your dashboard account. If you are new, Medblocks creates a workspace for you automatically.
### Choose what it can access [#choose-what-it-can-access-1]
Review the consent screen, tick the capabilities you want to grant, and click Allow. Confirm the connection with `codex mcp list`.
Codex stores the connection in `~/.codex/config.toml`. To connect a scripted workspace without the browser sign in, add the server with an API key header instead.
```bash
codex mcp add medblocks --url https://app.medblocks.com/mcp \
--header "Authorization: Bearer mb_sk_..."
```
## Connect ChatGPT and Claude [#connect-chatgpt-and-claude]
The ChatGPT and claude.ai web apps both connect with the same server URL and handle sign in and consent in the browser.
```
https://app.medblocks.com/mcp
```
### Claude (claude.ai and Cowork) [#claude-claudeai-and-cowork]
The same connector works for Claude on the web and for Cowork.
#### Open Connectors and click Add [#open-connectors-and-click-add]
Go to Settings > Connectors and click Add in the top right.
#### Add a custom connector [#add-a-custom-connector]
Choose Add custom connector. Name it Medblocks, paste `https://app.medblocks.com/mcp`, and click Add. Leave the optional OAuth fields blank.
#### Sign in and choose what it can access [#sign-in-and-choose-what-it-can-access]
Claude opens a Medblocks page. Sign in, review the consent screen, tick the capabilities you want to grant, and click Allow.
### ChatGPT [#chatgpt]
#### Turn on developer mode [#turn-on-developer-mode]
Go to Settings > Security and login > Advanced security and turn on Developer mode. This is available on paid plans. You can leave “Enforce CSP in developer mode” on. The Medblocks in-chat panel declares everything it loads and works under the stricter policy.
#### Open Plugins and add a new one [#open-plugins-and-add-a-new-one]
Go to Settings > Plugins and click the plus button in the top right.
#### Enter the server URL [#enter-the-server-url]
In the New Plugin dialog, set Connection to Server URL and paste `https://app.medblocks.com/mcp`. Leave Authentication on OAuth, tick “I understand and want to continue”, and click Create.
#### Sign in and choose what it can access [#sign-in-and-choose-what-it-can-access-1]
ChatGPT opens a Medblocks page. Sign in, review the consent screen, tick the capabilities you want to grant, and click Allow.
When the AI assistant starts a connection in ChatGPT or in Claude on the web, a Medblocks panel inside the chat lists the matching health systems ready to connect. Name several facilities at once and the panel lists matches for each. Remove any that do not belong, search and add any that are missing, then click connect. The secure Medblocks page opens where you sign in to each facility. Return to the panel and check the status once after you finish. Connections that can no longer retrieve records are clearly marked as needing reconnection.
Claude Code and Codex run in the terminal and do not display panels. There the assistant presents the matches in the conversation and asks you to choose before it creates a plain link.
Before it asks where you receive care, the assistant checks for health systems you previously connected in your production workspace. If it finds an active connection, it names the health system and asks whether you want to use those records or connect more facilities. If a connection needs attention, it offers to reconnect it. Sandbox workspaces and their connections stay out of the conversation unless you explicitly ask for sandbox or testing.
When you connect another facility, the assistant identifies whose records you are connecting. It uses your signed-in name when the records are yours, or asks for the other person’s name. A matching name reuses the person already in your workspace. A new person always needs a real name.
## What each permission allows [#what-each-permission-allows]
When you connect, Medblocks shows a consent screen with one tick box per capability, all ticked by default. Untick any you would rather not grant. The last one covers destructive actions, so you may want to leave it off unless you need it. The AI assistant always knows who you are (your name and email) and can see your workspace, so those are granted without a prompt.
| Permission | What it allows | Default |
| ---------------------------------- | -------------------------------------------------------------------------------------------------------------------------------------------------------- | ------- |
| Connect your healthcare facilities | Lets the AI assistant search the hospitals, clinics, and insurers you name, securely connect to them, and bring your health records into your workspace. | On |
| Read your health records | Lets the AI assistant read the health records that have been brought into your workspace. | On |
| Manage people and delete data | Lets the AI assistant add or remove people in your workspace, disconnect facilities, and delete records. Not needed for everyday use. | On |
You can grant fewer permissions than the AI assistant requests. Anything you leave off is simply unavailable to it, and you can reconnect later with a different choice.
## Tools [#tools]
The server exposes ten tools. The AI assistant decides which ones to call based on what you ask, and the permissions above gate what it is allowed to reach.
| Tool | What it does |
| -------------------------- | ----------------------------------------------------------------------------------------------------------------------------------------------------------------------------------------------------- |
| `get_workspace_overview` | Reports who you are, summarizes the selected workspace, and lists health systems previously connected there. |
| `list_workspaces` | Lists every workspace you can use, labeled production or sandbox. |
| `list_people` | Lists everyone set up in your workspace. |
| `search_health_systems` | Searches hospitals, clinics, and insurers by name. |
| `choose_health_systems` | Opens the in-chat panel with every matching facility so you can make the selection. |
| `connect_health_system` | Creates a private connection session and secure link after you select one or more facilities. It reuses an existing person with the same name or creates a new person from the real name you provide. |
| `check_connection_status` | Checks how a connection is going, for a single session or for a whole person. |
| `get_health_records` | Reads a person’s medical records from their connected health systems. |
| `disconnect_health_system` | Stops retrieving records from one connected health system and revokes access. |
| `delete_person` | Permanently removes a person and all their retrieved records from the workspace. |
Every tool call writes a private audit entry in your workspace. This is why even lookup tools declare that they change state in their MCP metadata. `connect_health_system` can create a person and connection session. The last two tools are destructive, so a well-behaved AI assistant confirms with you before it runs them.
## Work in a sandbox workspace [#work-in-a-sandbox-workspace]
Developers who keep a sandbox workspace for testing can point the AI assistant at it. Say something like “pull my records from the Cerner sandbox” and the assistant looks up your workspaces, switches to your sandbox, and works there for the rest of the task. Medblocks verifies your Better Auth workspace membership before every switch. If you have several sandbox workspaces it asks which one you mean.
The assistant never creates a sandbox workspace for you. Create one from the dashboard first, then ask again. API key connections stay bound to the workspace that minted the key and cannot switch.
## Use the server as a developer [#use-the-server-as-a-developer]
If you are driving the server from your own code, you can skip OAuth. Send a Medblocks API key as a bearer token on every request, and the server acts as that workspace.
```bash
curl https://app.medblocks.com/mcp \
-H "Authorization: Bearer mb_sk_..."
```
Mint the key from the dashboard under Settings > API Keys. An API key is a server-side secret, so keep it out of browser code and client bundles, the same as any other Medblocks API key. See [Set up your workspace](/docs/workspace) for how to create and rotate keys.
A key uses the permissions stamped on it rather than the consent scopes above. Reach for OAuth when a person is connecting their own AI assistant, and reach for a key when a backend service needs the tools.
## Import the Medblocks skill [#import-the-medblocks-skill]
The server publishes the Medblocks agent skill through the draft Skills over MCP extension. ChatGPT reads this catalog when a plugin publisher runs Scan Tools and stores a static snapshot in the plugin draft. Run the scan again after changing the skill files so a new plugin version receives the update.
Skill discovery does not change ordinary MCP tool calls. Clients that do not support the extension continue to use the same tools and resources.
## Revoke access later [#revoke-access-later]
You stay in control after you connect. In the dashboard, go to Settings > MCP server. Revoke the AI assistant there and it can no longer refresh its access, and any access already issued expires within an hour. Removing the connector inside the AI assistant stops that client from calling the server as well.
## Troubleshooting [#troubleshooting]
**Unexpected content type `text/html`, or “No authorization support detected.”** Your client reached a web page instead of the MCP server. Check that the URL is exactly `https://app.medblocks.com/mcp` with no trailing path, and that you did not point the client at a plain website address. A correct URL answers an unauthenticated request with a `401` and a `WWW-Authenticate` header, which is what starts the sign in.
**Codex rejects the connection before sign in.** Include the resource flag so Codex requests a signed token, otherwise the server declines. Add the server with `--oauth-resource https://app.medblocks.com/mcp` as shown above.
## See also [#see-also]
* [Set up your workspace](/docs/workspace)
* [Build with AI](/docs/build-with-ai)
* [Patient access overview](/docs/patient-access/overview)
* [Security and compliance](/docs/security-and-compliance)
---
# Overview
Reach a patient's records across organizations through the national networks.
Source URL: /docs/network
# Overview
Reach a patient's records across organizations through the national networks.
These Network docs are a work in progress. Use them as orientation while we expand the implementation guides.
Network integrations are for reaching records across organizations when your product has the right clinical relationship and permitted purpose. Instead of integrating one hospital at a time, exchange networks can help discover and retrieve records from many participating organizations.
This is not a shortcut around consent, treatment relationships, or policy. It is a different integration surface for products that are allowed to request records through networks such as CommonWell, Carequality, TEFCA-aligned exchange, or other regional and national connectivity paths.
## When network access helps [#when-network-access-helps]
Network access is useful when the record you need is not limited to one known source:
* A care team needs outside records before a visit.
* A specialty service needs longitudinal history across prior sites of care.
* A clinical workflow depends on documents, encounters, medications, labs, or conditions from multiple organizations.
* Your product has a treatment or operational context where network exchange is permitted.
Patient access and backend access are still valuable even when you add network access. Patient access is often fastest for consumer-facing products. Backend access is better for organization-scoped sync. Network access fills in the cross-organization record when the relationship supports it.
## How Medblocks fits [#how-medblocks-fits]
Medblocks helps map your use case to the right exchange path, configure the network connection, monitor retrieval, and normalize the records that come back alongside data from your other sources.
Because network access depends heavily on your product, relationship, and permitted purpose, setup is usually a conversation rather than a purely self-serve toggle.
## Configure the connection [#configure-the-connection]
Use [Configure Network](/docs/configure-connections/network) to understand what belongs in the workspace configuration and when to reach out.
## See also [#see-also]
* [Configure Network](/docs/configure-connections/network)
* [Integration patterns](/docs/integration-patterns)
* [Sources and connections](/docs/sources-and-connections)
* [Security and compliance](/docs/security-and-compliance)
---
# Our approach
How healthcare integration works today, and how we do it differently.
Source URL: /docs/our-approach
# Our approach
How healthcare integration works today, and how we do it differently.
> **A great healthcare product that can’t integrate is just a demo.**
However good your app is, it needs patient data to be useful, and a place in the clinician’s workflow to be used. If your app can’t do that, it gets replaced by one that can: a competitor that integrates better, or the EHR itself, shipping the feature natively to everyone already inside its walls. For most apps, good integration isn’t a nice-to-have. It’s the whole game.
But healthcare is one of the hardest industries in the world to integrate with. The systems that hold the data were designed to keep you out. So sooner or later, everyone building here hits the same wall and asks the same question: “How do I integrate?”
## The cost of buying access [#the-cost-of-buying-access]
There’s no shortage of vendors who will sell you “integration solutions” in healthcare. So why are we building another one? Because most of them aren’t selling you integration. **They’re selling you access.**
That access usually comes in one of two shapes: a narrow slice of the ecosystem with no path to the rest, or a bundle of the whole thing where you pay for all of it at once, whether you use it or not.
Reaching an EHR, a system of record, or a Health Information Exchange has traditionally meant bespoke, one-off connections, because every system speaks its own dialect: as the old line goes, if you’ve seen one HL7v2 implementation, you’ve seen exactly one. The companies holding the data are notorious for gatekeeping it, so each connection takes months to stand up, and most of your bill goes to the negotiation, the red tape, and the proprietary glue holding brittle connections together.
And you’re renting a broker, not building on a technology vendor you control. The access sits on their side, not yours, so you’re never really free to leave.
We break down the main ones in our [comparisons](/docs/comparisons).
## Why direct integration is finally possible [#why-direct-integration-is-finally-possible]
That is finally changing, and regulation is the reason. ONC’s information blocking rules and certification program, alongside CMS initiatives like CMS-9115, CMS-0057-F, and “Kill the Clipboard”, have steadily forced the systems open. The result is a set of standardized, regulated APIs you can connect to directly, with no broker in the middle.
The clearest way to see it is by surface. A single healthcare system now exposes several standardized API surfaces, and a different set of rules is now forcing each one open.
### Patient access [#patient-access]
The patient’s own right to their data is the most powerful key you have, because it opens far more than their EHR. With a single authorization, the same patient can unlock the data every system holds about them.
It starts with the EHR. [ONC g(10)](https://docs.smarthealthit.org/) requires certified EHRs to let a patient pull their own records in minutes, from a single link. The patient signs in to their portal, like Epic MyChart, and authorizes your app directly.
In Epic MyChart, the patient chooses whose records to share and authorizes your app directly.
But the EHR is only the first source. [CMS-9115](https://www.cms.gov/priorities/burden-reduction/overview/interoperability/policies-regulations/cms-interoperability-patient-access-final-rule-cms-9115-f) mandates payers to expose patient data through the same kind of standardized APIs, so you reach the claims and coverage history no single EHR has.
[TEFCA IAS](https://rce.sequoiaproject.org/rce-tefca-for-individuals/) goes further still: a patient can request everything a network knows about them after identity verification alone, with no treatment relationship required. The same is likely to extend to the CMS-aligned networks, opening up data that simply wasn’t reachable before.
The same consent reaches beyond the chart: patients can connect wearables and glucose monitors just as easily, contributing data no system of record has.
### Clinician workflow integration [#clinician-workflow-integration]
This is the surface most don’t even know opened up. [CDS Hooks](https://cds-hooks.org) and [SMART App Launch](https://docs.smarthealthit.org) are enforced by [CMS-0057-F](https://www.cms.gov/initiatives/burden-reduction/overview/interoperability/policies-regulations/cms-interoperability-prior-authorization-final-rule-cms-0057-f) for prior authorization and ONC’s EHR certification regulation. Together they let your app meet the practitioner inside the chart, at the right time.
CDS Hooks fire at the right moment in the clinician’s workflow, like opening a patient or placing an order, and surface your app’s guidance as a native card, right in the EHR.
A CDS Hooks card from your app, surfaced natively inside athenaOne at the point of care.
From that card, SMART App Launch opens your full app embedded inside the EHR, already authorized and scoped to the patient in front of them.
SMART App Launch opens your app inside Epic, in context for the patient on screen, with no separate login.
You’re not just pulling data, you’re in the workflow where care actually happens. Almost no other integration platform offers this surface at all. That is what gets your app used: it appears at the right moment in the clinician’s existing workflow, instead of sitting in a separate tab they have to remember to open.
### Backend integration [#backend-integration]
[FHIR](https://hl7.org/fhir) is now the common API for clinical data, and ONC certification requires every certified EHR to expose it server-to-server. The same standard works across systems, so you build against one API instead of a bespoke connector per vendor.
This surface runs without a user present. [SMART Backend Services](https://hl7.org/fhir/smart-app-launch/backend-services.html) lets your server authenticate with its own credentials and system-level scopes, so integrations run unattended on a schedule instead of waiting for a patient or clinician to log in.
The [FHIR Bulk Data](https://hl7.org/fhir/uv/bulkdata/) APIs, now mandated by regulation as well, export all the data for a group of patients in a single job, so you can keep an entire cohort in sync continuously.
Together these cover most of what the legacy paths used to, replacing point-to-point HL7v2 feeds and proprietary SOAP APIs. EHRs are taking it further: Epic now [routes HL7v2 interfaces over HTTP](https://fhir.epic.com/Documentation?docId=interfaces) authenticated with SMART Backend Services, opening up a whole layer of integrations that used to need a dedicated interface engine.
### Network integration [#network-integration]
The big exchange networks like CommonWell and Carequality are going FHIR-first through [TEFCA](https://rce.sequoiaproject.org/tefca/) and the [CMS-aligned networks](https://www.cms.gov/health-technology-ecosystem/interoperability-framework) initiative, so you can reach a patient’s data across organizations.
Under TEFCA, networks connect through QHINs, and a single QHIN reaches far beyond its own members. Epic Nexus, for example, links not only Epic-using organizations but every other QHIN and the non-Epic orgs beneath them.
Through TEFCA, connecting to one QHIN like Epic Nexus reaches every other QHIN and the organizations beneath them, Epic and non-Epic alike.
Put together, the brokered route is no longer the only way in, and increasingly not the cheapest or fastest one either. Because these standardized APIs replace the bespoke connections, negotiation, and proprietary glue that the brokered route bills you for, connecting to them directly typically costs **10-20x less than a traditional bundled integration**.
## Pick the integrations that fit you [#pick-the-integrations-that-fit-you]
Ideally, every app wants every integration surface. More patient data and a place in more clinician workflows only make your product stronger. What’s practically viable comes down to the relationships you have, to the patient and to the organization, and each one unlocks a different level of access. Knowing which you have lets you plan your product around them.
A **patient relationship** is the easiest to start with. If your app reaches the patient directly, their consent alone unlocks patient access, with no contract with the health system required. The same consent reaches their EHR, payer, and wearables at once, which makes it the fastest way to launch.
An **organizational relationship** with a provider unlocks the system of record itself: clinician workflow integration and backend access. This takes more to set up, since the organization has to register and configure your app, but it puts you inside their EHR and lets you sync data server-to-server.
A **treatment relationship** unlocks network integration. The networks only open up if you actually provide or coordinate the patient’s care, which means having a licensed clinician with an NPI on your payroll treating them. With it, you reach a patient’s data across every organization on the network, not just the ones you connect to directly.
Bundled integration solutions break this. They assume you already hold both a treatment and an organizational relationship, because their contracts are structured to require them. The moment that isn’t true for you, you don’t get a smaller integration, you get none at all, because every point of integration is gated behind relationships you may not have.
We unbundle each integration from the rest: your app connects directly to each surface the moment your relationship permits it, and takes only what fits. You can start with whatever you have today and grow from there. A patient-facing app might launch on patient access alone, then contract its first clinic for organizational access, then hire clinicians and reach the network through a treatment relationship. All of it stays on one platform, and we are there to support you at each step as you grow.
## The integration landscape [#the-integration-landscape]
The same regulated APIs that let you connect directly have opened the door for a wave of specialist tools. Each is genuinely good at one piece: patient access, network exchange, or EHR integration.
The standards opened each kind of integration to specialist tools. Most cover one or two of these well.
You could assemble several of them and cover real ground, and for many teams a point solution per source is a reasonable place to start. We break down where each one fits in our [comparisons](/docs/comparisons).
But connecting is the easy part. The moment data starts arriving from more than one place, two problems show up:
### One patient, many sources [#1-one-patient-many-sources]
When you pull a patient from an EHR backend and the same patient through a patient-mediated connection, nothing guarantees they line up. Names, birth dates, and identifiers sometimes match exactly across systems, sometimes they don’t. So one person often arrives as two records that look like two people.
### One concept, many representations [#2-one-concept-many-representations]
Even once the records are linked, the same clinical fact is rarely written the same way twice. A single HbA1c result can arrive under different LOINC codes and inside different FHIR resources, and the problem compounds across coding systems like SNOMED CT, RxNorm, ICD-10, and CPT, and document formats like HL7 C-CDA. Something as specialized as [tumor size can take many forms for the same concept](https://medblocks.com/blog/ge-healthcare-x-medblocks-simplifying-cancer-care-decisions#the-challenge-multiple-formats-same-concepts).
### Reconciling is now your problem [#reconciling-is-now-your-problem]
Many point solutions deduplicate and normalize the data they return, but only within their own source. None of them sees the others, so the moment you combine their outputs the duplicate patients and mismatched codes reappear, and reconciling the same patient and the same clinical fact across all of them becomes your problem.
Each tool cleans only its own data, so reconciling across them is left to you.
And this is not trivial work. Every new source you connect adds more identifiers to line up, more code systems to map, and more conflicting values to choose between. The reconciliation logic becomes yours to build, test, and maintain, on top of the integrations you were trying to outsource in the first place.
This is the hardest part of working with healthcare data, and it rarely shows up until something goes wrong in production. When it does, the **failure can be fatal**. A penicillin allergy documented in one integration source might never be reconciled with a duplicate patient record your app is reading. A clinician then orders an antibiotic containing penicillin, and the patient goes into anaphylaxis.
## Reconciliation as clinical safety [#reconciliation-as-clinical-safety]
Whether it is a duplicate patient or a miscoded value, the result is the same: both leave your app reading data that looks correct but isn’t. A duplicate patient record can hide a comorbidity, and a warfarin medication request recorded under a code your query didn’t expect can vanish from the result. Either way your app shows something that isn’t true, and a clinician might act on it.
We are a [clinically led team](https://medblocks.com/about), so we treat this as a patient safety problem, not a data formatting nuisance.
Because we hold every source in one place, we resolve both, once, before the data ever reaches your app.
One connection to every source, deduplicated and normalized once, before it reaches your app.
On the identity side, our built-in Master Data Management resolves who is who. It uses advanced probabilistic linkage, weighing names, birth dates, identifiers, and other traits, to score how likely two records are the same person, so matches hold up even when the details don’t line up exactly. Every source then feeds one record instead of fragmenting into many.
On the meaning side, we don’t hand you raw data to figure out. We normalize every source into openly available, clinically vetted data models, inspired by the [openEHR Clinical Knowledge Manager](https://ckm.openehr.org/). Few integration vendors invest here. Most stop at raw FHIR and leave the modeling to you. We maintain a vetted model for **thousands of clinical concepts** and present them as simple tables that are ready to query.
Every source, from Epic and payers to TEFCA and wearables, normalized into the same clinically vetted models, ready to query.
## Where to go from here [#where-to-go-from-here]
That is our approach: direct integration across every surface your relationships unlock, with the data linked, normalized, and ready to query. No broker in the middle, and nothing locked behind a bundle you don’t need.
If you’re weighing us against other integration vendors, networks, and data platforms out there, the [comparisons](/docs/comparisons) lay out where we differ and why. If you’re ready to build, the [Quickstart](/docs/patient-access/quickstart) takes you from your first connection to your first patient record in minutes.
---
# Introduction
Let patients authorize and consent to their own health records.
Source URL: /docs/patient-access
# Introduction
Let patients authorize and consent to their own health records.
Let a patient authorize your app to read their own health records. There is no contract with the health system, no separate integration to build per hospital, and no HIPAA release forms or paper authorizations to chase down. The patient signs in to their provider’s portal, approves access, and their records flow to your app. For most teams it is the fastest way to launch on Medblocks.
## Start building [#start-building]
## See also [#see-also]
* [Patient session](/docs/patient-access/patient-session)
* [Integration patterns](/docs/integration-patterns)
* [Quickstart](/docs/patient-access/quickstart)
---
# Aetna
Guide to integrate with the Aetna Patient Access API for Medicare Advantage and commercial members' clinical + claims data.
Source URL: /docs/patient-access/aetna
# Aetna
Guide to integrate with the Aetna Patient Access API for Medicare Advantage and commercial members' clinical + claims data.
Aetna is one of the largest US health insurers and exposes a patient-facing FHIR API under the CMS Interoperability Rule (CMS-9115-F). Members can authorize a third-party app to retrieve their demographics, coverage, claims, medications, observations, and procedures over SMART on FHIR. Integrate with [Aetna](https://developerportal.aetna.com/) to enhance care coordination for Aetna’s Medicare Advantage, commercial, and dental members.
This is a step-by-step guide to registering a patient-facing app on Aetna’s Interoperability API Developer Portal, testing against the sandbox, and submitting for production access. The Patient Access product exposes the full US Core / CARIN BB Patient-compartment surface — AllergyIntolerance, CarePlan, CareTeam, Condition, Coverage, Device, DiagnosticReport, DocumentReference, Encounter, ExplanationOfBenefit, Goal, Immunization, MedicationDispense, MedicationRequest, Observation, Patient, and Procedure via search — plus reference-only reads for Practitioner, PractitionerRole, Organization, Medication, Location, and Binary. Full list at [`/v2/patientaccess/metadata`](https://vteapif1.aetna.com/fhirdemo/v2/patientaccess/metadata).
## Setup Guide [#setup-guide]
### Prerequisites [#prerequisites]
If you’re serious about serving US patients and customers, having a US company will help with onboarding across the board. [Stripe Atlas](https://stripe.com/atlas) and [StartFleet](https://www.startfleet.io/) can get you a registered US entity with a real address in minutes.
For a US phone number, [Tello](https://tello.com/) gives you a virtual SIM with a real number. Grab a domain on [Namecheap](https://www.namecheap.com/) and set up a business email with [Google Workspace](https://workspace.google.com/). If you’re using the Medblocks Platform, you can use `app.medblocks.com` as your domain and skip the domain setup entirely.
Since you’ll be serving US Aetna members, you’ll need US infrastructure anyway. Set up a VM in a US cloud region, install [Tailscale](https://tailscale.com/), and use it as your exit node, this gives you a clean, stable US IP for development and testing.
You’ll also need:
* A publicly accessible domain with HTTPS for your redirect URI, or use `app.medblocks.com` if you’re on the Medblocks Platform
* A server-side backend that can handle the OAuth callback and store tokens securely (the client secret must never reach the browser)
* A privacy policy and terms of service published at a stable URL
### Create a Developer Portal Account [#1-create-a-developer-portal-account]
1. Go to the [Aetna Interoperability API Developer Portal](https://developerportal.aetna.com/) and click **Login / Register**.
2. Enter your company email, first name, and last name. Review and accept Aetna’s Terms of Use.
3. Aetna emails a 6-digit security code. Enter it within 10 minutes.
4. Create a username and password. Sign in to land on the Dashboard.
### Submit the Sandbox Questionnaire [#2-submit-the-sandbox-questionnaire]
Sandbox access is gated by a role-specific questionnaire. Aetna’s Interoperability team reviews submissions and responds within 2–4 business days.
1. From the Dashboard, click **My Applications → Create New**.
2. For **I Am Representing**, select **Third Party Application** (this gives access to Patient Access, Payer-to-Payer, and RTPBC APIs). EHR and Payer roles have their own separate questionnaires.
3. For **Application Environment**, select **Sandbox**.
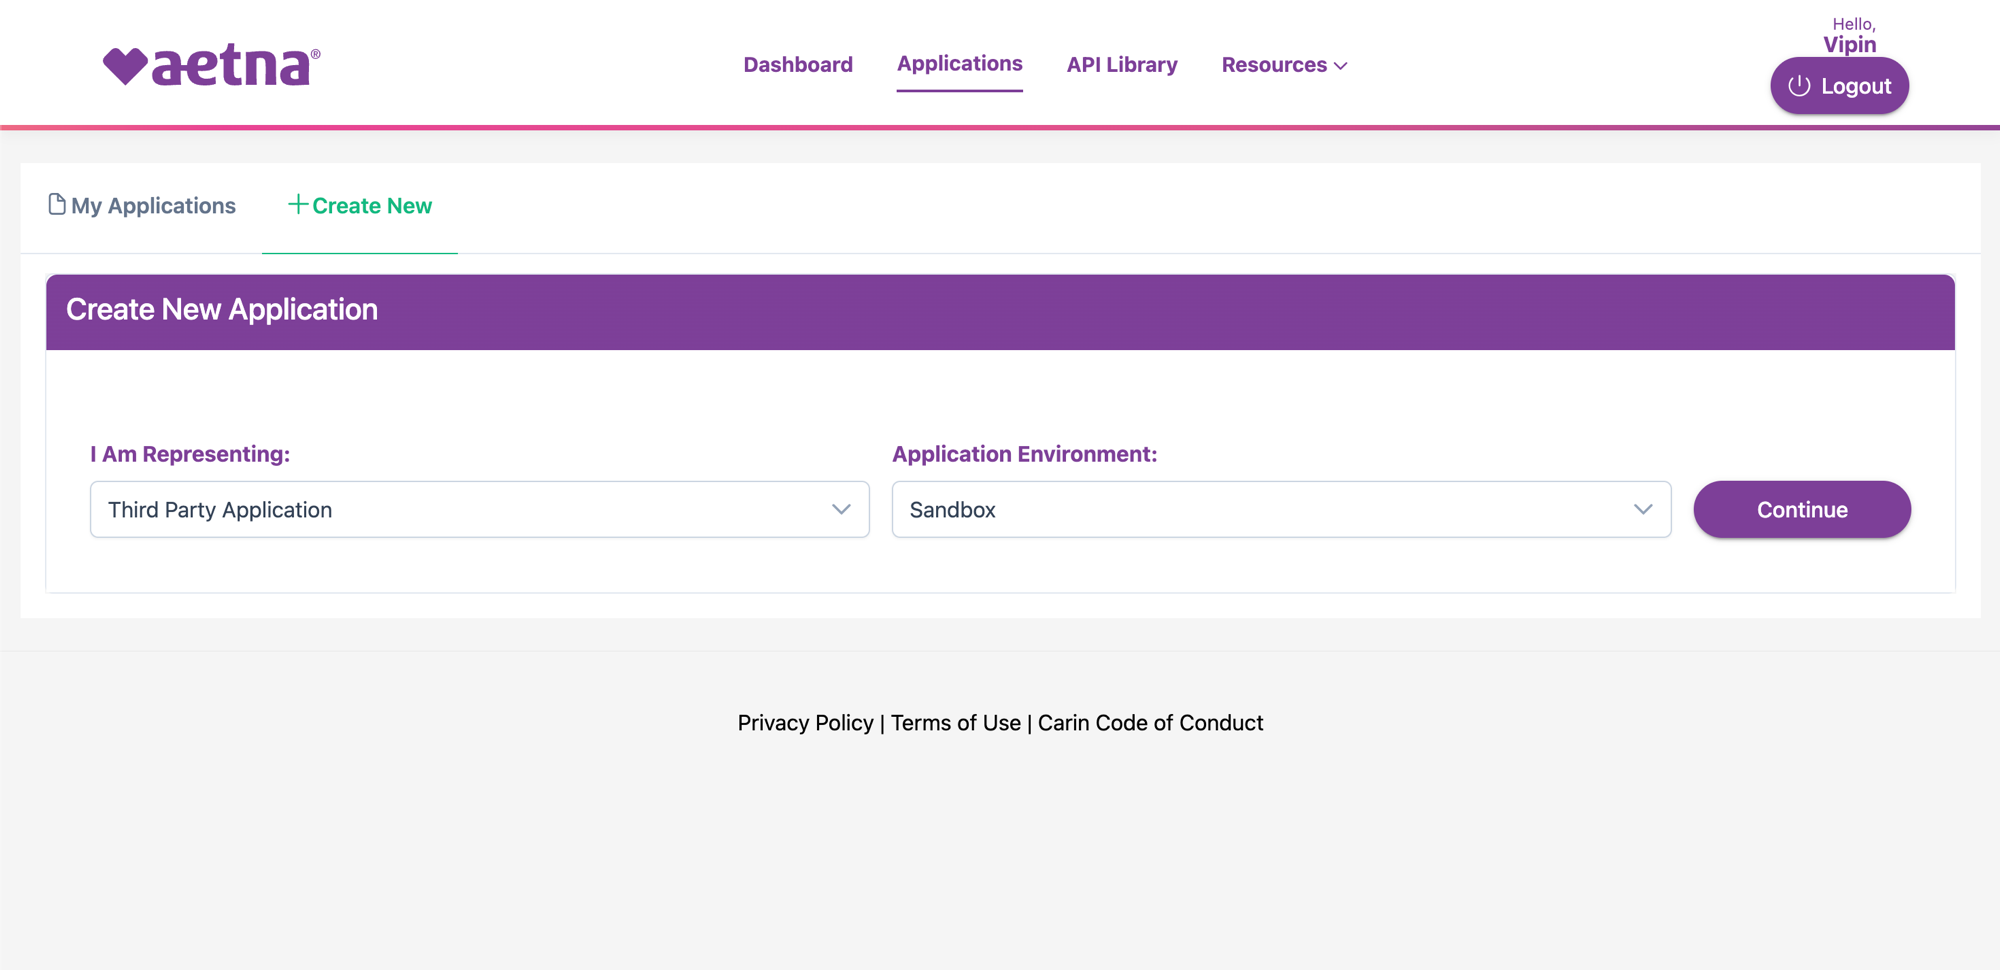
4. Click **Continue**. A page opens with a link to the role’s **Questionnaire**, open it, fill in your organization details, intended use, and security posture, and submit.
5. Track approval status on the Dashboard under **My Approvals**. Once your sandbox questionnaire is approved, the **Create Application** button on that row activates.
### Create the Sandbox Application [#3-create-the-sandbox-application]
1. From the approved row in **My Approvals**, click **Create Application**. The same Create New form opens, this time with an additional **Application Name** and **Callback URL** field.
2. Fill in:
* **Application Name**, your product’s user-facing name. This appears on the Aetna consent screen members see during authorization.
* **Callback URL**, where Aetna redirects after the member authorizes. Must be HTTPS in production; sandbox accepts `http://localhost:3000/api/auth/smart/callback` for local development. Register every URL you intend to use end-to-end as a comma-separated list. If you’re on the Medblocks Platform, include `https://app.medblocks.com/api/auth/smart/callback` plus any staging hostnames you deploy to.
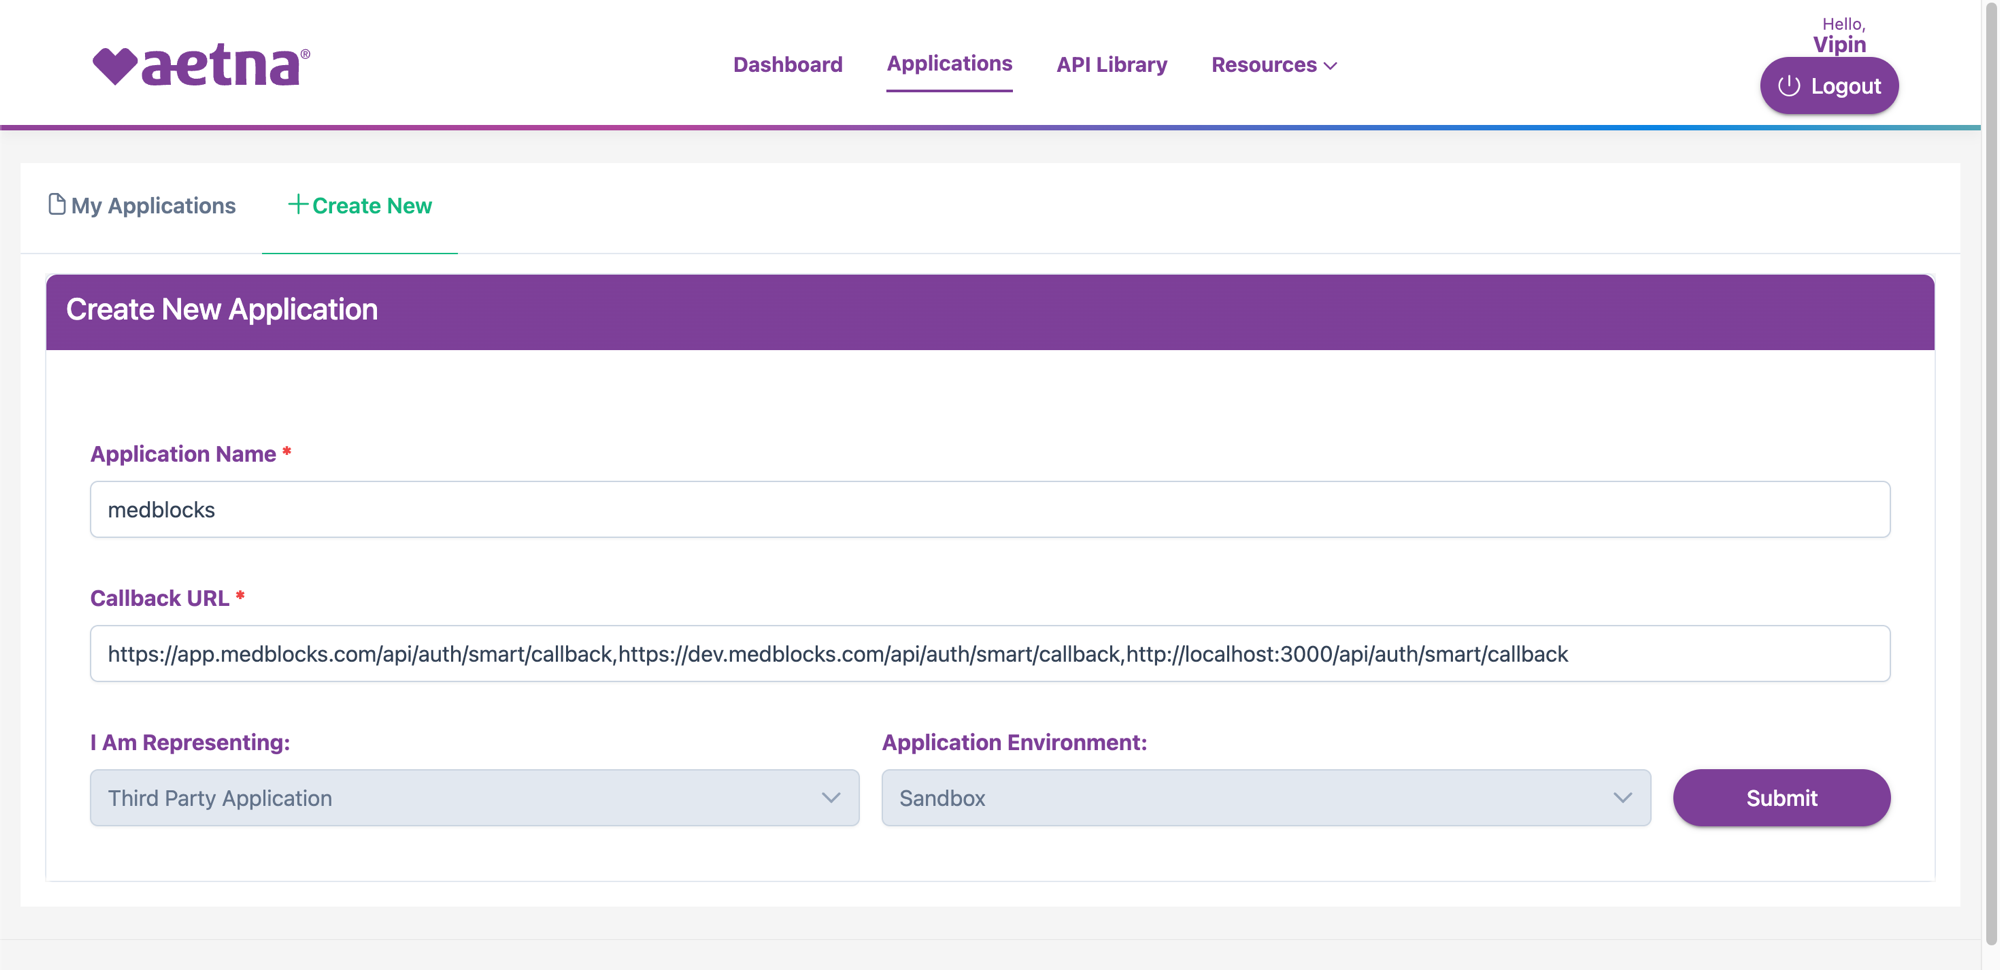
3. Click **Submit**. Aetna displays the **Client ID** and **Client Secret** **once** with the message *“Please save the client secret for this App, client secret will not get displayed again for this App.”* Copy both into your secret manager immediately, there is no “show again” option. If you lose the secret, you’ll have to delete the app and start over.
### Subscribe to Products [#4-subscribe-to-products]
Subscribing your application to the right products is what actually grants the OAuth flow access to FHIR resources. **Without active product subscriptions, the Aetna login page renders blank** during the OAuth flow, this is the most common gotcha.
1. From **My Applications**, find your app and click **Products**.
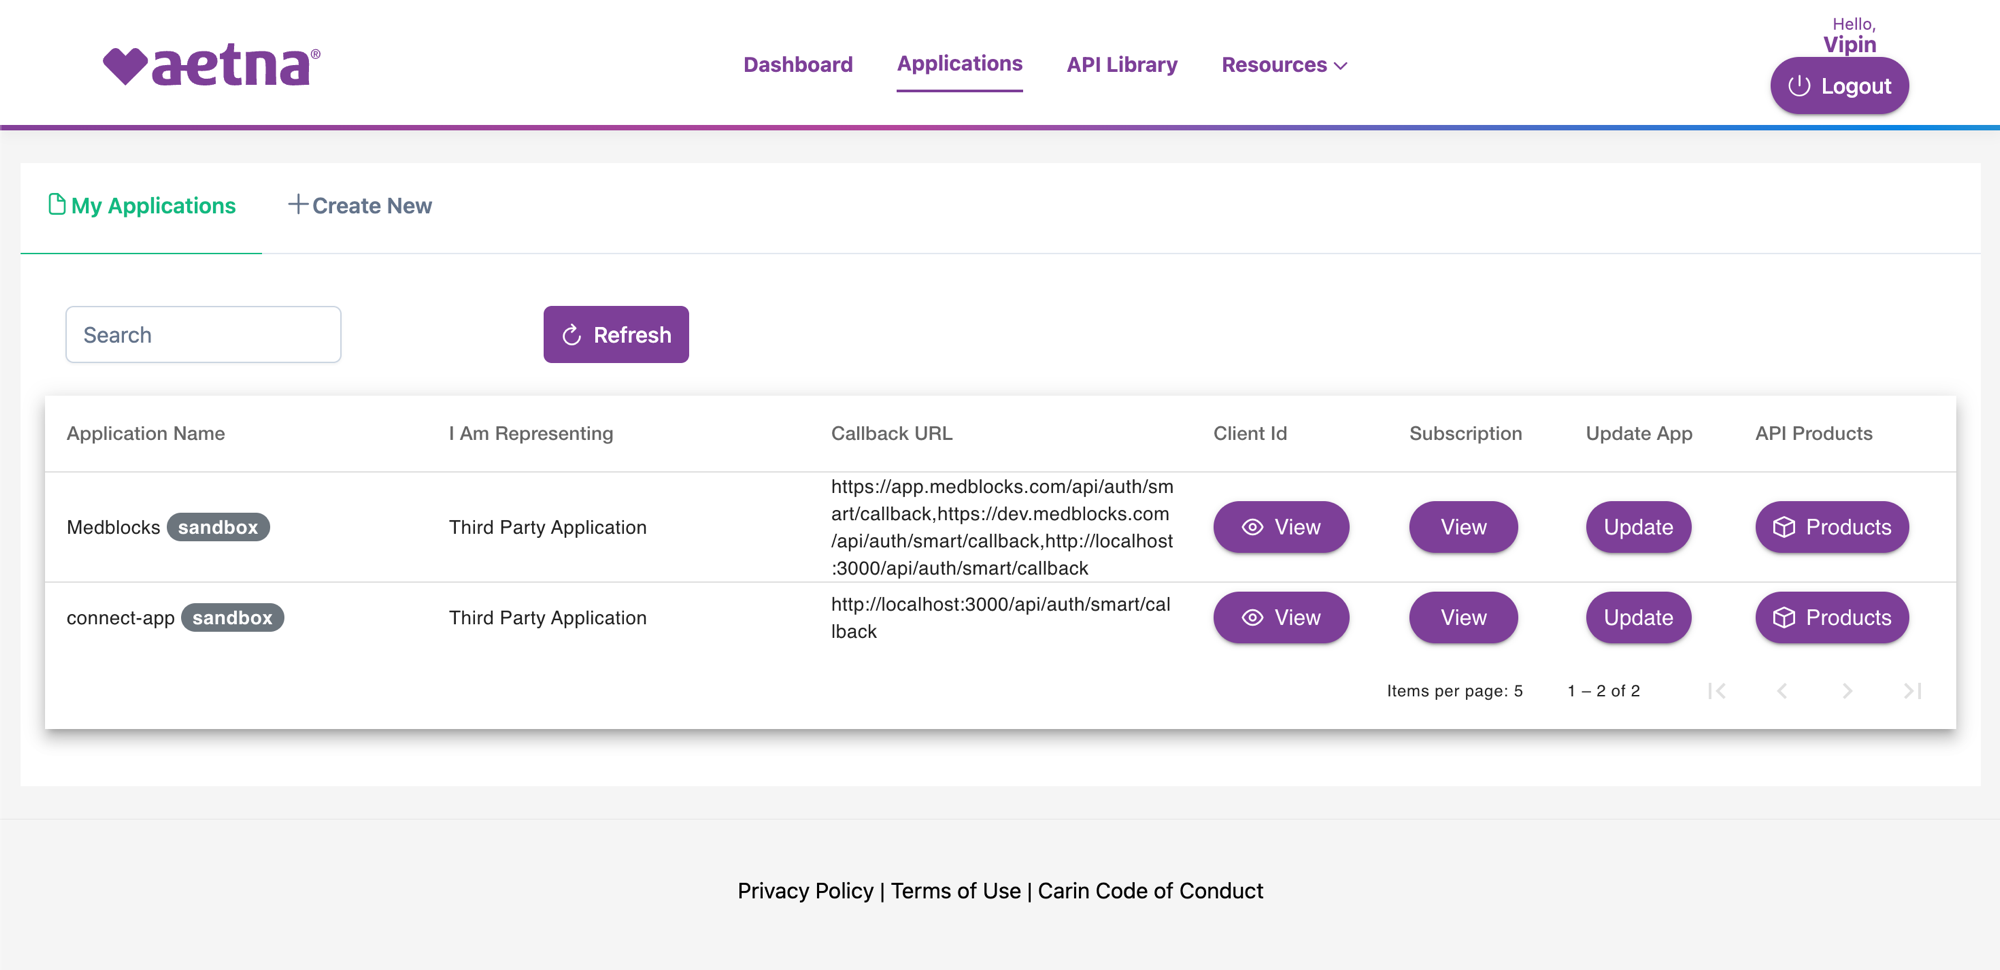
2. Tick the checkboxes for all Patient Access products for Third Party applications:
* sandbox-patientaccessapi-fhir
* sandbox-patientaccessapi-fhir-a
* sandbox-patientaccessapi-fhir-b
* sandbox-patientaccessapi-fhir-c
* sandbox-patientaccessapi-fhir-d
* sandbox-patientaccessapi-fhir-e
* sandbox-realtimepharmacybenefitcheckapi-fhir
3. Click **Subscribe Now** and confirm. Wait 2–5 minutes for the subscription to propagate before testing, Aetna explicitly calls out the delay in their docs.
4. Each subscribed product shows **APPROVED** status once active.
### Configure Medblocks [#5-configure-medblocks]
1. In your Medblocks dashboard, go to **Settings → Connections**.
2. Find **Aetna** in the list and open it.
3. Toggle **Use custom credentials** and paste the Client ID from the Aetna portal.
4. Check **Enter client secret** and paste the Client Secret. Aetna’s token endpoint requires `client_secret_basic` auth, so the secret is required (unlike Epic and Cerner, which use PKCE or `private_key_jwt`).
5. Save.
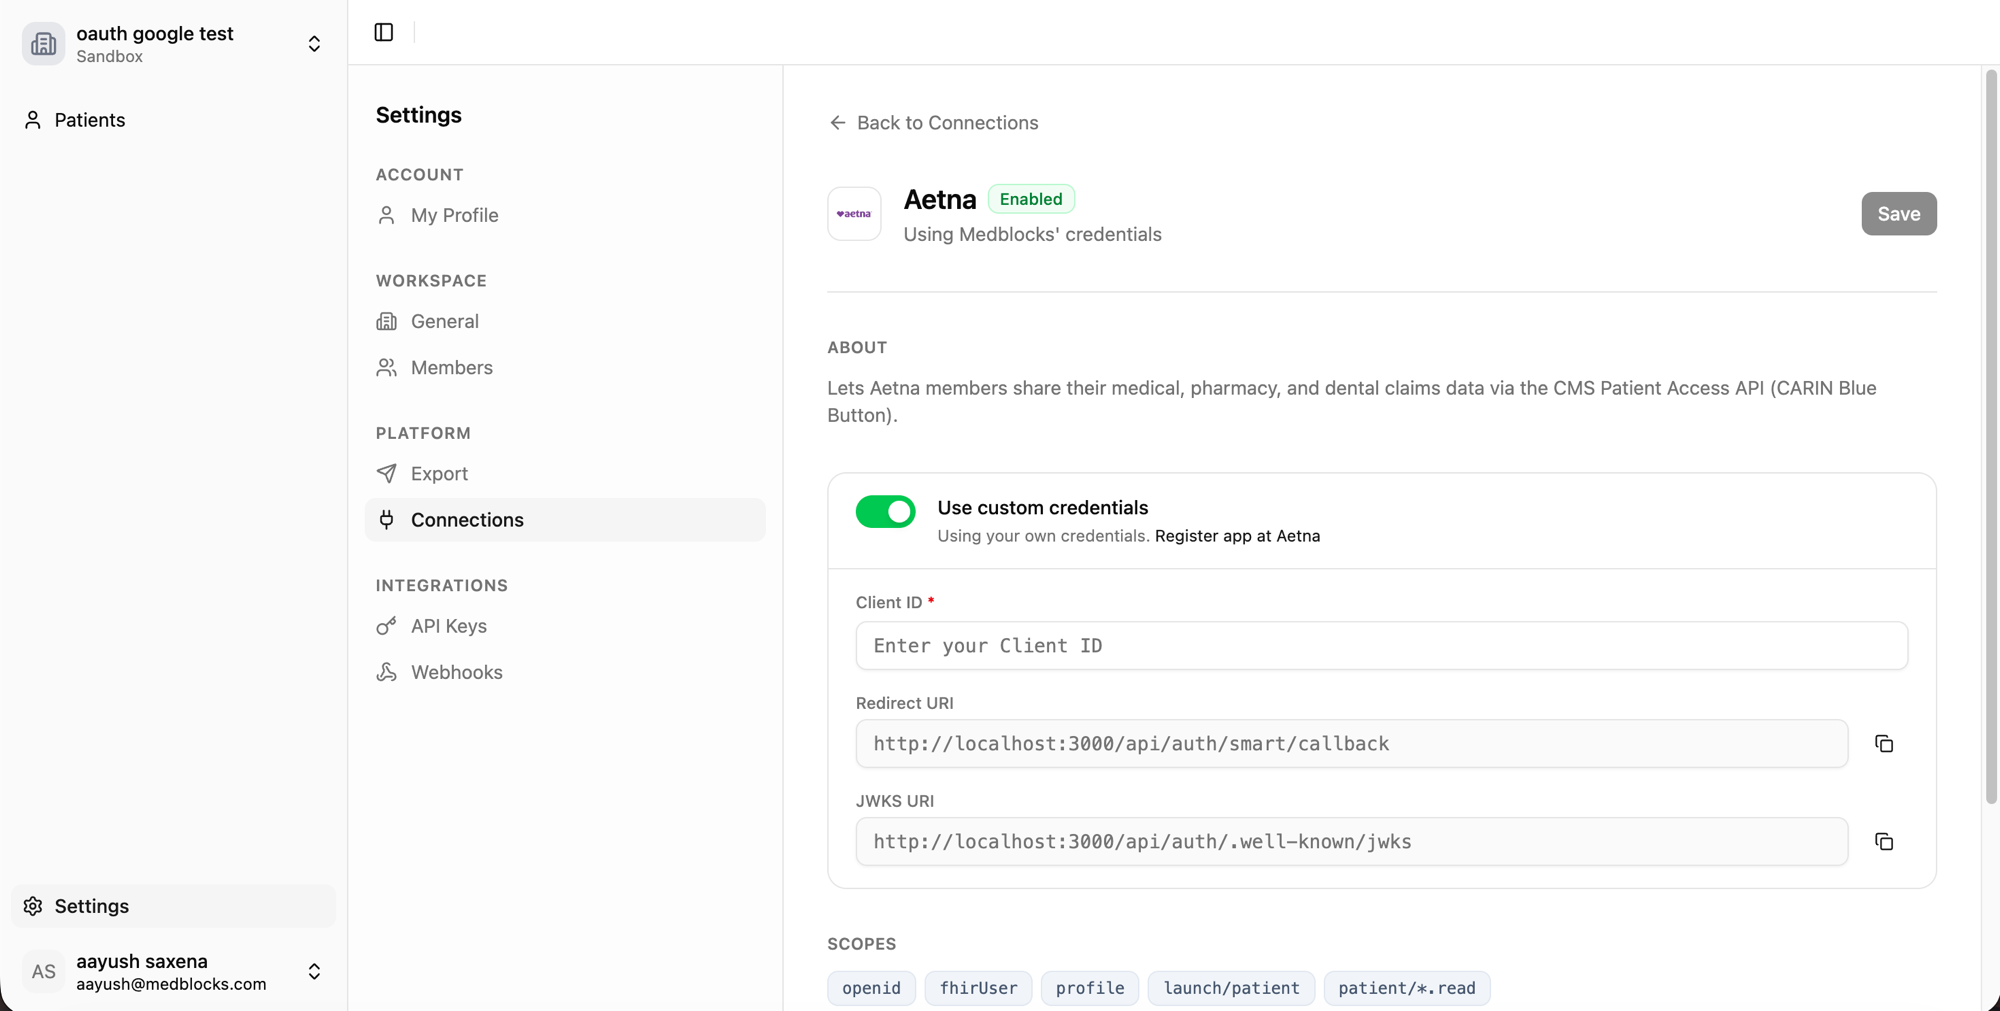
That’s it, the platform handles the rest of the OAuth flow, including the Aetna-specific quirks (`aud` param, `skin=skin13` query param, HTTP Basic auth on the token endpoint, and the deeper `/v2/patientaccess` resource path).
### Test with Sandbox Synthetic Users [#6-test-with-sandbox-synthetic-users]
Aetna’s sandbox uses synthetic test members with pre-populated claims. No real Aetna member account is required.
Sandbox endpoints (advertised at the [Aetna sandbox `.well-known/smart-configuration`](https://vteapif1.aetna.com/fhirdemo/.well-known/smart-configuration)):
| Endpoint | URL |
| ----------- | --------------------------------------------------------------------------------------------------------------------------------------------------- |
| Authorize | [https://vteapif1.aetna.com/fhirdemo/v1/fhirserver\_auth/oauth2/authorize](https://vteapif1.aetna.com/fhirdemo/v1/fhirserver_auth/oauth2/authorize) |
| Token | [https://vteapif1.aetna.com/fhirdemo/v1/fhirserver\_auth/oauth2/token](https://vteapif1.aetna.com/fhirdemo/v1/fhirserver_auth/oauth2/token) |
| FHIR base | [https://vteapif1.aetna.com/fhirdemo/v2/patientaccess](https://vteapif1.aetna.com/fhirdemo/v2/patientaccess) |
| `aud` value | [https://vteapif1.aetna.com/fhirdemo](https://vteapif1.aetna.com/fhirdemo) |
The `aud` value is the auth root, not the resource base, they differ on Aetna, which trips most off-the-shelf SMART clients. Default sandbox test credentials documented by Aetna: `VTETestUser01` / `FHIRdemo2020`.
Test flow:
1. From your app, trigger an Aetna connect.
2. Browser redirects to `vteapif1.aetna.com/fhirdemo/v1/fhirserver_auth/oauth2/authorize?...` with `aud=https://vteapif1.aetna.com/fhirdemo` and `skin=skin13`.
3. Aetna redirects to its AccountManager login page. Sign in with the sandbox credentials.
4. Consent screen, click **Allow**.
5. Aetna redirects to your registered callback with `?code=...&state=...`.
6. Your backend exchanges the code for tokens. Aetna’s token endpoint advertises `client_secret_basic`, credentials go in the Authorization header, not the body, alongside the PKCE `code_verifier`.
7. Token response includes `access_token`, `refresh_token`, `patient` (synthetic member id), and `scope`. **No `id_token`** when `openid` isn’t requested, use the `patient` claim to fetch `Patient/{id}` directly.
8. FHIR resources live at `/v2/patientaccess/{Resource}`. Search-type resources take `?patient={id}` (e.g. `Coverage?patient={id}`, `ExplanationOfBenefit?patient={id}`, `MedicationRequest?patient={id}`, `Observation?patient={id}`, `Procedure?patient={id}`, `Encounter?patient={id}`, etc.). Reference resolution then fetches `Practitioner/{id}`, `PractitionerRole/{id}`, `Organization/{id}`, `Medication/{id}`, `Location/{id}`, `Binary/{id}` as needed.
The Aetna Developer Portal’s **API Library → Patient Access API** lists every resource path your token can access. Useful to cross-reference if a request 404s.
Known sandbox quirks:
* **Aetna login page returns `null`**, means your application has no active product subscriptions, or you submitted the OAuth request before the 2–5 minute subscription propagation completed. Verify subscriptions show APPROVED, wait 5 minutes, and retry.
* **`skin=skin13` is required** on the authorize URL, without it, Aetna’s AccountManager login UI renders blank.
* **Scope set**, Aetna’s `.well-known/smart-configuration` advertises `openid, fhirUser, profile, launch/patient, patient/*.read` — **no `offline_access`**. Sending a scope outside this list makes the AccountManager render literally `null`. The Medblocks Platform sends `launch/patient patient/*.read`.
* **No refresh\_token in the token response**, Aetna’s Patient Access sandbox does not return a `refresh_token` (there’s no `offline_access` scope to opt into). Every retrieval that hits the proactive-refresh path fails with “No refresh token available”; the worker must fetch on the initial access token before it expires or re-run the OAuth flow.
* **Tight rate limits**, sandbox returns `429 Too Many Requests` (“Assembly Rate Limit exceeded”) under burst load. The worker must honor `Retry-After` with backoff.
### Apply for Production Access [#7-apply-for-production-access]
Production access requires a separate questionnaire and a separate application, even if your sandbox is already approved. The production review covers the same areas as CMS Blue Button, privacy policy, terms of service, consent UX, data retention, and member revocation.
1. From the Dashboard, click **My Applications → Create New**.
2. Select **Third Party Application** and **Production**.
3. Click **Continue** and complete the production questionnaire. Aetna’s Interoperability team responds within 2–4 business days. End-to-end approval typically takes longer in practice, expect follow-up questions and a possible demo before production credentials are issued. While the request is in review, the production row in **My Approvals** stays in **PENDING** status until the team approves.
Before submitting, verify:
* Sandbox integration works end-to-end, at least one successful pull covering the full Patient Access surface (see the [capability statement](https://vteapif1.aetna.com/fhirdemo/v2/patientaccess/metadata) for the exact resource list) for a synthetic member.
* Privacy policy is published at a stable URL and covers the CMS-required sections: collection, use, sharing, retention after revocation, dormant-account handling, breach notification, and data handling on company sale.
* Terms of service is published at a stable URL.
* Consent screen shows the inviting organization name and what data will be accessed.
* Member can revoke access, either an in-app disconnect button or a documented email path with a documented 30-day deletion SLA.
4. Once the production questionnaire is approved, repeat **Step 3** (Create Application) but with **Application Environment: Production**. Aetna issues a new production Client ID and Client Secret.
5. Subscribe to the production patient-access products (`public-patientaccessapi-fhir`, `public-patientaccessapi-fhir-a` through `-g`, plus `public-realtimepharmacybenefitcheckapi-fhir` if applicable). Production subscriptions go through a second review, Aetna shows:
6. Once subscriptions are approved, plug the production credentials into Medblocks at **Settings → Connections → Aetna** with **Use custom credentials**. The platform repoints to Aetna’s production endpoints (`https://apif1.aetna.com/fhir/...`) automatically.
## FHIR API Usage [#fhir-api-usage]
Aetna’s Patient Access API is **CARIN Blue Button (C4BB) aligned**, same resources as CMS Blue Button, just for Aetna’s member base. No clinical resources beyond what claims naturally carry.
* **Patient**, member demographics. `GET /v2/patientaccess/Patient/{id}`
* **Coverage**, member’s Aetna coverage details. `GET /v2/patientaccess/Coverage?beneficiary=Patient/{id}`
* **ExplanationOfBenefit**, claims (Inpatient, Outpatient Institutional, Professional / Non-Clinician, Pharmacy). `GET /v2/patientaccess/ExplanationOfBenefit?patient={id}`
All responses conform to the [CARIN Blue Button Implementation Guide](https://hl7.org/fhir/us/carin-bb/STU1.1/) profiles. The exact swagger for each resource is downloadable from the Aetna Developer Portal under **API Library → Patient Access API**.
Request these scopes on authorize:
* launch/patient
* patient/\*.read
Aetna only documents the wildcard `patient/*.read`, there are no per-resource scopes. `openid` is accepted but the token endpoint never issues an `id_token`, so requesting it is a no-op.
## Token Lifecycle [#token-lifecycle]
* **Access token**, short-lived (typically 1 hour). Used as `Authorization: Bearer ` on FHIR calls.
* **Refresh token**, long-lived; refresh via `grant_type=refresh_token` with the same client\_secret + PKCE pattern.
* **Member consent**, Aetna doesn’t publish an explicit consent expiration like CMS BB’s 13-month window, but expect the member’s authorization to need re-confirmation at least annually.
* **Revocation**, Aetna does not publish a standalone revoke endpoint. Discard the tokens locally and the access tokens expire naturally; refresh tokens can be invalidated by re-running the OAuth flow.
## Common Errors and Fixes [#common-errors-and-fixes]
* **Aetna login page shows literal `null`**, application has no active product subscriptions, or you tried before the 2–5 minute subscription propagation. Confirm all `sandbox-patientaccessapi-fhir*` products show APPROVED in your app’s Products tab and wait 5 minutes.
* **Login page is blank / unstyled**, `skin=skin13` query param missing from the authorize URL. Aetna’s AccountManager renders nothing without it. The Medblocks Platform appends it automatically.
* **`401 invalid_client` on token exchange**, Aetna’s token endpoint requires HTTP Basic auth (`Authorization: Basic base64(client_id:client_secret)`), not body credentials. Confirm your token request sends credentials in the Basic header.
* **`404 No resources match requested URI` on Patient or Coverage**, wrong base URL. Aetna’s resources live at `/v2/patientaccess/{Resource}`, not at the auth root. The `aud` param on the authorize URL stays at the auth root (`/fhirdemo` for sandbox), but resource calls go to `/v2/patientaccess`.
* **`429 Assembly Rate Limit exceeded`**, sandbox rate limits. Implement `Retry-After`-aware backoff. Cap concurrency per worker.
* **Consent screen shows wrong app name**, using a different sandbox app’s credentials. In **Settings → Connections → Aetna**, confirm the Client ID matches the app you registered on Aetna’s portal.
---
# After connection
Read the session result, list a patient's connections, and listen for record events.
Source URL: /docs/patient-access/after-connection
# After connection
Read the session result, list a patient's connections, and listen for record events.
After your return page has parsed `patient_id` and `patient_session_id`, confirm the outcome on your server. A [patient session](/docs/patient-access/patient-session) finishing is not the same as a connection going active, and a connection going active is not the same as records being ready. This page covers all three, the authoritative reads on your server and the events that save you from polling for them.
## Read the session [#read-the-session]
Call `mb.patientSession.retrieve(id)` on your server with the `patient_session_id` you read from the return. It gives you the session and its connections, one per facility the patient tried in that session.
```ts title="server/get-patient-session.ts"
import { mb } from "./medblocks";
const session = await mb.patientSession.retrieve(patientSessionId);
const active = (session.connections ?? []).filter((connection) => connection.status === "active");
const connected = active.length > 0;
```
A session can be `complete` and still have connected nothing, for example if the patient changed their mind at the portal. So the session lifecycle answers whether the patient finished, and the connection status answers whether records flow. The real success signal is a connection going `active`, not the session being `complete`. Act on the connection.
```ts title="server/read-session-status.ts"
// session.status is the patient's progress, not the result.
// connections[].status decides whether records flow.
const failed = (session.connections ?? []).filter((connection) => connection.status === "failed");
const lapsed = (session.connections ?? []).filter((connection) => connection.status === "refresh_failed");
```
A `refresh_failed` connection worked before but its access lapsed, so prompt the patient to reconnect. [Authorization](/docs/patient-access/authorization) explains why access lapses.
## Read the patient’s connections [#read-the-patients-connections]
A session shows one trip. To see everything a patient has connected across every session, read the patient. `mb.patients.retrieve(id)` returns the patient with a `connections` array, each entry carrying a `facility` and a `status`, including failed attempts so you can surface them.
```ts title="server/get-patient.ts"
import { mb } from "./medblocks";
const patient = await mb.patients.retrieve("user_42");
const live = patient.connections.filter((connection) => connection.status === "active");
```
Each entry already carries its `facility` inline, ready to drop into a UI. Skip failed connections, since they carry no data.
```ts title="server/connected-facilities.ts"
import { mb } from "./medblocks";
const patient = await mb.patients.retrieve("user_42");
for (const connection of patient.connections) {
if (connection.status !== "active") continue;
console.log(connection.facility.name, connection.facility.logo_url, connection.facility.fhir_base_url);
}
```
## Disconnect a connection [#disconnect-a-connection]
Sometimes a patient asks you to stop pulling from a source, or you no longer need one they linked. `mb.patients.disconnectConnection(patientId, connectionId)` removes your organization’s access to one of the patient’s linked sources using the connection `id` you read above. Stored credentials are cleared once no other workspace still uses them, and the call returns a tombstone confirming the disconnect.
```ts title="server/disconnect-connection.ts"
import { mb } from "./medblocks";
const result = await mb.patients.disconnectConnection("user_42", "conn_01J9YR9N3X4VZ6P2K5RH7M3LMP");
console.log(result.id, result.disconnected);
```
## A patient’s session history [#a-patients-session-history]
A patient is not limited to one session. They reconnect when access lapses, add another hospital later, or retry after a failed attempt. `mb.patients.listPatientSessions(id)` lists every session a patient has had, most recent first, which is what you want for a “past connections” view or a support screen.
```ts title="server/list-patient-sessions.ts"
import { mb } from "./medblocks";
const page = await mb.patients.listPatientSessions("user_42", { limit: 50 });
for (const session of page.data) {
console.log(session.id, session.status);
}
```
The result is cursor-paginated. Await it for the first page, or iterate it to walk them all.
## Listen to events [#listen-to-events]
Reading the session tells you where things stand at one moment. But records arrive in the [background](/docs/patient-access/background-pull) after the patient has moved on, and access can lapse weeks later, so polling for either is wasteful and slow. Subscribe to events instead. Medblocks posts to your server the moment something settles.
Four events matter here.
* `patient_session.completed`. The patient finished a session. Update your connected UI and kick off whatever should happen next.
* `records.sync.completed`. A background pull settled and new records are ready to read. Trigger downstream processing here rather than guessing when the data has landed.
* `records.sync.failed`. A background pull errored. Surface it or page your on-call team.
* `connection.token_refresh_failed`. A connection’s access lapsed. Prompt the patient to reconnect to resume the pull.
The full payload for each is in the [event catalog](/docs/webhooks/events), and the [webhooks quickstart](/docs/webhooks/quickstart) walks you through a receiver that verifies signatures so you can trust what arrives. Build the receiver there, then handle these four events.
## Common errors [#common-errors]
| Code | Meaning |
| -------------------- | ------------------------------------------------------------------------------------------ |
| `resource_not_found` | No patient or session matches the ID you retrieved, or it belongs to another organization. |
| `bad_request` | A query parameter is malformed, such as a `limit` outside the allowed range. |
| `missing_api_key` | The `Authorization` header is missing from your server’s request. |
| `invalid_api_key` | The key is invalid or does not belong to your organization. |
Read the full envelope and code list in [Errors](/docs/reference/errors).
## See also [#see-also]
* [Background pull](/docs/patient-access/background-pull)
* [Get the data](/docs/patient-access/get-the-data)
* [Webhooks](/docs/webhooks)
---
# athenahealth
Guide to integrate with athenahealth.
Source URL: /docs/patient-access/athena
# athenahealth
Guide to integrate with athenahealth.
Athenahealth is one of the largest healthcare technology companies, serving over 150,000 healthcare providers and managing data for more than 72 million patients across their connected network. Their EHR system features intuitive workflows with AI-powered capabilities like automatic clinical documentation through Ambient Notes, real-time patient data integration from across their vast network, and specialty-specific configurations for areas like women’s health, pediatrics, and behavioral health. The platform combines electronic health records with practice management and patient engagement tools, allowing providers to access comprehensive patient charts that automatically pull in records, lab results, and care history from anywhere patients receive treatment within their extensive provider network. Integrate with [Athena Health](https://www.athenahealth.com/) to plug your app into that network.
This is a step-by-step guide to registering a system-to-system FHIR app on athenahealth’s developer portal and taking it all the way to connected production practices. We use the **Certified APIs** path with **3-legged OAuth** and **JWKS-based** client authentication. *Certified APIs do not require athena’s Technical Request Form, which is the fastest route to live data. If you need a non-certified endpoint later, you can add it from the same app.*
## Setup Guide [#setup-guide]
### Create a developer account [#1-create-a-developer-account]
1. Go to the [Athena Developer Portal](https://developer.api.athena.io/ams-portal/) and open the signup form.
2. Fill in your name, work email, and company details. Submit the form, athena emails you a verification link.
3. Click the link in the email and set your password. *If the email doesn’t arrive within a few minutes, check spam.*
4. Once your account is active, sign back in with your credentials.
### Create your application [#2-create-your-application]
1. After login you land on the developer console. Click “Create a New App”.
2. Choose **“My app will use Certified APIs only”**. *This is what lets us skip the Technical Request Form. Certified APIs cover every USCDI scope you need for a read-only patient-facing integration.*
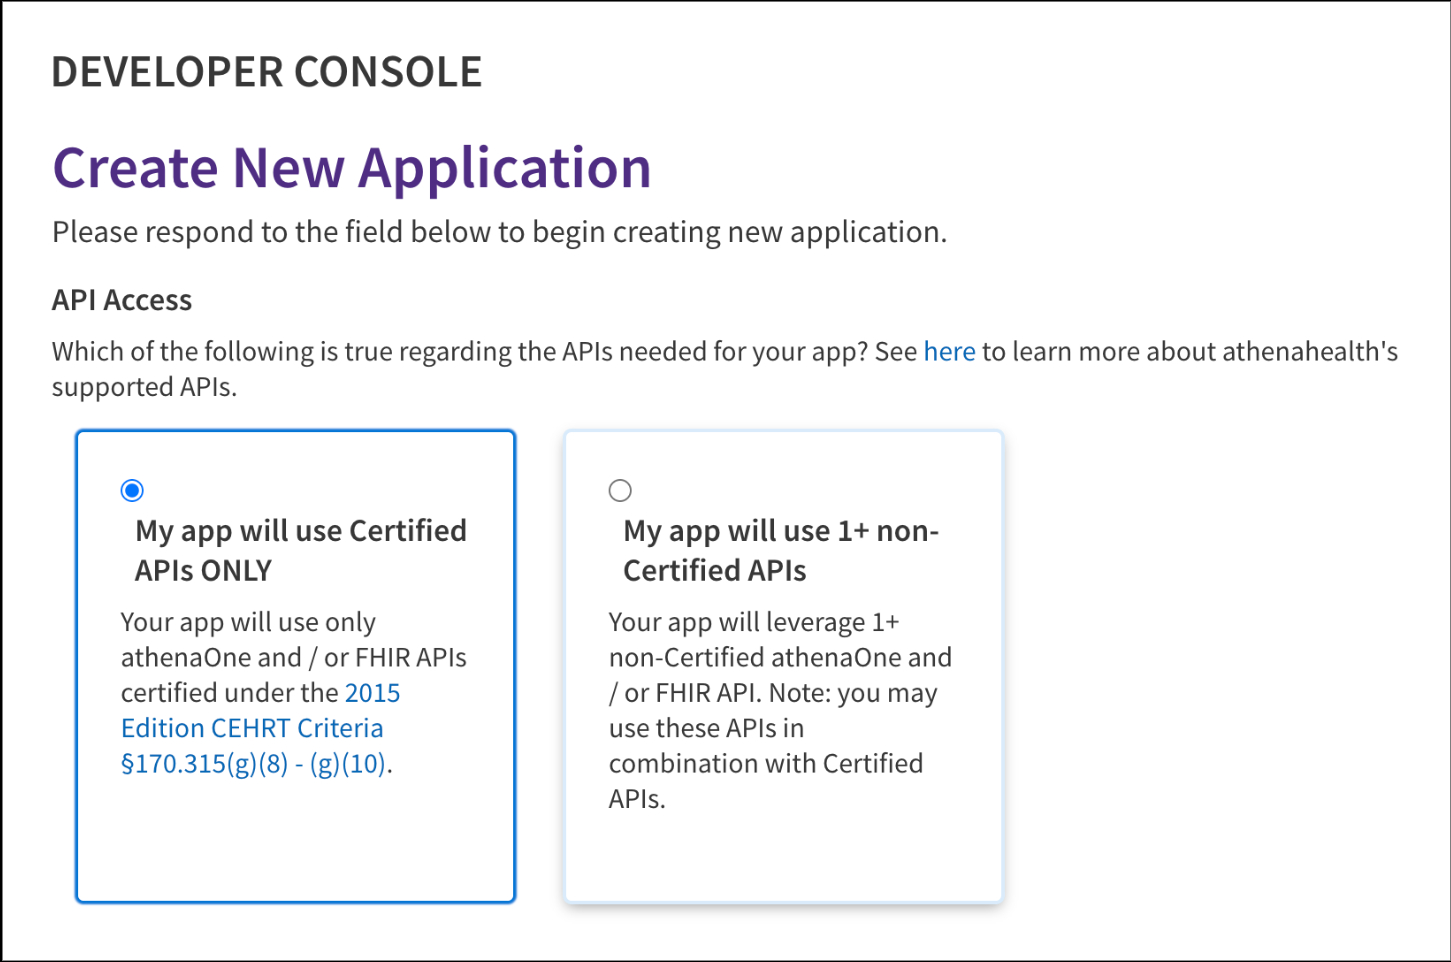
3. Pick the app category that best matches your use case. For most patient-facing integrations this is the record-access / patient-app category. *If you are using Medblocks Platform, use the “3-Legged OAuth for Patients” option.*
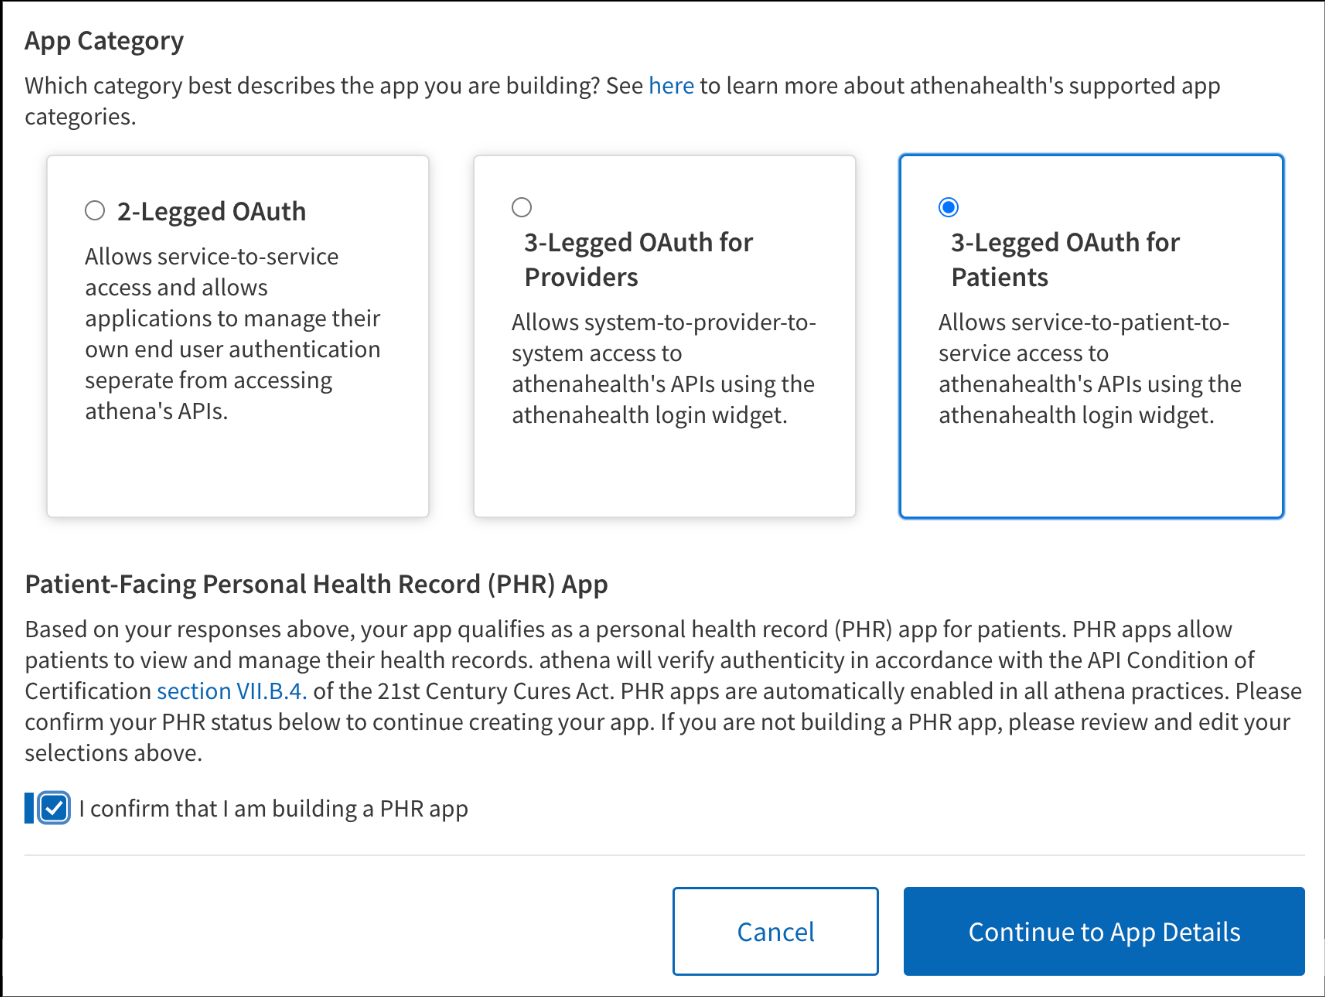
4. Click on the checkbox to confirm the PHR app.
5. Click “Continue to App Details”.
### Fill your app details [#3-fill-your-app-details]
1. Enter the app name, a short description, and a support contact email. *The name and description are customer-visible on the athenaOne Marketplace listing; keep them clean and accurate.*
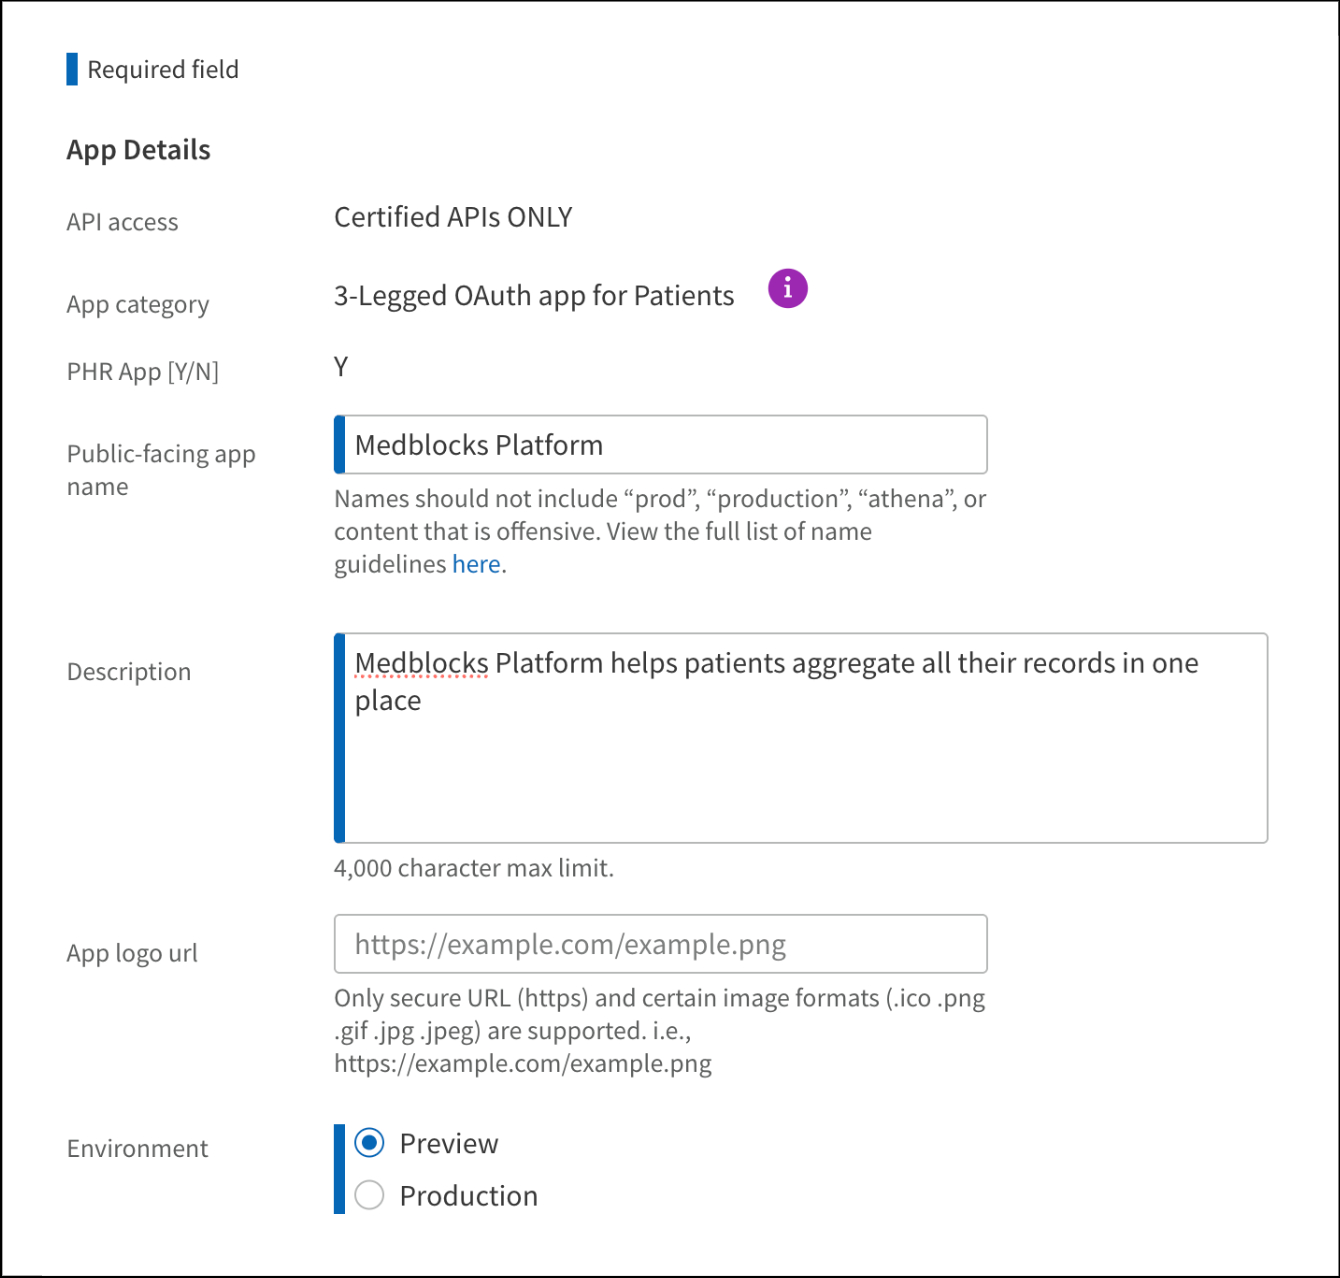
2. Set the **Application Type** to **Web**, if you are integrating using the Medblocks Platform. *“Web” means a server-side app that holds its signing key on a trusted backend, athena calls these “confidential” apps and only confidential apps get issued a client ID suitable for JWKS auth. Pick “Browser” only for a pure SPA with no backend (it forces PKCE instead of JWKS), or “Native” for desktop/mobile apps.*
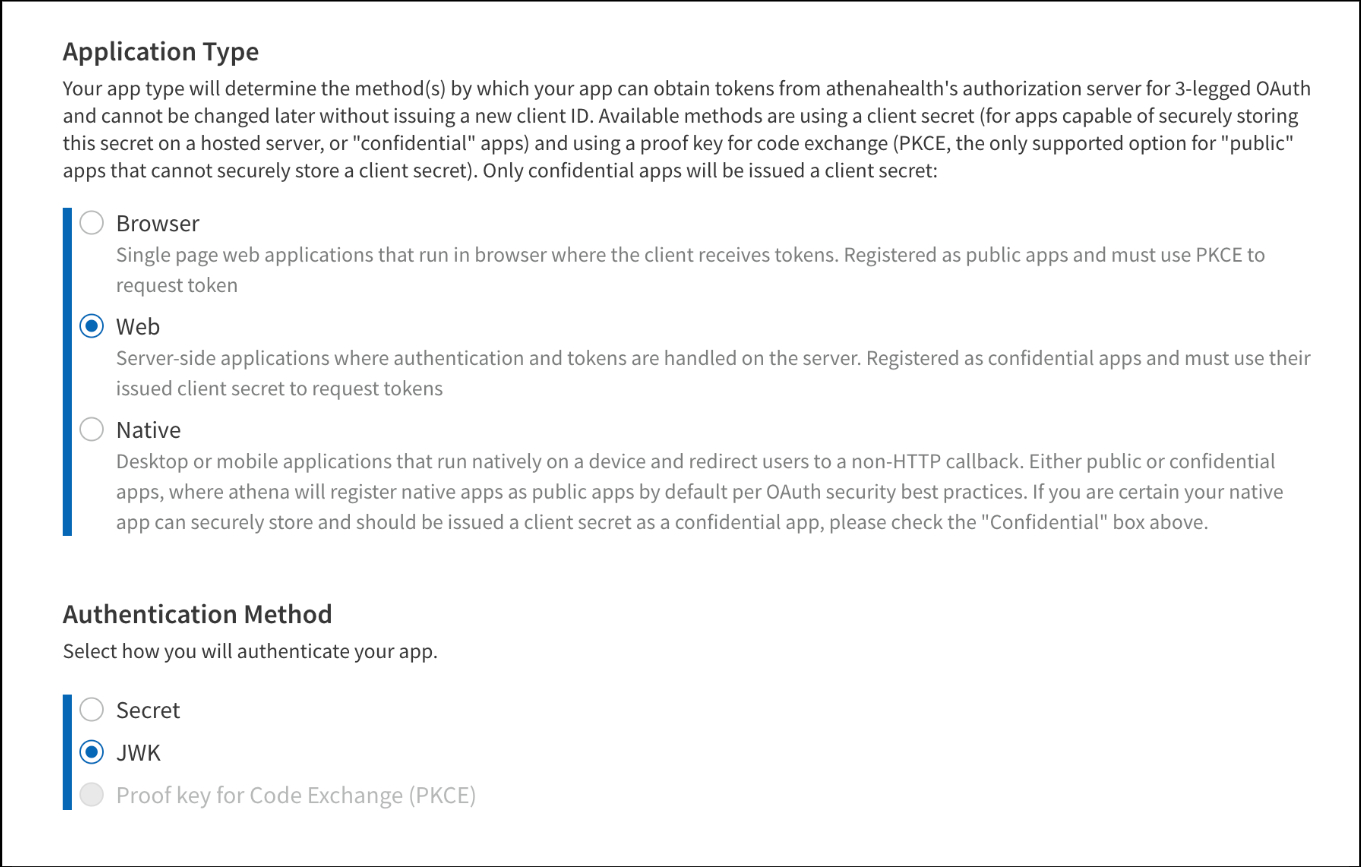
3. Add your post-login redirect URIs. With 3-legged OAuth these are the callback URLs athena sends the patient back to after they authorize your app, so every URL your server listens on needs to be registered. You’ll typically want at least two.
* [http://localhost:3000/callback](http://localhost:3000/callback) for local development
* [https://app.medblocks.com/api/auth/smart/callback](https://app.medblocks.com/api/auth/smart/callback) for production
* an optional staging URL if you have one
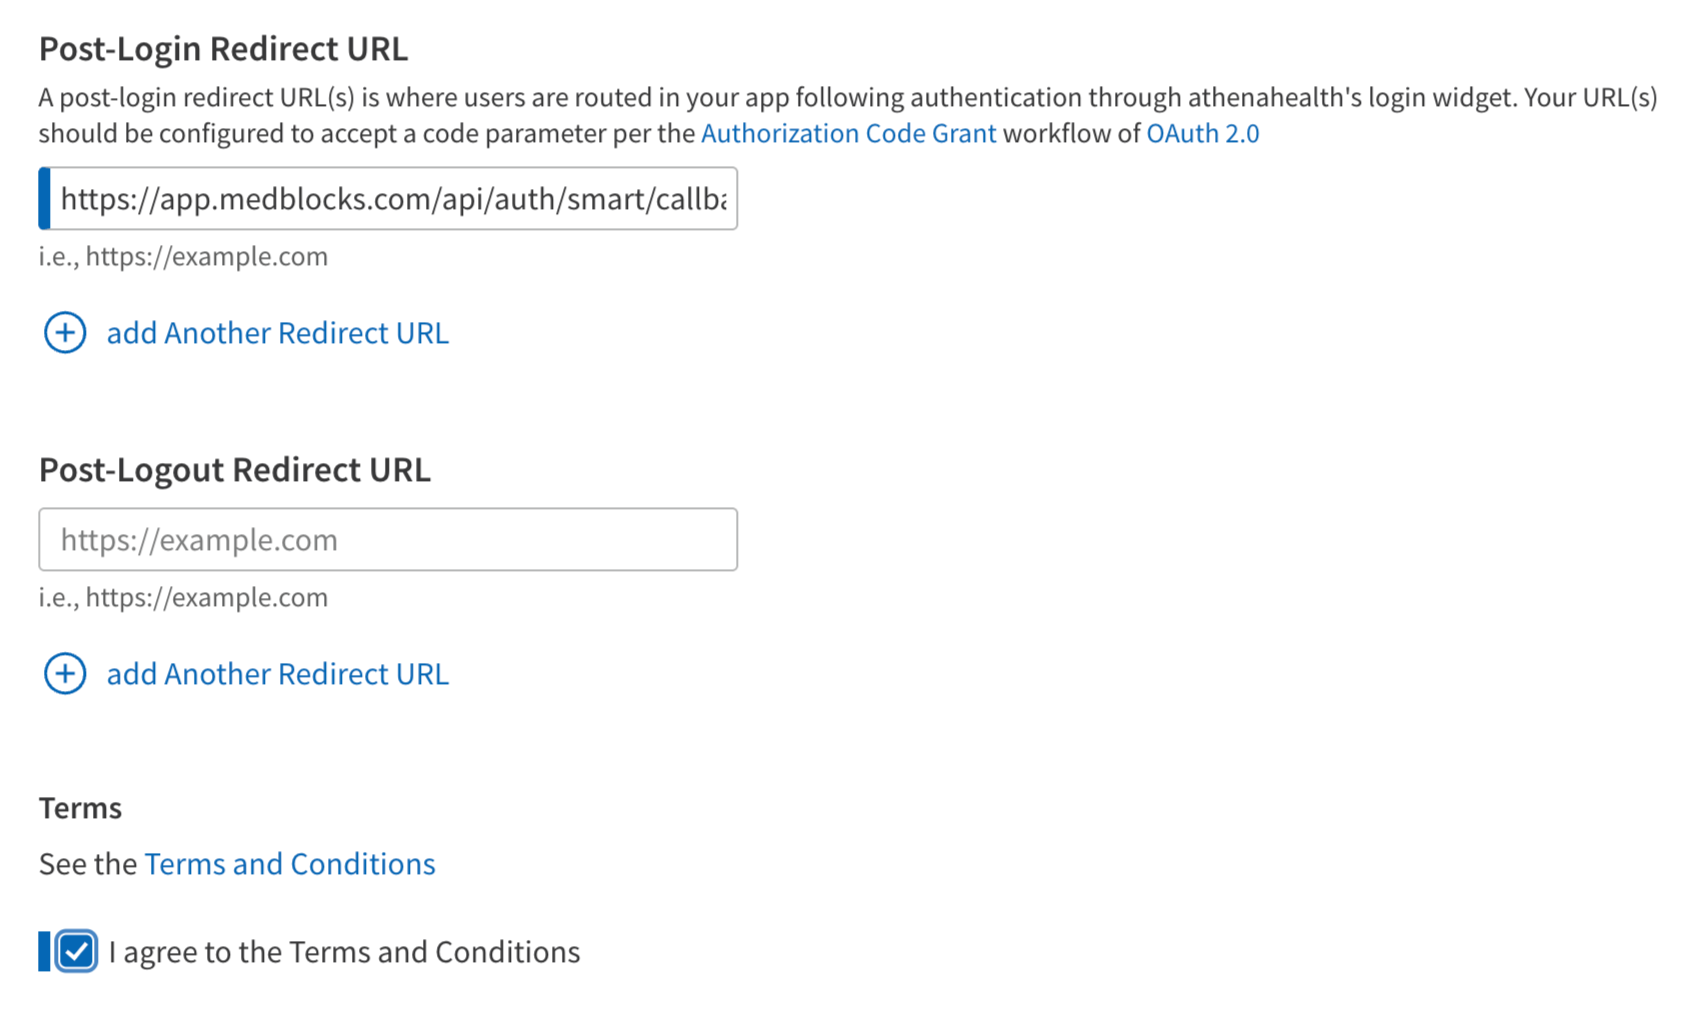
4. You can also add a post logout redirect url. *If you are using Medblocks Platform use,*
* [https://app.medblocks.com/](https://app.medblocks.com/)
### Set up authentication [#4-set-up-authentication]
Athena supports two client authentication methods, a shared client secret and an asymmetric JWKS. We use **JWKS** because the private key never leaves your environment, only the public key goes to athena.
1. On the authentication section of the app form, pick **JWKS** as the authentication method.
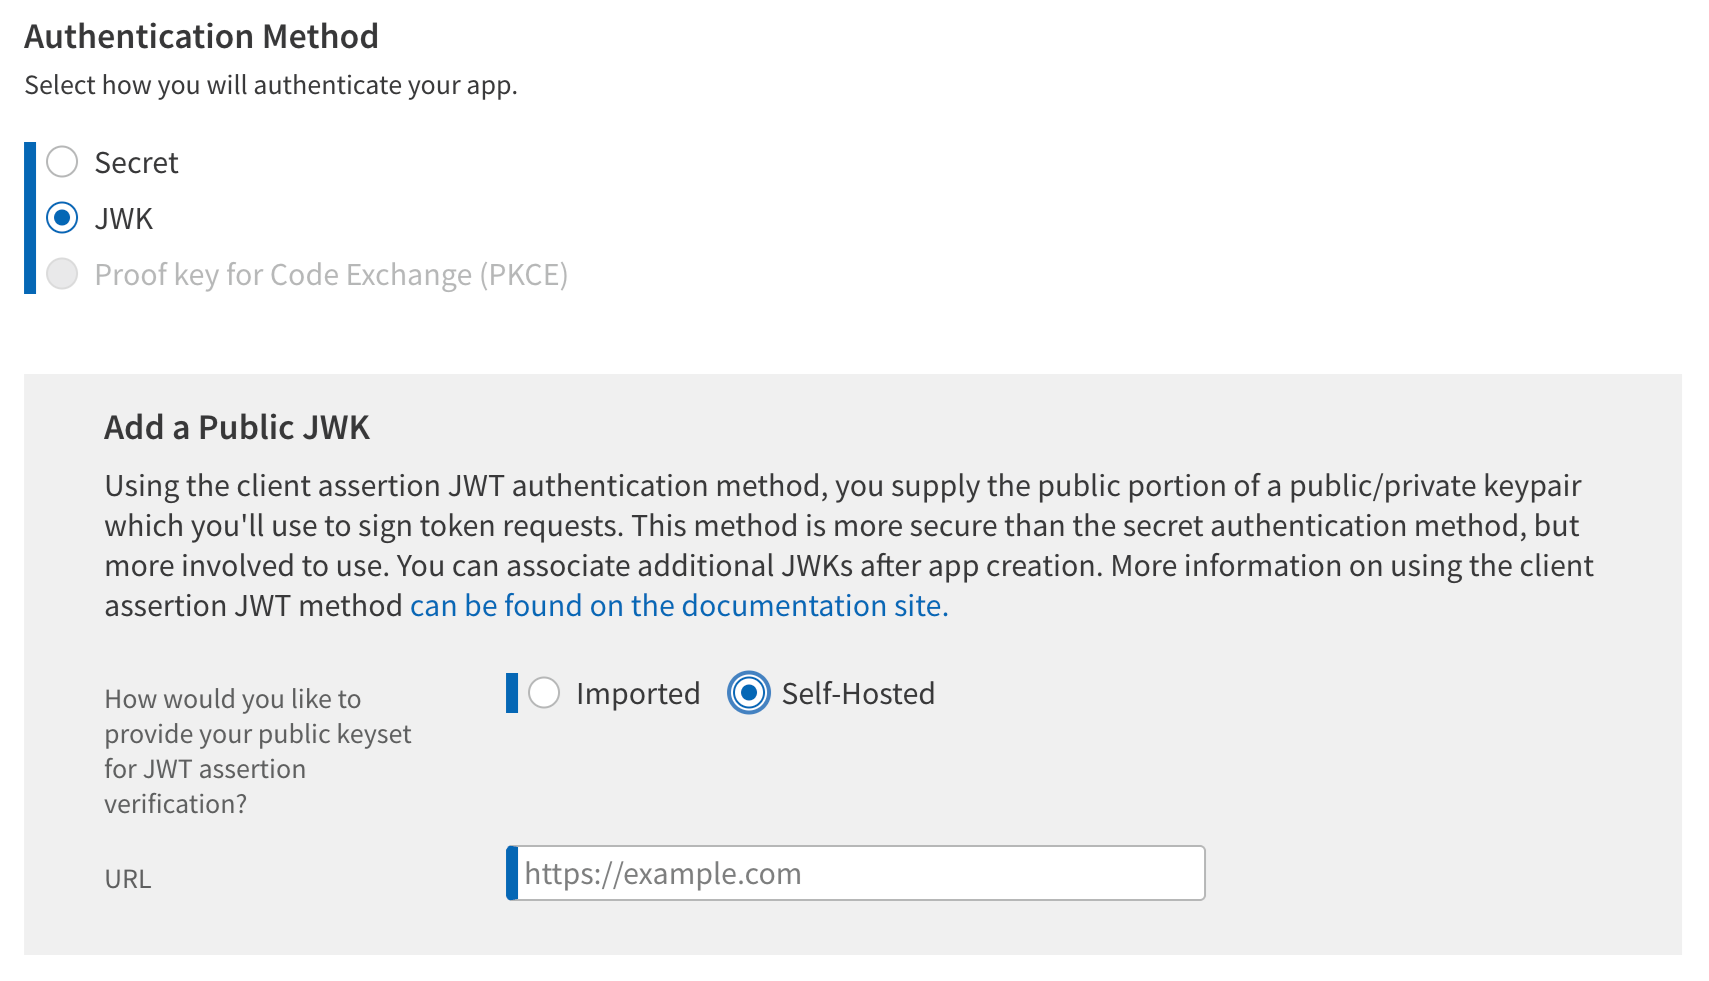
#### Generate your private key [#generate-your-private-key]
1. Generate an RSA key pair locally with OpenSSL.
```shell
openssl genrsa -out privatekey.pem 2048
```
*Do NOT use any online “generate JWK” websites for this. Your private key is what signs your authentication tokens. If anyone else has a copy of it, they can impersonate your app. Generate it on your machine, store it securely (environment variable or secrets manager), and never commit it to git.*
2. Your app needs to read this private key and serve the public portion as a JWKS at the /.well-known/jwks.json route. Here’s a minimal example with Node.js using the jose library.
```javascript
import { createPrivateKey } from "crypto";
import { exportJWK, calculateJwkThumbprint } from "jose";
import { readFileSync } from "fs";
import express from "express";
const app = express();
const privateKeyPem = readFileSync("privatekey.pem", "utf-8");
const privateKey = createPrivateKey(privateKeyPem);
// Derive the public JWK from the private key
const publicJwk = await exportJWK(privateKey.export({ type: "spki", format: "pem" }));
publicJwk.alg = "RS384";
publicJwk.use = "sig";
publicJwk.kid = await calculateJwkThumbprint(publicJwk, "sha256");
app.get("/.well-known/jwks.json", (req, res) => {
res.json({ keys: [publicJwk] });
});
app.listen(3000, () => console.log("Listening on port 3000"));
```
> athena requires `alg: "RS384"` and `use: "sig"`. Use a stable `kid`, a JWK thumbprint works well because it’s deterministic and survives redeploys.
3. Paste your public JWKS URL into the portal. The URL must be served over HTTPS from a publicly reachable host, and must return a JSON document with a keys array. *athena recommends keeping between 1 and 5 public keys in your JWKS so you can rotate without downtime, publish the new key alongside the old one, roll your signer over, then remove the old key.*
4. When you sign JWTs for athena’s token endpoint, set the JWT header’s kid to the one in your JWKS. athena fetches your /.well-known/jwks.json, matches on kid, and verifies the signature. *Include the \`kid\` even when you only have one key today, the moment you add a second key for rotation, requests without a \`kid\` become ambiguous.*
### Select scopes (use the console script) [#5-select-scopes-use-the-console-script]
Certified APIs are split across several products (athenaOne, Event Notifications, FHIR DSTU2, FHIR R4 SMART V1, V2, …), each with its own scope list. Clicking every checkbox by hand across every product is tedious and error-prone. Use the script below.
1. In the developer console, click on the “view App” button for the created application.
2. In the app portal, navigate to the **Scopes** tab of your app and then click on the “Edit Scopes” button.
#### Manual [#manual]
For each product in the left column, click the product, then tick every scope checkbox on the right. Repeat for all products, then click the portal’s Save button. This is fine for a quick sanity check but impractical if you need every scope across every product.
#### Using the script [#using-the-script]
1. Right-click anywhere on the page and select Inspect to open DevTools, then switch to the Console tab.
2. If the browser warns you about pasting, type allow pasting and press Enter.
3. Paste the following script into the console. It walks every product, snapshots each scope value, and ticks any that are unchecked, because athena’s scope table is virtualized and off-screen rows get unmounted.
```javascript
/**
* Athena Developer Portal: Add all scopes across every product.
*
* Paste the whole file into the console on a page like
* https://developer.api.athena.io/ams-portal/apps/
* on the "Scopes" tab, then run:
*
* await addAthenaScopes({ dryRun: true }) // walks products, counts only
* await addAthenaScopes() // ticks every unchecked box
* window.__athenaScopeResults // last-run summary
*/
async function addAthenaScopes({
dryRun = false,
perClickDelay = 60,
perProductDelay = 500,
postScrollDelay = 80,
verifyRetries = 2,
} = {}) {
const sleep = (ms) => new Promise((r) => setTimeout(r, ms));
const getProducts = () =>
[...document.querySelectorAll('.ScopeProduct_Container')].map((el) => ({
el,
id: el.id,
name: el.querySelector('.ScopeProduct_Header')?.innerText?.trim() || el.id,
badge: parseInt(el.querySelector('.ScopeProduct_StatusTag')?.innerText?.trim() || '0', 10),
}));
const isActive = (el) => el.classList.contains('ScopeProduct_Selected');
const scopeBoxes = () =>
[...document.querySelectorAll('input[name="scopes_checkbox_group"]')];
const findByValue = (value) =>
document.querySelector(
`input[name="scopes_checkbox_group"][value="${CSS.escape(value)}"]`,
);
const waitFor = async (pred, { timeout = 3000, poll = 50 } = {}) => {
const start = Date.now();
while (Date.now() - start < timeout) {
if (pred()) return true;
await sleep(poll);
}
return false;
};
const activateProduct = async (product) => {
if (isActive(product.el)) return true;
product.el.scrollIntoView({ block: 'center' });
product.el.click();
const ok = await waitFor(() => isActive(product.el));
await sleep(perProductDelay);
return ok;
};
const tickScope = async (value) => {
for (let attempt = 0; attempt <= verifyRetries; attempt++) {
let cb = findByValue(value);
if (!cb) {
const anyBox = scopeBoxes()[0];
if (anyBox) {
const scrollable = findScrollableAncestor(anyBox);
if (scrollable) {
scrollable.scrollTop = 0;
await sleep(100);
cb = findByValue(value);
if (!cb) {
scrollable.scrollTop = scrollable.scrollHeight;
await sleep(100);
cb = findByValue(value);
}
}
}
}
if (!cb) continue;
if (cb.checked) return 'already';
cb.scrollIntoView({ block: 'center' });
await sleep(postScrollDelay);
const fresh = findByValue(value);
if (!fresh) continue;
if (fresh.checked) return 'already';
fresh.click();
await sleep(perClickDelay);
const verify = findByValue(value);
if (verify && verify.checked) return 'added';
}
return 'missed';
};
const findScrollableAncestor = (el) => {
let node = el?.parentElement;
while (node) {
const style = getComputedStyle(node);
const overflowY = style.overflowY;
if ((overflowY === 'auto' || overflowY === 'scroll') && node.scrollHeight > node.clientHeight) {
return node;
}
node = node.parentElement;
}
return null;
};
const products = getProducts();
console.group(`addAthenaScopes - ${products.length} products (dryRun=${dryRun})`);
console.log(products.map((p) => ({ id: p.id, name: p.name, selectedCount: p.badge })));
const summary = [];
let totalAdded = 0;
let totalAlready = 0;
let totalMissed = 0;
for (const product of products) {
const activated = await activateProduct(product);
if (!activated) {
console.warn(` Could not activate ${product.name} (${product.id}) - skipping.`);
summary.push({ product: product.name, status: 'skip', total: 0, added: 0, already: 0, missed: 0 });
continue;
}
const values = [...new Set(scopeBoxes().map((cb) => cb.value))];
if (values.length === 0) {
console.log(` ${product.name}: no scope checkboxes rendered (empty product).`);
summary.push({ product: product.name, status: 'empty', total: 0, added: 0, already: 0, missed: 0 });
continue;
}
if (dryRun) {
const currentlyChecked = scopeBoxes().filter((cb) => cb.checked).length;
console.log(` ${product.name}: ${values.length} scopes (${currentlyChecked} already ticked, would tick ${values.length - currentlyChecked})`);
summary.push({
product: product.name,
status: 'dry-run',
total: values.length,
added: values.length - currentlyChecked,
already: currentlyChecked,
missed: 0,
});
continue;
}
let added = 0;
let already = 0;
const missed = [];
for (const value of values) {
const outcome = await tickScope(value);
if (outcome === 'added') added++;
else if (outcome === 'already') already++;
else missed.push(value);
}
if (missed.length) {
console.log(` ${product.name}: retrying ${missed.length} missed scopes…`);
const stillMissed = [];
for (const value of missed) {
const outcome = await tickScope(value);
if (outcome === 'added') added++;
else if (outcome === 'already') already++;
else stillMissed.push(value);
}
if (stillMissed.length) {
console.warn(` Still missed: ${stillMissed.join(', ')}`);
}
missed.length = 0;
missed.push(...stillMissed);
}
console.log(` ${product.name}: ticked ${added}/${values.length} (already had ${already}${missed.length ? `, missed ${missed.length}` : ''})`);
summary.push({
product: product.name,
status: missed.length ? 'partial' : 'done',
total: values.length,
added,
already,
missed: missed.length,
missedValues: missed,
});
totalAdded += added;
totalAlready += already;
totalMissed += missed.length;
}
console.log('\nSummary:');
console.table(summary.map(({ missedValues, ...rest }) => rest));
if (!dryRun) {
console.log(`Done. Ticked ${totalAdded} new scopes (${totalAlready} already on, ${totalMissed} missed).`);
if (totalMissed) {
console.warn('Some scopes could not be ticked - inspect summary[].missedValues in window.__athenaScopeResults and re-run to retry just those.');
}
console.log('Remember to click Athena\'s Save button - this script does not save.');
}
console.groupEnd();
window.__athenaScopeResults = summary;
return summary;
}
console.log('add-scopes-athena loaded.');
console.log('Commands:');
console.log(' await addAthenaScopes({ dryRun: true }) - walk products, count only');
console.log(' await addAthenaScopes() - tick every unchecked scope');
console.log(' window.__athenaScopeResults - last-run summary (incl. missedValues)');
```
4. Preview first with `await addAthenaScopes({ dryRun: true })`. The console prints a per-product table totals, how many are already ticked, how many would be ticked. Confirm the numbers look right.
5. Then run for real with await addAthenaScopes(). The script walks each product in turn, ticks every unchecked scope, and retries any that missed due to virtualization. Inspect window.\_\_athenaScopeResults afterwards if you want the per-product detail.
6. **Click the portal’s Save button.** *The script does not save. Every ticked checkbox will be discarded if you navigate away without hitting Save.*
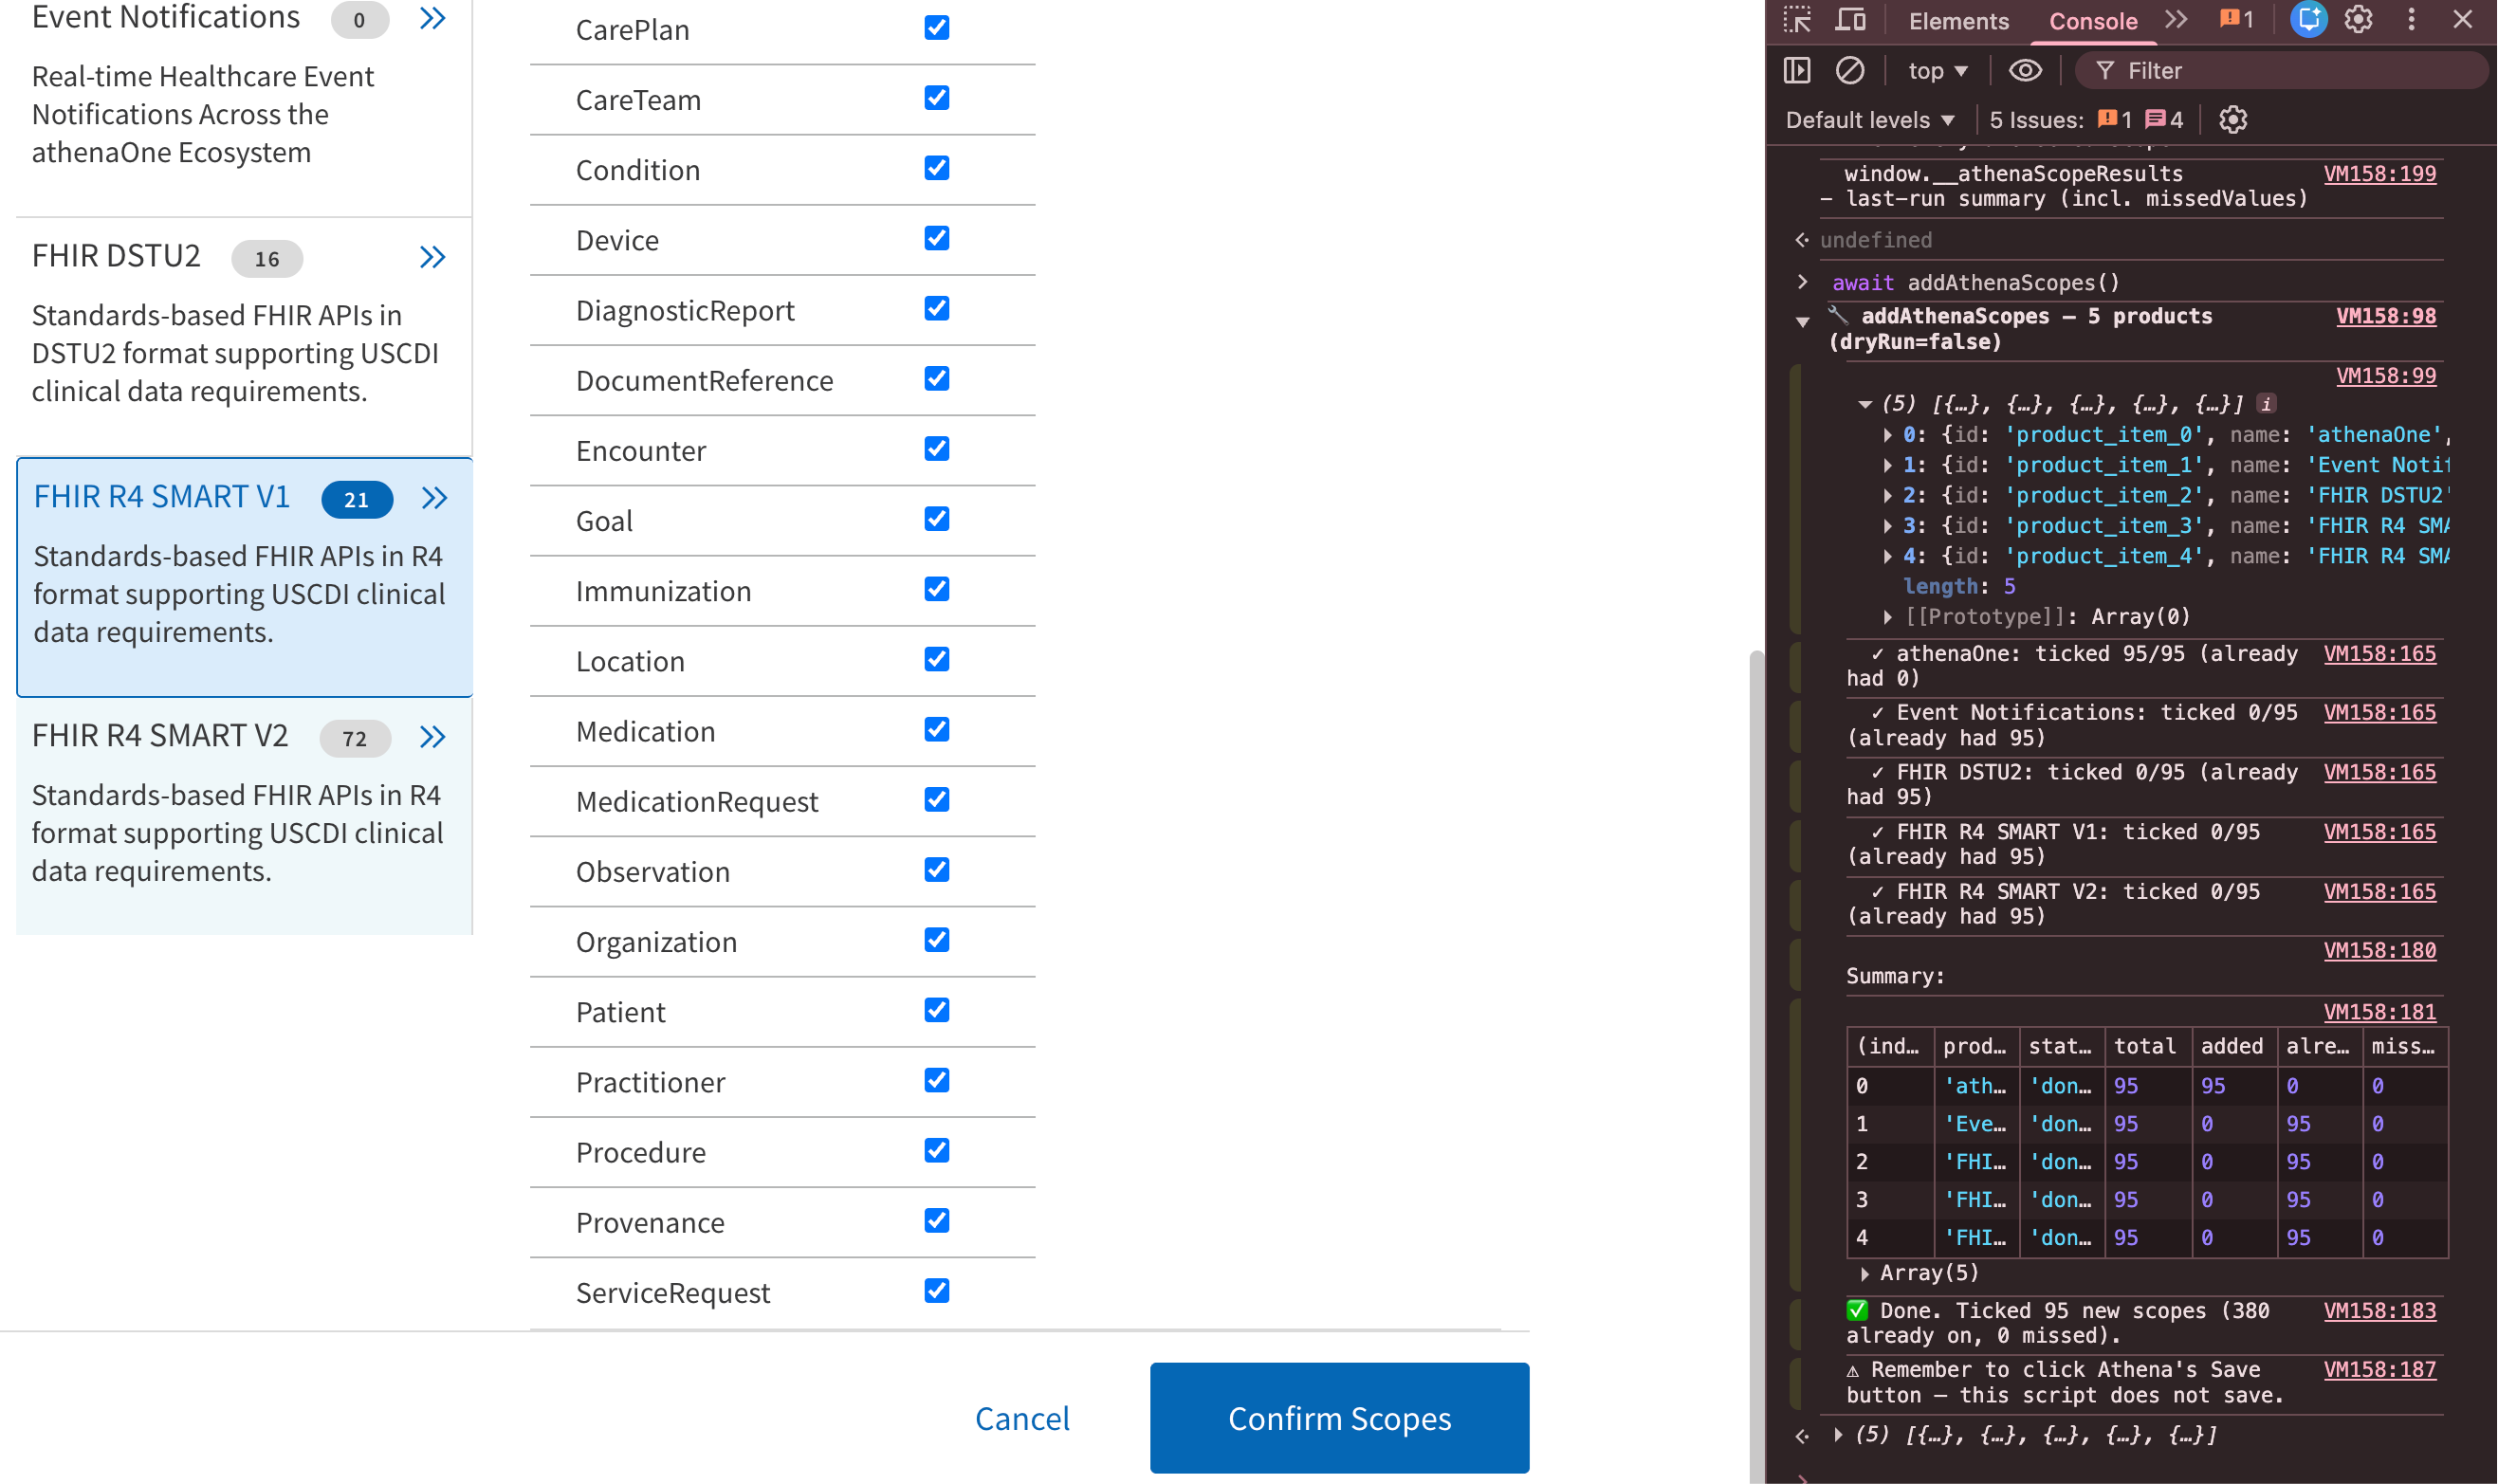
### Create your production application [#6-create-your-production-application]
Because the app is using **Certified APIs only**, athena gives you a fully self-service path to production, no Tech Spec form, no Solution Validation call. Production is its own app entry, **not a toggle on your preview app**, so production credentials are cleanly separated from preview from day one.
1. In [the developer portal](https://developer.api.athena.io/ams-portal/), click **”+ Create a New App”** and pick **“3-Legged OAuth for PHR / Certified Apps”** the same category you chose in Step 2.
2. Fill in the app fields exactly as you did for preview, with two differences.
* Set **Environment** to **Production**.
* Provide **production redirect URIs**. HTTPS only, localhost is not preferred for production.
3. On the **Scopes** tab of the new app, select the Certified API scopes your app needs. You can rerun the console script from Step 5 on this app’s scopes page, it works identically. *PHR apps must use Certified API scopes only. Any non-certified scope kicks you out of the self-service path and into the Technical Request Form / Platform Services flow.*
4. Register your **production JWKS URL**. It can point at the same endpoint as preview, but a separate production JWKS is recommended so the two keyrings can rotate independently.
5. Athena issues your **production Client ID** (and your JWKS config takes effect). These are distinct from your preview credentials; keep them in a separate environment/secret store in your app so there’s no chance of crossing them.
6. Swap hosts in your app wherever preview was in use, skip if you are integrating using the medblocks platform.
| | Preview | Production |
| :----------------- | :--------------------------------------------------------- | :------------------------------------------------ |
| Authorize endpoint | api.preview\.platform.athenahealth.com/oauth2/v1/authorize | api.platform.athenahealth.com/oauth2/v1/authorize |
| Token endpoint | api.preview\.platform.athenahealth.com/oauth2/v1/token | api.platform.athenahealth.com/oauth2/v1/token |
| FHIR base | api.preview\.platform.athenahealth.com/fhir/r4 | api.platform.athenahealth.com/fhir/r4 |
### Going live [#7-going-live]
Once your production app clears validation in Step 6, it is **auto-enabled across every athenaOne tablespace**, no per-practice install, and is automatically listed on the athenahealth Marketplace. Request an enhanced listing (custom copy, screenshots, branding) through the Developer Console if you want to polish the storefront.
athena withholds a patient’s data until that patient signs in and authorizes your app, so the 3-legged OAuth flow from Step 4 is the only consent gate you need. A practice can revoke that access at any time, treat it as a normal state in your UI, not an error.
*Practice IDs: the patient’s practice is chosen \*\*before\*\* OAuth, your app passes its FHIR base URL as \`aud\`, so the token response returns only a \`patient\` ID, not a practice ID. For preview testing, use Practice \`80000\` with login \`[phrtest\_preview@mailinator.com](mailto:phrtest_preview@mailinator.com)\` / \`Password1\`.*
With your Client ID, JWKS, and production credentials issued, you’re ready to test and launch your integration with athena via Medblocks Platform.
## See also [#see-also]
* [Create a patient session](/docs/patient-access/create-patient-session)
* [Find connections](/docs/patient-access/find-connections)
---
# Authorization
How a patient grants your app access to their records, and what Medblocks handles for you.
Source URL: /docs/patient-access/authorization
# Authorization
How a patient grants your app access to their records, and what Medblocks handles for you.
When a patient connects in your app, they are doing one specific thing. They are granting your app permission to read their records from their hospital. That permission step is the authorization, and it runs on a healthcare standard called SMART on FHIR.
You do not build any of this. You start a [patient session](/docs/patient-access/patient-session), the patient approves at their hospital, and Medblocks runs the standard underneath. This page explains what is happening, so you can reason about it, handle the cases where it fails, and trust the access behind your data.
## SMART on FHIR in one minute [#smart-on-fhir-in-one-minute]
SMART on FHIR is OAuth 2.0 shaped for healthcare, and OAuth is the same pattern as “Sign in with Google”. The patient signs in at their hospital, not in your app, and grants you limited, revocable access to their data. Two things follow from that, and both matter to you.
* Your app never sees the patient’s hospital password. They type it on their hospital’s own page.
* The hospital decides what you can read and can revoke it at any time. You ask, the patient approves, and the hospital grants access on its terms.
## What the patient is approving [#what-the-patient-is-approving]
Your app asks for a set of permissions, called scopes. For patient access these cover reading the patient’s own clinical data, confirming who they are, and keeping access alive after they leave. You do not assemble them, Medblocks requests the right scopes for each source. The one worth knowing by name is `offline_access`, because it is what lets Medblocks keep pulling records after the patient closes the tab. Without it you would get a single snapshot and nothing after.
## What Medblocks handles for you [#what-medblocks-handles-for-you]
Once the patient approves, Medblocks and the hospital run a short exchange to turn that approval into usable access. Medblocks builds the request, uses a technique called PKCE to keep the exchange safe so an intercepted approval cannot be reused, trades the approval for an access token, and stores that token on its own side. Your app never handles the token, and you never write token storage or refresh code.
None of this is yours to build. It is here so you know what “Medblocks runs the sign-in” actually means.
## Keeping access alive [#keeping-access-alive]
Access tokens are short lived by design, often under an hour. So along with the access token, `offline_access` gives Medblocks a longer-lived refresh token, and Medblocks uses it to renew access quietly in the background. Records keep flowing without asking the patient to sign in again.
Renewal can stop working, usually because the patient revoked access or too long passed. When it does, the connection moves to `refresh_failed`. That is the one case that comes back to you. When you see it, prompt the patient to connect again.
## When something goes wrong [#when-something-goes-wrong]
The patient signs in on a system you do not control, so a connection can fail in a few ordinary ways. Treat these as normal states in your UI, not errors to bury.
| What happened | What your app should do |
| --------------------------------------------------- | ------------------------------------------------------------------------- |
| The patient cancelled or declined at their hospital | Offer to try again |
| The hospital returned an error | Log the patient session ID, show a retry, read the session for the reason |
| The session link expired before they finished | Start a new patient session |
| Access lapsed later (`refresh_failed`) | Prompt the patient to reconnect |
## Debugging a connection [#debugging-a-connection]
Every attempt a patient makes leaves a trail you can read in the dashboard. It shows which source they tried, whether they reached the hospital, whether consent went through, and a stable error code when it did not. When a patient tells you it did not work, that history is where you see why, and whether the problem was at the hospital or in how your app set up the session.
## See also [#see-also]
* [Patient session](/docs/patient-access/patient-session)
* [Background pull](/docs/patient-access/background-pull)
* [Webhooks](/docs/webhooks)
---
# Background pull
Why records arrive after the patient connects, and what your app should show while they do.
Source URL: /docs/patient-access/background-pull
# Background pull
Why records arrive after the patient connects, and what your app should show while they do.
A patient connecting in your app and their records being ready are two different moments. Approving access takes seconds. Pulling the actual records takes longer, and Medblocks does it in the background after the patient has already moved on in your app.
This shapes how you build the connected experience. Wait for the data before showing anything and the patient stares at a spinner. Treat the connection as done the moment it goes `active` and your app stays responsive while the records fill in behind it.
## Why it is not instant [#why-it-is-not-instant]
A patient’s history can be large. Years of visits, lab results, medications, and notes, sometimes spread across several hospitals. Once a connection goes `active`, Medblocks works through the records that source holds and keeps the access fresh (see [Authorization](/docs/patient-access/authorization)) so it can keep going. A first pull can land in seconds, or take longer for a deep history.
## What your app should do [#what-your-app-should-do]
Treat a connection going `active` as your “connected” signal, not the arrival of data. Show the patient they are connected, let them keep moving, and bring records in as they land.
You have two ways to know records have landed.
* Subscribe to the `records.sync.completed` [webhook](/docs/webhooks/events). Medblocks tells your server the moment a pull settles, so you are not guessing. Use this in production.
* Read the patient’s data when you need it, accepting that early on it may still be filling in.
## It keeps running [#it-keeps-running]
The pull is not a one-time import. Medblocks re-pulls so the record stays current as new data appears at the source, for as long as the access holds. When the access finally lapses, the connection becomes `refresh_failed`, and the patient reconnects to resume.
## See also [#see-also]
* [After connection](/docs/patient-access/after-connection)
* [Get the data](/docs/patient-access/get-the-data)
* [Webhooks](/docs/webhooks)
---
# Cerner
Configure Cerner authorization, patient launch, and FHIR access for Medblocks Platform.
Source URL: /docs/patient-access/cerner
# Cerner
Configure Cerner authorization, patient launch, and FHIR access for Medblocks Platform.
Cerner (Oracle Health) is an enterprise EHR platform used across hospitals and health networks worldwide. This is a step-by-step guide to registering a patient-facing SMART on FHIR app on Cerner’s open platform and taking it all the way to production.
Unlike Epic’s centralized distribution, Cerner requires per-organization activation, so each hospital must independently enable your app within their tenant.
For Medblocks Platform integrations, use a **confidential** SMART app with **PKCE** and **JWT client authentication**. PKCE protects the authorization-code flow, and the backend proves the app’s identity at token exchange by signing a `client_assertion` JWT. Cerner verifies that JWT against the public key exposed through your registered JWKS URI.
## Setup Guide [#setup-guide]
### Prerequisites [#prerequisites]
If you’re serious about serving US patients and customers, having a US company will help with onboarding across the board. [Stripe Atlas](https://stripe.com/atlas) and [StartFleet](https://www.startfleet.io/) can get you a registered US entity with a real address in minutes.
For a US phone number, [Tello](https://tello.com/) gives you a virtual SIM with a real number. Grab a domain on [Namecheap](https://www.namecheap.com/) and set up a business email with Google Workspace. If you are using the Medblocks Platform, you can use `app.medblocks.com` as your domain and skip the domain setup entirely.
Since you’ll be serving US customers, you’ll need US infrastructure anyway. Set up a VM in a US cloud region, install [Tailscale](https://tailscale.com/), and use it as your exit node. This gives you a clean, stable US IP for development and testing, much more reliable than a VPN, which often gets blacklisted.
* A registered business entity
* A publicly accessible domain with HTTPS for your redirect URI (or use `app.medblocks.com` if you’re on the Medblocks Platform)
* A server-side backend that can handle the OAuth callback and store tokens securely
### Create a Developer Account [#1-create-a-developer-account]
1. Go to [Cerner Care](https://cernercare.com/accounts/create) and create a developer account.
2. Fill in your email and complete the secret questions, then submit the registration form.
3. Once approved, sign in and navigate to the [Cerner Code Console](https://code-console.cerner.com/).
### Create your Application [#2-create-your-application]
1. From the top navigation ribbon, click **“My Applications”**.
2. Click **”+ New Application”**.
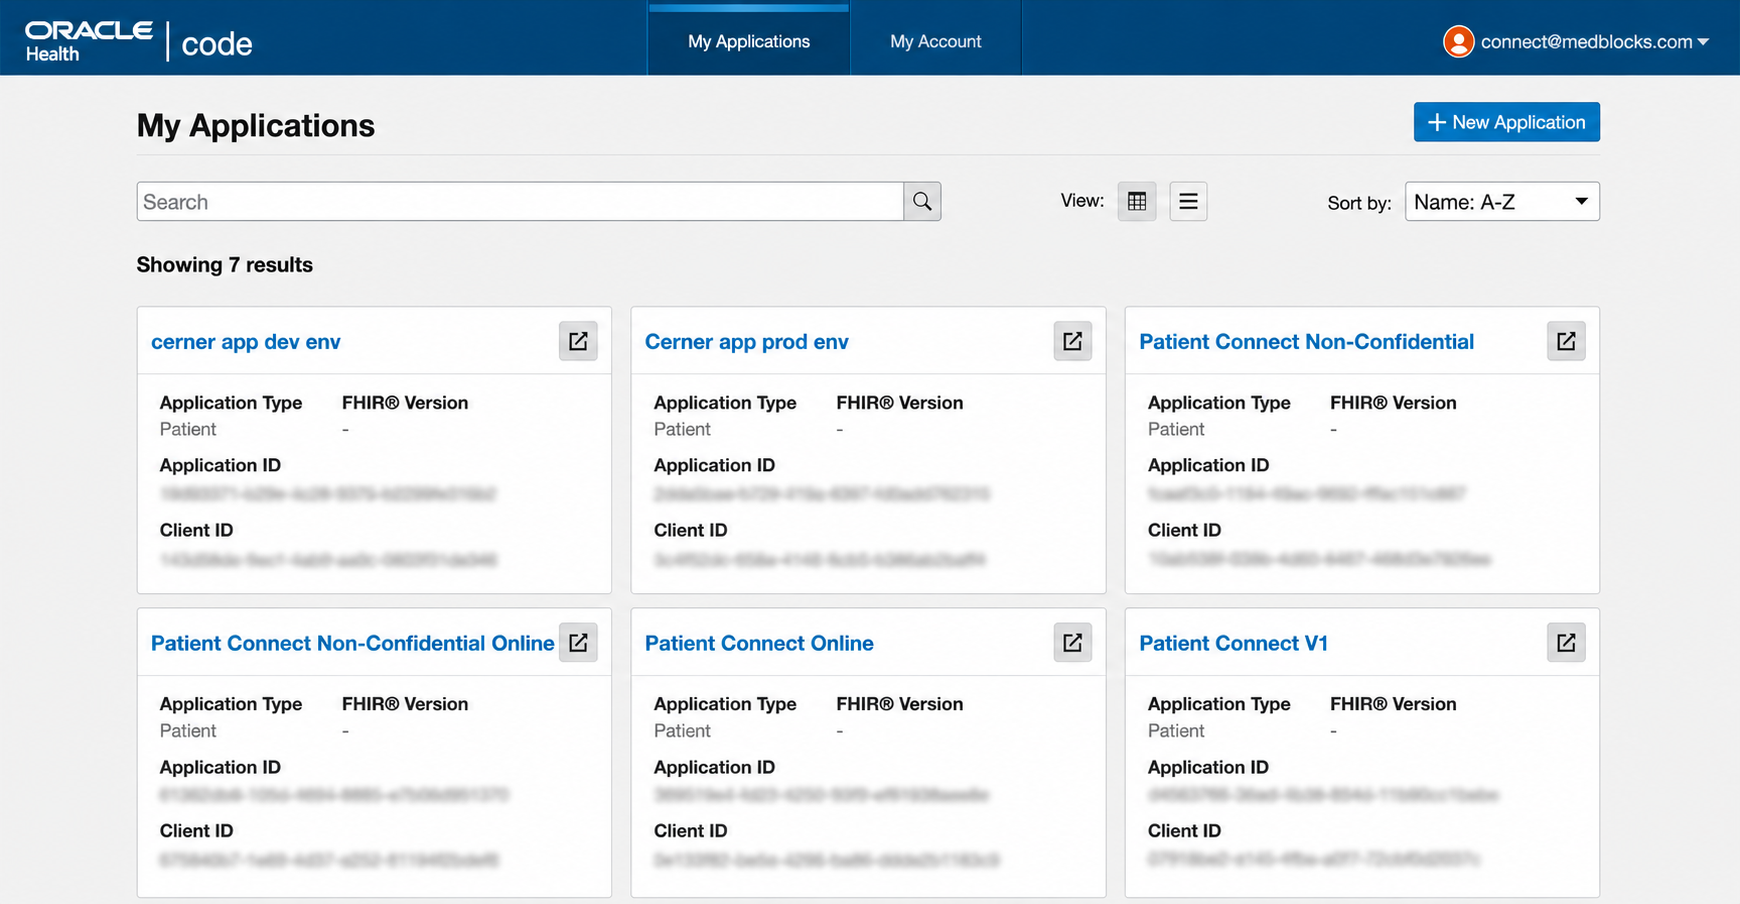
3. Fill in the application details.
| Field | Value |
| :-------------------- | :------------------------------------------------------------------------- |
| **App Name** | Your app name |
| **App Owner** | Your organization name |
| **App Type** | Patient |
| **Type of Access** | Offline |
| **SMART Version** | SMART v1 |
| **Intended Users** | Individual / Caregiver |
| **Intended Purposes** | Individuals’ Access to their EHI |
| **Redirect URI** | `https://app.medblocks.com/api/auth/smart/callback` for Medblocks Platform |
| **Type of Privacy** | Confidential |
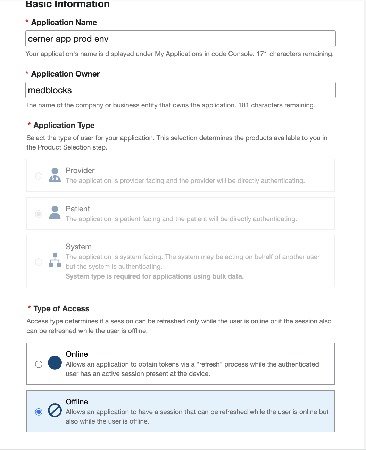
#### Public vs Confidential [#public-vs-confidential]
Select **Confidential** for Medblocks Platform. The platform has a backend that can hold the signing key safely, preserve the PKCE `code_verifier`, and send a signed `client_assertion` JWT during token exchange.
Public apps are only appropriate for browser-only or native clients that cannot hold a credential. That is not the Medblocks Platform flow.
### Configure Endpoint URIs [#3-configure-endpoint-uris]
Add a redirect URI for each environment you need.
```
http://localhost:3000/api/auth/smart/callback # local development
https://app.medblocks.com/api/auth/smart/callback # Medblocks Platform
```
**Using the Medblocks Platform?** Your callback URL is already handled. Use `https://app.medblocks.com/api/auth/smart/callback` as your production redirect URI, with no custom domain or backend setup needed.
Click **Add Another URI** if you need more environments (e.g. staging).
⚠️ **Critical:** The URI must match exactly, including protocol, domain, port, and path. Any mismatch causes an immediate `redirect_uri_mismatch` error before the patient sees the login screen.
### Configure Product Type [#4-configure-product-type]
Set the following.
* **Product Family:** `Millennium`
* **Products:** `Cerner FHIR APIs for Millennium: FHIR R4, All`
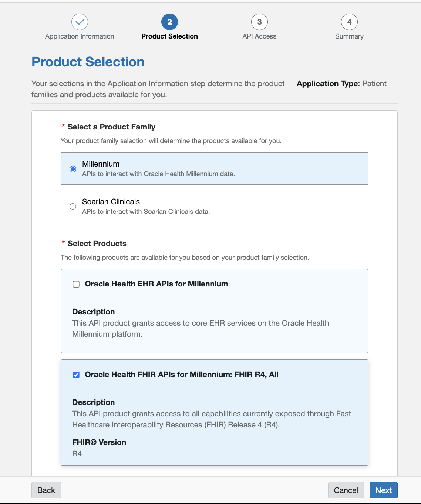
### Select Scopes [#5-select-scopes]
Select the API resources relevant to your use case. At minimum, include the following.
* **Patients**
* **Observations**
For full USCDI v1 coverage, also select the following.
* AllergyIntolerance, CarePlan, CareTeam, Condition, Device, DiagnosticReport, DocumentReference, Encounter, Goal, Immunization, MedicationRequest, Procedure, ServiceRequest, Coverage, RelatedPerson
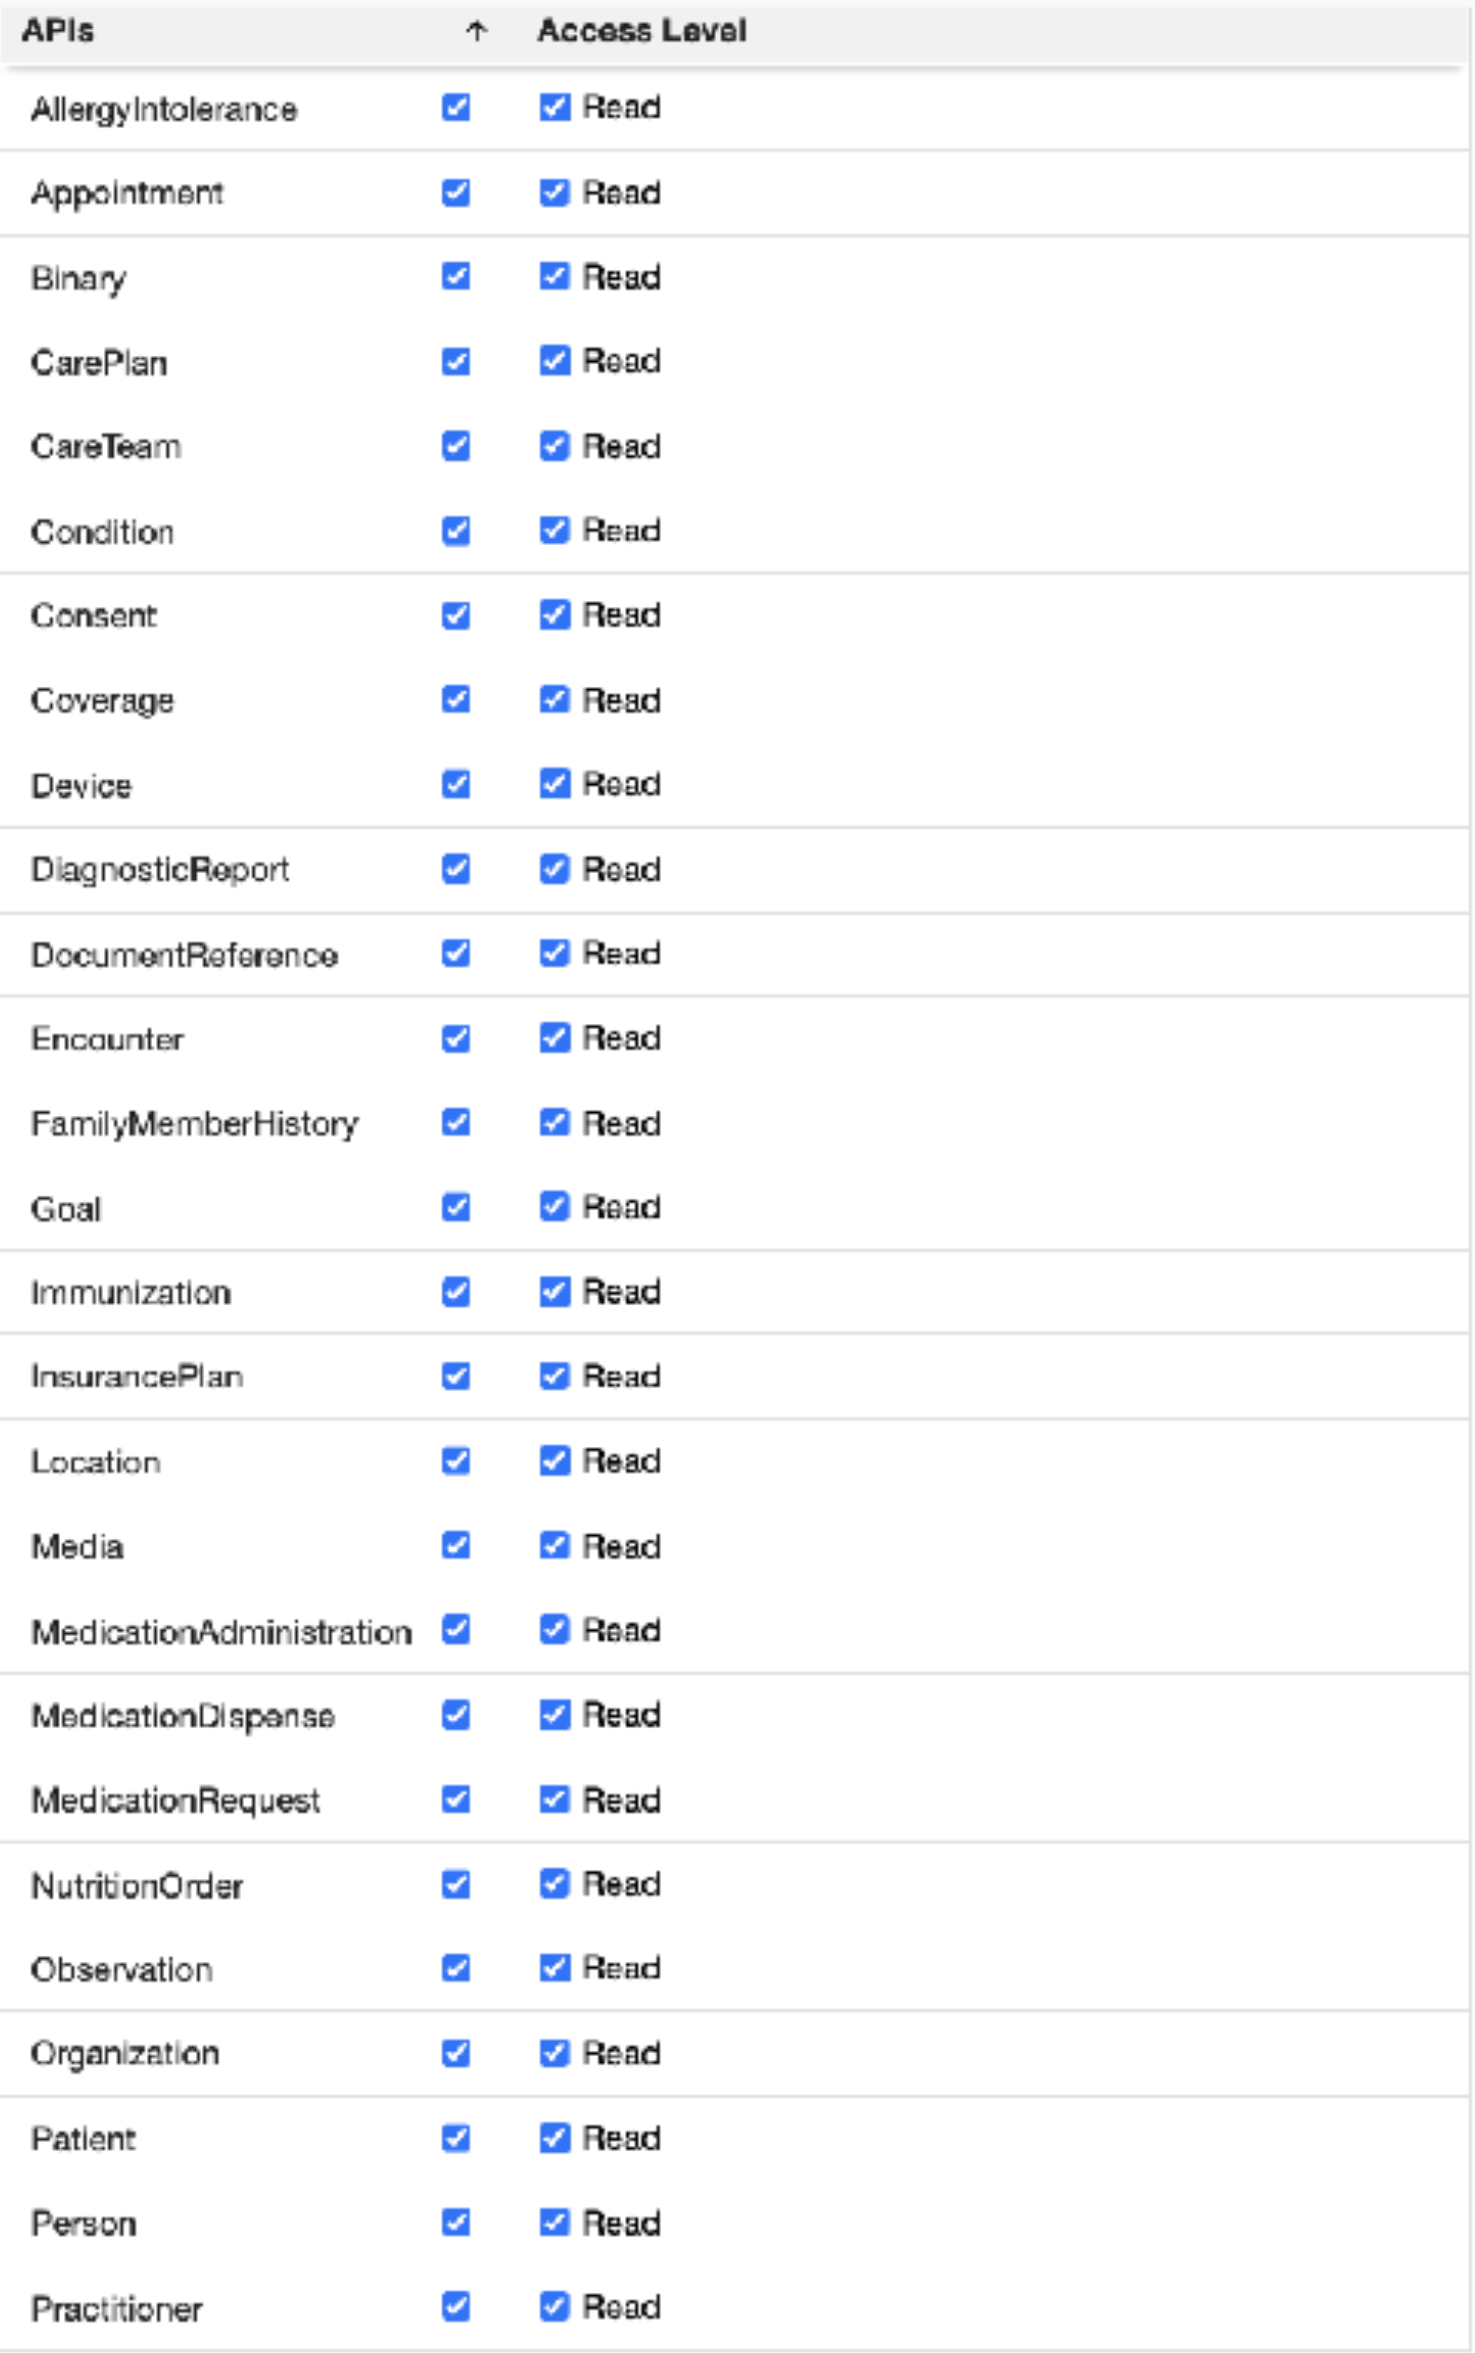
#### Important Notes on Scopes [#important-notes-on-scopes]
| Scope | Why it matters |
| :--------------- | :---------------------------------------------------------------------------------------------------------------------------------------- |
| `offline_access` | Required for refresh tokens. Without it the patient must re-authenticate every \~1 hour when the access token expires. |
| `fhirUser` | Required to identify the patient from the ID token’s `fhirUser` claim. Without it your backend cannot link the token to a patient record. |
| Scope mismatch | Only request scopes registered on the app. Any unregistered scope causes an `invalid_scope` error during authorization. |
### Set up Authentication [#6-set-up-authentication]
Cerner’s patient-facing flow has two pieces.
* **PKCE** binds the authorization request to the token exchange. The backend creates a `code_verifier`, sends the derived `code_challenge` to Cerner, then sends the original `code_verifier` when exchanging the code.
* **JWT client authentication** proves the confidential app’s identity. The backend signs a `client_assertion` JWT with its private key, and Cerner verifies it using the public key from the JWKS URI you register in the system account.
The token exchange should include the following.
* `client_id`
* `code`
* `redirect_uri`
* `grant_type=authorization_code`
* `code_verifier`
* `client_assertion_type=urn:ietf:params:oauth:client-assertion-type:jwt-bearer`
* `client_assertion`
Here is a minimal example of generating the PKCE pair server-side.
```ts
import { randomBytes, createHash } from "crypto";
const codeVerifier = randomBytes(96).toString("base64url"); // 128-char URL-safe string
const codeChallenge = createHash("sha256")
.update(codeVerifier)
.digest("base64url");
// Store codeVerifier server-side (e.g. encrypted session cookie)
// Send codeChallenge + code_challenge_method=S256 in the authorization request
// Send codeVerifier in the token exchange request
```
If you are integrating through Medblocks Platform, the platform handles the private key, JWT signing, JWKS endpoint, PKCE verifier storage, and token exchange. You only need to register the app as confidential and add the Medblocks JWKS URI in Cerner.
### Save your Client ID [#7-save-your-client-id]
After saving the application, Cerner assigns a **Client ID** in UUID format.
```
xxxxxxxx-xxxx-xxxx-xxxx-xxxxxxxxxxxx
```
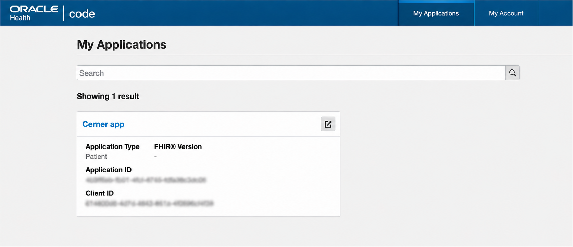
Copy this value. You will pass it as `client_id` in all authorization and token requests. If you are using the Medblocks Platform, enter it under **Settings → EHR Clients → Cerner**.
**Note:** The Client ID is **not a secret.** It appears in every authorization URL and is visible to anyone. App identity is proven by the signed `client_assertion` JWT, and the authorization code is protected by PKCE.
### Register your JWKS URI [#8-register-your-jwks-uri]
After creating your Confidential app, Cerner provisions a **System Account** for it. Register your JWKS URI there so Cerner can verify the JWT assertions your backend sends to the token endpoint.
1. Navigate to the system account page.
```
https://cernercentral.com/system-accounts/{your-client-id}
```
Replace `{your-client-id}` with the client ID from step 7.
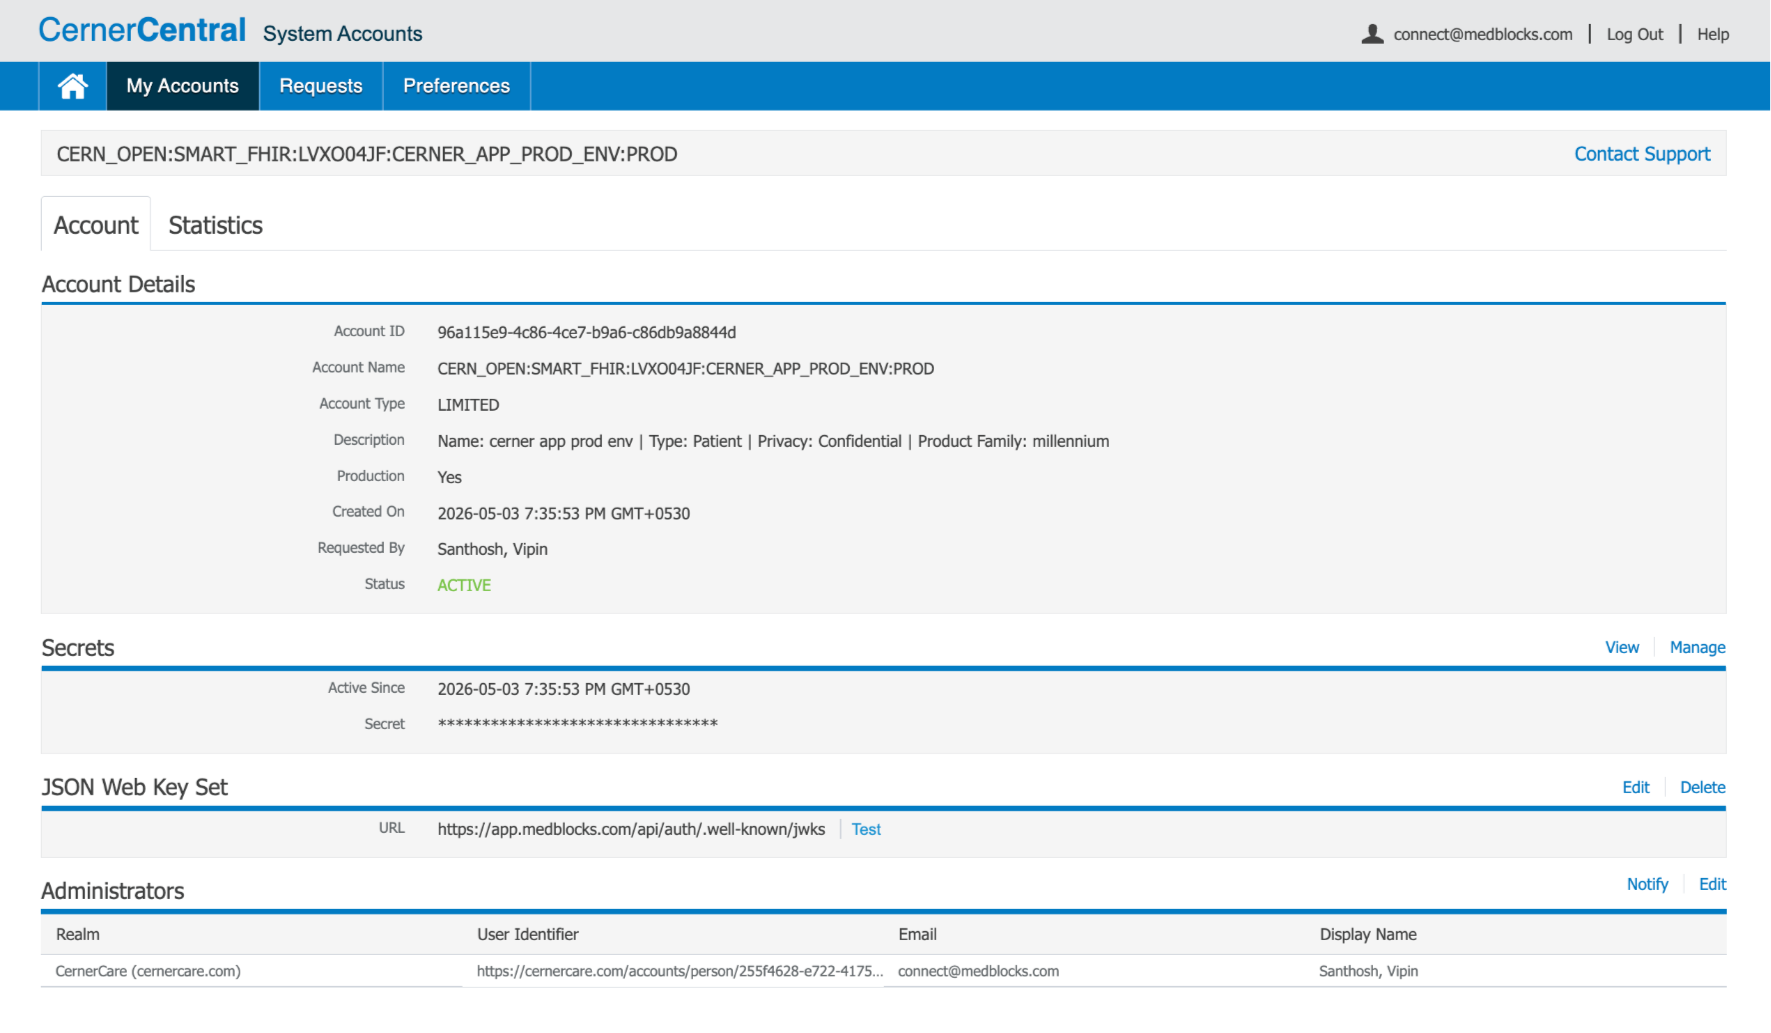
2. Under the **JSON Web Key Set** section, click **Edit**.
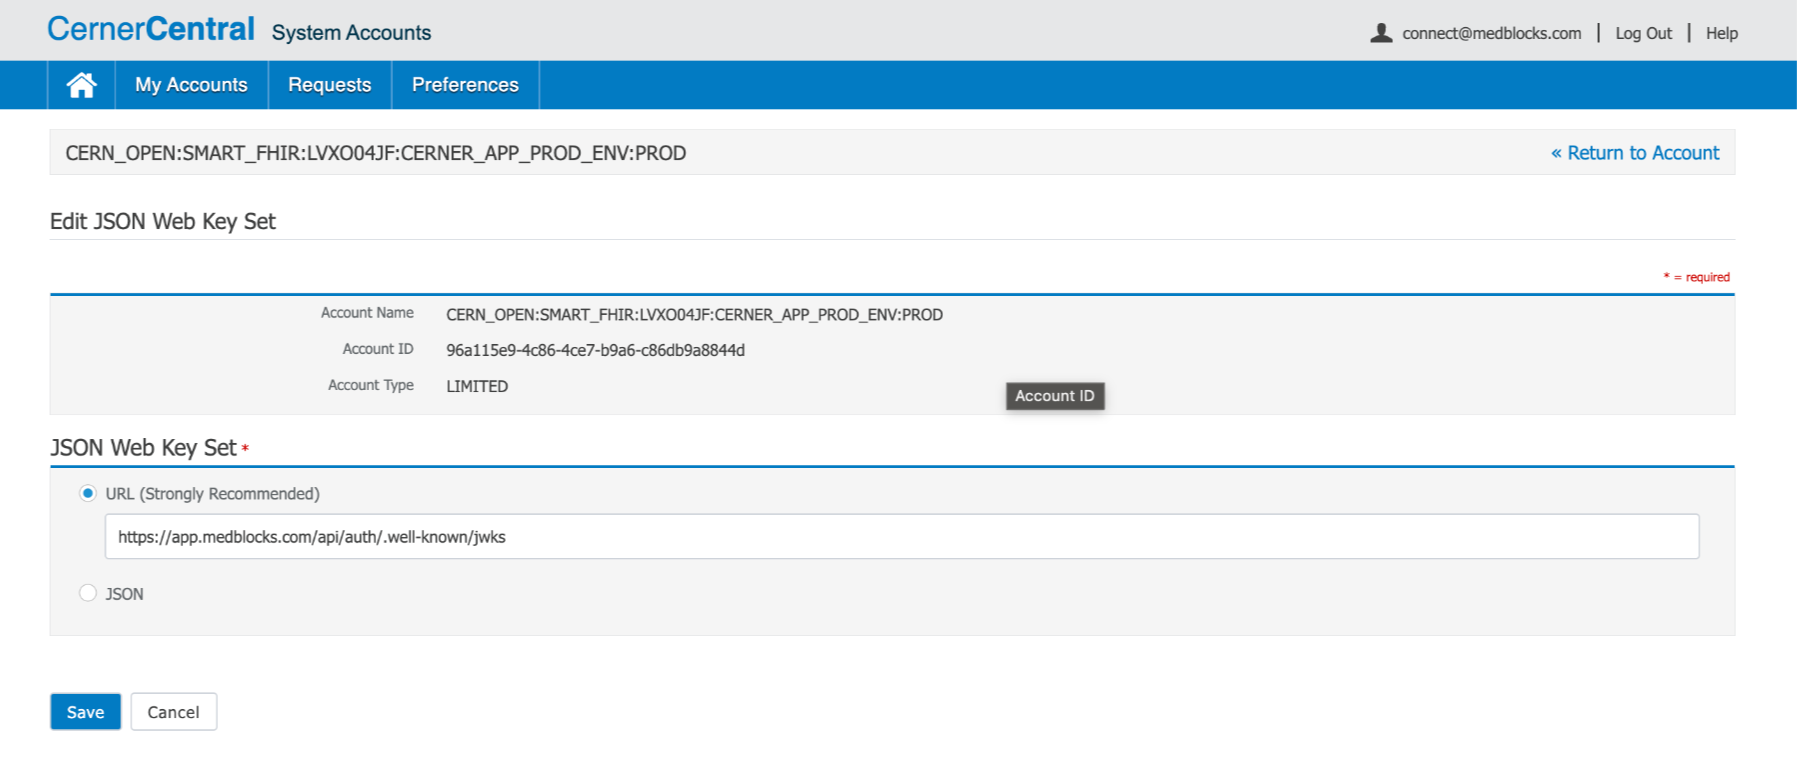
3. Enter the Medblocks Platform JWKS URI.
```
https://app.medblocks.com/api/auth/.well-known/jwks
```
4. Save. Cerner will fetch this public key set when verifying JWT assertions.
5. Enter the Client ID in the Medblocks admin panel under **Settings → EHR Clients → Cerner**.
**Verify the endpoint is reachable** before saving.
```shell
curl https://app.medblocks.com/api/auth/.well-known/jwks
```
It should return a JSON object with a `keys` array containing your RSA public key.
If you are self-hosting instead of using Medblocks Platform, generate and store your own private key, expose its public key as JWKS over HTTPS, and sign the `client_assertion` JWT with a `kid` that matches one of the keys in that JWKS.
### Test with Cerner Sandbox [#9-test-with-cerner-sandbox]
Cerner provides a sandbox environment per tenant. Each hospital has its own `tenant_id` embedded in its FHIR base URL.
#### Sandbox Endpoint Structure [#sandbox-endpoint-structure]
| Endpoint | URL |
| :----------------- | :----------------------------------------------------------------------------------------------------------------------------- |
| **FHIR Base** | `https://fhir-myrecord.cerner.com/r4/{tenant_id}` |
| **Auth Endpoint** | `https://authorization.cerner.com/tenants/{tenant_id}/protocols/oauth2/profiles/smart-v1/personas/patient/authorize` |
| **Token Endpoint** | `https://authorization.cerner.com/tenants/{tenant_id}/hosts/fhir-myrecord.cerner.com/protocols/oauth2/profiles/smart-v1/token` |
You can discover these endpoints programmatically from the SMART configuration endpoint.
```
GET https://fhir-myrecord.cerner.com/r4/{tenant_id}/.well-known/smart-configuration
```
### Activate Organizations [#10-activate-organizations]
Unlike Epic’s USCDI v3 auto-distribution, Cerner does **not** have a global “mark ready for production” button that pushes your app to all organizations automatically.
Production access is **per-organization**. For each Cerner customer hospital you want to support, do the following.
1. Contact the organization’s Cerner integration or IT team
2. Provide them with the following.
* Your **Client ID**
* Your **production redirect URI** (`https://app.medblocks.com/api/auth/smart/callback` for Medblocks Platform)
* The **list of scopes** your app requests
3. They activate your app within their Cerner tenant configuration
4. Use their FHIR base URL to build your authorization request.
```
https://fhir-myrecord.cerner.com/r4/{their_tenant_id}
```
Once activated, patients at that organization can authenticate and pull their health records through your app.
### Add the Source in Medblocks Platform [#11-add-the-source-in-medblocks-platform]
Once a Cerner organization has activated your app, do the following.
1. Navigate to **Settings → EHR Clients → Cerner** in the Medblocks admin panel
2. Enter your **Client ID** if you haven’t already
3. The organization’s FHIR base URL (`https://fhir-myrecord.cerner.com/r4/{tenant_id}`) needs to be added to the Medblocks FHIR sources database. Contact Medblocks support to get this added for each new organization
Once the FHIR source is added, patients at that organization will see Cerner as a connect option in your app.
## FHIR API Usage [#fhir-api-usage]
After token exchange, fetch patient resources using the following request.
```
GET https://fhir-myrecord.cerner.com/r4/{tenant_id}/{Resource}
Authorization: Bearer {access_token}
Accept: application/fhir+json
```
### Resources Available via Cerner FHIR R4 [#resources-available-via-cerner-fhir-r4]
| Resource | Description |
| :------------------- | :------------------------- |
| `Patient` | Demographics |
| `AllergyIntolerance` | Allergies and intolerances |
| `CarePlan` | Care plans |
| `CareTeam` | Care team members |
| `Condition` | Problems and diagnoses |
| `Device` | Implanted / used devices |
| `DiagnosticReport` | Lab and imaging reports |
| `DocumentReference` | Clinical documents |
| `Encounter` | Visits and encounters |
| `Goal` | Patient goals |
| `Immunization` | Vaccination history |
| `MedicationRequest` | Prescriptions |
| `Observation` | Labs and vital signs |
| `Procedure` | Performed procedures |
| `ServiceRequest` | Ordered services |
| `Coverage` | Insurance coverage |
| `RelatedPerson` | Family / related contacts |
## Token Lifecycle [#token-lifecycle]
| Token | Lifetime | Behaviour |
| :-------------- | :------- | :----------------------------------------- |
| `access_token` | \~1 hour | Used as Bearer token on all FHIR API calls |
| `refresh_token` | Rolling | Each use issues a brand new refresh token |
Refresh tokens should be stored securely server-side. If a refresh token expires (patient inactive for an extended period), the patient must re-authenticate from scratch.
## Common Errors and Fixes [#common-errors-and-fixes]
| Error | Cause | Fix |
| :---------------------- | :-------------------------------------------------- | :----------------------------------------------------------------- |
| `redirect_uri_mismatch` | URI does not exactly match the registered value | Check protocol (`http`/`https`), trailing slashes, full path |
| `invalid_grant` | Authorization code expired or already used | Codes are single-use with \~1 min expiry, never reuse or cache |
| `invalid_scope` | A scope in the request is not registered on the app | Only request scopes approved at app registration |
| `invalid_client` | Wrong Client ID | Verify the UUID from code-console.cerner.com |
| `401 Unauthorized` | Expired access token sent to FHIR API | Refresh the access token before it expires |
| `CORS error` | FHIR call made directly from the browser | All FHIR calls must go through your backend, never from the client |
| No patient context | `fhirUser` scope is missing | Add `fhirUser` to the app’s scope list and re-register |
## See also [#see-also]
* [Create a patient session](/docs/patient-access/create-patient-session)
* [Find connections](/docs/patient-access/find-connections)
---
# CMS Blue Button
Guide to integrate with the CMS Blue Button 2.0 Medicare claims API.
Source URL: /docs/patient-access/cms-blue-button
# CMS Blue Button
Guide to integrate with the CMS Blue Button 2.0 Medicare claims API.
CMS Blue Button 2.0 is the federal Medicare claims API. Any Medicare enrollee can authorize a third-party app to retrieve their Patient, Coverage, and Explanation of Benefit data over OAuth 2.0 / SMART on FHIR. Integrate with [CMS Blue Button](https://bluebutton.cms.gov/) to enhance care coordination for Medicare beneficiaries.
This is a step-by-step guide to registering a patient-facing app on the CMS Blue Button developer sandbox, testing against CMS’s synthetic beneficiaries, and submitting for production access. Unlike Epic or Cerner where each health system registers the app, CMS Blue Button is **app-global**: one client\_id serves every Medicare beneficiary nationwide once production access is granted.
## Setup Guide [#setup-guide]
### Prerequisites [#prerequisites]
If you’re serious about serving US Medicare beneficiaries, having a US company will help with the production-access review. [Stripe Atlas](https://stripe.com/atlas) and [StartFleet](https://www.startfleet.io/) can get you a registered US entity with a real address in minutes.
For a US phone number, [Tello](https://tello.com/) gives you a virtual SIM with a real number, CMS asks for a customer support phone on the production application. Grab a domain on [Namecheap](https://www.namecheap.com/) and set up a business email with [Google Workspace](https://workspace.google.com/). If you’re using the Medblocks Platform, you can use `app.medblocks.com` as your domain and skip the domain setup entirely.
Since you’ll be serving US Medicare enrollees, you’ll need US infrastructure anyway. Set up a VM in a US cloud region, install [Tailscale](https://tailscale.com/), and use it as your exit node, this gives you a clean, stable US IP for development and testing.
You’ll also need:
* A publicly accessible domain with HTTPS for your redirect URI, or use `app.medblocks.com` if you’re on the Medblocks Platform
* A server-side backend that can handle the OAuth callback and store tokens securely (the client secret must never reach the browser)
* A **privacy policy** and **terms of service** published at a stable URL, CMS reviews both before granting production access
### Create a Developer Account [#1-create-a-developer-account]
1. Go to the [CMS Blue Button Sandbox](https://sandbox.bluebutton.cms.gov/) and sign up with a business email.
2. CMS sends a verification link, confirm it before proceeding.
3. Sign in and you’ll land on the **Developer Dashboard**.
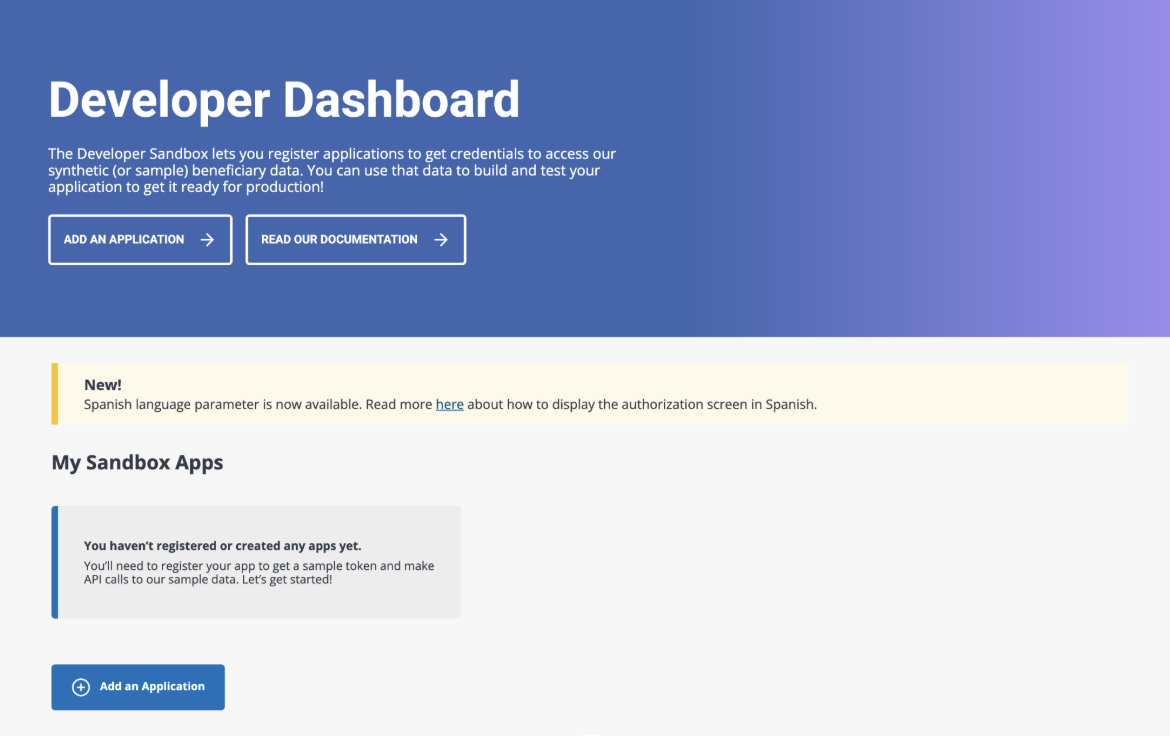
### Register a Sandbox Application [#2-register-a-sandbox-application]
1. From the Developer Dashboard, click **Add an Application** (or the **ADD AN APPLICATION** button in the hero).
2. You land on the **Register a New Application** form.
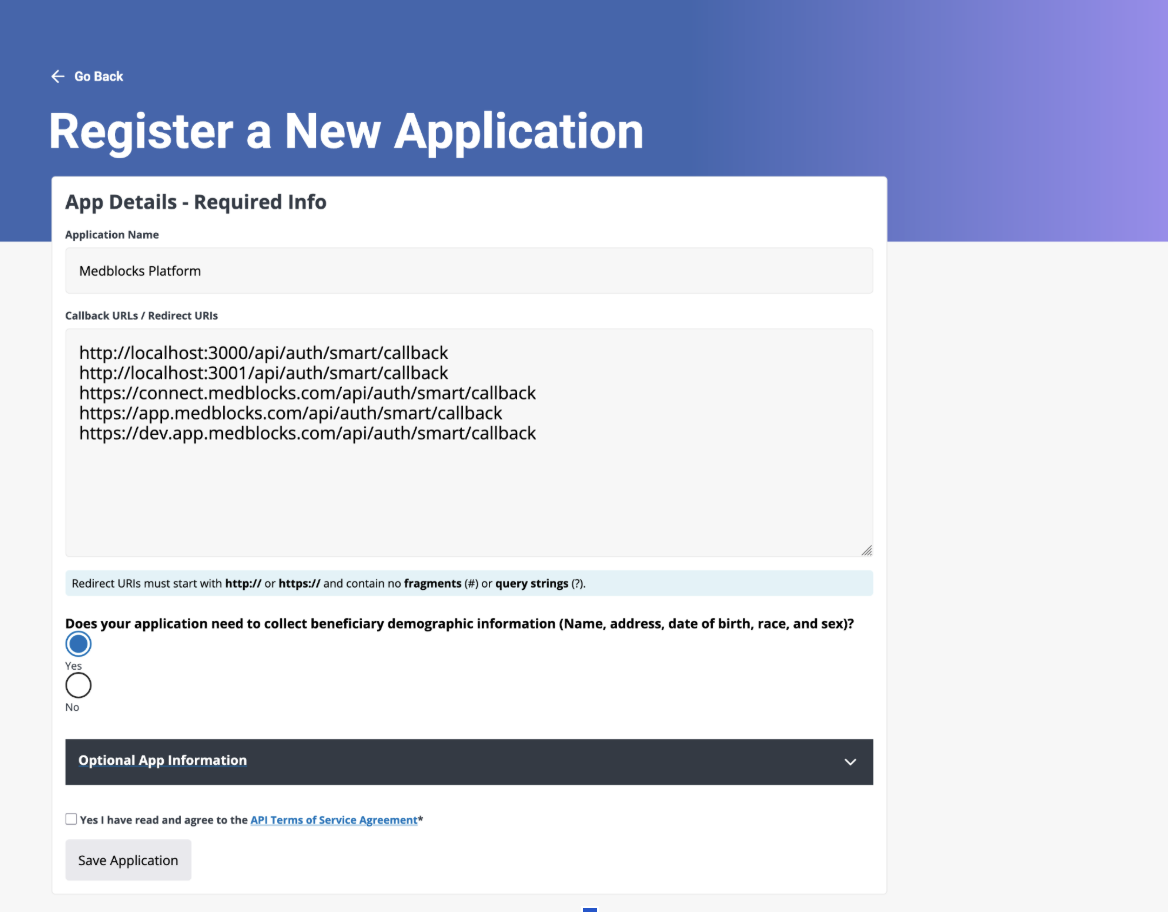
3. Fill in **App Details, Required Info**:
* **Application Name**, your product’s user-facing name. This is what beneficiaries see on the CMS consent screen and on medicare.gov’s “My Connected Apps”.
* **Callback URLs / Redirect URIs**, one per line. Must start with `http://` or `https://` and contain no fragments (`#`) or query strings (`?`).
* **Does your application need to collect beneficiary demographic information?**, Yes if you need name, address, date of birth, race, sex. Selecting Yes means the CMS consent screen surfaces a `Personal Information` toggle the beneficiary can uncheck.
Register every redirect URI you’ll use end-to-end, local dev, staging, and production:
* [http://localhost:3000/api/auth/smart/callback](http://localhost:3000/api/auth/smart/callback)
* [https://staging.yourdomain.com/api/auth/smart/callback](https://staging.yourdomain.com/api/auth/smart/callback)
* [https://app.yourdomain.com/api/auth/smart/callback](https://app.yourdomain.com/api/auth/smart/callback)
If you’re on the Medblocks Platform, your backend already exposes `/api/auth/smart/callback`, just register the hostnames you deploy to, including `https://app.medblocks.com/api/auth/smart/callback`.
### Optional App Information [#3-optional-app-information]
This section is technically optional for sandbox, but **filling it in now is required for production access**, and it simulates what real Medicare beneficiaries will see on the consent screen, so it’s worth doing right the first time.
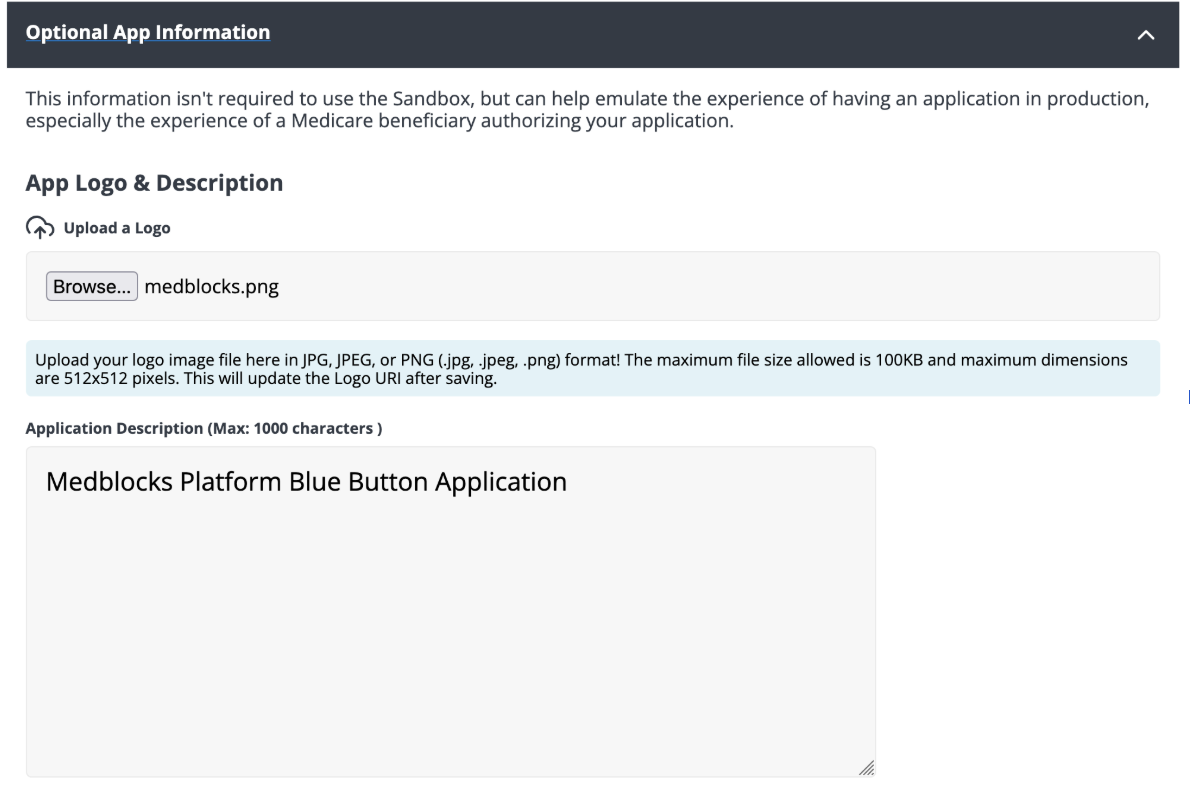
1. **Upload a Logo**, JPG, JPEG, or PNG, max 100 KB, max 512×512 px. This appears next to your app name on the consent screen and in the beneficiary’s connected-apps list. Use the same logo you publish elsewhere.
2. **Application Description**, up to 1000 characters. Plain-English description of what your app does with Medicare data. Cover what data you pull, who sees it, and the purpose. Keep it patient-readable, this is the description CMS reviewers will compare to your actual user-facing screens during the production demo.
### Organization & Policy Info [#4-organization--policy-info]
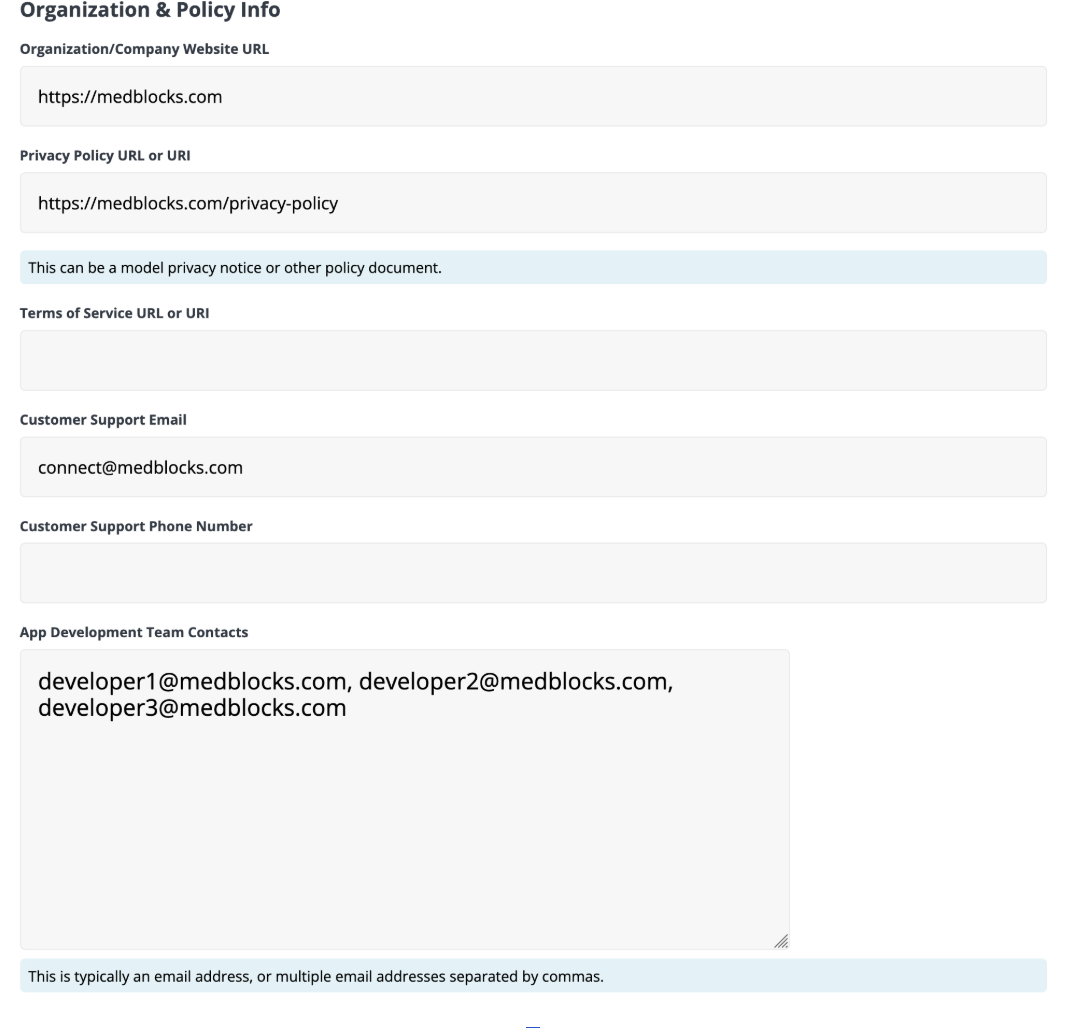
Fill in:
* **Organization / Company Website URL**, your company’s marketing site.
* **Privacy Policy URL**, a live page covering the CMS-required sections: collection, use, sharing, retention after revocation, dormant-account handling, breach notification, and data handling on company sale. If you’re on the Medblocks Platform, `docs/medblocks-privacy-policy.md` in the connect-web repo is a starting template.
* **Terms of Service URL**, leave blank for sandbox; **required for production**, point it at your hosted ToS.
* **Customer Support Email**, a monitored inbox. CMS uses this address for sandbox notifications and review correspondence.
* **Customer Support Phone Number**, optional for sandbox; **strongly recommended** for production, CMS reviewers may try to call.
* **App Development Team Contacts**, comma-separated list of 2–4 engineers CMS can reach for technical issues.
### Accept the Agreement and Save [#5-accept-the-agreement-and-save]

1. Tick **Yes I have read and agree to the API Terms of Service Agreement**, read it; it covers attribution requirements (the “not endorsed by CMS” disclaimer) and prohibited uses (no advertising, no profiling, no sale of data).
2. Click **Save Application**.
You’re redirected to the application detail page.
### Save your Client ID and Client Secret [#6-save-your-client-id-and-client-secret]
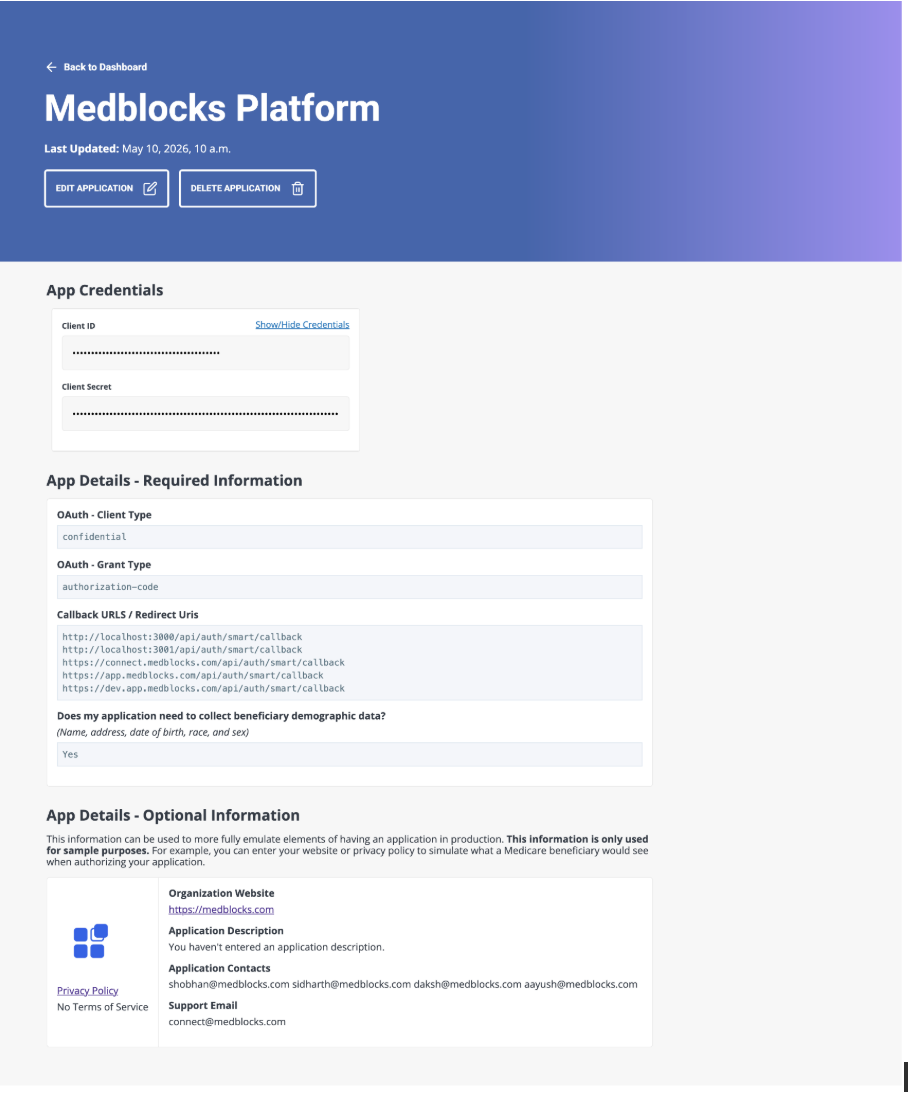
1. In **App Credentials**, click **Show/Hide Credentials** to reveal the Client ID and Client Secret. Copy both into your secret manager **immediately**, a leaked secret means re-registering the app.
2. Plug the credentials into Medblocks:
* Go to **Settings**.
* Select **Connections**.
* Find **Medicare** and open it.
* Toggle **Use custom credentials**, paste your Client ID and Client Secret, and **Save**.
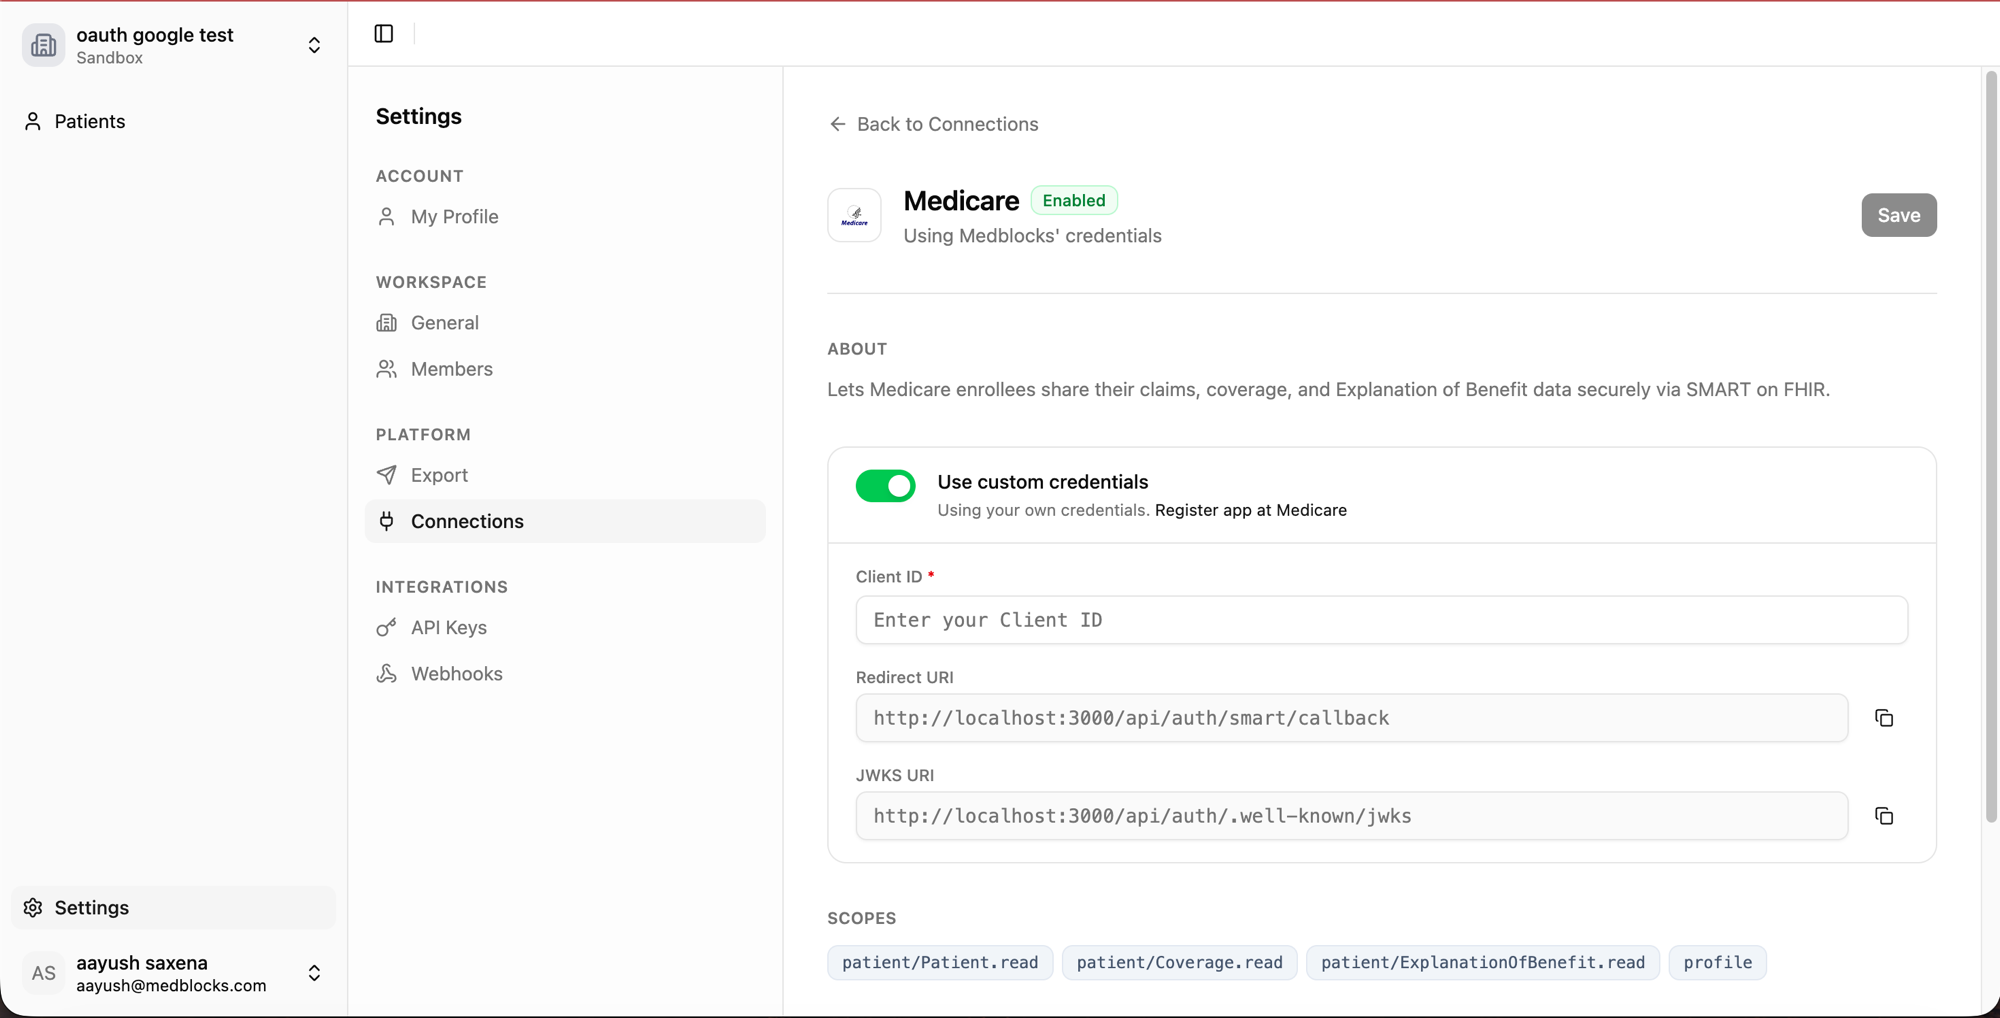
3. The App Details panel on the CMS dashboard confirms the configuration:
* OAuth Client Type, `confidential` (because we registered a secret)
* OAuth Grant Type, `authorization-code`
* All callback URIs we registered
* Demographic data flag, Yes
### Test with Sandbox Synthetic Users [#7-test-with-sandbox-synthetic-users]
CMS provides \~30 synthetic Medicare beneficiaries (`BBUser00000` through `BBUser00029`, passwords `PW00000!` through `PW00029!`) with pre-populated claims. No real Medicare account is required, synthetic credentials are accepted by the CMS BB sandbox login flow.
Sandbox endpoints:
| Endpoint | URL |
| --------- | ---------------------------------------------------------------------------------------------------------------- |
| Authorize | [https://sandbox.bluebutton.cms.gov/v2/o/authorize/](https://sandbox.bluebutton.cms.gov/v2/o/authorize/) |
| Token | [https://sandbox.bluebutton.cms.gov/v2/o/token/](https://sandbox.bluebutton.cms.gov/v2/o/token/) |
| FHIR base | [https://sandbox.bluebutton.cms.gov/v2/fhir/](https://sandbox.bluebutton.cms.gov/v2/fhir/) |
| JWKS | [https://sandbox.bluebutton.cms.gov/v2/o/jwks/](https://sandbox.bluebutton.cms.gov/v2/o/jwks/) |
| UserInfo | [https://sandbox.bluebutton.cms.gov/v2/connect/userinfo](https://sandbox.bluebutton.cms.gov/v2/connect/userinfo) |
| Revoke | [https://sandbox.bluebutton.cms.gov/v2/o/revoke\_token/](https://sandbox.bluebutton.cms.gov/v2/o/revoke_token/) |
Test flow:
1. From your app, trigger a Medicare connect.
2. The browser redirects to `sandbox.bluebutton.cms.gov/v2/o/authorize/?...&aud=https://sandbox.bluebutton.cms.gov/v2/fhir/`.
3. CMS BB redirects to `medicare.gov/account/login` for SSO.
4. Sign in as a synthetic user, e.g. `BBUser00001` / `PW00001!`.
5. On the CMS BB consent screen, click **Connect**.
6. CMS redirects to your registered callback with `?code=...&state=...`.
7. Your backend exchanges the code for tokens, Basic auth header with `client_id:client_secret`, plus `code_verifier` from PKCE.
8. Token response includes `access_token`, `refresh_token`, `patient` (synthetic beneficiary id, e.g. `-10000010254647`), `scope`. **No `id_token`**, fetch `/v2/connect/userinfo` with the access token to resolve identity.
9. Fetch `Patient/{id}`, `Coverage?beneficiary=Patient/{id}`, `ExplanationOfBenefit?patient={id}`. Synthetic users have 30+ EOB records each.
Known sandbox quirks:
* **Rate limits** are tighter than production (\~10 req/s/app). The worker must handle `429` with `Retry-After`-aware backoff or you’ll see “Assembly Rate Limit exceeded” errors.
* **No `id_token`**, CMS BB does not issue id\_tokens. Use the `/v2/connect/userinfo` endpoint instead, or use the `patient` claim from the token response and fetch `Patient/{id}` directly.
### Apply for Production Access [#8-apply-for-production-access]
CMS reviews every app individually before granting production credentials. The review takes 2–4 weeks and includes a live demo of the user journey.
Before contacting CMS, verify:
* Sandbox integration works end-to-end, at least one successful Patient + Coverage + EOB pull.
* Privacy policy is published at a stable URL and covers all CMS-required sections.
* Terms of service is published at a stable URL.
* Consent screen shows the inviting organization name (`Shared with: `).
* Beneficiary can revoke access, either an in-app disconnect button or a documented email path (e.g. `privacy@yourdomain.com`) with a documented 30-day deletion SLA.
* Disconnect stops future retrievals and clears locally stored Medicare credentials after the final workspace grant is revoked.
Send a production access request to **[BlueButtonAPI@cms.hhs.gov](mailto:BlueButtonAPI@cms.hhs.gov)** from the customer support email you registered on the sandbox app. CMS replies within a few business days with a request form and a link to schedule a demo.
At minimum include your sandbox `client_id`, your privacy policy URL, your terms of service URL, the list of production redirect URIs, and a one-paragraph description of what your application does with Medicare data. Anything else CMS needs they’ll ask for via the request form.
After approval, CMS schedules a 30–45 minute Zoom demo. Have ready: a live walkthrough of beneficiary signup, consent dialog, Medicare connection, data display, and revocation; your privacy policy and ToS open in another tab; your security writeup. CMS may request follow-ups on retention, the unlink workflow, or data sharing, respond within 48 hours.
Once approved, CMS issues a **production client\_id and client\_secret** via secure file transfer. In your Medblocks dashboard, go to **Settings → Connections → Medicare**, switch to **Custom credentials**, and paste the production values. The platform repoints the FHIR endpoints to production (`https://api.bluebutton.cms.gov/v2/...`) automatically.
## Common Errors and Fixes [#common-errors-and-fixes]
* `invalid_client` on token exchange, client secret mismatch, or PKCE verifier missing/wrong. Confirm the Client Secret in **Settings → Connections → Medicare** matches the CMS dashboard, and that you’re sending PKCE `code_verifier` alongside the secret.
* `invalid_grant` on token exchange, authorization code already used, or `redirect_uri` does not exactly match the one used on `/authorize`. Codes are single-use. Make sure the callback URL passed to token exchange is byte-identical to the one on the authorize URL (case, trailing slash).
* `429 Too Many Requests` / `Assembly Rate Limit exceeded`, sandbox rate limits. Implement `Retry-After`-aware backoff. Cap concurrency per worker.
* `404 No resources match requested URI` on `Patient/{id}`, wrong base URL (e.g. hitting the production base while connected to sandbox). Verify the configured FHIR source matches the environment that issued the token.
* `401` on FHIR fetch after months of success, either access token expired (refresh it) or the 13-month consent window lapsed. Refresh first; if refresh also 401s, prompt the beneficiary to re-connect Medicare.
* Consent screen shows app name “BlueButton Client (Test - Internal Use Only)” instead of yours, using CMS’s default test app credentials, not your own. In **Settings → Connections → Medicare**, confirm Custom credentials is selected and the Client ID matches your sandbox app’s.
---
# Create a patient session
Pick who renders connection search. Let Medblocks host the page, or build it into your own UI.
Source URL: /docs/patient-access/create-patient-session
# Create a patient session
Pick who renders connection search. Let Medblocks host the page, or build it into your own UI.
To pull a patient’s records, you first need them to sign in to their hospital’s patient portal, such as MyChart, and approve access for your app. That sign-in is the [authorization](/docs/patient-access/authorization) step. There are two ways to put it in front of the patient. You can let Medblocks host the page, or build it into your own UI and send the patient straight to the hospital they chose.
Both end the same way. The patient runs through the same authorization, you get back the same [patient session](/docs/patient-access/patient-session), and you read the same [connection](/docs/patient-access/patient-session#checking-how-it-went) result. The only thing that differs is who renders connection search, where the patient finds and selects the hospital or clinic whose records you want to pull.
## How to choose [#how-to-choose]
The split comes down to three things, who renders connection search, how much control you have over how it looks and feels, and how much you build.
| | Medblocks-hosted page | Your own UI |
| ----------------------------- | ----------------------------------------------------------------------------------------------- | --------------------------------------------------------------------------------- |
| Who renders connection search | Medblocks, on the page you redirect to | You, inside your app |
| UX and branding control | The page is themed to your brand, but the layout and copy are Medblocks’ | Full control. The search is part of your product |
| What you build | A redirect. Your server starts the session, then you send the patient to the `url` you get back | Search on top of the connection catalog, plus the redirect once the patient picks |
With the Medblocks-hosted page, your app does not need to know which connection the patient uses, and you build no search UI. The patient searches the catalog, picks a connection, and approves, all on the hosted page. That is the fastest way to launch.
With your own UI, you search the connection catalog yourself (see [Find connections](/docs/patient-access/find-connections)), show the results however you like, and pass the connection the patient picked into the session. The patient lands on their portal login directly, having never left your design.
Reach for the Medblocks-hosted page when you want the fastest launch and are happy to let Medblocks render connection search. Reach for your own UI when picking a connection is part of your product, like an intake or trial-matching flow where the choice carries its own context, or when you need full control of the experience.
You are not locked in. You can use both in the same product, for example offering your own search and falling back to the hosted page when a patient cannot find their hospital.
## See also [#see-also]
* [Medblocks-hosted page](/docs/patient-access/create-patient-session/medblocks-hosted-page)
* [Your own UI](/docs/patient-access/create-patient-session/your-own-ui)
* [Find connections](/docs/patient-access/find-connections)
---
# Medblocks-hosted page
The least-code way to connect a patient. Start a session, send them to the URL you get back, and let Medblocks render the page where they find their hospital and approve.
Source URL: /docs/patient-access/create-patient-session/medblocks-hosted-page
# Medblocks-hosted page
The least-code way to connect a patient. Start a session, send them to the URL you get back, and let Medblocks render the page where they find their hospital and approve.
Once you have a `patient_id`, start the browser journey that lets the patient approve access. This is the simplest way to connect a patient. Your app starts a [patient session](/docs/patient-access/patient-session), sends the patient to the returned `url`, and lets Medblocks render the page where the patient finds their hospital or clinic. After the patient chooses a connection, they sign in to that patient portal and approve access for your app. They return to the `return_url` you set.
On the Medblocks-hosted page, the patient searches the connection catalog before signing in to their patient portal.
## Start the session [#start-the-session]
Use this page when you want the patient to choose their connection after they leave your app. Your server starts the session with the patient’s ID and a `return_url`, and Medblocks returns a `url` for the patient. If you already know likely connections, pass them as `recommended_connection_ids` so they appear first.
If your app already has the exact connection the patient chose, use [your own UI](/docs/patient-access/create-patient-session/your-own-ui) instead. That path sends the patient straight to that facility’s patient portal.
Your API key is a secret that lives only on your server, so the browser calls a route on your server and never the Medblocks API directly. The browser fetches that route and redirects the patient to the `url` it returns.
```ts title="server/start-patient-session.ts"
import { mb } from "../medblocks";
export async function initPatientSession(input: { patientId: string }) {
const session = await mb.patientSession.init({
patient_id: input.patientId,
return_url: "https://app.example.com/connected",
return_button_label: "Back to Acme Health",
});
return { url: session.url };
}
```
```ts title="src/start-patient-session.ts"
async function startSession(patientId: string) {
const response = await fetch("/api/patient-sessions", {
method: "POST",
headers: { "Content-Type": "application/json" },
body: JSON.stringify({ patientId }),
});
const { url } = await response.json();
window.location.href = url;
}
```
## Return button [#return-button]
The hosted page ends on a Medblocks completion screen. At the bottom of that screen, Medblocks shows a button that sends the patient back to your app.
* `return_url` is the destination for that button.
* `return_button_label` is the button text the patient sees.
Use product-specific wording. `Back to Acme Health`, `Continue`, or `Return to intake` read better than a generic label.
The hosted page shows your return button after the patient finishes connecting records.
When the patient taps the button, Medblocks redirects to your `return_url` with the patient ID and the patient session ID.
```text
https://app.example.com/connected?patient_id=user_42&patient_session_id=ps_...
```
## Recommended connections [#recommended-connections]
Pass `recommended_connection_ids` when you already have a good guess at which facilities the patient uses. Those connections appear at the top of the hosted search, and the patient can still search for any other facility.
Recommended connections appear first, but the patient can still search for other facilities.
Omit `recommended_connection_ids` when you do not have suggested facilities to show first.
## Next step [#next-step]
The patient lands on your `return_url` with `patient_id` and `patient_session_id` in the query string. Continue to [Handle the return](/docs/patient-access/handle-the-return) to read those params and show which facilities connected.
## Common errors [#common-errors]
| Code | Meaning |
| ------------------------- | ---------------------------------------------------------------------------------- |
| `invalid_api_key` | The API key is missing, invalid, or expired. |
| `unsupported_api_version` | The `Version` header is not supported. |
| `resource_not_found` | A recommended connection ID does not exist or is not visible to your organization. |
| `bad_request` | Request fields are missing, malformed, or mutually exclusive. |
Read the full envelope and code list in [Errors](/docs/reference/errors).
## See also [#see-also]
* [Your own UI](/docs/patient-access/create-patient-session/your-own-ui)
* [Handle the return](/docs/patient-access/handle-the-return)
* [Patient session](/docs/patient-access/patient-session)
---
# Your own UI
Build connection search into your own app, then send the patient straight to the facility they chose.
Source URL: /docs/patient-access/create-patient-session/your-own-ui
# Your own UI
Build connection search into your own app, then send the patient straight to the facility they chose.
After the patient has chosen a connection in your UI, start a session for that specific facility. Build connection search into your own app wherever it fits, an intake form, a trial-matching flow, an account settings page, or a dedicated search screen. The patient chooses a connection, you start a [patient session](/docs/patient-access/patient-session) for that connection, and they land directly on that facility’s patient portal to sign in. Reach for this when choosing a facility is part of your product experience, or when you want full control of the look and feel.
The rest of the flow is unchanged. The patient signs in to their hospital’s patient portal, approves access for your app through [authorization](/docs/patient-access/authorization), and returns to you. Medblocks then pulls their records in the [background](/docs/patient-access/background-pull).
## Find the connection [#find-the-connection]
The patient chooses a connection in your UI, and you keep its connection ID, which looks like `fhirsrc_01J9YR9N3X4VZ6P2K5RH7M3LMP`. That ID is what you pass into the session below. [Find connections](/docs/patient-access/find-connections) covers searching the catalog and rendering the results, so this page picks up once the patient has chosen.
## Start the session for that connection [#start-the-session-for-that-connection]
When the patient chooses a connection, start a session for it. Your server calls `mb.patientSession.init` with the patient’s ID, the connection’s `connection_id`, and a `return_url`, and gets back a `url`. Your browser code then redirects the patient to that `url`, which sends them straight to the facility’s patient portal. Your API key is a secret that lives only on your server, so the browser calls a route on your server and never the Medblocks API directly.
Pass the `connection_id` of the connection the patient chose. That tells Medblocks which facility’s patient portal to send them to.
```ts title="server/start-patient-session.ts"
import { mb } from "../medblocks";
export async function startSession(input: {
patientId: string;
connectionId: string;
}) {
const session = await mb.patientSession.init({
patient_id: input.patientId,
connection_id: input.connectionId,
return_url: "https://app.example.com/connected",
});
return { url: session.url };
}
```
```ts title="src/start-patient-session.ts"
async function startSession(connection: { id: string; name: string }) {
const response = await fetch("/api/patient-sessions", {
method: "POST",
headers: { "Content-Type": "application/json" },
body: JSON.stringify({
patientId: currentPatientId,
connectionId: connection.id,
}),
});
const { url } = await response.json();
window.location.href = url;
}
```
## Handle success and failure [#handle-success-and-failure]
When your app sends the patient straight to one connection, the `return_url` includes success or failure details for that connection. Every return carries the patient ID (`patient_id`), the patient session ID (`patient_session_id`), and a `success` flag. On success the URL also carries the `connection_id` that connected. On failure it carries an `error` code and an `error_description` instead.
On success, the patient lands back on your app with the facility connected.
```text
https://app.example.com/connected?patient_id=user_42&patient_session_id=ps_...&success=true&connection_id=fhirsrc_...
```
Use the success return to show the patient that the facility connected.
When the patient cancels or the portal rejects the attempt, the URL carries `success=false` with the error code and description, so you can show a retry path.
```text
https://app.example.com/connected?patient_id=user_42&patient_session_id=ps_...&success=false&error=user_denied&error_description=Patient+canceled+the+connection
```
Use the failure return to show the portal error and let the patient retry.
Continue to [Handle the return](/docs/patient-access/handle-the-return) for the landing-page code shared by the Medblocks-hosted page and your own UI.
## Common errors [#common-errors]
| Code | Meaning |
| ----------------------- | ----------------------------------------------------------------------------------------------------------------- |
| `resource_not_found` | The `connection_id` you passed does not exist or is not available. |
| `bad_request` | `connection_id` is missing, or it conflicts with `recommended_connection_ids`. Pass one or the other, never both. |
| `oauth_error` | The portal authorization failed upstream. |
| `token_exchange_failed` | Medblocks could not exchange the OAuth code for tokens. |
Read the full envelope and code list in [Errors](/docs/reference/errors).
## See also [#see-also]
* [Medblocks-hosted page](/docs/patient-access/create-patient-session/medblocks-hosted-page)
* [Find connections](/docs/patient-access/find-connections)
* [Handle the return](/docs/patient-access/handle-the-return)
---
# Create patients
Give each person a stable patient_id, or let the session create one for you.
Source URL: /docs/patient-access/create-patients
# Create patients
Give each person a stable patient_id, or let the session create one for you.
After you know which connections a patient can choose from, give that person a stable identity in Medblocks. A patient is one person in your app whose health records you want to pull. You provide the `patient_id`, and Medblocks uses that ID everywhere, for starting a patient session, reading session history, checking connection status, and reading records later.
Use a stable ID from your system. Good choices are an internal user ID, member ID, or chart ID. Avoid IDs that can change, like email addresses.
## Option 1: Create the patient first [#option-1-create-the-patient-first]
Create the patient up front when your app has an intake step before the person connects any records. Your API key is a secret, so the call runs on your server. The client just asks your server to do it.
```ts title="server/create-patient.ts"
import { mb } from "./medblocks";
export async function createPatient(input: { patientId: string; email?: string; name?: string }) {
return mb.patients.create({
patient_id: input.patientId,
email: input.email,
name: input.name,
metadata: { signup_source: "intake" },
});
}
```
```ts title="patient-form.ts"
async function createPatient(values: { patientId: string; email?: string; name?: string }) {
const response = await fetch("/api/patients", {
method: "POST",
headers: { "Content-Type": "application/json" },
body: JSON.stringify(values),
});
if (!response.ok) {
const { error } = await response.json();
throw new Error(error?.message ?? "Could not create patient");
}
return response.json() as Promise<{ id: string; email: string | null; name: string | null }>;
}
```
Only `patient_id` is required. `email` and `name` are optional, and `metadata` is a free-form object you can use to stash your own fields.
## Option 2: Upsert when you start a patient session [#option-2-upsert-when-you-start-a-patient-session]
You can skip creating the patient and start a patient session directly. If the patient does not exist, Medblocks creates it. If the patient already exists, Medblocks reuses it and updates the `patient_email` or `patient_name` you pass when they differ.
```ts title="server/start-patient-session.ts"
const session = await mb.patientSession.init({
patient_id: "user_42",
return_url: "https://your-app.example.com/connected",
});
```
For most apps, letting the session create the patient is the shortest path. [Create a patient session](/docs/patient-access/create-patient-session) covers it in full.
## Read a patient [#read-a-patient]
Read a patient when you need to show which facilities they have connected, or when you need to inspect a recent failed attempt. The response includes a `connections` array, which lists failed attempts too.
```ts title="server/get-patient.ts"
import { mb } from "./medblocks";
export async function getPatient(patientId: string) {
return mb.patients.retrieve(patientId);
}
```
```ts title="connected-facilities.ts"
async function getPatient(patientId: string) {
const response = await fetch(`/api/patients/${encodeURIComponent(patientId)}`);
const body = await response.json();
if (!response.ok) throw new Error(body.error?.message ?? "Could not read patient");
return body as { id: string; connections?: Array<{ id: string; status: string; facility: { id: string; name: string } }> };
}
```
Each connection carries a `facility` with the name, logo, and portal link, so you can render the patient’s connected facilities directly. Skip connections whose [authorization](/docs/patient-access/authorization) failed, since those carry no data.
```ts title="server/connected-facilities.ts"
const patient = await mb.patients.retrieve("user_42");
for (const connection of patient.connections) {
if (connection.status !== "active") continue;
console.log(connection.facility.name, connection.facility.logo_url, connection.facility.fhir_base_url);
}
```
## Common errors [#common-errors]
| Code | Meaning |
| ---------------------------- | ------------------------------------------------------------------------------------ |
| `invalid_request` | A reserved-prefix `patient_id`, an ID over 200 characters, or a malformed `email`. |
| `external_id_already_exists` | The `patient_id` is already taken by another patient. |
| `forbidden` | The workspace holds its owner’s own records only, so it cannot take another patient. |
| `not_found` | The patient does not exist. |
| `missing_api_key` | The `Authorization` header is missing. |
| `invalid_api_key` | The key is invalid or does not belong to your workspace. |
The full list, and how to read the error envelope, lives in [Errors](/docs/reference/errors).
## See also [#see-also]
* [Create a patient session](/docs/patient-access/create-patient-session)
* [After connection](/docs/patient-access/after-connection)
---
# eClinicalWorks
Guide to integrate with eClinicalWorks via the healow platform.
Source URL: /docs/patient-access/ecw
# eClinicalWorks
Guide to integrate with eClinicalWorks via the healow platform.
eClinicalWorks is one of the largest privately held healthcare IT companies, serving more than 180,000 physicians and nurse practitioners and over 850,000 medical professionals across 110,000+ facilities worldwide. Founded in 1999 to digitize communication between providers, pharmacies, and labs, the platform now spans more than 50 medical specialties from dental, vision, and behavioral health to ambulatory surgery centers and urgent care. Their V12 + AI release pairs the core EHR with AI-driven tooling like Sunoh.ai for ambient clinical documentation, Image AI, and the healow Genie contact center, alongside an integrated stack covering practice management, revenue cycle, value-based care, population health analytics, and patient engagement through the healow app (self-scheduling, telehealth, secure messaging). The cloud-based platform, gives providers a single chart that ties together encounters, labs, imaging, and care history from across the eClinicalWorks network. Integrate with [eClinicalWorks](https://www.eclinicalworks.com/) to plug your app into that network.
This is a step-by-step guide to registering a patient-facing FHIR app against eClinicalWorks and taking it from sandbox to live practices. We use the **healow Clinical API** path with **SMART Standalone Launch**, **3-legged OAuth**, and **JWKS-based** (asymmetric) client authentication.
eClinicalWorks splits its FHIR program across two developer portals, and picking the right one matters.
| Portal | What it’s for |
| :---------------------------------------------------------------------------------------------- | :----------------------------------------------------------------------------------------- |
| [connect4.healow.com](https://connect4.healow.com/apps/jsp/dev/signIn.jsp) | **Patient-centric apps** standalone launch, patient logs in via the healow patient portal. |
| [fhir.eclinicalworks.com/ecwopendev](https://fhir.eclinicalworks.com/ecwopendev/external/index) | Provider-centric apps, EHR-launch, and backend / bulk services. |
## Setup Guide [#setup-guide]
### Create a developer account [#1-create-a-developer-account]
1. Go to the [healow Developer Portal](https://connect4.healow.com/apps/jsp/dev/signIn.jsp) and click **Sign Up**.
2. Complete the four-step registration form.
* **Contact**: first name, last name, job title, phone, work email.
* **Company**: company name, full address, website URL.
* **Other details**: industry, primary business, top 3 competitors. *healow really does ask for competitors, it’s part of their authenticity check, not a marketing question.*
* **Security**: three security questions, then accept the Terms & Conditions.
3. healow emails a verification link. Click it and set your password.
4. Sign back in with your credentials. *In practice the developer account is active immediately after email verification, you can register a clinical app right away.*
### Register your Clinical App [#2-register-your-clinical-app]
1. After login you land on the developer console. Click **“Register Clinical App”**. *Use “Register Scheduling App” only if you specifically need the appointment-booking API, clinical record retrieval lives under the Clinical App.*
2. Fill the basic app information.
* **App name**, **description**, **icon**. *The name and description are shown to the patient on the consent screen, keep them clean and accurate.*
* **Launch type**: **Patient-centric**. *This is what routes login to the healow patient portal instead of the eClinicalWorks EHR login.*
* **Authentication method**: **Asymmetric (JWKS)**. *healow also supports symmetric (client secret), but asymmetric is the SMART-preferred method and the only one we recommend , your private key never leaves your environment.*
3. Save the draft. You’ll fill in scopes, redirect URIs, and JWKS URL in the next steps.
### Select scopes [#3-select-scopes]
For patient-facing standalone apps, healow uses **patient/-prefixed** SMART scopes, the patient logs in via the healow patient portal and authorizes your app to read their own records.\
The scope picker is a single flat list, healow gives you an **“All”** checkbox right at the top of the list.
1. After saving the App Information step, the wizard advances to **Step 2. Select Scopes**. The left pane shows every patient-facing scope healow exposes (32 entries), and the right pane is your empty “Selected Scopes” basket.
2. Tick the **“All”** checkbox at the top of the left pane. Every patient/\.read scope below it is selected in one click. *If you only need a subset, untick “All” and pick individually, the search box at the top of the left pane filters by name. Extra scopes you never read just bloat the consent screen the patient sees.*
3. Click **“Add Selected”** in the top right of the left pane. The chosen scopes move into the right “Selected Scopes” basket, the header should now read Selected Scopes\* (32).
4. Click **“Save and Next”** to advance to the **Other Details** step. *The wizard does not auto-save; leaving this page without clicking Save and Next discards your selection.*
### Configure redirect URIs [#4-configure-redirect-uris]
1. Add your post-login redirect URIs. With Standalone Launch these are the callback URLs healow sends the patient back to after they authorize your app, so every URL your server listens on needs to be registered. You’ll typically want at least two.
* for production e.g., [https://app.medblocks.com/api/auth/smart/callback](https://app.medblocks.com/api/auth/smart/callback) if you are integrating using the medblocks platform.
* staging URL if you have one.
2. Multiple redirect URIs are supported, but they must match **exactly** at authorize time, a trailing slash mismatch returns a 400.
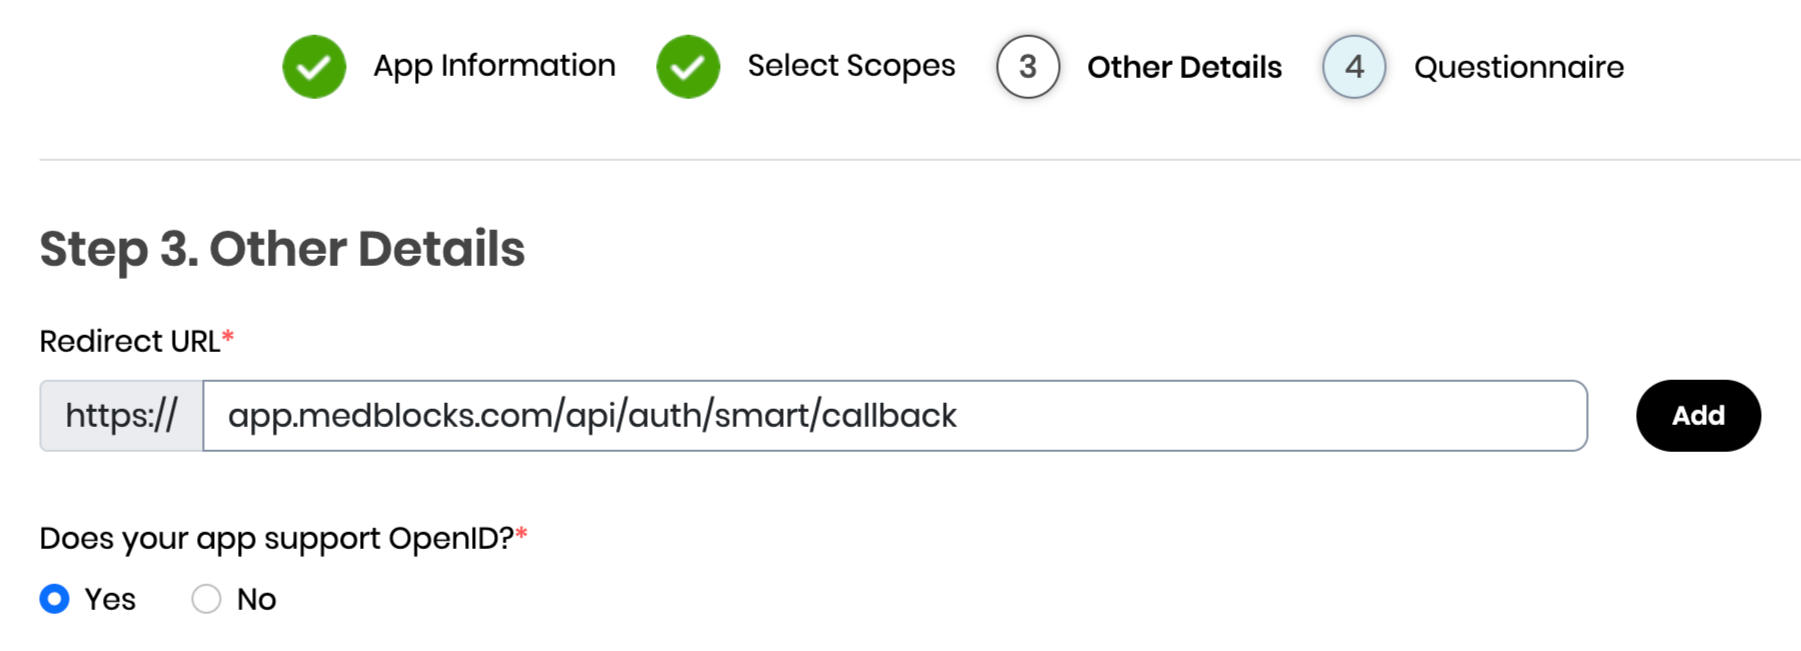
### Set up authentication [#5-set-up-authentication]
healow’s clinical API offers two client types, and within one of them, two auth methods. The choice cascades.
**Confidential vs Public.** A *public* app holds no credential and authenticates only via PKCE, appropriate for browser SPAs or native mobile apps that can’t safely keep a secret. A *confidential* app holds a credential (client secret or private key) and proves its identity at the token endpoint. We pick **confidential** because (a) Medblocks Platform has a backend that can hold a credential safely, and (b) **refresh tokens are confidential-only**, the healow docs are explicit that public apps *“are not assigned with refresh token value,”* which would force a fresh consent every time a 1-hour access token expires.
**Symmetric vs Asymmetric (both confidential).** Symmetric ships a pre-shared client\_secret on every token request inside an HTTP Basic header, the credential crosses the wire on every call, and healow holds a copy by definition. Asymmetric registers a public key with healow and signs a client\_assertion JWT with the matching private key, nothing secret ever leaves your environment. We pick **asymmetric** because (a) the private key never crosses the network, so a healow-side breach can’t impersonate us; (b) key rotation is mechanical via JWKS (publish the new key alongside the old.
1. In the app settings, confirm **Authentication Method = Asymmetric**, after choosing the confidential app.
#### Generate your private key [#generate-your-private-key]
1. Generate an RSA key pair locally with OpenSSL.
```shell
openssl genrsa -out privatekey.pem 2048
```
*Do NOT use any online “generate JWK” websites for this. Your private key is what signs your authentication tokens. If anyone else has a copy of it, they can impersonate your app. Generate it on your machine, store it securely (environment variable or secrets manager), and never commit it to git.*
2. Your app needs to read this private key and serve the public portion as a JWKS at the /.well-known/jwks.json route. Here’s a minimal example with Node.js using the jose library.
```javascript
import { createPrivateKey } from "crypto";
import { exportJWK, calculateJwkThumbprint } from "jose";
import { readFileSync } from "fs";
import express from "express";
const app = express();
const privateKeyPem = readFileSync("privatekey.pem", "utf-8");
const privateKey = createPrivateKey(privateKeyPem);
// Derive the public JWK from the private key
const publicJwk = await exportJWK(privateKey.export({ type: "spki", format: "pem" }));
publicJwk.alg = "RS384";
publicJwk.use = "sig";
publicJwk.kid = await calculateJwkThumbprint(publicJwk, "sha256");
app.get("/.well-known/jwks.json", (req, res) => {
res.json({ keys: [publicJwk] });
});
app.listen(3000, () => console.log("Listening on port 3000"));
```
* *healow requires \`alg: “RS384”\` and \`use: “sig”\` this is the \*\*only\*\* signing algorithm accepted on the asymmetric path. Use a stable \`kid\`, a JWK thumbprint works well because it’s deterministic and survives redeploys.*
3. Paste your public JWKS URL into the portal. The URL must be served over HTTPS from a publicly reachable host, and must return a JSON document with a keys array. *healow whitelists the JWKS URL on its servers if you change the URL later, you have to update the registration before the next token exchange.*
4. When you sign JWTs for healow’s token endpoint, set the JWT header’s kid to the one in your JWKS. healow fetches your /.well-known/jwks.json, matches on kid, and verifies the signature. *Include the \`kid\` even when you only have one key today, the moment you add a second key for rotation, requests without a \`kid\` become ambiguous, and healow will reject them with \`invalid\_client\`.*
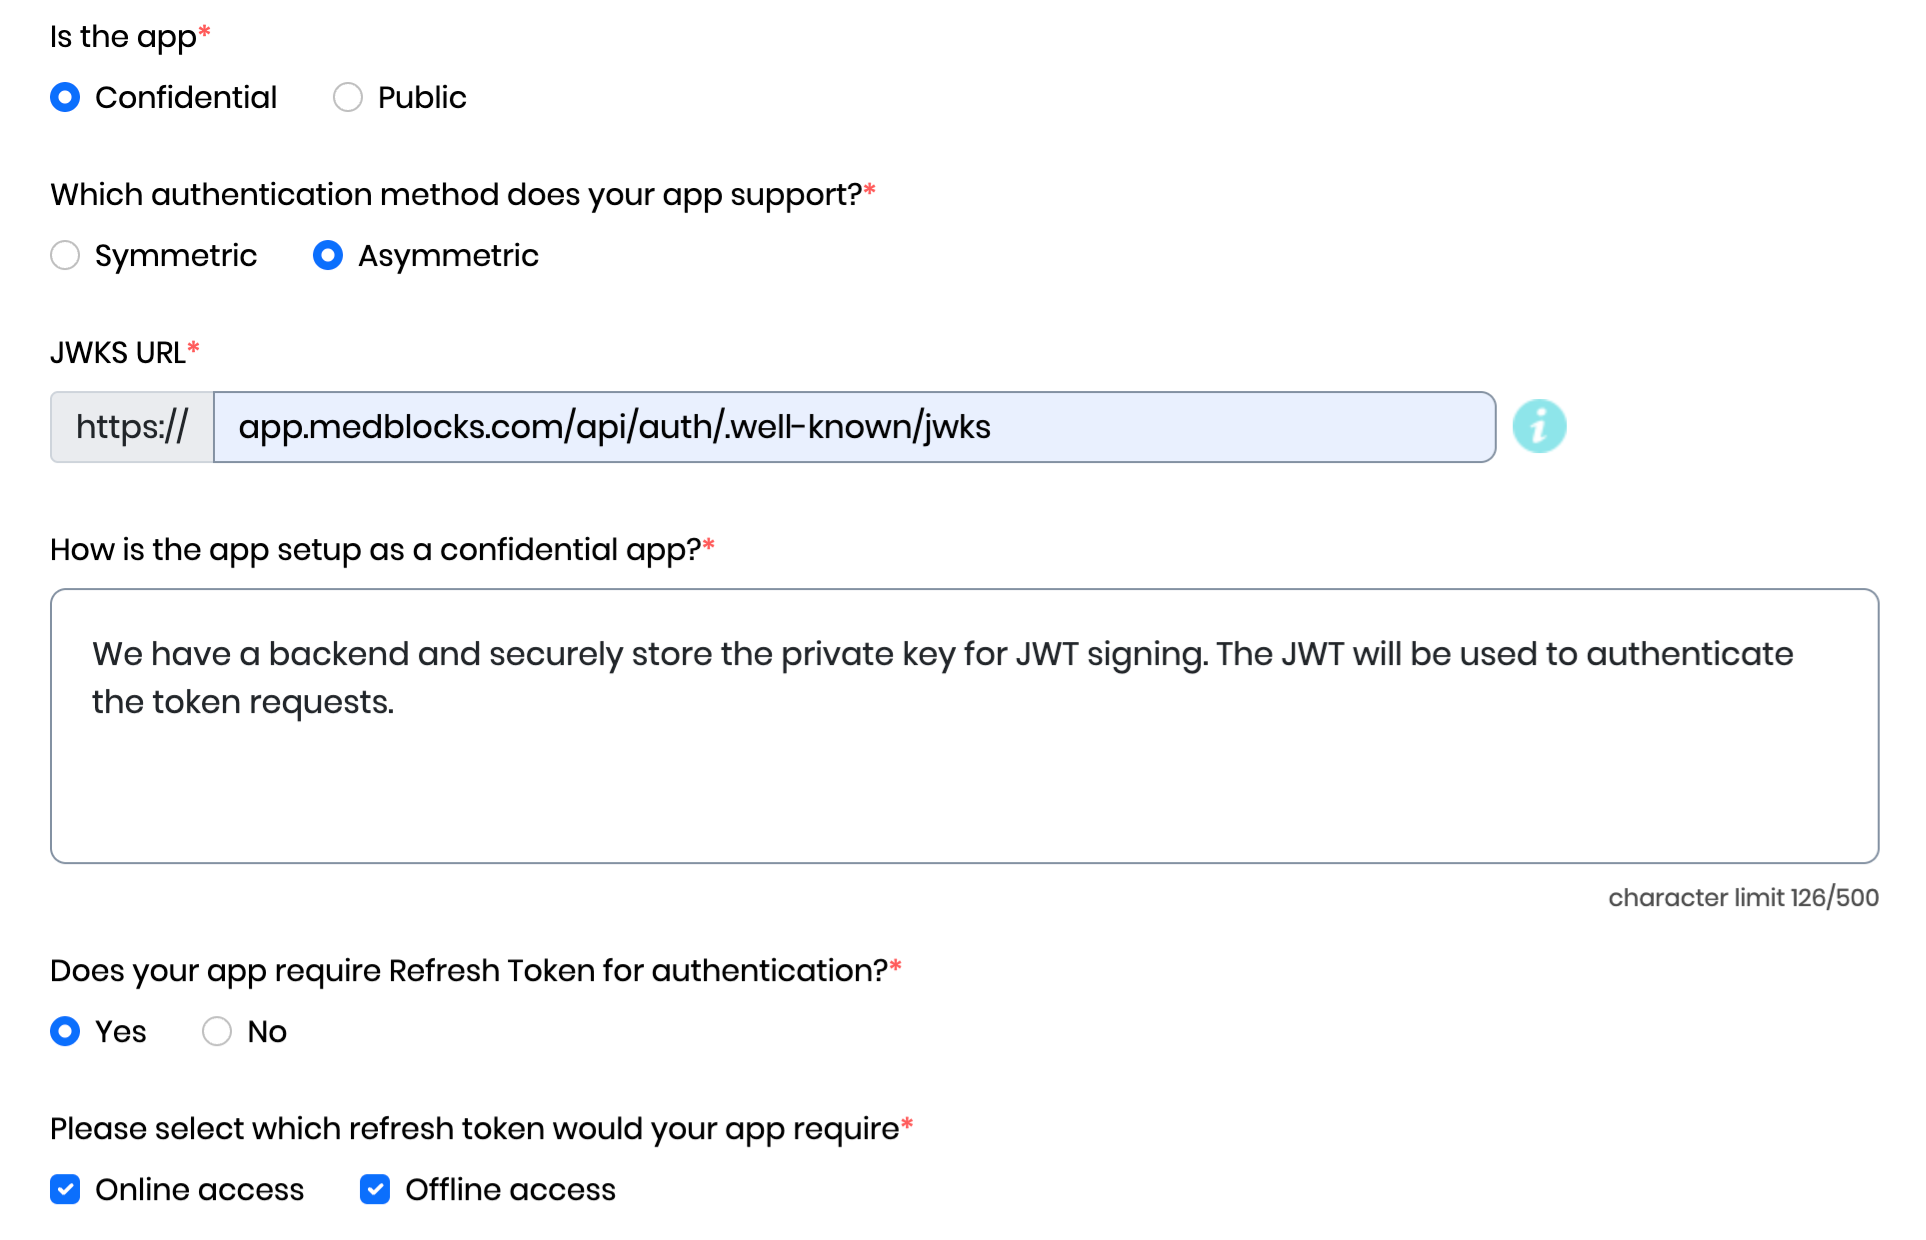
Note: If you are integrating using the medblocks platform, there’s no need to create a private key and host it. Simply use, [https://app.medblocks.com/api/auth/.well-known/jwks](https://app.medblocks.com/api/auth/.well-known/jwks)
### Fill the Questionnaire [#6-fill-the-questionnaire]
The final wizard step is a healow data-use questionnaire, your answers feed directly into the consent screen the patient sees before authorizing your app, so be honest. Mismatches between what you state here and what your app actually does are how apps get pulled from the App Gallery.
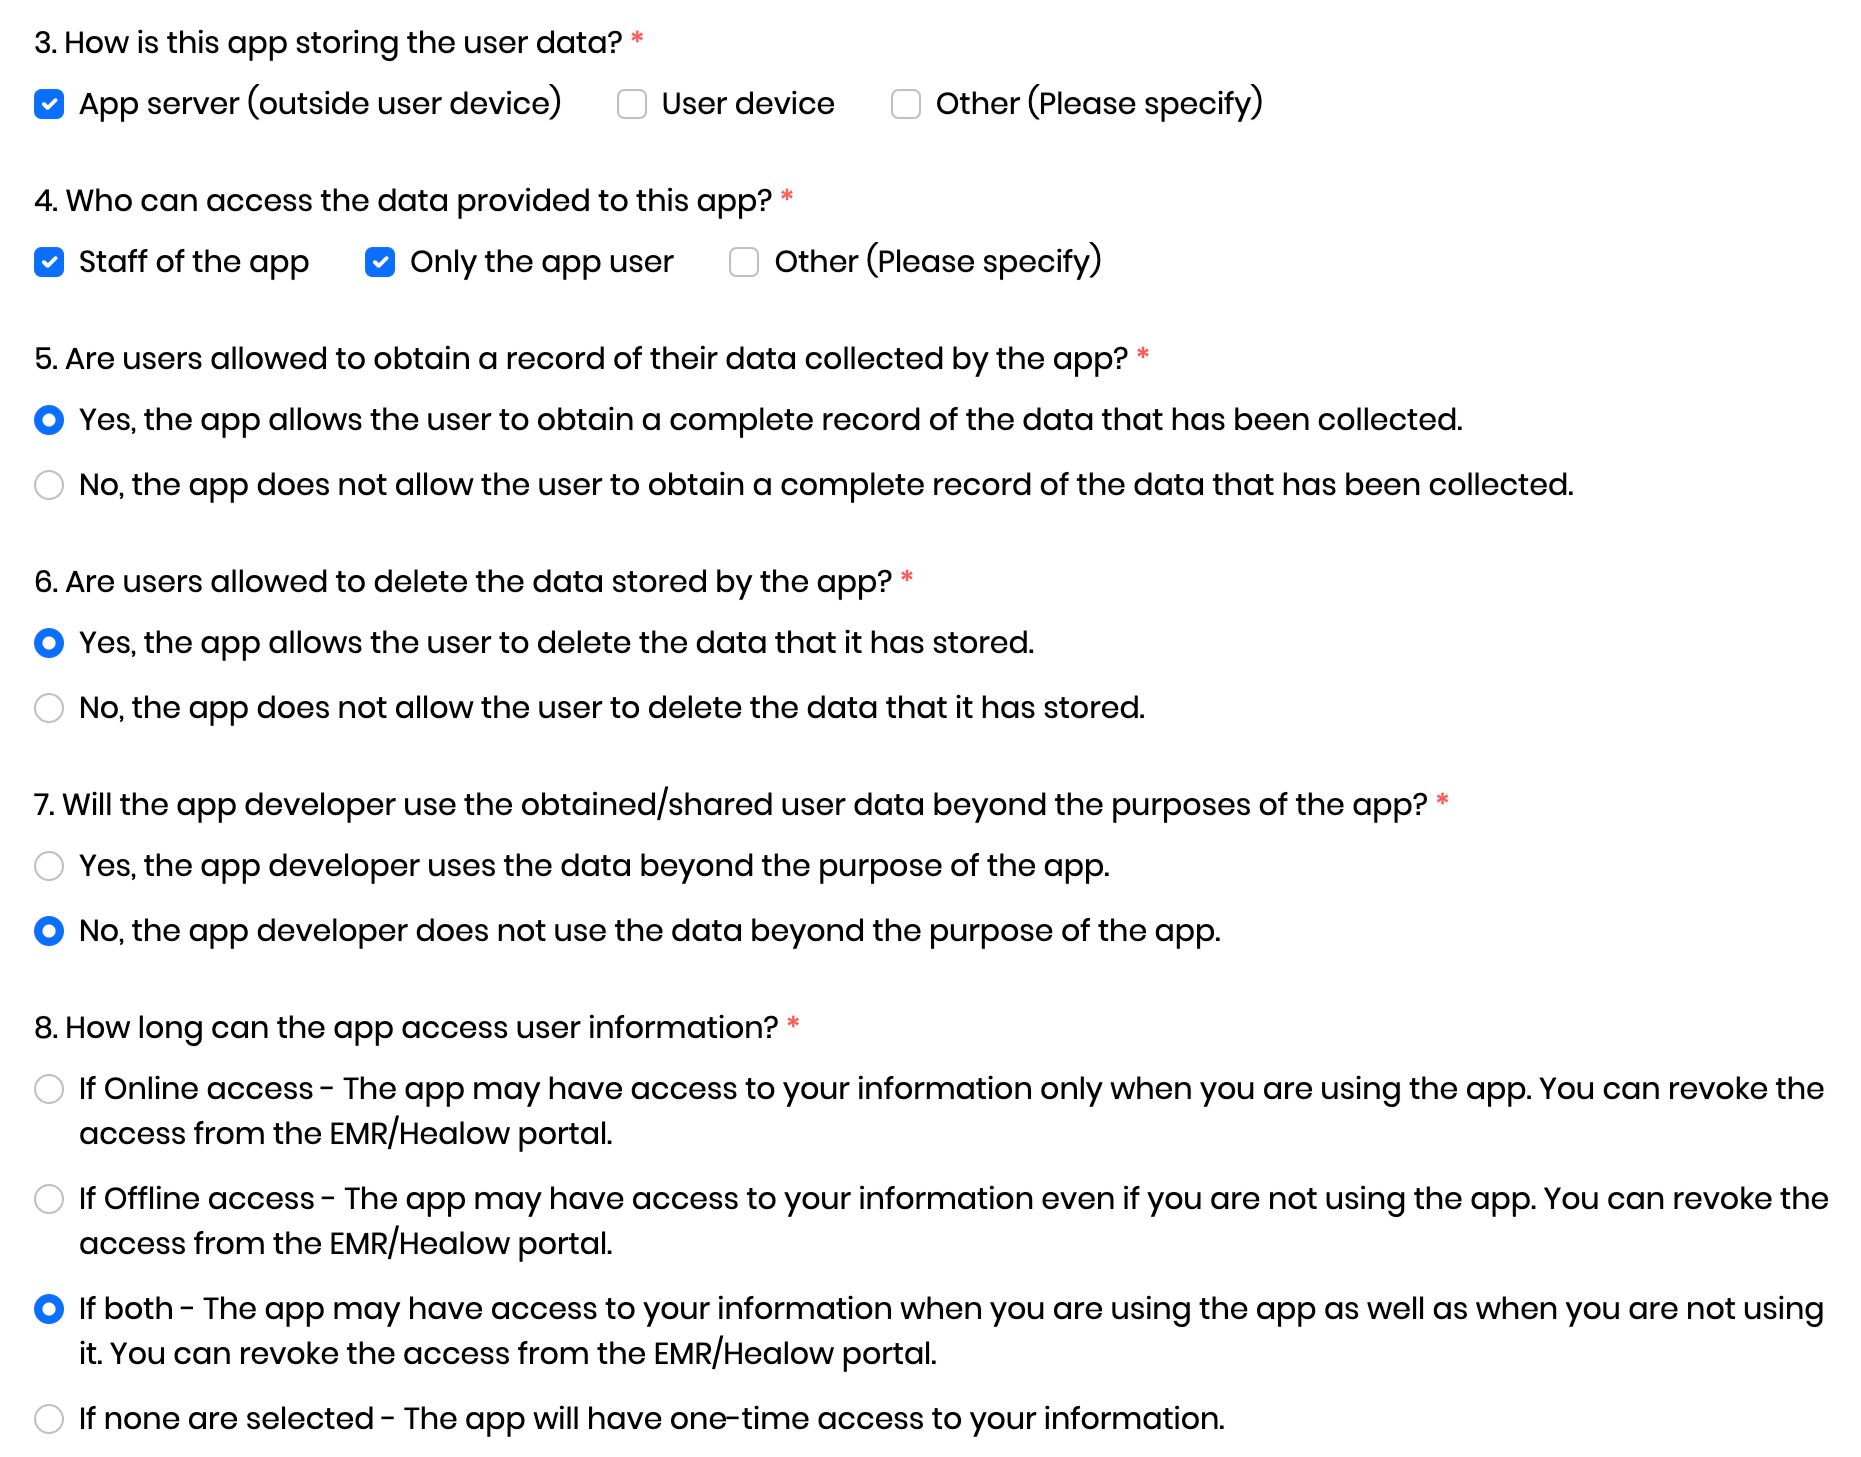
7. Click **“Submit”** at the bottom of the form. *healow’s docs describe a Dev Portal Team review-and-approve step, but in practice the app is created and usable immediately, your client ID is issued on submit, and you can start hitting the sandbox right away.*
### Test in the sandbox [#7-test-in-the-sandbox]
healow ships a single shared sandbox tenant, no per-practice provisioning required.
| | Value |
| :-------------------------------------- | :------------------------------------------------------------- |
| **Sandbox practice code** | JAFJCD |
| **FHIR base URL** | `https://{fhir_base_url}/fhir/r4/JAFJCD` |
| **Test patients** (password e\@CWFHIR1) | AdultFemaleFHIR, AdultMaleFHIR, ChildFemaleFHIR, ChildMaleFHIR |
1. Launch your app, kick off the OAuth flow with `aud = https://{fhir_base_url}/fhir/r4/JAFJCD`, and log in as one of the test patients on the healow consent screen.
2. Exchange the code at the token endpoint with a client\_assertion JWT signed by your private key (alg: RS384, kid matching your JWKS, client\_assertion\_type=urn:ietf:params:oauth:client-assertion-type:jwt-bearer). You should get back an access token (expires\_in: 3600), a 90-day refresh token (because you requested offline\_access), and an id\_token.
3. Hit `GET {fhir_base_url}/fhir/r4/JAFJCD/Patient/{id}` with `Authorization: Bearer ...` and confirm you get a US Core Patient resource.
*\*\*CORS is not supported.\*\* Token exchange and FHIR calls must run server-side. If you’re integrating via Medblocks Platform this is already handled, don’t try to call healow directly from a browser.*
### Go to production [#8-go-to-production]
Production is a **separate clinical app entry**, not a toggle on your sandbox app, credentials are cleanly separated from day one.
1. Click **Register Clinical App** again and fill the same fields, with these differences.
* **Environment**: Production.
* **Redirect URIs**: HTTPS only, no localhost in production.
* **JWKS URL**: a separate production JWKS is recommended so the two keyrings can rotate independently.
2. Click **Submit**. As with the sandbox app, the production app is created immediately and healow issues your **production client ID** on submit. Keep it in a separate environment / secret store from your sandbox client ID, there is no shared identifier between the two.
3. Swap the FHIR base URL in your app from the sandbox practice code to the per-practice production base URL (see Step 8).
### Going live with practices [#9-going-live-with-practices]
Healow’s model is **practice-driven**: each eCW practice opts your app in on their side using your production client ID, and that gives you an endpoint scoped to their practice code.
1. Patients (or the practice) can find your app via the healow App Gallery (/apps/jsp/dev/odaAppList.jsp). Provide the practice with your production client ID and the consent screen description.
2. For each connected practice, look up the FHIR base URL via the **Clinical FHIR Endpoints** search at [connect4.healow.com/apps/jsp/dev/r4/fhirEndpoints.jsp](https://connect4.healow.com/apps/jsp/dev/r4/fhirEndpoints.jsp) search by practice name, copy the resulting `{fhir_base_url}/fhir/r4/{practice_code}`. The practice code is part of the URL path, so multi-tenant routing is per-URL, not via a header.
3. **Rate limits** (effective Oct 7, 2025): **250 calls/minute per base URL**, covering FHIR resource calls plus authorize and token requests. The counter is per practice code, so 5 connected practices give you 1,250 req/min in aggregate. Exceeding the limit returns HTTP 429 until the minute resets.
4. healow withholds a patient’s data until that patient signs in via the healow patient portal and authorizes your app, so the 3-legged OAuth flow from Step 4 is the only consent gate you need. A patient can revoke that access at any time, treat it as a normal state in your UI, not an error.
With your client ID, JWKS, and production credentials issued, you’re ready to test and launch your integration with eClinicalWorks via Medblocks Platform. Check our API specification for implementation details.
## See also [#see-also]
* [Create a patient session](/docs/patient-access/create-patient-session)
* [Find connections](/docs/patient-access/find-connections)
---
# Epic
Guide to integrate with the Epic EHR system.
Source URL: /docs/patient-access/epic
# Epic
Guide to integrate with the Epic EHR system.
Epic’s globally recognized EHR system facilitates coordinated care delivery and improved patient outcomes across diverse healthcare settings, thanks to its comprehensive capabilities and seamless interoperability. Integrate with [Epic](https://fhir.epic.com/) to enhance healthcare delivery.
This is a step-by-step guide to registering a patient-facing FHIR app on Epic’s open platform and taking it all the way to production. If you’ve selected USCDI v3 for automatic client distribution, Epic will push your app to all qualifying customer organizations automatically. But there are still a few steps you need to get right.
## Setup Guide [#setup-guide]
### Prerequisites [#prerequisites]
If you’re serious about serving US patients and customers, having a US company will help with onboarding across the board. [Stripe Atlas](https://stripe.com/in/atlas) and [StartFleet](https://startfleet.io/) can get you a registered US entity with a real address in minutes.
For a US phone number, [Tello](https://tello.com/) gives you a virtual SIM with a real number. Grab a domain on [Namecheap](https://www.namecheap.com/) and set up a business email with [Google Workspace](https://workspace.google.com/).
Since you’ll be serving US customers, you’ll need US infrastructure anyway. Set up a VM in a US cloud region, install [Tailscale](https://tailscale.com/), and use it as your exit node. This gives you a clean, stable US IP for development and testing, much more reliable than a VPN, which often gets blacklisted.
### Create an Account on Epic on FHIR [#1-create-an-account-on-epic-on-fhir]
1. Go to the [Epic on FHIR website](https://fhir.epic.com/) and click Sign Up in the top right corner.
2. Fill out the registration form with your user and business information. You’ll need your company name, email, address, and website. Hit Submit when done.
3. Once your account is approved, sign in with your credentials.
### Create your Application [#2-create-your-application]
1. Navigate to Build Apps in the top navigation. You’ll land on the “My Apps” page.
2. Click ”+ Create” to create a new app.
3. Fill you application details
* Give your app a name. E.g. Medblocks Platform
* set your “Application Audience” to Patients.
* set “Automatic Client Distribution” to USCDI v3 (it means your app will be automatically pushed to all qualifying Epic customers once you mark it ready for production).
### Configure Endpoint URIs [#3-configure-endpoint-uris]
1. Add your redirect/callback URIs. You’ll typically want at least three.
* `http://localhost:3000/callback` for local development
* Similarly, you can set another URI for your production application.
* If you are using Medblocks platform use, `https://app.medblocks.com/api/auth/smart/callback` for production
2. Click Add Another URI if you need more.
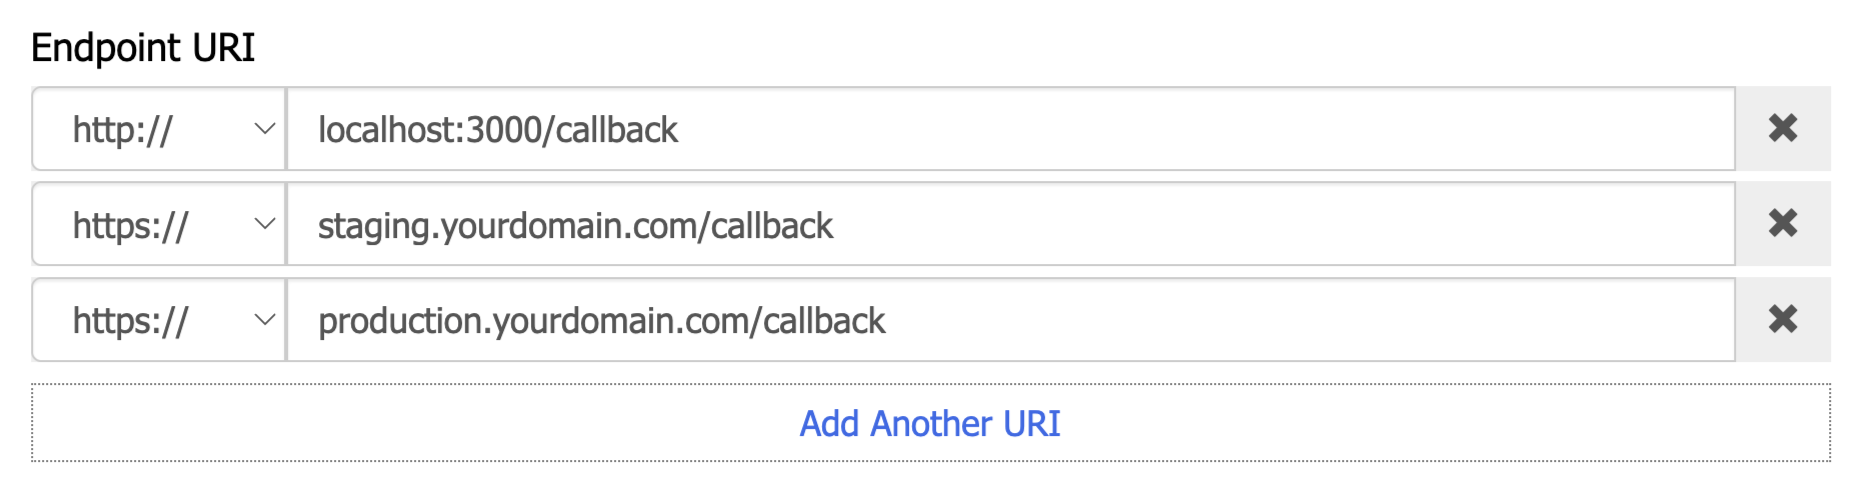
### Setup Authentication [#4-setup-authentication]
1. Check the following options.
* Is Confidential Client (patient-facing apps with a backend server should be confidential).
* Requires Persistent Access (needed to get refresh tokens).
* Uses Rolling Refresh Tokens (so each refresh gives you a new token).
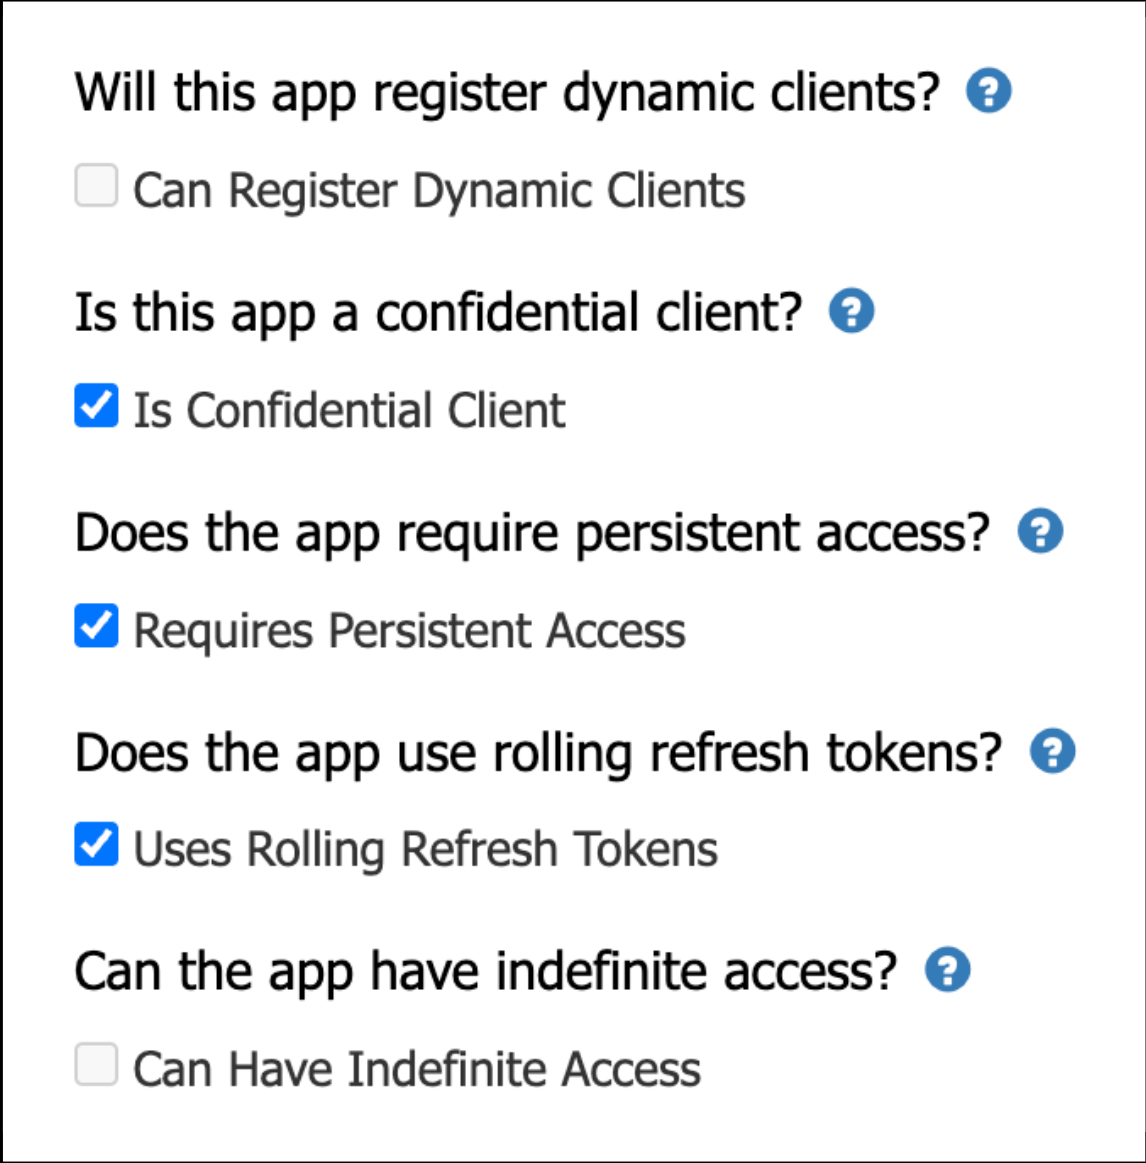
#### Generate Your Private Key [#generate-your-private-key]
1. Generate an RSA key pair locally with OpenSSL.
```shell
openssl genrsa -out privatekey.pem 2048
```
*Do NOT use any online “generate JWK” websites for this. Your private key is what signs your authentication tokens. If anyone else has a copy of it, they can impersonate your app. Generate it on your machine, store it securely (environment variable or secrets manager), and never commit it to git.*
2. Your app needs to read this private key and serve the public portion as a JWKS at the `/.well-known/jwks.json` route. Here’s a minimal example with Node.js using the `jose` library.
```javascript
import { createPrivateKey } from "crypto";
import { exportJWK, calculateJwkThumbprint } from "jose";
import { readFileSync } from "fs";
import express from "express";
const app = express();
const privateKeyPem = readFileSync("privatekey.pem", "utf-8");
const privateKey = createPrivateKey(privateKeyPem);
// Derive the public JWK from the private key
const publicJwk = await exportJWK(privateKey.export({ type: "spki", format: "pem" }));
publicJwk.alg = "RS384";
publicJwk.use = "sig";
publicJwk.kid = await calculateJwkThumbprint(publicJwk, "sha256");
app.get("/.well-known/jwks.json", (req, res) => {
res.json({ keys: [publicJwk] });
});
app.listen(3000, () => console.log("Listening on port 3000"));
```
2. Enter your JWKS endpoints for both environments, If you are integrating using the Medblocks Platform just enter the below endpoints.
* Non-Production: `https://app.medblocks.com/.well-known/jwks.json`
* Production: `https://app.medblocks.com/.well-known/jwks.json`
*You might see a validation warning about the JWK Set URL not being reachable. That’s fine if your URL isn’t publicly accessible yet.*
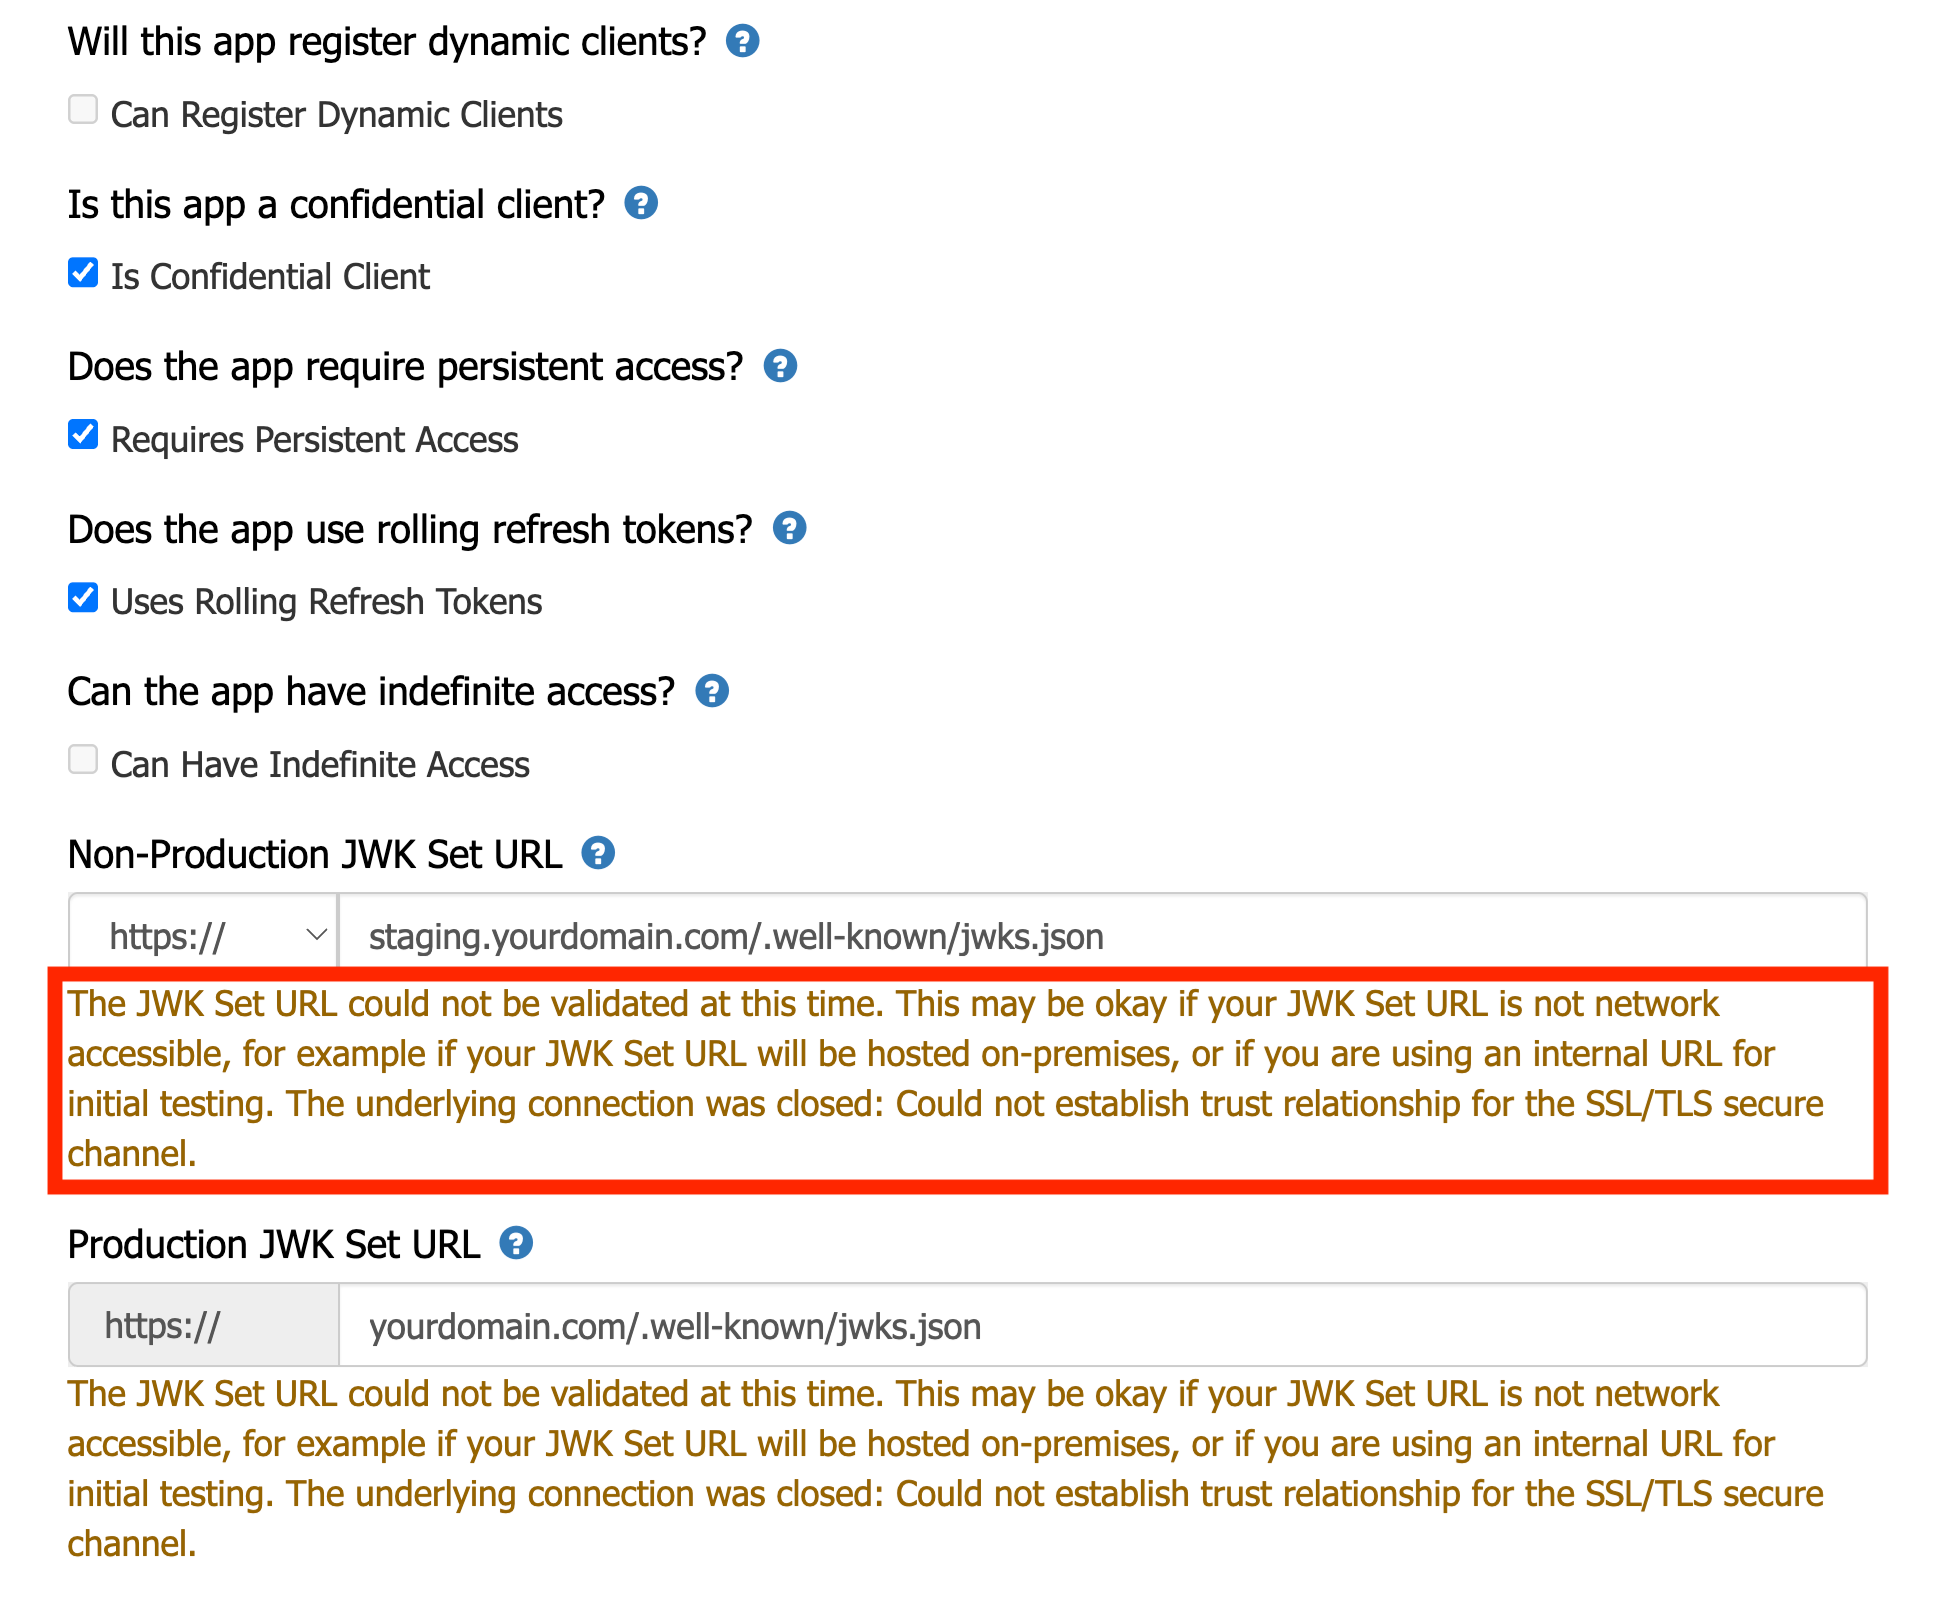
3. When you sign JWTs for the Epic OAuth flow, use the same private key and set the `kid` header to match. Epic will fetch your `/.well-known/jwks.json`, find the matching key, and verify the signature. Once your app is live and the JWKS URL is publicly reachable, the warning goes away and it should look like this.
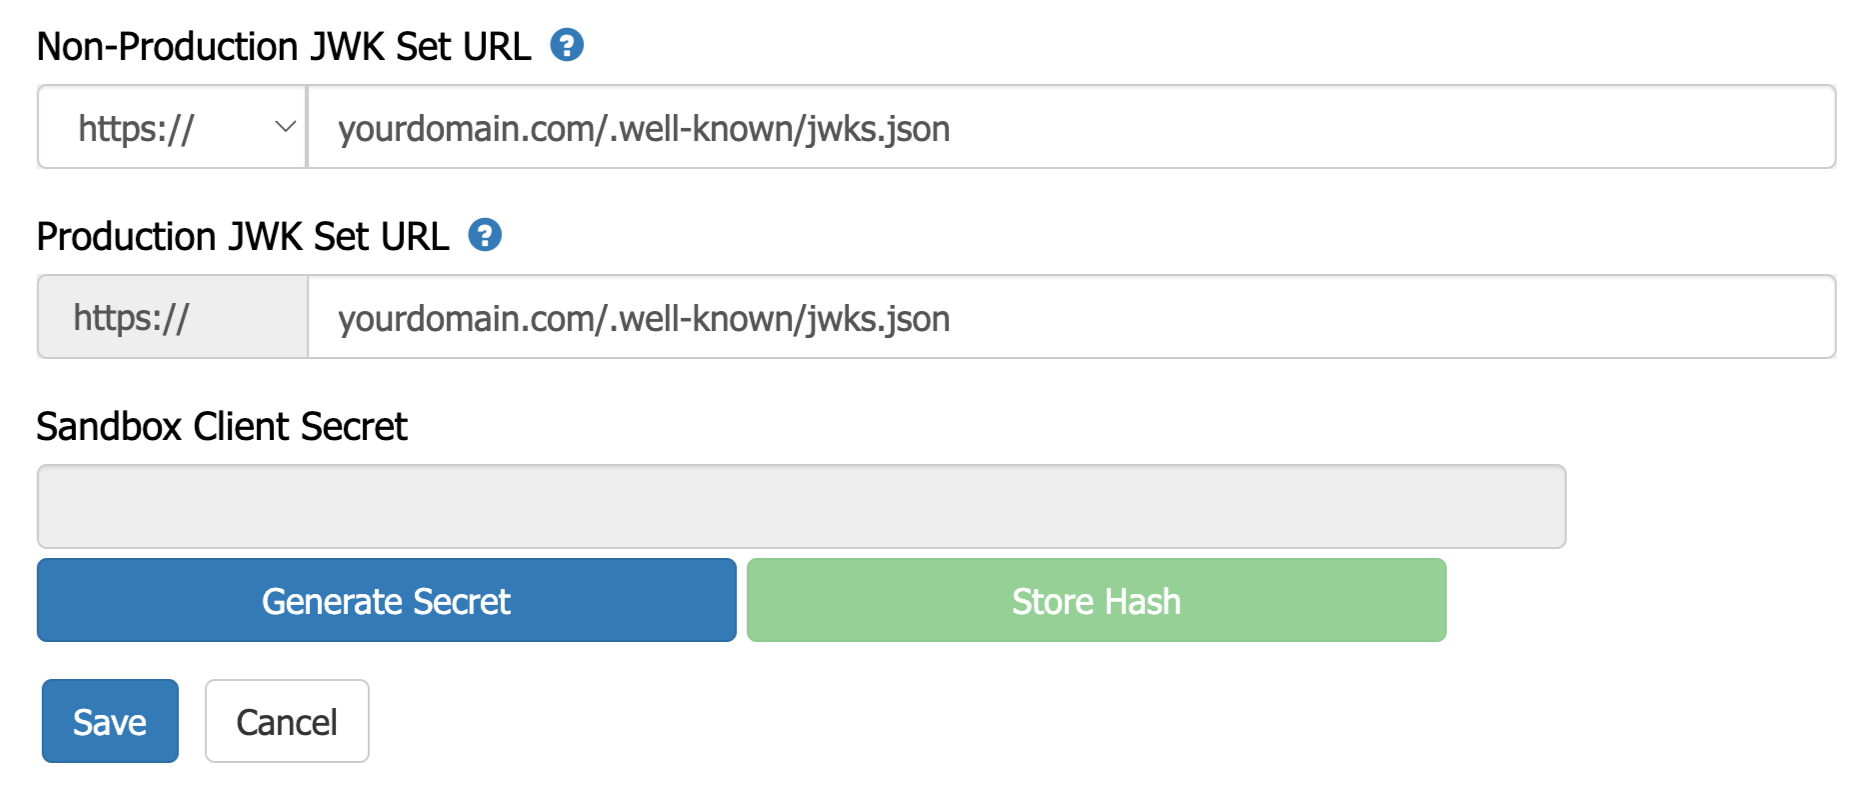
### Select Scopes (use the console script) [#5-select-scopes-use-the-console-script]
Epic’s “Incoming APIs” list is long, and you need to select all the USCDI v3 / USCDI read-only R4 scopes. Instead of clicking through hundreds of items, use a script.
#### Steps to Run the console script in your browser [#steps-to-run-the-console-script-in-your-browser]
1. Right-click anywhere on the page and select Inspect to open DevTools.
2. Switch to the Console tab.
3. If the browser warns you about pasting, type `allow pasting` and press Enter.
4. Paste the following script into the console. It automatically selects all USCDI v3 and USCDI read-only R4 scopes from the available list.
```javascript
(async function () {
const sleep = ms => new Promise(r => setTimeout(r, ms));
const appIdMatch = location.search.match(/appId=(\d+)/i);
if (!appIdMatch) {
console.error('[Epic Scopes] Could not find appId in URL.');
return;
}
const APP_ID = appIdMatch[1];
console.log(`%c[Epic Scopes] App ID: ${APP_ID}`, 'color: blue; font-weight: bold');
const labels = [
...document.querySelectorAll('option[data-uscdi-readonly="True"]'),
...document.querySelectorAll('option[data-uscdi-v3="True"]')
]
.map(o => o.label)
.filter(l => l.includes("(R4)"))
.sort((a, b) => a.localeCompare(b));
const uniqueLabels = [...new Set(labels)];
console.log(`[Epic Scopes] Target scopes: ${uniqueLabels.length}`);
const listContainer =
document.querySelector("ul.apiList") ||
document.querySelector(".apiList");
const clickAddButton = () => {
const btn = [...document.querySelectorAll("button, input")]
.find(el => el.innerText?.trim() === ">>");
btn?.click();
return !!btn;
};
let added = 0;
let skipped = 0;
const notFound = [];
for (const label of uniqueLabels) {
if (listContainer) listContainer.scrollTop = 0;
await sleep(50);
let found = false;
for (let attempts = 0; attempts < 50; attempts++) {
const li = [...document.querySelectorAll("li.apiListItem")]
.find(el => el.innerText?.trim() === label);
if (li) {
const alreadySelected =
li.getAttribute("onclick")?.includes("SelectedWebServicesClicked");
if (!alreadySelected) {
li.scrollIntoView({ block: "center" });
li.click();
await sleep(100);
clickAddButton();
await sleep(200);
added++;
} else {
skipped++;
}
found = true;
break;
}
if (listContainer) {
listContainer.scrollTop += 500;
}
await sleep(100);
}
if (!found) {
notFound.push(label);
}
}
if (notFound.length) {
console.warn('[Epic Scopes] Could not find:', notFound);
}
console.log(`%c[Epic Scopes] Done! Added ${added}, already selected ${skipped}, ${notFound.length} not found.`, 'color: green; font-weight: bold');
})();
```
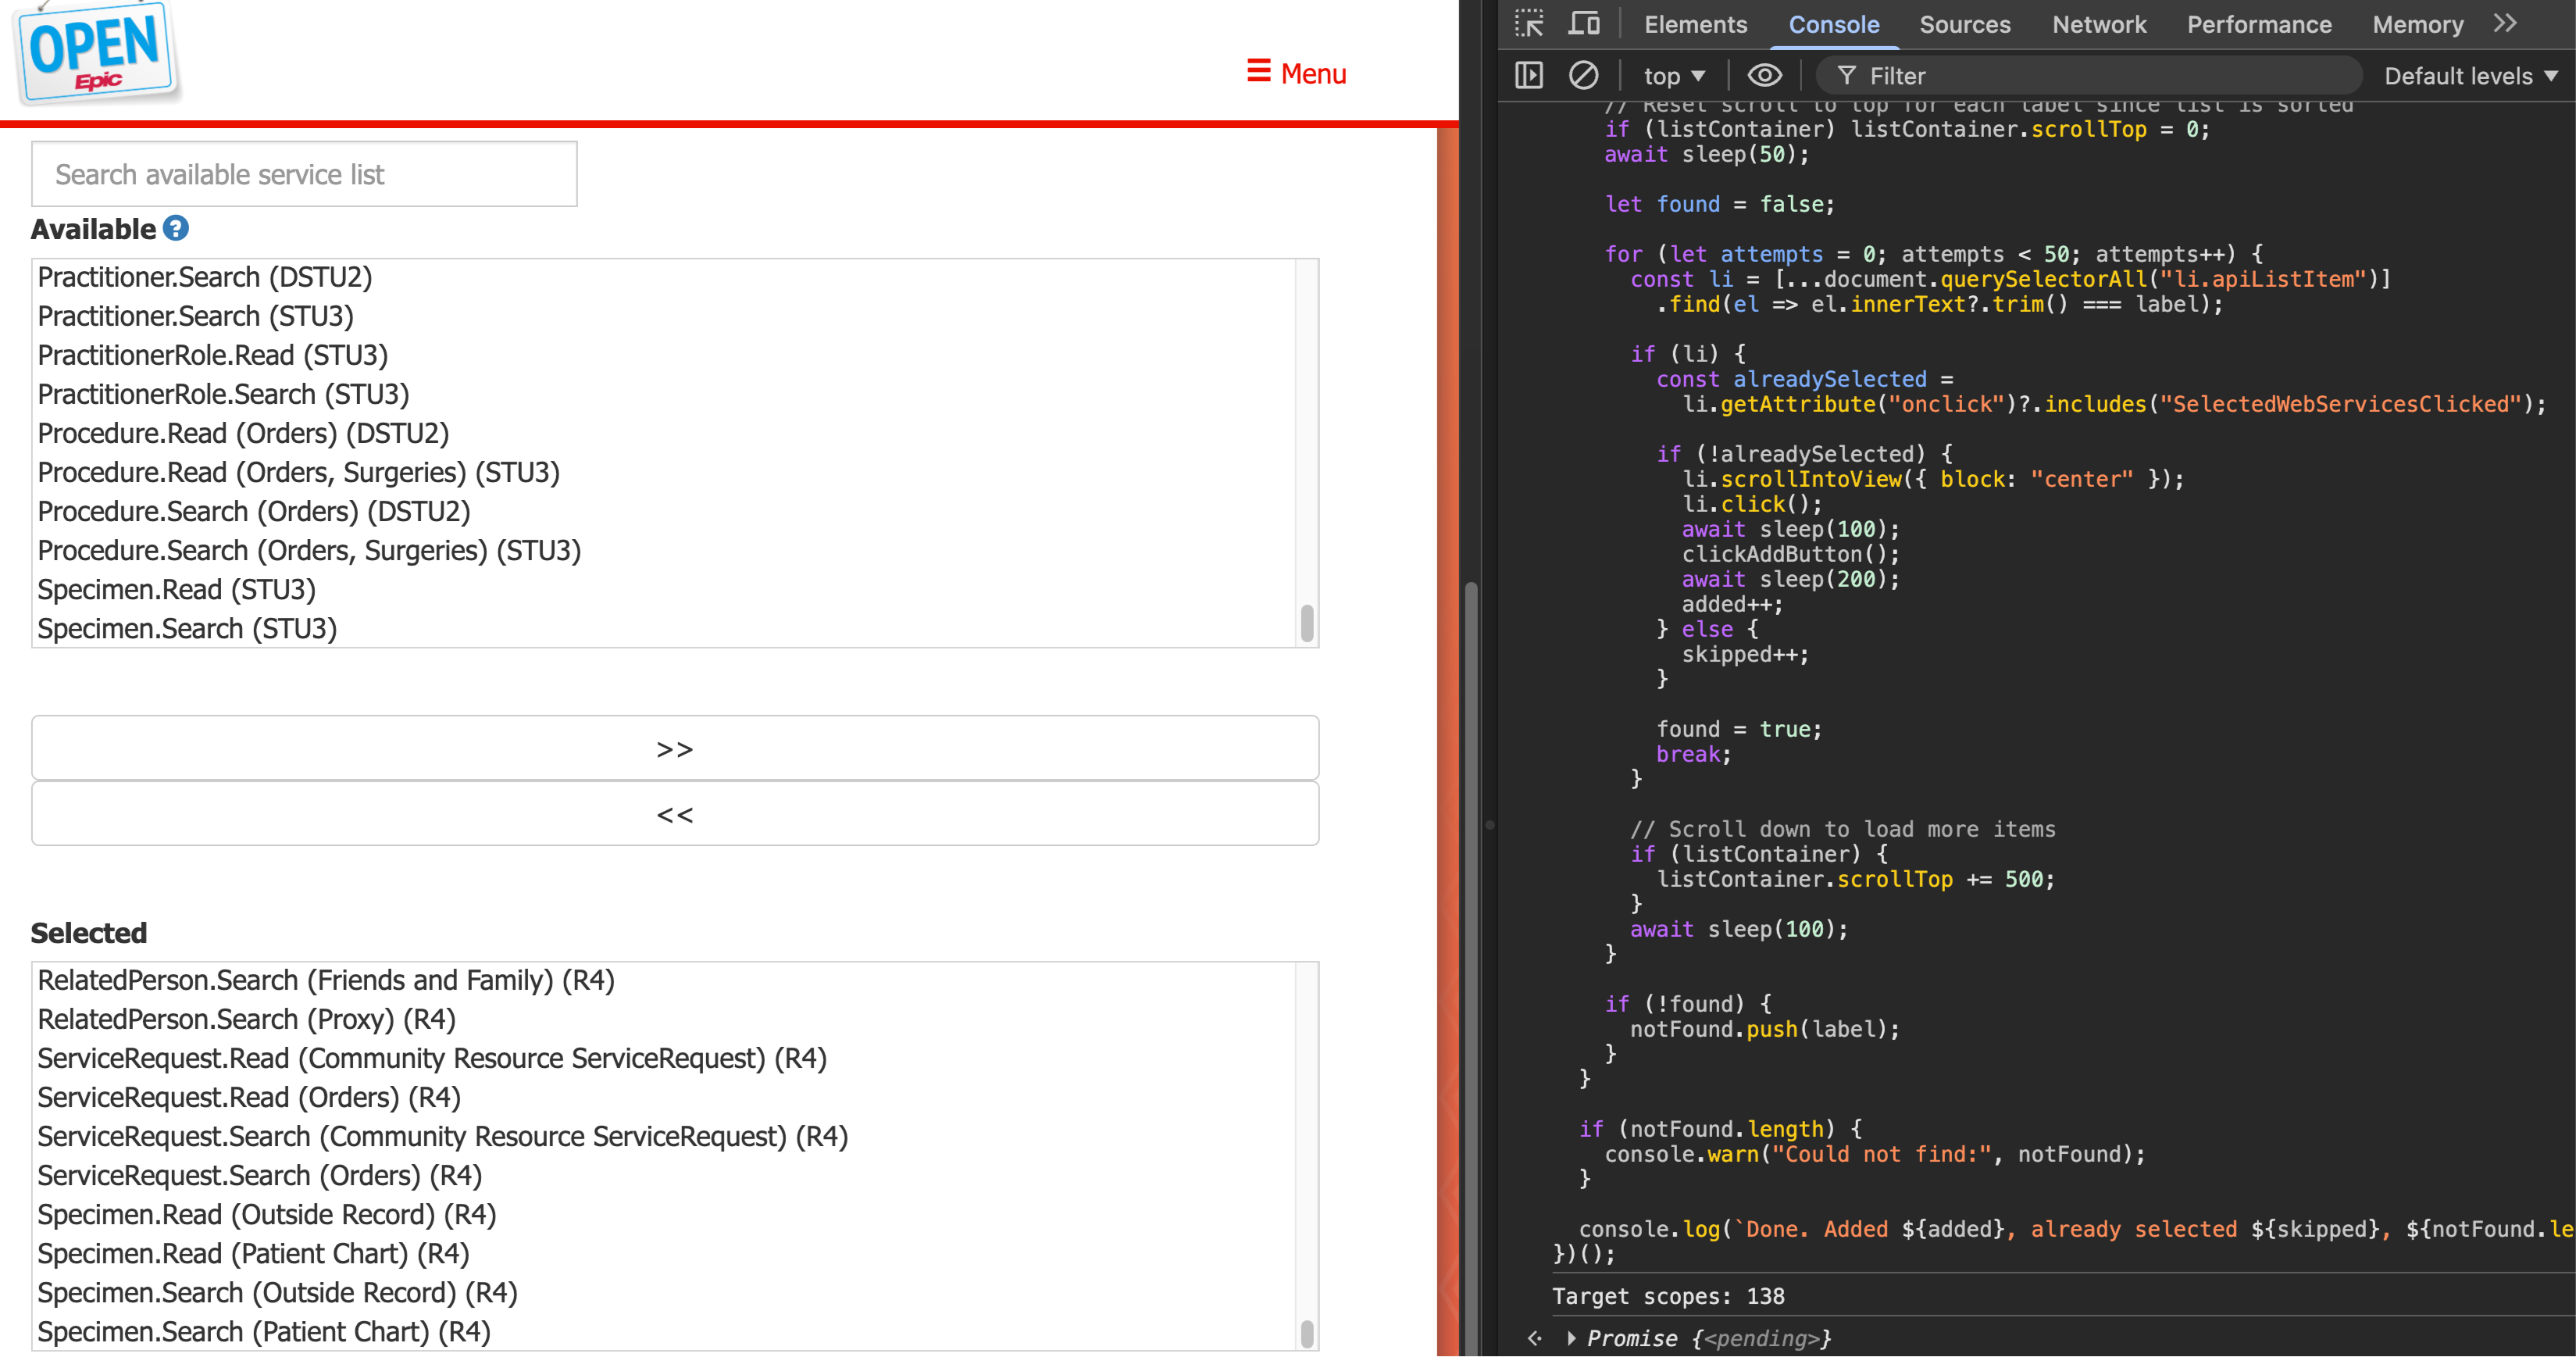
5. The script scrolls through the available API list, finds each matching scope, and clicks the `>>` button to add it to the selected list. You’ll see it working in real time.
6. Once the script finishes, scroll down and click Save.
### Fill your application metadata [#6-fill-your-application-metadata]
1. Set the following fields.
* SMART on FHIR Version to R4.
* SMART Scope Version to SMART v1.
* FHIR ID Generation Scheme to Use Unconstrained FHIR IDs.
2. Write a summary and description for your app, and check the boxes that match your intended purposes and users.
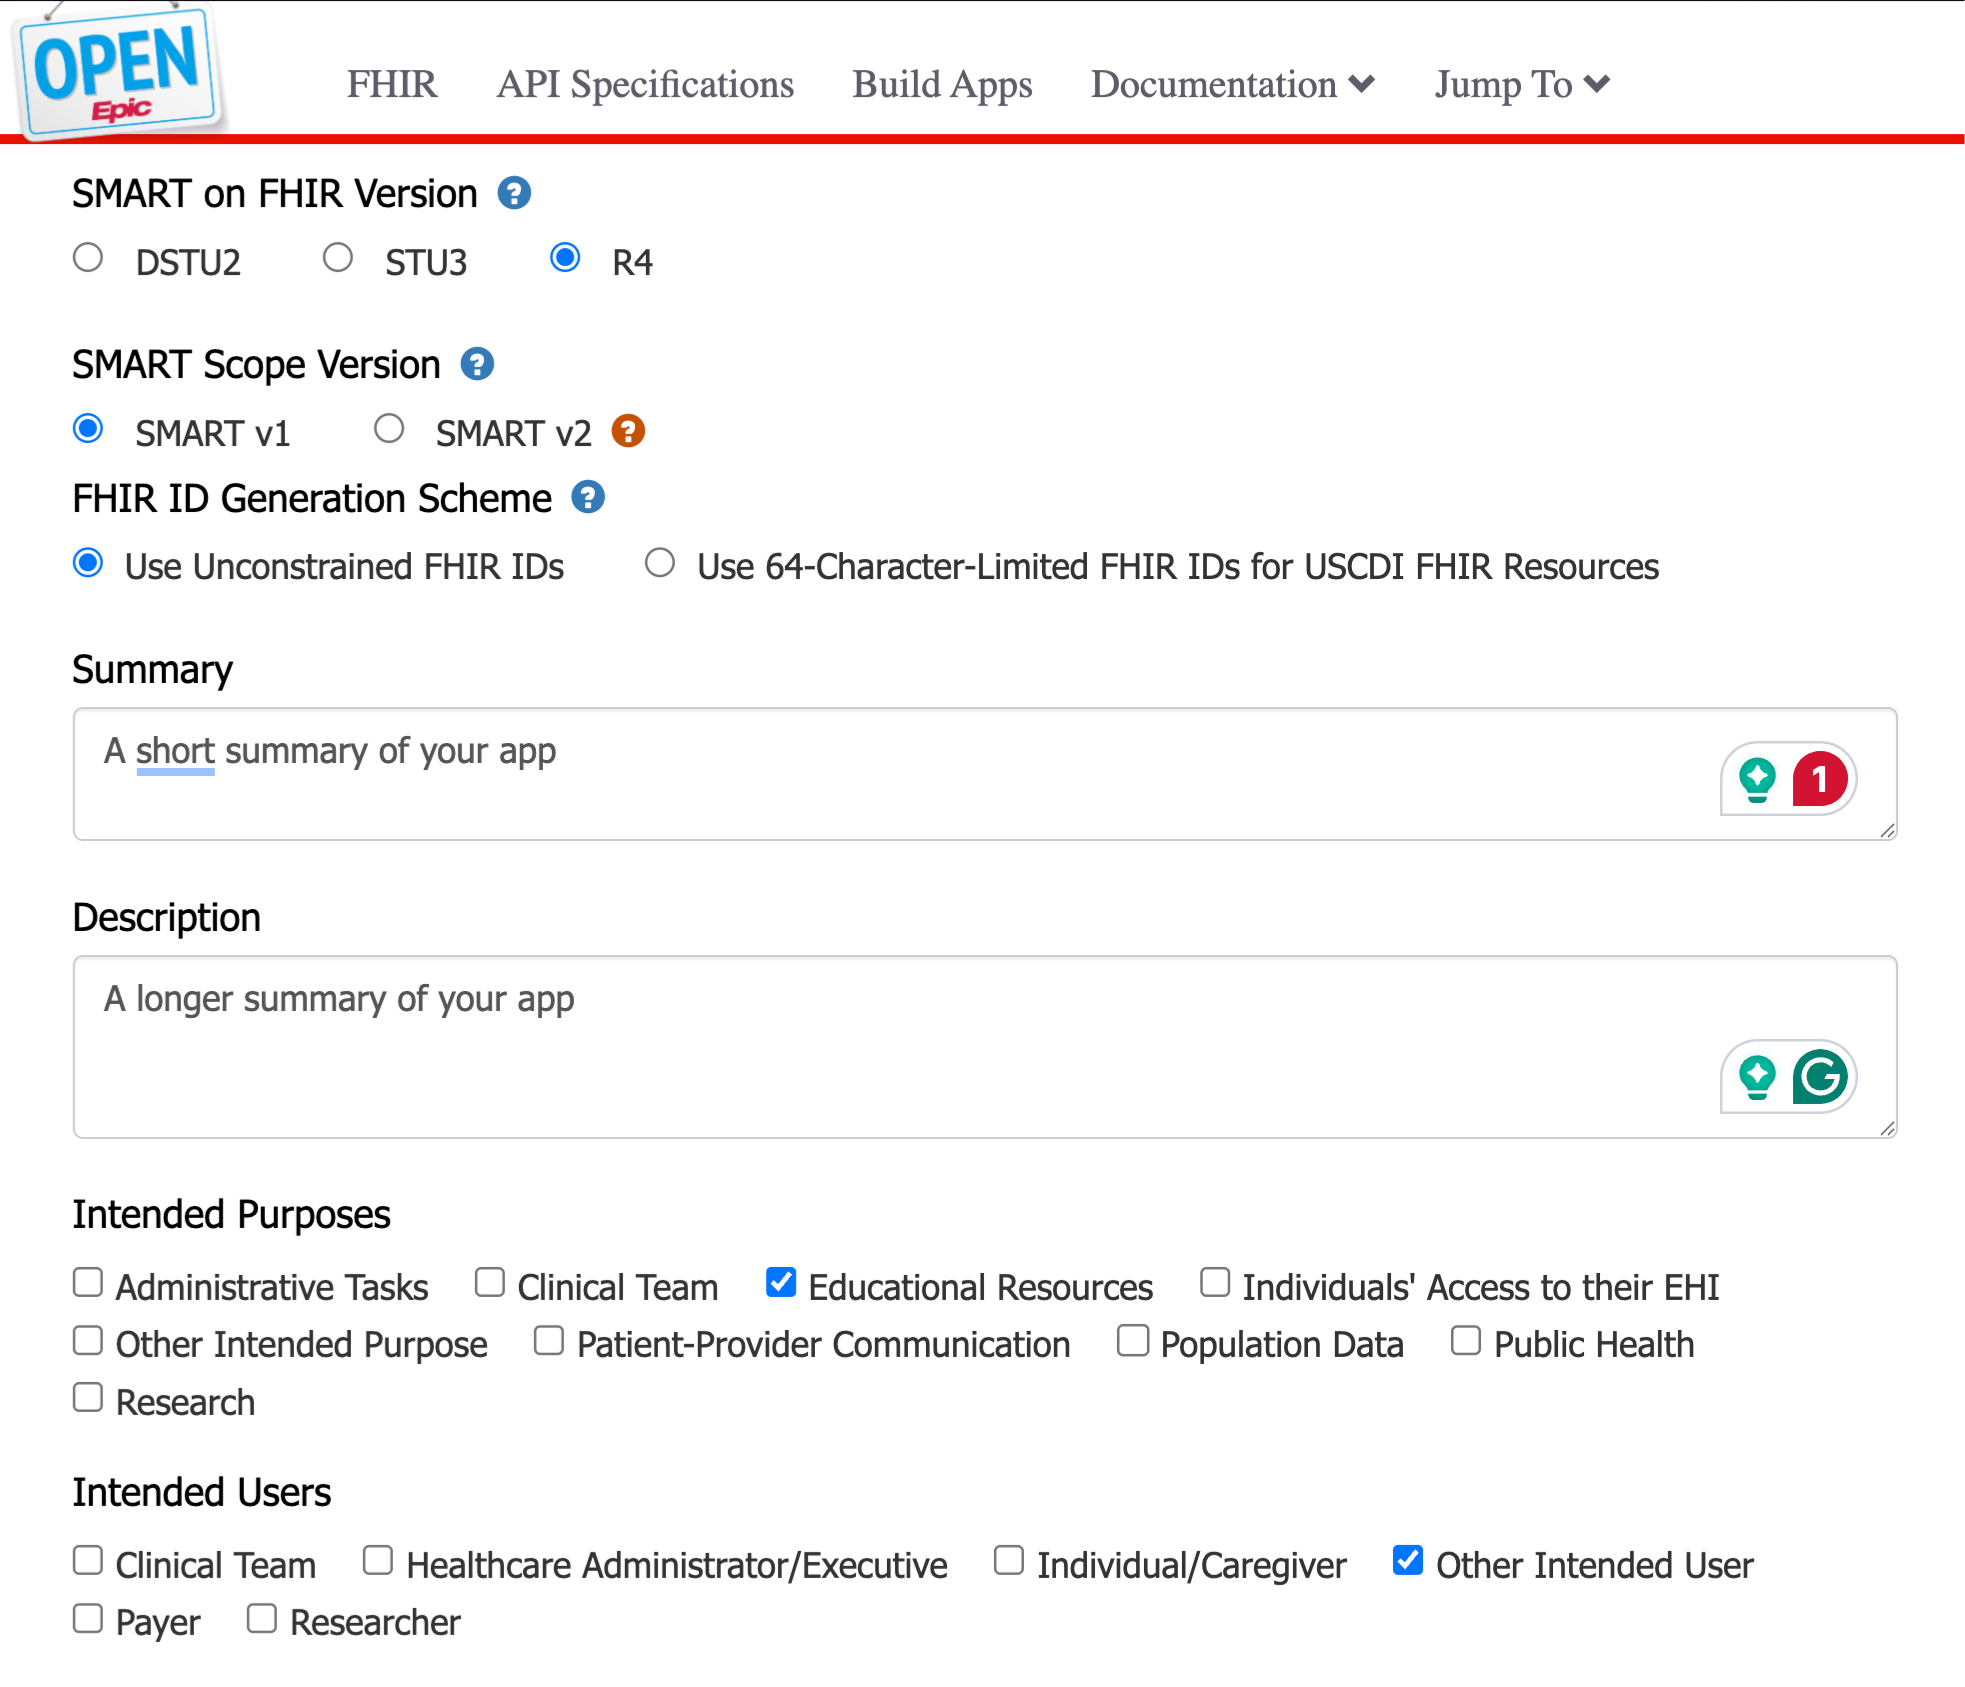
3. Upload a thumbnail and screenshots. Fill in your Terms and Conditions URL and (optionally) the Additional Disclosure Information URL.
### Fill your application data use Questionnaire (Important) [#7-fill-your-application-data-use-questionnaire-important]
1. Click Open Data Use Questionnaire. There are two questionnaires you need to complete before you can go live.
2. Answer the questionnaire honestly. Questions cover your organization type, how the app is funded, and how you handle user data.
3. Click Save Changes after each section.
### Mark your application Ready for Production [#8-mark-your-application-ready-for-production]
Once everything is filled out, click Save & Ready for Production.
*After this, the app is locked and can’t be edited.*
### Activate Organizations [#9-activate-organizations]
1. Go back to My Apps. Your app should now have a green “Production Ready” badge.
2. Click Review & Manage Downloads.
3. You’ll see a list of all Epic customer organizations. With USCDI v3 automatic distribution, hundreds of organizations will appear, most with a “Not responded” status. You need to activate each one for both Non-Production and Production.
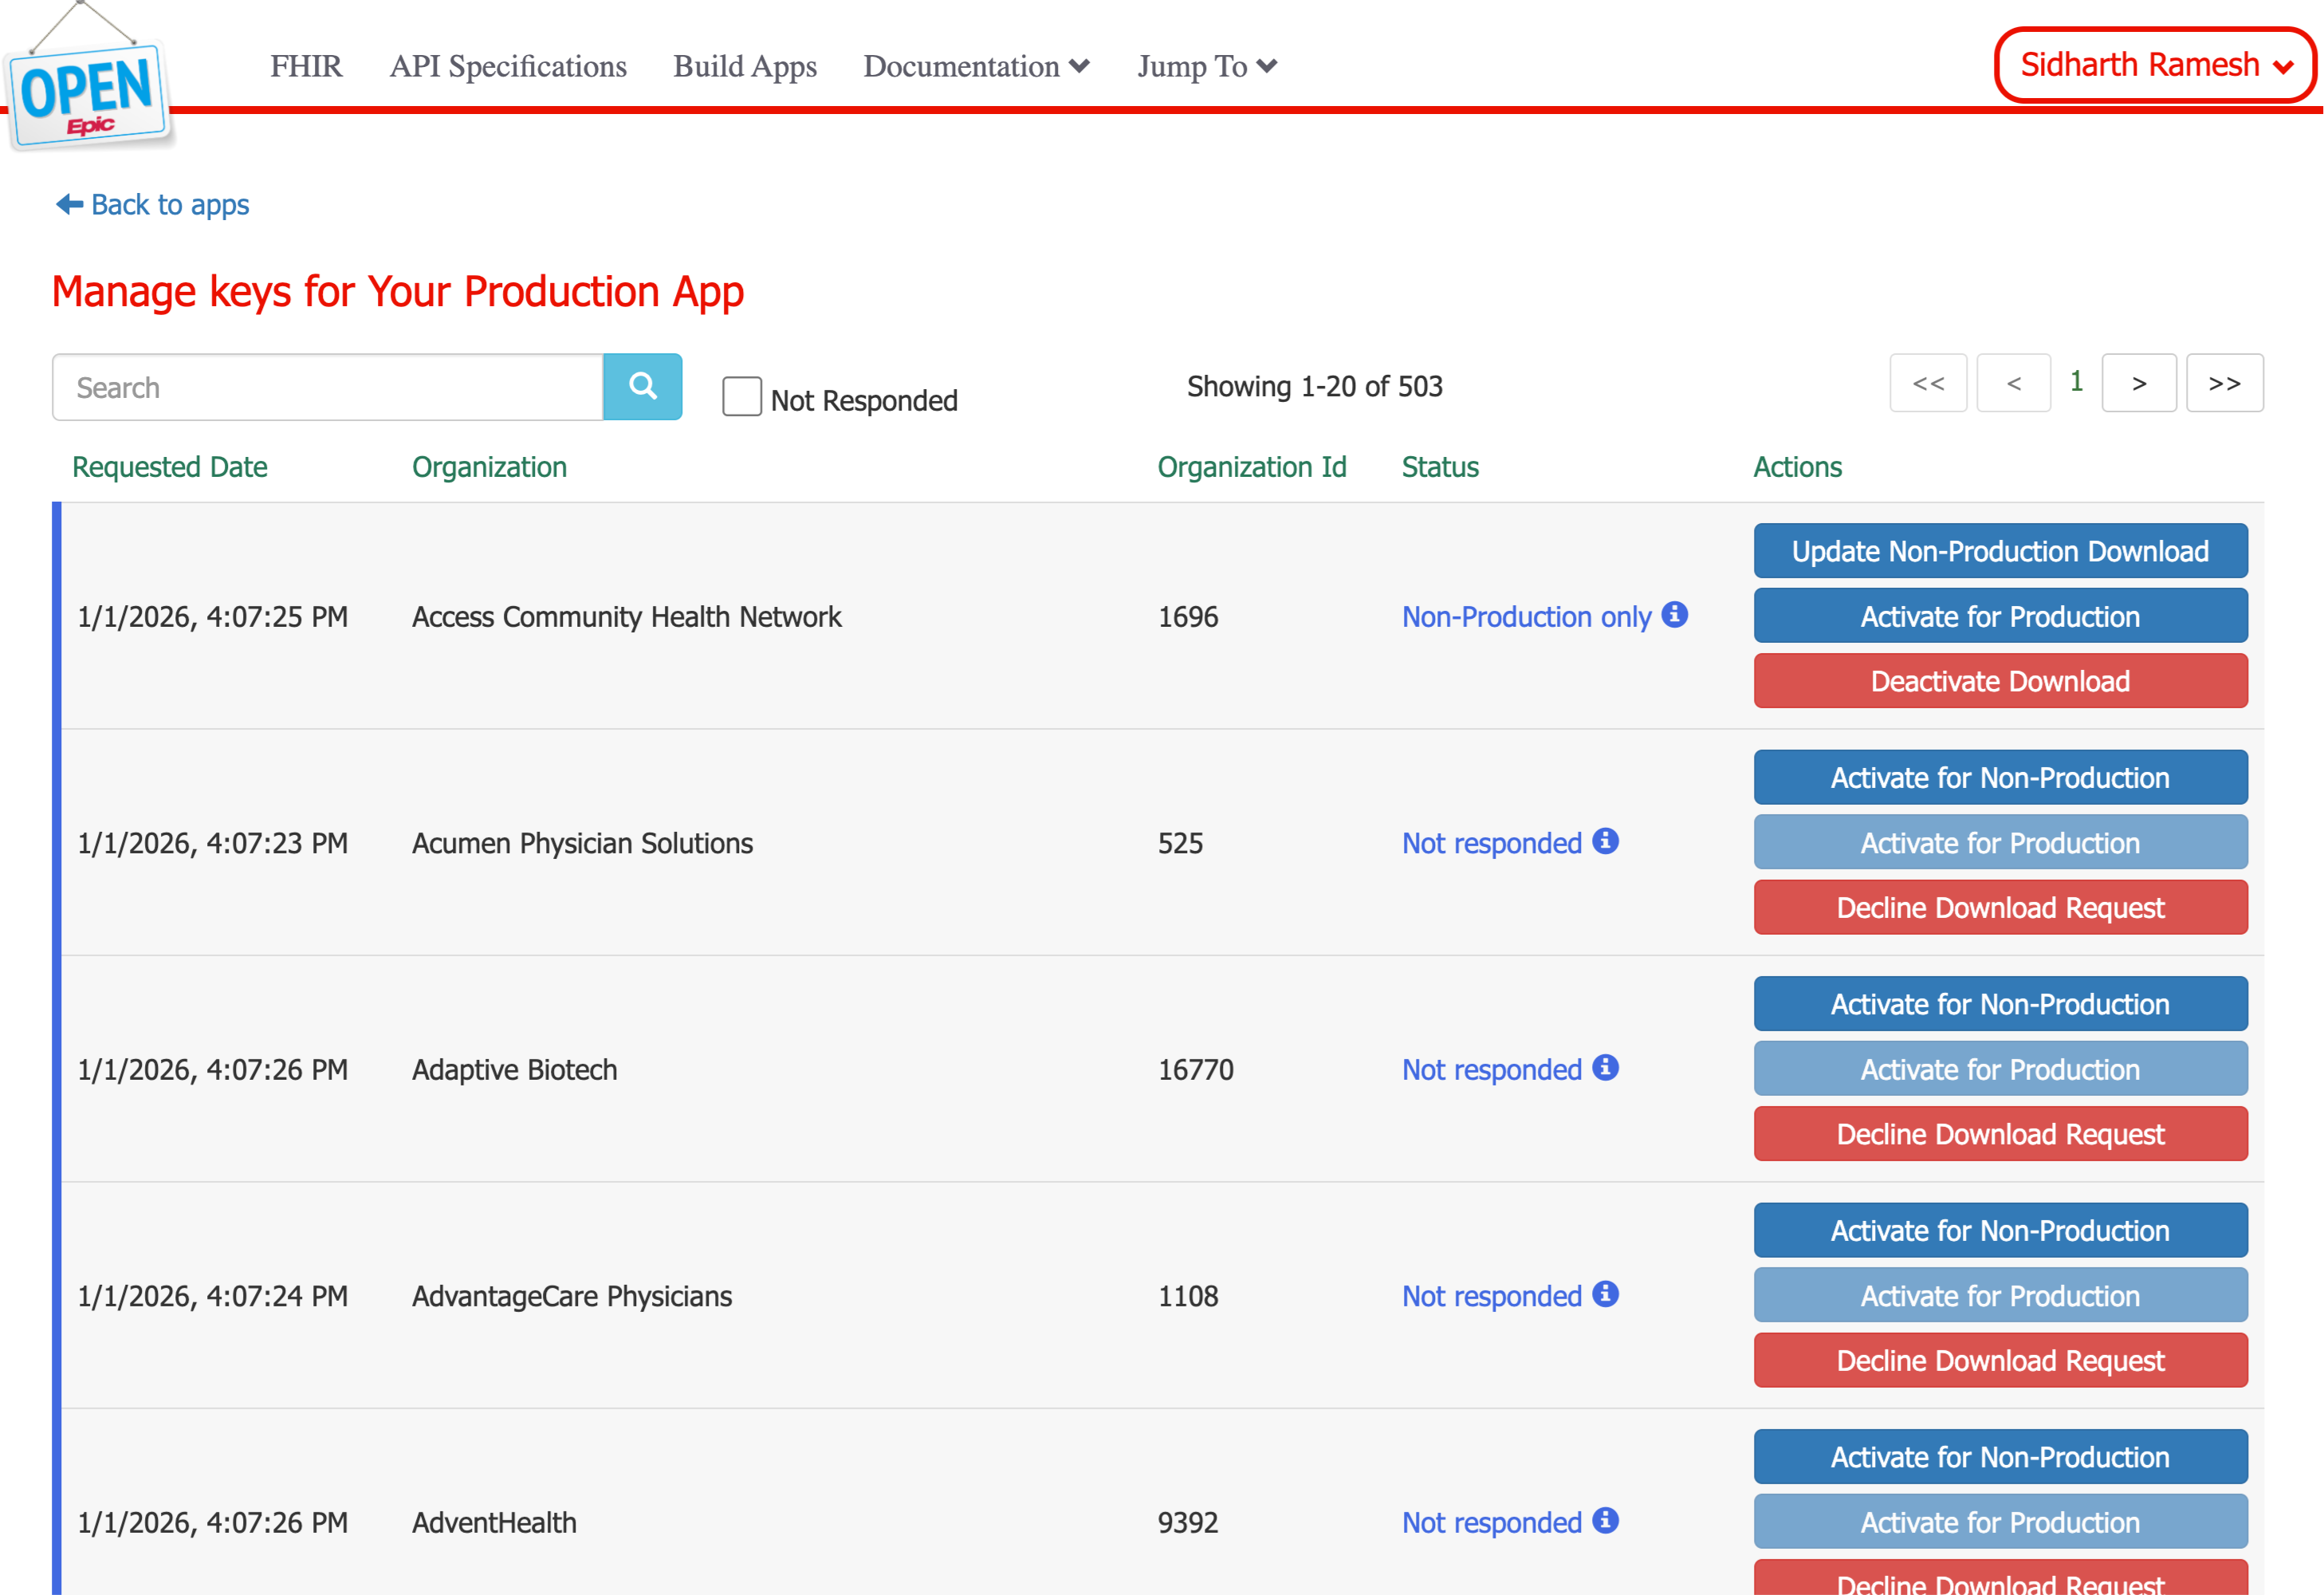
#### Manual [#manual]
For each organization, activate Non-Production and Production individually. This is fine if you only need a handful of organizations, but doing it for 500+ orgs is not practical; use the script below instead.
#### Using the script [#using-the-script]
This script is inspired by [Josh Mandel’s post on the “7000 clicks” problem](https://www.linkedin.com/pulse/7000-clicks-register-fhir-app-josh-mandel-md-ta7ic/). Open the browser console again and paste the activation script:
```javascript
(async function activateAllOrgs() {
const appIdMatch = location.search.match(/id=(\d+)/i);
if (!appIdMatch) {
console.error('[Epic Activator] Could not find app ID in URL.');
return;
}
const APP_ID = appIdMatch[1];
console.log(`%c[Epic Activator] App ID: ${APP_ID}`, 'color: blue; font-weight: bold');
const DELAY_MS = 500;
const LOG_KEY = 'epicActivatorLog';
const logLines = [];
function log(msg, style) {
logLines.push({ time: new Date().toISOString(), msg });
sessionStorage.setItem(LOG_KEY, JSON.stringify(logLines));
if (style) {
console.log(`%c${msg}`, style);
} else {
console.log(msg);
}
}
function logError(msg) {
logLines.push({ time: new Date().toISOString(), msg, error: true });
sessionStorage.setItem(LOG_KEY, JSON.stringify(logLines));
console.error(msg);
}
const prev = sessionStorage.getItem(LOG_KEY);
if (prev) {
try {
const prevLines = JSON.parse(prev);
console.log('%c[Epic Activator] Previous run log found (' + prevLines.length + ' entries):', 'color: purple; font-weight: bold');
for (const line of prevLines) {
const prefix = line.time.split('T')[1].split('.')[0];
if (line.error) {
console.error(` [${prefix}] ${line.msg}`);
} else {
console.log(` [${prefix}] ${line.msg}`);
}
}
console.log('%c[Epic Activator] End of previous run log. Starting new run...', 'color: purple; font-weight: bold');
} catch (e) { /* ignore parse errors */ }
}
sessionStorage.removeItem(LOG_KEY);
function sleep(ms) {
return new Promise(resolve => setTimeout(resolve, ms));
}
function getCSRFToken() {
const input = document.querySelector('input[name="__RequestVerificationToken"]');
if (!input) throw new Error('CSRF token not found on page');
return input.value;
}
async function postAPI(url, body) {
const resp = await fetch(url, {
method: 'POST',
headers: {
'Content-Type': 'application/x-www-form-urlencoded',
'RequestVerificationToken': getCSRFToken()
},
body
});
if (!resp.ok) throw new Error(`HTTP ${resp.status}`);
const data = await resp.json();
if (!data.Success) throw new Error(data.Message || 'API returned Success=false');
return data;
}
async function approveDownload(orgId, { nonProdOnly, prodOnly }) {
const data = await postAPI('/Developer/ApproveDownload', new URLSearchParams({
OrgId: orgId,
AppId: APP_ID,
Testhash: '',
Testhash256: '',
Prodhash: '',
Prodhash256: '',
NonProdOnly: String(nonProdOnly),
ProdOnly: String(prodOnly),
FhirIdGenerationScheme: '',
OverrideNonProdClientId: '',
OverrideProdClientId: '',
TestJWKS: '',
ProdJWKS: ''
}).toString());
if (!data.Data.Success) throw new Error(data.Data.Message || 'Inner Success=false');
return data;
}
log('[Epic Activator] Fetching all orgs...', 'color: blue; font-weight: bold');
const PAGE_SIZE = 2000;
const allOrgs = [];
let page = 0;
while (true) {
const data = await postAPI('/Developer/LoadDownloads', `appId=${APP_ID}&PageSize=${PAGE_SIZE}&page=${page}`);
const downloads = data.Data.Downloads;
for (const d of downloads) {
allOrgs.push({ orgId: d.Id.split('_')[0], orgName: d.OrgName, approved: d.Approved });
}
log(`[Epic Activator] Fetched page ${page + 1}: ${downloads.length} orgs (${allOrgs.length} total)`);
if (downloads.length < PAGE_SIZE) break;
page++;
}
const needsBoth = allOrgs.filter(o => o.approved === 0);
const needsProd = allOrgs.filter(o => o.approved === 3);
const alreadyDone = allOrgs.filter(o => o.approved === 1);
log('[Epic Activator] Summary:', 'color: blue; font-weight: bold');
log(` Total orgs: ${allOrgs.length}`);
log(` Already enabled: ${alreadyDone.length}`);
log(` Need Non-Prod + Prod: ${needsBoth.length}`);
log(` Need Prod only: ${needsProd.length}`);
log(` Total API calls needed: ${needsBoth.length * 2 + needsProd.length}`);
if (needsBoth.length === 0 && needsProd.length === 0) {
log('[Epic Activator] Nothing to do!', 'color: green; font-weight: bold');
return;
}
const proceed = confirm(
`Epic Activator will make ${needsBoth.length * 2 + needsProd.length} API calls:\n` +
`• ${needsBoth.length} orgs: activate Non-Prod + Prod\n` +
`• ${needsProd.length} orgs: activate Prod only\n` +
`• ${alreadyDone.length} orgs: already done (skipped)\n\n` +
`Click OK to proceed, Cancel to abort.`
);
if (!proceed) {
log('[Epic Activator] Aborted by user.', 'color: red; font-weight: bold');
return;
}
let successCount = 0;
let errorCount = 0;
const errors = [];
const total = needsBoth.length * 2 + needsProd.length;
let callIndex = 0;
for (const org of needsBoth) {
try {
callIndex++;
log(`[${callIndex}/${total}] ${org.orgName} (${org.orgId}) - Non-Production...`);
await approveDownload(org.orgId, { nonProdOnly: true, prodOnly: false });
successCount++;
await sleep(DELAY_MS);
} catch (e) {
logError(` FAILED: ${org.orgName} (${org.orgId}) non-prod: ${e.message}`);
errors.push({ org: org.orgName, orgId: org.orgId, step: 'non-prod', error: e.message });
errorCount++;
continue;
}
try {
callIndex++;
log(`[${callIndex}/${total}] ${org.orgName} (${org.orgId}) - Production...`);
await approveDownload(org.orgId, { nonProdOnly: false, prodOnly: true });
successCount++;
await sleep(DELAY_MS);
} catch (e) {
logError(` FAILED: ${org.orgName} (${org.orgId}) prod: ${e.message}`);
errors.push({ org: org.orgName, orgId: org.orgId, step: 'prod', error: e.message });
errorCount++;
}
}
for (const org of needsProd) {
try {
callIndex++;
log(`[${callIndex}/${total}] ${org.orgName} (${org.orgId}) - Production...`);
await approveDownload(org.orgId, { nonProdOnly: false, prodOnly: true });
successCount++;
await sleep(DELAY_MS);
} catch (e) {
logError(` FAILED: ${org.orgName} (${org.orgId}) prod: ${e.message}`);
errors.push({ org: org.orgName, orgId: org.orgId, step: 'prod', error: e.message });
errorCount++;
}
}
log(`[Epic Activator] Done!`, 'color: green; font-weight: bold');
log(` Successful calls: ${successCount}`);
log(` Failed calls: ${errorCount}`);
if (errors.length > 0) {
log(` Failed orgs: ${errors.map(e => `${e.org} (${e.step})`).join(', ')}`);
console.table(errors);
}
log('[Epic Activator] Reloading page in 3s...');
await sleep(3000);
location.reload();
})();
```
The script fetches all organizations, shows you a confirmation dialog with the count, and then activates each one with a 500ms delay between calls. It logs progress to the console and to `sessionStorage`, so you can check results even after the page reloads. After the script finishes and the page reloads, all organizations should show “Keys enabled” status.
Run the script in the console and click “OK” on the browser prompt.
4. After the script finishes and the page reloads, all organizations should show “Keys enabled” status.
5. Your app is live across all activated Epic organizations, and patients at those hospitals can now authenticate and pull their records through your app.
With client ID you’re now ready to test and launch your integration with Epic via Medblocks Platform.
## See also [#see-also]
* [Create a patient session](/docs/patient-access/create-patient-session)
* [Find connections](/docs/patient-access/find-connections)
---
# Find connections
Search the Medblocks catalog to find the hospital or payer a patient should connect to.
Source URL: /docs/patient-access/find-connections
# Find connections
Search the Medblocks catalog to find the hospital or payer a patient should connect to.
This is the first build step. Before a patient can connect their records, you need the connection they belong to. A connection is a catalog entry for one hospital, clinic, or payer (a health insurer). Medblocks keeps a catalog of these, and you search it to find the one the patient uses.
If you choose the [Medblocks-hosted page](/docs/patient-access/create-patient-session/medblocks-hosted-page), Medblocks renders this search for the patient. Use this page when you want to integrate the search functionality with your own UI.
## Search the catalog [#search-the-catalog]
Search with `mb.connections.list`, passing the patient’s text as `q`. This is what powers the search box in your own UI, where the patient types their hospital’s name and picks it from the results. Your browser code never touches the Medblocks API directly, since your API key is a secret that lives only on your server. The browser calls a route on your server, and your server runs the search and returns the results.
```ts title="server/search-connections.ts"
import { mb } from "../medblocks";
export async function searchConnections(query: string) {
if (query.trim().length < 2) return { data: [] };
const page = await mb.connections.list({ q: query, limit: 20 });
return {
data: page.data.map((connection) => ({
id: connection.id,
name: connection.name,
type: connection.type,
logo_url: connection.logo_url,
})),
};
}
```
```ts title="src/connection-search.ts"
async function searchConnections(query: string) {
if (query.trim().length < 2) return [];
const response = await fetch(`/api/connections?q=${encodeURIComponent(query)}`);
const { data } = await response.json();
return data as Array<{ id: string; name: string; type: string | null }>;
}
```
`q` is a case-insensitive match on the connection’s name, and `type` narrows the results to one vendor, such as `epic` or `cerner`.
The screenshot below is an example from TrialMatched, a clinical trial matching app. TrialMatched asks patients to connect records from their hospitals so it can match them to relevant trials. In an app like that, this search box is where the patient finds the hospital or clinic they want to connect.
Example connection search inside TrialMatched, where a patient chooses the hospital or clinic to connect.
## What a connection looks like [#what-a-connection-looks-like]
The API returns a page of connection results. A single result looks like this.
```json title="Example response item"
{
"id": "fhirsrc_01J9YR9N3X4VZ6P2K5RH7M3LMP",
"name": "Epic MyChart",
"type": "epic",
"fhir_base_url": "https://fhir.epic.com/interconnect-fhir-oauth/api/FHIR/R4",
"logo_url": "https://cdn.medblocks.com/logos/epic.png",
"portal_url": "https://www.mychart.com"
}
```
These are the fields you will usually render or store.
| Field | Description |
| --------------- | ----------------------------------------------------------------------------------------------------------- |
| `id` | The connection ID, like `fhirsrc_01J9YR9N3X4VZ6P2K5RH7M3LMP`. This is what you pass into a patient session. |
| `name` | The display name, such as `Epic MyChart`. |
| `type` | The vendor, such as `epic` or `cerner`, or `null` when unknown. Both EHRs and payers appear in the catalog. |
| `fhir_base_url` | The connection’s FHIR data endpoint. It also works as an alternate id wherever `id` is accepted. |
| `logo_url` | A logo for your UI, or `null` when one hasn’t been curated. |
| `portal_url` | The patient-facing portal link, useful for help text, or `null`. |
You only need `id` and `name` to build a working search experience. The rest is there to make it look right.
## List or retrieve connections [#list-or-retrieve-connections]
Drop the `q` to walk the whole catalog, handy for caching it on your server. Call `autoPagingIterator()` and the SDK follows the pagination cursor for you, one page at a time.
```ts title="server/dump-catalog.ts"
for await (const connection of mb.connections.list({ limit: 100 }).autoPagingIterator()) {
console.log(connection.id, connection.name);
}
```
Already know which connection you want? Pass `mb.connections.retrieve` either the connection ID or the `fhir_base_url`, since both resolve to the same entry. An ID that matches nothing throws a `not_found_error`.
```ts title="server/get-connection.ts"
const connection = await mb.connections.retrieve("fhirsrc_01J9YR9N3X4VZ6P2K5RH7M3LMP");
```
## Next [#next]
Once the patient picks a connection, pass its `id` into a patient session. The patient goes to that facility’s patient portal to sign in and approve access. [Your own UI](/docs/patient-access/create-patient-session/your-own-ui) shows how to wire the chosen connection into the session.
If you’d rather not run the search at all, a [Medblocks-hosted page](/docs/patient-access/create-patient-session/medblocks-hosted-page) does it for you. The patient searches the catalog on the page you send them to.
## Common errors [#common-errors]
| Code | Meaning |
| -------------------- | ------------------------------------------------------------------------------------- |
| `resource_not_found` | The id or `fhir_base_url` you retrieved does not match any connection in the catalog. |
| `bad_request` | A query parameter is malformed, such as a `limit` outside the allowed range. |
| `missing_api_key` | The `Authorization` header is missing from your server’s request. |
| `invalid_api_key` | The key is invalid or does not belong to your organization. |
Read the full envelope and code list in [Errors](/docs/reference/errors).
## See also [#see-also]
* [Your own UI](/docs/patient-access/create-patient-session/your-own-ui)
* [Create a patient session](/docs/patient-access/create-patient-session)
* [Directory](/docs/directory)
---
# Get the data
Read connected records on demand or send them to your own systems with exports.
Source URL: /docs/patient-access/get-the-data
# Get the data
Read connected records on demand or send them to your own systems with exports.
Once a patient connects, Medblocks pulls their records from the facility or payer they approved in the [background](/docs/patient-access/background-pull). This page shows how your backend reads those records.
## Read on demand [#read-on-demand]
Once a patient’s connection is active and the background pull has had time to land records, read them with `mb.patients.records`. It returns the latest stored resources for that patient as a paginated list, and each item names the EHR source it came from. The SDK calls [`GET /patients/{id}/records`](/docs/reference/api/get-patient-records) under the hood, so the same read works from any HTTP client.
```ts title="server/read-patient-records.ts"
import { Medblocks } from "medblocks";
const mb = new Medblocks(process.env.MEDBLOCKS_API_KEY!);
const page = await mb.patients.records("user_42", { count: 100 });
for (const item of page.data) {
console.log(item.source, item.resource.resourceType);
}
```
```ts title="app/load-records.ts"
// Your API key stays on the server. The browser calls your own route,
// which runs the read above and returns the page as JSON.
const response = await fetch("/api/records?patient_id=user_42");
const page = await response.json();
for (const item of page.data) {
console.log(item.source, item.resource.resourceType);
}
```
Each item carries the resource exactly as the source EHR returned it, with one addition. Your `patient_id` is appended to the `Patient` resource’s identifier list under the `urn:medblocks:patient-id` system, so the record stays matched to your patient wherever it lands. Medblocks does not rewrite ids or references.
```json
{
"resource_type": "list",
"patient_id": "user_42",
"data": [
{
"source": "fhirsrc_SMsb6YLMQLal1qm9AbdSPAcc",
"resource": {
"resourceType": "Patient",
"id": "eCB8Nuu2lGe...",
"identifier": [
{ "system": "urn:oid:1.2.840.114350...", "value": "MRN12345" },
{ "system": "urn:medblocks:patient-id", "value": "user_42" } // [!code highlight]
]
}
},
{
"source": "fhirsrc_SMsb6YLMQLal1qm9AbdSPAcc",
"resource": { "resourceType": "Observation", "id": "eWDRZ...", "status": "final" }
}
],
"has_more": true,
"next_cursor": "aB3xK9mQp2Lz",
"previous_cursor": null
}
```
The `source` on each item is the id of the EHR the resource was pulled from. Resolve it with the SDK to get the EHR’s name, type, and base URL. The [FHIR source reference](/docs/reference/api/get-fhir-source) documents the underlying endpoint.
```ts
const ehr = await mb.connections.retrieve(item.source);
```
When a patient has connected more than one EHR, a single read returns items from every source in the same list, and `source` is what tells them apart. Group a page client-side when your code handles each EHR separately.
```ts
const bySource = Object.groupBy(page.data, (item) => item.source);
```
## Filter the read [#filter-the-read]
Two query parameters narrow what comes back. `type` takes comma-separated FHIR resource types, and `since` keeps only resources changed after the timestamp you pass.
```ts title="server/read-recent-results.ts"
const page = await mb.patients.records("user_42", {
type: "Observation,Condition",
since: "2026-06-01T00:00:00Z",
});
```
Use `since` to read incrementally when you keep your own copy of the record. Anything not ISO 8601 is rejected. Filters are validated against the pagination cursor, so a read keeps the same filters from its first page to its last.
## Pagination [#pagination]
A patient’s records can run to more than one page. Each response carries a `next_cursor` when more records remain, so you keep passing it back as `starting_after` and stop once `has_more` is false. The example below does this and returns every resource.
Your result set is fixed the moment you request the first page. Records that arrive while you are still reading are not slipped into the pages you are working through, so you never see a resource twice or in a shifting order. You pick up the new records the next time you read from the start.
```ts title="src/read-all-records.ts"
import { mb } from "./medblocks";
/**
* Reads every page of a patient's records by following `next_cursor`,
* and returns all collected resources.
*/
export async function readAllRecords(patientId: string) {
const resources = [];
let starting_after: string | undefined;
while (true) {
const page = await mb.patients.records(patientId, {
count: 100,
starting_after,
});
resources.push(...page.data.map((item) => item.resource));
if (!page.has_more || !page.next_cursor) return resources;
starting_after = page.next_cursor;
}
}
```
```ts title="app/load-all-records.ts"
// Your server walks the pages and returns the full list. The browser
// makes one call and never touches cursors or the API key.
const response = await fetch("/api/records?patient_id=user_42");
const resources = await response.json();
console.log(`Loaded ${resources.length} resources`);
```
Cursors are short opaque tokens. Pass them back exactly as received and never store them long term. Each cursor stays valid for 7 days from the page response that issued it, and every new page issues fresh cursors, so a read that keeps going never expires. Only a cursor left unused for more than 7 days goes stale, and the API answers it with `bad_request` and the message `Invalid or expired cursor`. When that happens, start the read again from the first page.
One caveat. When a patient revokes a source’s access while you are paging, the very next page stops returning that source’s records, so a read can end with fewer resources than earlier pages implied. Consent wins over consistency.
## Export to your systems [#export-to-your-systems]
You do not have to pull records yourself. An export delivers them for you. Pick a FHIR server or object storage destination once in the dashboard, and Medblocks keeps it current as new records land, with nothing to build or maintain on your side. [Data out](/docs/data-out) walks through setting one up.
## See also [#see-also]
* [Data out](/docs/data-out)
* [After connection](/docs/patient-access/after-connection)
* [Get patient records](/docs/reference/api/get-patient-records)
---
# Pagination
Read a single page from any list method, or let the SDK walk every page for you.
Source URL: /docs/patient-access/get-the-data/pagination
# Pagination
Read a single page from any list method, or let the SDK walk every page for you.
Every `list` method in `medblocks` is cursor-paginated. Await the call and you get one page back. Call `.autoPagingIterator()` on the same call and the SDK follows the cursor for you, page after page, until there is nothing left.
The two modes share one call. You choose how to consume it.
## Fetch one page [#fetch-one-page]
Await a `list` call to get a single `Page`. It carries the items in `data`, a `has_more` flag, and a `next_cursor` you pass back to get the page after this one.
```ts title="server/first-page.ts"
const page = await mb.patients.list({ limit: 50 });
for (const patient of page.data) {
console.log(patient.id);
}
if (page.has_more && page.next_cursor) {
const next = await mb.patients.list({ limit: 50, starting_after: page.next_cursor });
}
```
A `Page` exposes three fields.
| Field | What it is |
| ------------- | ----------------------------------------------------------------------- |
| `data` | The items on this page, typed to the resource you listed. |
| `has_more` | `true` when at least one more page exists after this one. |
| `next_cursor` | The cursor to pass as `starting_after` next time, or `null` at the end. |
`Page` is exported, so you can annotate code that receives one.
```ts title="server/types.ts"
import type { Page, Patient } from "medblocks";
function firstId(page: Page) {
return page.data[0]?.id ?? null;
}
```
Awaiting the same `list` call more than once does not refetch. The SDK caches the first page on the returned value, so two awaits share one network request.
```ts title="server/cached.ts"
const patients = mb.patients.list({ limit: 50 });
const a = await patients;
const b = await patients;
// one request, same page
```
## Page through everything [#page-through-everything]
When you want the whole result set, call `.autoPagingIterator()` instead of awaiting, and drive it with `for await`. The SDK yields each item, then follows `next_cursor` to fetch the next page, and stops when `has_more` is `false`.
```ts title="server/all-patients.ts"
let count = 0;
for await (const patient of mb.patients.list({ limit: 100 }).autoPagingIterator()) {
count += 1;
}
console.log(`${count} patients total`);
```
It works the same on every list method.
```ts title="server/iterate-any.ts"
for await (const session of mb.patients.listPatientSessions("user_42").autoPagingIterator()) { /* ... */ }
for await (const source of mb.connections.list({ q: "epic" }).autoPagingIterator()) { /* ... */ }
```
Be careful walking the whole catalog. `mb.connections.list()` spans every source Medblocks knows, which is large. Filter it with `q` or `type`, or page through it manually, rather than iterating all of it in one loop.
## Manual cursors [#manual-cursors]
`.autoPagingIterator()` walks everything in a single pass, which suits a script that runs start to finish. Reach for manual cursors when the job needs to survive interruptions or run in batches. Save `next_cursor` after each page and you can resume where you left off, across separate runs of a cron or queue worker.
The cursor is an opaque token. Store it as is and pass it back as `starting_after`. Do not build or parse one yourself.
```ts title="server/walk-with-checkpoint.ts"
let cursor: string | null = await checkpoint.read();
while (true) {
const page = await mb.patients.list({ limit: 100, starting_after: cursor ?? undefined });
for (const patient of page.data) await process(patient);
if (!page.has_more || !page.next_cursor) break;
cursor = page.next_cursor;
await checkpoint.write(cursor);
}
```
## Limits [#limits]
Pass `limit` to set the page size. The default is small, so set it explicitly when you page through a lot of data.
| Param | Default | Range |
| ---------------- | ------- | --------------------------------------------- |
| `limit` | `10` | `1` to `100` |
| `starting_after` | none | A cursor from a previous page’s `next_cursor` |
A `limit` above `100` is rejected with an `invalid_request_error`. Some lists take extra filters on top of these, such as `q` and `type` on `mb.connections.list`. Each resource documents its own.
## See also [#see-also]
* [Errors](/docs/reference/errors)
* [Create patients](/docs/patient-access/create-patients)
---
# Handle the return
Read the return_url params, then show the connected facilities in your app.
Source URL: /docs/patient-access/handle-the-return
# Handle the return
Read the return_url params, then show the connected facilities in your app.
After the patient finishes the hosted page or the direct portal flow, their browser lands back on the `return_url` you set when you started the [patient session](/docs/patient-access/patient-session). That URL is a route in your app, usually something like `/connected`. This page handles the return for both paths, the Medblocks-hosted page and your own UI.
## What comes back [#what-comes-back]
Every return URL carries `patient_id` and `patient_session_id`. When your own UI sends the patient straight to one connection, Medblocks also includes success or failure details for that connection.
| Parameter | Meaning |
| ------------------------------- | ------------------------------------------------------------------------------------------------------------------------------------------------------ |
| `patient_id` | The stable ID you gave the patient. Use it to read the patient’s current connections. |
| `patient_session_id` | The ID of this patient session. Store it if you want to inspect this browser journey later. |
| `success` | Present when your own UI sent the patient straight to one connection. `true` means the facility connected, `false` means the portal returned an error. |
| `connection_id` | Present on success when your own UI sent the patient straight to one connection. |
| `error` and `error_description` | Present when the portal returned the patient without a connected facility. |
`parseReturnUrl` reads those parameters and returns a typed object. If the current page was not opened from a Medblocks return URL, it returns `null`.
## On your landing page [#on-your-landing-page]
You can handle the return entirely on the server. Parse the URL, show a retry path when the portal returned an error, and read the patient’s connected facilities when the connection succeeded.
```ts title="server/connected.ts"
import { parseReturnUrl } from "medblocks";
import { mb } from "./medblocks";
export async function connected(req: Request): Promise {
const result = parseReturnUrl(new URL(req.url).searchParams);
if (!result) return new Response("Missing return parameters", { status: 400 });
if ("success" in result && !result.success) {
return Response.json({
status: "retry",
message: result.error_description ?? "Connection failed. Please try again.",
});
}
const patient = await mb.patients.retrieve(result.patient_id);
const active = patient.connections.filter((connection) => connection.status === "active");
return Response.json({
status: "connected",
patientId: result.patient_id,
sessionId: result.patient_session_id,
connections: active.map((connection) => ({
id: connection.facility.id,
name: connection.facility.name,
logo_url: connection.facility.logo_url,
})),
});
}
```
```tsx title="connected-page.tsx"
import { parseReturnUrl } from "medblocks";
export function ConnectedPage() {
const result = parseReturnUrl();
if (!result) return ;
if ("success" in result && !result.success) {
return ;
}
return ;
}
```
## Show connected facilities [#show-connected-facilities]
The server example uses `mb.patients.retrieve(result.patient_id)`. Each connection carries a `facility` with the source EHR’s names, logos, and portal URLs so your UI can display them immediately.
```ts title="server/connected-facilities.ts"
import { mb } from "./medblocks";
const patient = await mb.patients.retrieve("user_42");
for (const connection of patient.connections) {
if (connection.status !== "active") continue;
console.log(connection.facility.name, connection.facility.logo_url);
}
```
## Common errors [#common-errors]
| Code | Meaning |
| ----------------- | ----------------------------------------------------------------- |
| `not_found` | No patient matches the `patient_id` in the return URL. |
| `missing_api_key` | The `Authorization` header is missing from your server’s request. |
| `invalid_api_key` | The key is invalid or does not belong to your organization. |
Read the full envelope and code list in [Errors](/docs/reference/errors).
## See also [#see-also]
* [After connection](/docs/patient-access/after-connection)
* [Create a patient session](/docs/patient-access/create-patient-session)
* [Patient session](/docs/patient-access/patient-session)
---
# Meditech
Guide to integrate with Meditech Expanse via the Greenfield Workspace program.
Source URL: /docs/patient-access/meditech
# Meditech
Guide to integrate with Meditech Expanse via the Greenfield Workspace program.
Meditech is one of the longest-standing EHR vendors in healthcare, with deployments across more than 2,300 hospitals and health systems in over 20 countries. Their flagship platform, **Expanse**, is a web-native EHR used widely across community hospitals, large health systems, and post-acute and ambulatory settings. Its FHIR APIs are exposed under the **Greenfield Workspace** developer program. Integrate with [Meditech](https://ehr.meditech.com/) to plug your app into Expanse.
This is a step-by-step guide to registering a patient-facing FHIR app against Meditech Expanse and taking it from the Greenfield sandbox to production at customer hospitals. We use the **US Core FHIR R4** APIs with **SMART Standalone Launch** and **3-legged OAuth 2.0**.
Three things make Meditech meaningfully different from Epic, Cerner, or eClinicalWorks, and you should plan for all three up front.
* **There is no self-service portal.** Greenfield Workspace is application-gated. You submit a registration form, then your Client ID and Client Secret are delivered to your organization’s primary contact via a **secure 1Password link (active for 14 days)**. *Don’t expect a same-day Client ID like Epic. There is a registration and delivery turnaround.*
* **There is no automatic distribution to customers.** Every Meditech-using hospital must register your app **individually**. Production onboarding is initiated by the **healthcare organization** (not you), by opening a case with their Meditech Interoperability team. Plan for a per-hospital onboarding loop.
* **The sandbox is shared and synthetic.** All Greenfield tenants point at the same FHIR base URL with synthetic patient data, so there is no per-tenant `iss` to discover. Production endpoints are listed in Meditech’s [public endpoint directory](https://fhir.meditech.com/explorer/endpoints) and are *separate* from Greenfield.
For Medblocks Platform integrations, use a **confidential** client with a **Client Secret** and **PKCE (S256)**. Meditech requires both on the same token request, so the platform sends the secret in the POST body and the PKCE `code_verifier` alongside it.
Meditech splits its developer surface across several hosts. Picking the right one matters, and it is the most common reason people ask “where’s the portal?”.
| URL | What it’s for |
| :--------------------------------------------------------------------------------------------------------------------------------------------- | :---------------------------------------------------------------------------------------------------------------- |
| [`ehr.meditech.com/meditech-greenfield`](https://ehr.meditech.com/meditech-greenfield) | Marketing landing page. The **Register** button here is the real start. |
| [`gf-ifiller.meditech.com/iFiller/iFiller.jsp`](https://gf-ifiller.meditech.com/iFiller/iFiller.jsp?fref=ab6de264-240a-4754-8ede-2b72dafb8272) | The actual **registration form**. This is where you “sign up”. |
| [`greenfield.meditech.com`](https://greenfield.meditech.com/) | The **Workspace itself**. Login lands here after you’re accepted, with the API explorer and sandbox patient data. |
| [`fhir.meditech.com/explorer/endpoints`](https://fhir.meditech.com/explorer/endpoints) | Public **endpoint list** for live customer organizations. Read-only, no app creation here. |
## Setup Guide [#setup-guide]
### Submit the Greenfield Workspace registration request [#1-submit-the-greenfield-workspace-registration-request]
1. Go to the [Greenfield landing page](https://ehr.meditech.com/meditech-greenfield) and click **Register**, or open the [iFiller registration form](https://gf-ifiller.meditech.com/iFiller/iFiller.jsp?fref=ab6de264-240a-4754-8ede-2b72dafb8272) directly.
2. Fill out the form with your company information and intended use case. *Be specific about the FHIR resources you plan to read and the patient population. Greenfield support uses this to shape the welcome packet and the EULA scope.*
3. Submit. You’ll receive an automated acknowledgement, then wait for a **welcome packet by email** from the Greenfield support team. *Turnaround is typically a few business days, not minutes.*
### Sign the EULA and provide a Google ID [#2-sign-the-eula-and-provide-a-google-id]
1. The welcome packet contains the **Greenfield End-User License Agreement (EULA)**. Sign it and return it per the packet’s instructions.
2. Provide a **Google ID** when asked. Greenfield Workspace authenticates members through **Google SSO**, not a username/password Meditech identity. *Use a shared Google Workspace account on your company domain (e.g. `dev@yourcompany.com`) rather than a personal Gmail. This is the single biggest gotcha. Without a Google identity you cannot log into the workspace at all.*
3. Greenfield support confirms your account is provisioned. You’re now ready to log in.
### Log into the Greenfield Workspace [#3-log-into-the-greenfield-workspace]
Go to [greenfield.meditech.com](https://greenfield.meditech.com/) and sign in with your provisioned Google ID. Once inside, you have access to the **API Explorer** (interactive docs for every exposed endpoint), **sample patient data** for testing, the **US Core FHIR R4** and **DSTU2** APIs, and **FHIR Scheduling** APIs where supported.
*Treat the Workspace’s built-in test app as a sanity check that your account is alive. Your own app gets a separate Client ID delivered in the next step.*
### Receive your OAuth credentials [#4-receive-your-oauth-credentials]
Meditech does not have a “Create App” button. Credentials are delivered via a **secure 1Password share**.
1. After your registration is processed, your organization’s primary contact receives an **email containing a 1Password link** with the **Client ID** and **Client Secret**. *The link is active for 14 days. Open it once, copy the values into your team’s secret manager, and never paste them into chat or commit them.*
2. Issues with the 1Password link or signing in to the Workspace? Email `greenfieldinfo@meditech.com`. *That inbox is scoped narrowly to sandbox access issues (Google sign-in problems, Greenfield Portal access). It is not the channel for redirect URI registration or scope changes.*
3. The registered client comes pre-configured. The grant type is `authorization_code` (3-legged OAuth, SMART Standalone Launch), and the sandbox enables the wildcard `patient/*.read` scope for exploratory testing. *The wildcard works in Greenfield only. Production restricts you to the minimum scopes for your approved workflow.*
4. The sandbox endpoints are **fixed and shared across all Greenfield tenants**, with no per-customer discovery.
| Endpoint | URL |
| :---------------------------- | :----------------------------------------------------------------------------------------- |
| **FHIR base (`iss` / `aud`)** | `https://greenfield-prod-apis.meditech.com/v2/uscore/STU6` |
| **Capability Statement** | `https://greenfield-prod-apis.meditech.com/v2/uscore/STU6/metadata/` |
| **SMART configuration** | `https://greenfield-prod-apis.meditech.com/v2/uscore/STU6/.well-known/smart-configuration` |
| **Authorize** | `https://greenfield-prod-apis.meditech.com/oauth/authorize` |
| **Token** | `https://greenfield-prod-apis.meditech.com/oauth/token` |
| **Introspection** | `https://greenfield-prod-apis.meditech.com/oauth/introspect` |
| **Revocation** | `https://greenfield-prod-apis.meditech.com/oauth/revoke` |
*Verify these any time by curling the SMART configuration URL. It returns `authorization_endpoint`, `token_endpoint`, and the full `scopes_supported` list as JSON.*
⚠️ **Critical:** Meditech’s authorization codes are **signed JWTs with a 60-second TTL**, not the opaque multi-minute codes most OAuth servers issue. Your callback handler must exchange the code for tokens immediately. Manual copy-paste flows will routinely expire, and any retry or queue logic between callback and token exchange has to fit inside that 60-second window. If you’re integrating through the Medblocks Platform, the exchange already happens inline in the callback.
### Configure your redirect URI [#5-configure-your-redirect-uri]
The Greenfield sandbox does **not** require you to pre-register redirect URIs by email. Meditech accepts any URI that conforms to the pattern rules below. Pass it as `redirect_uri` on the authorize call and use the same value verbatim on the token exchange.
| Requirement | Rule |
| :------------------------------------------- | :---------------------------------------------------------------------------------------------------------------------------------------------------------------------------------------- |
| Must be **fully qualified** | No relative paths. Full scheme + host + port + path. |
| **No wildcards** | Exact-match only. |
| Must align with the **declared client type** | Browser-based / confidential apps use HTTPS. Native public apps use a custom URI scheme. Mobile public apps use OS-verified deep links. Installed desktop apps use loopback per RFC 8252. |
| **HTTPS** | Required for browser-based and confidential clients. |
| **`localhost` / non-HTTPS** | Permitted only in Greenfield Workspace and on-site TEST environments. Disallowed in LIVE (production). |
**Using the Medblocks Platform?** Your callback URL is already handled. Use `https://app.medblocks.com/api/auth/smart/callback` as your redirect URI, with no custom domain or backend setup needed.
⚠️ **Critical:** The URI must match exactly between the authorize request and the token exchange, including protocol, domain, port, and path. A mismatch at authorize time returns a `400` with `redirectUri: null` in the error envelope, before the patient ever sees a login screen.
### Select scopes [#6-select-scopes]
Meditech exposes the standard **US Core FHIR R4** patient scopes, in both SMART **v1** (`patient/Patient.read`) and **v2** (`patient/Patient.rs`) formats.
1. For the **sandbox**, request `openid fhirUser launch/patient offline_access patient/*.read` and you’ll have read access to every supported US Core resource.
2. For **production**, the wildcard is *not* allowed. List every scope your workflow actually needs, at minimum `patient/Patient.read`, `patient/Observation.read`, `patient/Condition.read`, `patient/MedicationRequest.read`, `patient/AllergyIntolerance.read`, `patient/DocumentReference.read`, `patient/Immunization.read`, `patient/Procedure.read`, and `patient/Encounter.read`, plus `openid`, `fhirUser`, `launch/patient`, and `offline_access` for refresh tokens.
3. The authoritative scope list is in the SMART configuration.
```shell
curl -s https://greenfield-prod-apis.meditech.com/v2/uscore/STU6/.well-known/smart-configuration | jq .scopes_supported
```
#### Important Notes on Scopes [#important-notes-on-scopes]
| Scope | Why it matters |
| :--------------- | :-------------------------------------------------------------------------------------------------------------------------------------------------------------------------------------- |
| `offline_access` | Required for refresh tokens. Without it the patient must re-authenticate every time the access token expires. |
| `launch/patient` | Returns the patient’s FHIR id in the token response, which is how the connection gets linked to a patient record. |
| `fhirUser` | Identifies who authenticated. In the Greenfield sandbox this resolves to the developer’s own identity, so the `launch/patient` context is the reliable way to reach the patient record. |
### Enter your Client ID in the Medblocks Platform [#7-enter-your-client-id-in-the-medblocks-platform]
1. Navigate to **Settings → EHR Clients → Meditech** in the Medblocks admin panel.
2. Enter the **Client ID** from your 1Password delivery.
3. Share the **Client Secret** with Medblocks support through a secure channel so it can be configured server-side. *The secret authenticates every token exchange and refresh, so it never belongs in frontend code or a repository.*
The Meditech Greenfield sandbox is already registered as a source on the platform, so once the credentials are in place, patients see Meditech as a connect option in your app.
### Test the connection in your app [#8-test-the-connection-in-your-app]
With the credentials in place, run the connect flow end to end. Create a [patient session](/docs/patient-access/create-patient-session), pick Meditech from the source list, and complete the authorization.
One quirk to know before you sign in. **The patient login is your Greenfield Google account**, not a separate test-patient credential. When the authorize step opens the Meditech sign-in page, use the same Google account you registered with Greenfield, and the token returns *that* user’s synthetic patient context.
[After the connection](/docs/patient-access/after-connection) completes, the platform pulls the patient’s records in the background and you can [read the data](/docs/patient-access/get-the-data) through the API or SDK. Seeing the synthetic patient’s demographics and observations come back confirms the whole chain, credentials, redirect URI, scopes, and token exchange.
*Want to poke the sandbox APIs without your app in the loop? See the optional Postman section below.*
### Going live at a customer hospital [#9-going-live-at-a-customer-hospital]
Greenfield testing is **not required** for production and does not initiate production onboarding. Production is a separate, organization-driven process.
1. You secure an active engagement with a healthcare organization that has reviewed and approved the proposed integration.
2. The **healthcare organization** opens a case with their **Meditech Interoperability team** to initiate onboarding. *You cannot start this yourself. Plan for a per-hospital sales and onboarding cycle.*
3. Meditech and the organization handle scope approval and registration. Provide the organization with your **Client ID**, your **production redirect URI** (`https://app.medblocks.com/api/auth/smart/callback` for Medblocks Platform), and the **list of scopes** your app requests.
4. The organization’s production FHIR endpoint is published in the [public endpoint directory](https://fhir.meditech.com/explorer/endpoints). Contact Medblocks support to get that FHIR base URL added as a source for each new organization.
⚠️ **Critical:** Greenfield credentials never become production credentials, and there is no global “make my app live everywhere” toggle. Each hospital issues its own registration.
## Explore the raw APIs with Postman (optional) [#explore-the-raw-apis-with-postman-optional]
You don’t need Postman for the platform flow. It’s a quick way to sanity-check your credentials and browse the sandbox data without your app in the loop, using the **Postman collection Meditech ships in your welcome email**.
1. Install Postman desktop and enable browser pop-ups in Chrome (the OAuth flow opens a window).
2. Import the **Greenfield US Core APIs Postman Collection** linked in your welcome email.
3. Highlight the collection name, open the **Variables** tab, enter your **Client ID** and **Client Secret**, and **Save**.
4. On the **Authorization** tab, click **Get New Access Token**. Postman opens a browser; sign in with your Greenfield Google account.
5. Pick any resource in the collection and **Send**.
**Note:** Your welcome package also includes a detailed **Getting Started guide** that walks through this Postman setup step by step, so keep it handy if you get stuck.
*Postman is not HIPAA-compliant. Only ever use synthetic sandbox data with it, and never point a Postman collection at production patient data.*
## FHIR API Usage [#fhir-api-usage]
After token exchange, fetch patient resources using the following request.
```
GET https://greenfield-prod-apis.meditech.com/v2/uscore/STU6/{Resource}?patient={patient_id}
Authorization: Bearer {access_token}
Accept: application/fhir+json
```
### Resources Available via Meditech FHIR R4 [#resources-available-via-meditech-fhir-r4]
| Resource | Description |
| :------------------- | :------------------------- |
| `Patient` | Demographics |
| `AllergyIntolerance` | Allergies and intolerances |
| `CarePlan` | Care plans |
| `CareTeam` | Care team members |
| `Condition` | Problems and diagnoses |
| `Coverage` | Insurance coverage |
| `Device` | Implanted / used devices |
| `DiagnosticReport` | Lab and imaging reports |
| `DocumentReference` | Clinical documents |
| `Encounter` | Visits and encounters |
| `Goal` | Patient goals |
| `Immunization` | Vaccination history |
| `MedicationDispense` | Dispensed medications |
| `MedicationRequest` | Prescriptions |
| `Observation` | Labs and vital signs |
| `Procedure` | Performed procedures |
| `Provenance` | Record provenance |
| `ServiceRequest` | Ordered services |
| `Specimen` | Collected specimens |
## Token Lifecycle [#token-lifecycle]
| Token | Lifetime | Behaviour |
| :------------------- | :------------- | :---------------------------------------------------------------------- |
| Authorization `code` | **60 seconds** | A signed JWT, single-use. Exchange it immediately after the redirect. |
| `access_token` | \~1 hour | Used as Bearer token on all FHIR API calls. |
| `refresh_token` | Long-lived | Issued when `offline_access` is granted. Store it securely server-side. |
If a refresh token expires or is revoked, the patient must re-authenticate from scratch. A patient can revoke access at any time, so treat that as a normal state in your UI, not an error.
## Common Errors and Fixes [#common-errors-and-fixes]
| Error | Cause | Fix |
| :------------------------------------------ | :----------------------------------------------------------------------------------------------------------------- | :------------------------------------------------------------------------------------------------------------ |
| `400` with `redirectUri: null` at authorize | The redirect URI violates the pattern rules, or in production it is not whitelisted on the hospital’s registration | Check the rules table in step 5, and confirm the URI was included in the organization’s Interoperability case |
| `invalid_grant` | Authorization code older than 60 seconds, or already used | Exchange the code immediately in the callback, never cache or retry it |
| `invalid_client` | Wrong Client ID or Client Secret | Verify both values from the 1Password delivery |
| `invalid_scope` / `403` | A requested scope is not granted to the client | Use the wildcard only in the sandbox, and request exactly the approved scopes in production |
| `401 Unauthorized` on FHIR calls | Expired access token | Refresh the access token before it expires |
Need a hand wiring up Meditech? [Reach out](https://medblocks.com/contact) and we’ll walk you through it.
## See also [#see-also]
* [Create a patient session](/docs/patient-access/create-patient-session)
* [Find connections](/docs/patient-access/find-connections)
---
# Overview
A step-by-step build guide for a complete patient-access integration.
Source URL: /docs/patient-access/overview
# Overview
A step-by-step build guide for a complete patient-access integration.
This section is a build guide. The pages that follow take you through a complete patient-access integration, server and client, one step at a time. Read them in order: each page starts from the thing the previous page produced. They assume you have been through the [concepts](/docs/patient-access/patient-session), so the focus here is on building.
## How it works [#how-it-works]
Your server starts a patient session and gets back a redirect URL. Your app sends the patient to it. The patient signs in to their hospital’s patient portal, such as MyChart, and approves access for your app. Medblocks handles the secure authorization through SMART on FHIR behind the scenes and sends the patient back. Your server then reads the result before your UI shows them connected.
You can bring the patient through two ways.
| Approach | When to use | What happens |
| ------------------------------------------------------------------------------------------ | -------------------------------------------------------------------------------------------- | ------------------------------------------------------------------------------------------------------------------------------- |
| [Medblocks-hosted page](/docs/patient-access/create-patient-session/medblocks-hosted-page) | You want Medblocks to host the page where the patient searches for and picks their facility. | The patient finds their facility, signs in to that facility’s patient portal to approve access, and returns to your app. |
| [Your own UI](/docs/patient-access/create-patient-session/your-own-ui) | You want to build the facility search inside your own app. | The patient picks a facility in your UI, signs in to that facility’s patient portal to approve access, and returns to your app. |
You can use both in the same product.
## What you’ll build [#what-youll-build]
The build follows these pages in order. By the end you will have brought a patient from a button in your app to records flowing in.
1. **[Find connections](/docs/patient-access/find-connections).** Look up the hospital or clinic the patient uses.
2. **[Create patients](/docs/patient-access/create-patients).** Give each patient a stable `patient_id`, or let the session create one.
3. **[Create a patient session](/docs/patient-access/create-patient-session).** Start the session and get back the `url` where the patient approves access.
4. **[Handle the return](/docs/patient-access/handle-the-return).** Read who came back on your `return_url`.
5. **[After connection](/docs/patient-access/after-connection).** React to the result and to events.
6. **[Get the data](/docs/patient-access/get-the-data).** Pull the records into your systems.
## Before you start [#before-you-start]
You need two things. Create an API key in your [workspace](/docs/workspace), and install the SDK and create the client. The [Quickstart](/docs/patient-access/quickstart) covers both in a minute.
## See also [#see-also]
* [Quickstart](/docs/patient-access/quickstart)
* [Patient session](/docs/patient-access/patient-session)
---
# Patient session
How your app lets a patient connect their records, and how you track it.
Source URL: /docs/patient-access/patient-session
# Patient session
How your app lets a patient connect their records, and how you track it.
Until recently, a patient couldn’t simply hand their medical records to an app like the one you are building. Reaching their data meant signing a contract with each health system and building a separate integration for every one. US ONC g(10) regulation changed that. ONC’s information blocking rules now require EHRs to let a patient pull their own records from a single link, and CMS’s patient access rules extend the same to health insurers. So a patient using your app can authorize you to read their records directly, by logging in to their hospital’s patient portal, like Epic MyChart, and approving access. We discuss this in more detail in [Our approach](/docs/our-approach).
A patient session is how your app does that for one patient.
## What happens in your app [#what-happens-in-your-app]
When a patient in your app chooses to connect their records, a patient session carries them through it.
1. Your server starts a session and gets back a redirect URL.
2. Your app redirects the patient to that URL.
3. The patient logs in to their hospital’s portal and approves access for your app. Medblocks under the hood completes the OAuth handshake and fetches the access token. You can take a deeper look at how we do it in [Authorization](/docs/patient-access/authorization).
4. The patient comes back to your app.
5. Medblocks begins pulling their records in the [background](/docs/patient-access/background-pull) using the access token we got from the EHR.
The one part that changes is where the patient picks their hospital. You can let Medblocks host connection search on the page you send them to, or build it into your own UI and send the patient straight to the hospital they chose. Either way the rest of the flow is the same, and [Create a patient session](/docs/patient-access/create-patient-session) covers both.
Every patient session is uniquely identified by patient session ID. You keep it and use it later to check how the session went.
## Checking how it went [#checking-how-it-went]
Two things tell you what happened, and they answer different questions.
The **session** tells you whether the patient finished the flow.
* `open`. The link is still live.
* `complete`. The patient finished and came back.
* `expired`. The link aged out, so you start a new session.
The **connection** tells you whether a hospital actually connected, which is what decides whether records flow. A session can finish with no connection, for example if the patient changed their mind at the portal, so the connection is the status you act on.
* `active`. Connected, and records are on the way.
* `failed`. The attempt did not go through.
* `refresh_failed`. It worked before, but access lapsed and the patient needs to reconnect.
[After connection](/docs/patient-access/after-connection) shows how to read both in code.
## One patient, many sessions [#one-patient-many-sessions]
A patient is not limited to one session. They reconnect when access lapses, add another hospital later, or retry after a failed attempt. Each is a new session for the same patient, so you can list a patient’s sessions to see their full history.
## See also [#see-also]
* [Authorization](/docs/patient-access/authorization)
* [After connection](/docs/patient-access/after-connection)
* [Create a patient session](/docs/patient-access/create-patient-session)
---
# Quickstart
Send a test patient to sign in at a sandbox hospital and read the records they share.
Source URL: /docs/patient-access/quickstart
# Quickstart
Send a test patient to sign in at a sandbox hospital and read the records they share.
Medblocks lets a patient connect their own hospital records to your app. In this quickstart you’ll run a small server, send a test patient to sign in at a sandbox hospital, and read the records they share.
## How it works [#how-it-works]
Four things happen.
1. Your server starts the connection and redirects the patient to the URL Medblocks returns.
2. The patient signs in to their hospital and approves access to their records.
3. They come back to your app, and you read which hospitals they connected.
4. Medblocks pulls the approved records in the background, and you read them with one call.
That is the whole flow. Let’s see how we can build it.
## Add your API key [#2-add-your-api-key]
Your API key is a secret, so it lives only on your server. Put it in an environment variable. You can create one in your [workspace](/docs/workspace).
```bash title=".env"
MEDBLOCKS_API_KEY="mb_sk_live_..."
```
## Create the client [#3-create-the-client]
Create the client once and reuse it everywhere. It reads the key from the environment and fails fast if it is missing. This file is the same whichever server you use.
```ts title="src/medblocks.ts"
import { Medblocks } from "medblocks";
const apiKey = process.env.MEDBLOCKS_API_KEY;
if (!apiKey) throw new Error("MEDBLOCKS_API_KEY is not configured");
export const mb = new Medblocks(apiKey);
```
## Start the connection [#4-start-the-connection]
Add a route the patient opens to begin. It starts the connection and redirects the browser to the URL Medblocks returns. `return_url` is where the patient lands when they finish.
```ts title="src/init-patient-session.ts"
import { mb } from "./medblocks";
/**
* GET /start — open a patient session and redirect the patient's browser to the
* Medblocks-hosted page. No frontend: the redirect is the whole integration.
*/
export async function initPatientSession(_req: Request): Promise {
const session = await mb.patientSession.init({
patient_id: "demo-patient",
return_url: "http://localhost:3000/connected",
return_button_label: "Back to Acme Health",
});
return Response.redirect(session.url, 302);
}
```
```ts title="src/init-patient-session.ts"
import type { Request, Response } from "express";
import { mb } from "./medblocks";
/**
* GET /start — open a patient session and redirect the patient to the
* Medblocks-hosted page. No frontend: the redirect is the whole integration.
*/
export async function initPatientSession(_req: Request, res: Response) {
const session = await mb.patientSession.init({
patient_id: "demo-patient",
return_url: "http://localhost:3000/connected",
return_button_label: "Back to Acme Health",
});
res.redirect(session.url);
}
```
## Read the connected facilities [#5-read-the-connected-facilities]
When the patient finishes, they land on your `return_url`. Read who came back, look up the facilities they connected, and show them.
```ts title="src/connections.ts"
import { parseReturnUrl } from "medblocks";
import { mb } from "./medblocks";
/**
* GET /connected — the return_url. The patient lands here after authorizing.
* Read who returned, look up the sources they connected, and say so.
*/
export async function connected(req: Request): Promise {
const result = parseReturnUrl(new URL(req.url).searchParams);
if (!result) return new Response("Not a return URL", { status: 400 });
const patient = await mb.patients.retrieve(result.patient_id);
const facilities = patient.connections
.filter((c) => c.status === "active")
.map((c) => c.facility.name)
.join(", ");
return new Response(`Connected to ${facilities || "your records"} successfully`);
}
```
```ts title="src/connections.ts"
import type { Request, Response } from "express";
import { parseReturnUrl } from "medblocks";
import { mb } from "./medblocks";
/**
* GET /connected — the return_url. Read who returned and which sources they connected.
*/
export async function connected(req: Request, res: Response) {
const result = parseReturnUrl(new URL(req.url, "http://localhost:3000").searchParams);
if (!result) {
res.status(400).send("Not a return URL");
return;
}
const patient = await mb.patients.retrieve(result.patient_id);
const facilities = patient.connections
.filter((c) => c.status === "active")
.map((c) => c.facility.name)
.join(", ");
res.send(`Connected to ${facilities || "your records"} successfully`);
}
```
## Read the records [#6-read-the-records]
Connecting is only half the story. The point is the data. Once a patient approves access, Medblocks pulls their records from the hospital in the [background](/docs/patient-access/background-pull), and one call returns everything it has stored, as raw FHIR resources.
Add a route that reads them with `mb.patients.records`. Under the hood the SDK calls [`GET /patients/{id}/records`](/docs/reference/api/get-patient-records).
```ts title="src/patient-records.ts"
import { mb } from "./medblocks";
/**
* GET /records?patient_id=... — read the patient's connected records on demand.
* Returns the first page of the latest stored FHIR resources as one line per resource.
*/
export async function patientRecords(req: Request): Promise {
const patientId = new URL(req.url).searchParams.get("patient_id");
if (!patientId) return new Response("Missing patient_id", { status: 400 });
const page = await mb.patients.records(patientId, { count: 100 });
const lines = page.data.map(
(item) => `${item.resource.resourceType}/${item.resource.id}`,
);
return new Response(`Found ${lines.length} resources\n${lines.join("\n")}`);
}
```
```ts title="src/patient-records.ts"
import type { Request, Response } from "express";
import { mb } from "./medblocks";
/**
* GET /records?patient_id=... — read the patient's connected records on demand.
* Returns the first page of the latest stored FHIR resources as one line per resource.
*/
export async function patientRecords(req: Request, res: Response) {
const patientId = typeof req.query.patient_id === "string" ? req.query.patient_id : "";
if (!patientId) {
res.status(400).send("Missing patient_id");
return;
}
const page = await mb.patients.records(patientId, { count: 100 });
const lines = page.data.map(
(item) => `${item.resource.resourceType}/${item.resource.id}`,
);
res.type("text/plain").send(`Found ${lines.length} resources\n${lines.join("\n")}`);
}
```
## Run it [#7-run-it]
Put your three routes behind a server on port 3000.
```ts title="src/server.ts"
import { initPatientSession } from "./init-patient-session";
import { connected } from "./connections";
import { patientRecords } from "./patient-records";
Bun.serve({
port: 3000,
routes: {
"/start": { GET: initPatientSession },
"/connected": { GET: connected },
"/records": { GET: patientRecords },
},
});
console.log("open http://localhost:3000/start");
```
```ts title="src/server.ts"
import express from "express";
import { initPatientSession } from "./init-patient-session";
import { connected } from "./connections";
import { patientRecords } from "./patient-records";
const app = express();
app.get("/start", initPatientSession);
app.get("/connected", connected);
app.get("/records", patientRecords);
app.listen(3000, () => console.log("open http://localhost:3000/start"));
```
Then start it.
```bash
bun run src/server.ts
```
Using Node? Run `node --env-file=.env --import tsx src/server.ts` instead.
## Connect the Epic sandbox [#8-connect-the-epic-sandbox]
Open [http://localhost:3000/start](http://localhost:3000/start). Search for **Epic Sandbox**, sign in with the [test credentials](https://fhir.epic.com/Documentation?docId=testpatients), and approve access.
They return to your app, where the `/connected` route reads what they connected and shows it.
## See their records [#9-see-their-records]
Approving grants access. The records themselves land a moment later through the background pull. Open [http://localhost:3000/records?patient\_id=demo-patient](http://localhost:3000/records?patient_id=demo-patient) to see what has arrived.
```
Found 58 resources
Patient/eq081-VQEgP8drUUqCWzHfw3
Observation/ejPFhUXYm7Bnv7yiCQnKsA3
Condition/e-Y7RyVDLDdLdRhU5N35rBQ3
...
```
If the count is still zero, the pull has not settled yet. Wait a little and refresh. Each item is a raw FHIR resource exactly as the hospital returned it, paired with the source it came from, and the response is a paginated list. [Get the data](/docs/patient-access/get-the-data) covers pagination, filtering by resource type, and reading only what changed since your last read.
## That’s it 🎉 [#10-thats-it-]
A patient connected their hospital, and you read their clinical records. That is a full patient integration, from connection to data, with no per-hospital code on your side.
## What just happened [#what-just-happened]
You just connected a patient to their hospital and read their records, end to end, without writing any hospital-specific code.
* Medblocks hosted the page where the patient picked their source. To build that screen in your own app, see [your own UI](/docs/patient-access/create-patient-session/your-own-ui).
* The records keep arriving after the patient returns. Later pulls add whatever is new, so `/records` returns more over time. [Get the data](/docs/patient-access/get-the-data) covers the read API in full, plus exports that deliver records to your own systems.
* For the full picture, the [build guide](/docs/patient-access/overview) walks through a complete integration, server and client.
## See also [#see-also]
* [Build guide](/docs/patient-access/overview)
* [Get the data](/docs/patient-access/get-the-data)
* [Handle the return](/docs/patient-access/handle-the-return)
* [Patient session](/docs/patient-access/patient-session)
---
# UnitedHealthcare
Guide to integrate UnitedHealthcare's Patient Access API (Optum FLEX) so members can share their claims and clinical data.
Source URL: /docs/patient-access/unitedhealthcare
# UnitedHealthcare
Guide to integrate UnitedHealthcare's Patient Access API (Optum FLEX) so members can share their claims and clinical data.
UnitedHealthcare exposes the CMS-mandated **Patient Access API** on **Optum’s FLEX platform**, a member-facing SMART-on-FHIR R4 API that returns the data the payer holds: coverage, claims (Explanation of Benefit), and US Core clinical resources. UnitedHealthcare is a payer, not an EHR, so members authorize access to *their plan’s* data, and it plugs into the same patient-mediated connect flow as your EHR integrations.
This is a step-by-step guide to registering an app on the Optum FLEX portal and wiring it up with Medblocks.
UnitedHealthcare uses a **confidential client with a client secret**, *not* the asymmetric JWKS/private-key flow used by Epic and Cerner. There’s no key pair to generate; Optum issues you a `client_id` and `client_secret`.
## Setup Guide [#setup-guide]
### Create a OneHealthcare ID and register your organization [#1-create-a-onehealthcare-id-and-register-your-organization]
1. Create a **OneHealthcare ID** at [identity.onehealthcareid.com](https://identity.onehealthcareid.com/). This is the shared identity used across all Optum/UHC platforms.
2. Go to the **Optum FLEX vendor portal** at [flex.optum.com/portal](https://flex.optum.com/portal) and register your organization under the **App Owner** section. Submit your org attestation and compliance documents and await email approval. Support: `flexvendorsupport@optum.com`.
### Register your application [#2-register-your-application]
Once your organization is approved, open **Register New App** in the left navigation and fill in the **App Details** form:
* **App Name** and **App Description**: how your app appears to members on the consent screen.
* **Privacy Policy URL**: required; link to your published privacy policy.
* **API Type**: select **Patient Access**. The “click here” link beside it opens the supported-scopes reference.
* **Application Environment**: choose **Sandbox** first. You’ll register a separate **Production** app later (Step 5).
* **Redirect URI**: enter your callback URL and click **Add** (see below).
* Tick **I agree to the terms and conditions**, then click **Continue**.
Select **Patient Access** as the API Type, **not** *Patient Access CMS 2025*. The CMS 2025 API type has a known issue on Optum’s end as of June 2026; use the standard **Patient Access** type until it’s resolved.
When the app is created, Optum issues a **`client_id`** and **`client_secret`**. Store the secret in a secrets manager or environment variable, never in source control.
Sandbox apps are approved immediately. A **Production** app goes through Optum’s security & compliance review before approval (Step 5).
#### Redirect URI [#redirect-uri]
If you’re using the Medblocks platform, register:
* **Sandbox / local:** `http://localhost:3000/api/auth/smart/callback`
* **Production:** `https://app.medblocks.com/api/auth/smart/callback`
Production **requires an `https://` redirect URI**; `localhost` is only accepted in sandbox. Register the exact callback URL of the environment you’re deploying.
#### Application registration & support contact [#application-registration--support-contact]
Next, Optum collects support and stakeholder details that may be shared with members:
* **Phone**: your support number, **digits only** (no `+`, `(` or `)`), e.g. `123` country code and `1234567890`.
* **Email**: a support inbox, e.g. `support@yourcompany.com`.
* **Website**: your company site, e.g. `https://yourcompany.com`.
* **Support contact name**: the person Optum contacts about the app.
* **Do you have an ID for your application for this platform?** Select **No** on first registration.
* **Name of your company**: e.g. `Your Company, Inc.`
* **For which platform application is registered?** Select **Website/IP**.
* **Name of application for this platform**: e.g. `Your App`.
* **Development and Stakeholders**: up to 10 people (name + email) to receive downtime and release notifications from the FLEX Admin Team.
The **Phone** field rejects special characters; enter digits only (no `+`, spaces, or parentheses).
### Scopes [#3-scopes]
Scopes are **assigned automatically** based on the API Type. A Patient Access app is granted these ten `patient/*` read scopes:
```
patient/Patient.read
patient/Coverage.read
patient/ExplanationOfBenefit.read
patient/Condition.read
patient/Encounter.read
patient/Procedure.read
patient/MedicationRequest.read
patient/MedicationDispense.read
patient/Observation.read
patient/Immunization.read
```
### Test in the Sandbox [#4-test-in-the-sandbox]
1. Configure your sandbox `client_id`/`client_secret` in Medblocks (Settings → EHR Clients) for the `uhc` provider, or set them as the Medblocks-managed sandbox credentials.
2. Start a patient connect flow and search **`unitedhealthcare`**.
3. At the **OneHealthcare ID** login, authenticate. Any OneHealthcare ID works for the sandbox (all map to the same synthetic member). Create one via the sign-up link if needed.
4. Approve the consent screen. The member’s clinical data syncs into Medblocks.
The sandbox synthetic member is clinical-only, so `Coverage` and `ExplanationOfBenefit` may return no data there. Real production members return their claims and coverage.
### Promote to Production [#5-promote-to-production]
Register a **Production application** (set **Application Environment** to Production). Production adds an extended questionnaire that Optum’s security and compliance team reviews before approval.
**Application Authentication**
Set **Identity Verification Method** to **HSID (Standard Login)**.

**Application Provider Demographics, Application Specific, and Privacy Questions**
* **Describe the intent of your application.** e.g. “Lets members securely authorize sharing their UnitedHealthcare coverage, claims, and clinical data with their healthcare organization via SMART-on-FHIR.”
* **List key changes since last attestation.** Enter `n/a` for a first attestation. **Date of last attestation:** leave blank (or `n/a`) on first submission.
* **Is the application supported by a third party** (other companies, individuals, freelancers, crowdsource, consultants)? `No` if you build and operate it in-house; answer `Yes` and name them if a vendor runs it for you.
* **Will the application require consumers to accept advertisements?** `No`.
* **Will consumers pay any cost to use the application?** `No`.
**Technology Questions**
* **Developer’s website:** your company site, e.g. `https://yourcompany.com`.
* **Expected transaction volume against UHG (per day, per month, per year):** your best estimate from your member base, e.g. `100` / `3,000` / `36,000`.
* **Device permissions the app requests:** leave all unchecked for a web/browser SMART app (Address Book, Contacts, Camera/Video, Microphone, Stored Pictures/Videos, Location Data, Activity Logs, and SD Cards/External Storage are not used).
* **Will data be encrypted in transit?** `Yes`. **At rest?** `Yes`.
* **Do you have a policy to relinquish and fully delete data at the user’s request?** `Yes`.
* **Is the application registered/listed with CARIN?** Answer per your status (`Yes` once you’ve completed CARIN listing, otherwise `No`).
* **Primary storage mechanism of user and application data:** an encrypted database (e.g. PostgreSQL) in a HIPAA-compliant cloud environment.
* **How long do you intend to store an individual’s data?** Per your retention policy, e.g. until the member disconnects or requests deletion.
* **Expected API call schedule:** on demand at member connect, plus periodic background refresh.
Click **Register**. Once approved, you receive a production `client_id` and `client_secret`.
UnitedHealthcare production covers **four payers**, each a separate choice your members can connect:
* UnitedHealthcare
* Rocky Mountain Health Plans
* Sierra Health and Life
* Peoples Health
The member authenticates with their plan’s identity provider and picks their payer during login; your one approved production app serves all four.
### Configure in Medblocks [#6-configure-in-medblocks]
Add your UnitedHealthcare `client_id` and `client_secret` in Medblocks (Settings → EHR Clients), or use Medblocks-managed credentials. Members in your organization can then search **UnitedHealthcare** and connect their plan data (coverage, claims, and clinical records) through the standard SMART-on-FHIR flow.
Need a hand wiring up UnitedHealthcare? [Reach out](https://medblocks.com/contact) and we’ll walk you through it.
---
# Wearables and mobile
Coming soon. Patient-authorized device data through the mobile SDK.
Source URL: /docs/patient-access/wearables
# Wearables and mobile
Coming soon. Patient-authorized device data through the mobile SDK.
Wearables and mobile data support is coming soon.
Medblocks will support patient-authorized device data through the mobile SDK. This page will cover setup, permissions, sync behavior, and the data model once the workflow is ready.
---
# Pull monitoring
Watch background pulls run and understand their failure states.
Source URL: /docs/pull-monitoring
# Pull monitoring
Watch background pulls run and understand their failure states.
After a patient authorizes a source, Medblocks retrieves their records server-side. A completed browser flow means access was granted or rejected; it does not mean every record is already available. This page is about watching the background pull that turns access into records.
## What starts a pull [#what-starts-a-pull]
A pull begins in one of three ways.
* A patient completes a patient session and a connection becomes `active`.
* An admin manually starts retrieval for a patient.
* A scheduled or retry path picks up pending work.
The first pull can take time. EHRs differ in how they paginate, which resource types they support, the rate limits they enforce, and how fast they respond.
Your patient-facing UI can move on after authorization. Your backend, dashboard, exports, and webhooks should handle data availability separately.
## What Medblocks pulls [#what-medblocks-pulls]
Medblocks schedules FHIR queries for the supported resource types on that source, fetches the resources, follows references where needed, stores the FHIR, and records status as it goes.
The access token is refreshed before it expires whenever possible. If the refresh token is revoked or expires, the connection becomes `refresh_failed`.
## Watching it in the dashboard [#watching-it-in-the-dashboard]
Open the patient detail page to see record status, the latest pull time, per-account status, and pull history.
Use pull history to see past attempts or to understand why a pull failed.
## Failure handling [#failure-handling]
| Failure | What it means | What to do |
| -------------------- | ------------------------------------------------- | -------------------------------------- |
| Portal auth failed | The patient did not grant usable access | Ask the patient to retry |
| Retrieval error | The portal returned an error during FHIR calls | Review the patient’s pull history |
| Token refresh failed | The stored refresh token is no longer usable | Ask the patient to reconnect |
| Export failed | Data arrived but delivery to a destination failed | Retry from the export destination page |
## When to use webhooks [#when-to-use-webhooks]
Use dashboard monitoring when a human needs to investigate a patient or destination. Use [Webhooks](/docs/webhooks) when your backend should react automatically.
| Event | Use it for |
| --------------------------------- | -------------------------------------------------- |
| `records.sync.completed` | Start downstream processing after a pull finishes. |
| `records.sync.failed` | Alert operations or show a support task. |
| `connection.token_refresh_failed` | Ask the patient to reconnect. |
## How it relates to export [#how-it-relates-to-export]
Background pull brings data into Medblocks. Export sends it out. When a pull completes, enabled export destinations can receive the new data. A patient connection can succeed even if an export destination later fails.
## See also [#see-also]
* [Export to FHIR server](/docs/export-to-fhir-server)
* [Export to S3](/docs/export-to-s3)
* [Auth event history](/docs/auth-event-history)
* [Background pull](/docs/patient-access/background-pull)
---
# Quickstarts
Pick an integration pattern and reach your first patient record in minutes.
Source URL: /docs/quickstarts
# Quickstarts
Pick an integration pattern and reach your first patient record in minutes.
Quickstarts are the shortest path to a visible result. Pick the integration pattern that matches the relationship your product has today.
Patient access is the best first quickstart for most teams because it starts from a direct patient relationship. You do not need a hospital contract to understand the flow.
## Before You Start [#before-you-start]
Create a [workspace](/docs/workspace), keep your API key server-side, and test with [sandboxes](/docs/sandboxes) before using production credentials.
## See also [#see-also]
* [Integration patterns](/docs/integration-patterns)
* [Workspace](/docs/workspace)
* [Patient access overview](/docs/patient-access/overview)
---
# API Reference
Explore the Medblocks Platform API generated from the oRPC OpenAPI specification.
Source URL: /docs/reference/api
# API Reference
Explore the Medblocks Platform API generated from the oRPC OpenAPI specification.
---
# Create a patient
Create a patient with your own patient_id plus optional email, name, and metadata. The id is unique within your organization.
Source URL: /docs/reference/api/create-patient
# Create a patient
Create a patient with your own patient_id plus optional email, name, and metadata. The id is unique within your organization.
{/* This file was generated from openapi\/medblocks.json. Do not edit directly. */}
Create a patient with your own `patient_id` plus optional email, name, and metadata. The id is unique within your organization.
{"name":"APIPage","children":"","attributes":{"document":{"type":"mdxJsxAttributeValueExpression","value":"\"medblocks\"","data":{"estree":{"type":"Program","start":675,"end":686,"body":[{"type":"ExpressionStatement","expression":{"type":"Literal","start":675,"end":686,"loc":{"start":{"line":22,"column":19,"offset":675},"end":{"line":22,"column":30,"offset":686}},"value":"medblocks","raw":"\"medblocks\"","range":[675,686]},"start":675,"end":686,"loc":{"start":{"line":22,"column":19,"offset":675},"end":{"line":22,"column":30,"offset":686}},"range":[675,686]}],"sourceType":"module","comments":[],"loc":{"start":{"line":22,"column":19,"offset":675},"end":{"line":22,"column":30,"offset":686}},"range":[675,686]}}},"operations":{"type":"mdxJsxAttributeValueExpression","value":"[{\"path\":\"/patients\",\"method\":\"post\"}]","data":{"estree":{"type":"Program","start":700,"end":738,"body":[{"type":"ExpressionStatement","expression":{"type":"ArrayExpression","start":700,"end":738,"loc":{"start":{"line":22,"column":44,"offset":700},"end":{"line":22,"column":82,"offset":738}},"elements":[{"type":"ObjectExpression","start":701,"end":737,"loc":{"start":{"line":22,"column":45,"offset":701},"end":{"line":22,"column":81,"offset":737}},"properties":[{"type":"Property","start":702,"end":720,"loc":{"start":{"line":22,"column":46,"offset":702},"end":{"line":22,"column":64,"offset":720}},"method":false,"shorthand":false,"computed":false,"key":{"type":"Literal","start":702,"end":708,"loc":{"start":{"line":22,"column":46,"offset":702},"end":{"line":22,"column":52,"offset":708}},"value":"path","raw":"\"path\"","range":[702,708]},"value":{"type":"Literal","start":709,"end":720,"loc":{"start":{"line":22,"column":53,"offset":709},"end":{"line":22,"column":64,"offset":720}},"value":"/patients","raw":"\"/patients\"","range":[709,720]},"kind":"init","range":[702,720]},{"type":"Property","start":721,"end":736,"loc":{"start":{"line":22,"column":65,"offset":721},"end":{"line":22,"column":80,"offset":736}},"method":false,"shorthand":false,"computed":false,"key":{"type":"Literal","start":721,"end":729,"loc":{"start":{"line":22,"column":65,"offset":721},"end":{"line":22,"column":73,"offset":729}},"value":"method","raw":"\"method\"","range":[721,729]},"value":{"type":"Literal","start":730,"end":736,"loc":{"start":{"line":22,"column":74,"offset":730},"end":{"line":22,"column":80,"offset":736}},"value":"post","raw":"\"post\"","range":[730,736]},"kind":"init","range":[721,736]}],"range":[701,737]}],"range":[700,738]},"start":700,"end":738,"loc":{"start":{"line":22,"column":44,"offset":700},"end":{"line":22,"column":82,"offset":738}},"range":[700,738]}],"sourceType":"module","comments":[],"loc":{"start":{"line":22,"column":44,"offset":700},"end":{"line":22,"column":82,"offset":738}},"range":[700,738]}}}}}
Non-2xx responses use the standard [API error envelope](/docs/reference/errors). Log `error.code` and `error.request_id` for support.
---
# Register a webhook endpoint
Register an HTTPS endpoint to receive signed event deliveries. The signing secret is returned once in this response.
Source URL: /docs/reference/api/create-webhook
# Register a webhook endpoint
Register an HTTPS endpoint to receive signed event deliveries. The signing secret is returned once in this response.
{/* This file was generated from openapi\/medblocks.json. Do not edit directly. */}
Register an HTTPS endpoint to receive signed event deliveries. The signing `secret` is returned once in this response.
{"name":"APIPage","children":"","attributes":{"document":{"type":"mdxJsxAttributeValueExpression","value":"\"medblocks\"","data":{"estree":{"type":"Program","start":659,"end":670,"body":[{"type":"ExpressionStatement","expression":{"type":"Literal","start":659,"end":670,"loc":{"start":{"line":22,"column":19,"offset":659},"end":{"line":22,"column":30,"offset":670}},"value":"medblocks","raw":"\"medblocks\"","range":[659,670]},"start":659,"end":670,"loc":{"start":{"line":22,"column":19,"offset":659},"end":{"line":22,"column":30,"offset":670}},"range":[659,670]}],"sourceType":"module","comments":[],"loc":{"start":{"line":22,"column":19,"offset":659},"end":{"line":22,"column":30,"offset":670}},"range":[659,670]}}},"operations":{"type":"mdxJsxAttributeValueExpression","value":"[{\"path\":\"/webhooks\",\"method\":\"post\"}]","data":{"estree":{"type":"Program","start":684,"end":722,"body":[{"type":"ExpressionStatement","expression":{"type":"ArrayExpression","start":684,"end":722,"loc":{"start":{"line":22,"column":44,"offset":684},"end":{"line":22,"column":82,"offset":722}},"elements":[{"type":"ObjectExpression","start":685,"end":721,"loc":{"start":{"line":22,"column":45,"offset":685},"end":{"line":22,"column":81,"offset":721}},"properties":[{"type":"Property","start":686,"end":704,"loc":{"start":{"line":22,"column":46,"offset":686},"end":{"line":22,"column":64,"offset":704}},"method":false,"shorthand":false,"computed":false,"key":{"type":"Literal","start":686,"end":692,"loc":{"start":{"line":22,"column":46,"offset":686},"end":{"line":22,"column":52,"offset":692}},"value":"path","raw":"\"path\"","range":[686,692]},"value":{"type":"Literal","start":693,"end":704,"loc":{"start":{"line":22,"column":53,"offset":693},"end":{"line":22,"column":64,"offset":704}},"value":"/webhooks","raw":"\"/webhooks\"","range":[693,704]},"kind":"init","range":[686,704]},{"type":"Property","start":705,"end":720,"loc":{"start":{"line":22,"column":65,"offset":705},"end":{"line":22,"column":80,"offset":720}},"method":false,"shorthand":false,"computed":false,"key":{"type":"Literal","start":705,"end":713,"loc":{"start":{"line":22,"column":65,"offset":705},"end":{"line":22,"column":73,"offset":713}},"value":"method","raw":"\"method\"","range":[705,713]},"value":{"type":"Literal","start":714,"end":720,"loc":{"start":{"line":22,"column":74,"offset":714},"end":{"line":22,"column":80,"offset":720}},"value":"post","raw":"\"post\"","range":[714,720]},"kind":"init","range":[705,720]}],"range":[685,721]}],"range":[684,722]},"start":684,"end":722,"loc":{"start":{"line":22,"column":44,"offset":684},"end":{"line":22,"column":82,"offset":722}},"range":[684,722]}],"sourceType":"module","comments":[],"loc":{"start":{"line":22,"column":44,"offset":684},"end":{"line":22,"column":82,"offset":722}},"range":[684,722]}}}}}
Non-2xx responses use the standard [API error envelope](/docs/reference/errors). Log `error.code` and `error.request_id` for support.
---
# Delete a patient
Permanently delete a patient and their connections by patient_id. Returns a tombstone confirming the deletion.
Source URL: /docs/reference/api/delete-patient
# Delete a patient
Permanently delete a patient and their connections by patient_id. Returns a tombstone confirming the deletion.
{/* This file was generated from openapi\/medblocks.json. Do not edit directly. */}
Permanently delete a patient and their connections by `patient_id`. Returns a tombstone confirming the deletion.
{"name":"APIPage","children":"","attributes":{"document":{"type":"mdxJsxAttributeValueExpression","value":"\"medblocks\"","data":{"estree":{"type":"Program","start":632,"end":643,"body":[{"type":"ExpressionStatement","expression":{"type":"Literal","start":632,"end":643,"loc":{"start":{"line":22,"column":19,"offset":632},"end":{"line":22,"column":30,"offset":643}},"value":"medblocks","raw":"\"medblocks\"","range":[632,643]},"start":632,"end":643,"loc":{"start":{"line":22,"column":19,"offset":632},"end":{"line":22,"column":30,"offset":643}},"range":[632,643]}],"sourceType":"module","comments":[],"loc":{"start":{"line":22,"column":19,"offset":632},"end":{"line":22,"column":30,"offset":643}},"range":[632,643]}}},"operations":{"type":"mdxJsxAttributeValueExpression","value":"[{\"path\":\"/patients/{id}\",\"method\":\"delete\"}]","data":{"estree":{"type":"Program","start":657,"end":702,"body":[{"type":"ExpressionStatement","expression":{"type":"ArrayExpression","start":657,"end":702,"loc":{"start":{"line":22,"column":44,"offset":657},"end":{"line":22,"column":89,"offset":702}},"elements":[{"type":"ObjectExpression","start":658,"end":701,"loc":{"start":{"line":22,"column":45,"offset":658},"end":{"line":22,"column":88,"offset":701}},"properties":[{"type":"Property","start":659,"end":682,"loc":{"start":{"line":22,"column":46,"offset":659},"end":{"line":22,"column":69,"offset":682}},"method":false,"shorthand":false,"computed":false,"key":{"type":"Literal","start":659,"end":665,"loc":{"start":{"line":22,"column":46,"offset":659},"end":{"line":22,"column":52,"offset":665}},"value":"path","raw":"\"path\"","range":[659,665]},"value":{"type":"Literal","start":666,"end":682,"loc":{"start":{"line":22,"column":53,"offset":666},"end":{"line":22,"column":69,"offset":682}},"value":"/patients/{id}","raw":"\"/patients/{id}\"","range":[666,682]},"kind":"init","range":[659,682]},{"type":"Property","start":683,"end":700,"loc":{"start":{"line":22,"column":70,"offset":683},"end":{"line":22,"column":87,"offset":700}},"method":false,"shorthand":false,"computed":false,"key":{"type":"Literal","start":683,"end":691,"loc":{"start":{"line":22,"column":70,"offset":683},"end":{"line":22,"column":78,"offset":691}},"value":"method","raw":"\"method\"","range":[683,691]},"value":{"type":"Literal","start":692,"end":700,"loc":{"start":{"line":22,"column":79,"offset":692},"end":{"line":22,"column":87,"offset":700}},"value":"delete","raw":"\"delete\"","range":[692,700]},"kind":"init","range":[683,700]}],"range":[658,701]}],"range":[657,702]},"start":657,"end":702,"loc":{"start":{"line":22,"column":44,"offset":657},"end":{"line":22,"column":89,"offset":702}},"range":[657,702]}],"sourceType":"module","comments":[],"loc":{"start":{"line":22,"column":44,"offset":657},"end":{"line":22,"column":89,"offset":702}},"range":[657,702]}}}}}
Non-2xx responses use the standard [API error envelope](/docs/reference/errors). Log `error.code` and `error.request_id` for support.
---
# Delete a webhook endpoint
Permanently delete a webhook endpoint and its delivery history. Returns a tombstone confirming the deletion.
Source URL: /docs/reference/api/delete-webhook
# Delete a webhook endpoint
Permanently delete a webhook endpoint and its delivery history. Returns a tombstone confirming the deletion.
{/* This file was generated from openapi\/medblocks.json. Do not edit directly. */}
Permanently delete a webhook endpoint and its delivery history. Returns a tombstone confirming the deletion.
{"name":"APIPage","children":"","attributes":{"document":{"type":"mdxJsxAttributeValueExpression","value":"\"medblocks\"","data":{"estree":{"type":"Program","start":631,"end":642,"body":[{"type":"ExpressionStatement","expression":{"type":"Literal","start":631,"end":642,"loc":{"start":{"line":22,"column":19,"offset":631},"end":{"line":22,"column":30,"offset":642}},"value":"medblocks","raw":"\"medblocks\"","range":[631,642]},"start":631,"end":642,"loc":{"start":{"line":22,"column":19,"offset":631},"end":{"line":22,"column":30,"offset":642}},"range":[631,642]}],"sourceType":"module","comments":[],"loc":{"start":{"line":22,"column":19,"offset":631},"end":{"line":22,"column":30,"offset":642}},"range":[631,642]}}},"operations":{"type":"mdxJsxAttributeValueExpression","value":"[{\"path\":\"/webhooks/{id}\",\"method\":\"delete\"}]","data":{"estree":{"type":"Program","start":656,"end":701,"body":[{"type":"ExpressionStatement","expression":{"type":"ArrayExpression","start":656,"end":701,"loc":{"start":{"line":22,"column":44,"offset":656},"end":{"line":22,"column":89,"offset":701}},"elements":[{"type":"ObjectExpression","start":657,"end":700,"loc":{"start":{"line":22,"column":45,"offset":657},"end":{"line":22,"column":88,"offset":700}},"properties":[{"type":"Property","start":658,"end":681,"loc":{"start":{"line":22,"column":46,"offset":658},"end":{"line":22,"column":69,"offset":681}},"method":false,"shorthand":false,"computed":false,"key":{"type":"Literal","start":658,"end":664,"loc":{"start":{"line":22,"column":46,"offset":658},"end":{"line":22,"column":52,"offset":664}},"value":"path","raw":"\"path\"","range":[658,664]},"value":{"type":"Literal","start":665,"end":681,"loc":{"start":{"line":22,"column":53,"offset":665},"end":{"line":22,"column":69,"offset":681}},"value":"/webhooks/{id}","raw":"\"/webhooks/{id}\"","range":[665,681]},"kind":"init","range":[658,681]},{"type":"Property","start":682,"end":699,"loc":{"start":{"line":22,"column":70,"offset":682},"end":{"line":22,"column":87,"offset":699}},"method":false,"shorthand":false,"computed":false,"key":{"type":"Literal","start":682,"end":690,"loc":{"start":{"line":22,"column":70,"offset":682},"end":{"line":22,"column":78,"offset":690}},"value":"method","raw":"\"method\"","range":[682,690]},"value":{"type":"Literal","start":691,"end":699,"loc":{"start":{"line":22,"column":79,"offset":691},"end":{"line":22,"column":87,"offset":699}},"value":"delete","raw":"\"delete\"","range":[691,699]},"kind":"init","range":[682,699]}],"range":[657,700]}],"range":[656,701]},"start":656,"end":701,"loc":{"start":{"line":22,"column":44,"offset":656},"end":{"line":22,"column":89,"offset":701}},"range":[656,701]}],"sourceType":"module","comments":[],"loc":{"start":{"line":22,"column":44,"offset":656},"end":{"line":22,"column":89,"offset":701}},"range":[656,701]}}}}}
Non-2xx responses use the standard [API error envelope](/docs/reference/errors). Log `error.code` and `error.request_id` for support.
---
# Disconnect a connection
Revoke your organization's access to one of the patient's connections by its conn_ id. The patient's link to the source EHR is removed for your organization; stored credentials are cleared when no other workspace still uses them. Returns a tombstone confirming the disconnect.
Source URL: /docs/reference/api/disconnect-patient-connection
# Disconnect a connection
Revoke your organization's access to one of the patient's connections by its conn_ id. The patient's link to the source EHR is removed for your organization; stored credentials are cleared when no other workspace still uses them. Returns a tombstone confirming the disconnect.
{/* This file was generated from openapi\/medblocks.json. Do not edit directly. */}
Revoke your organization’s access to one of the patient’s connections by its `conn_` id. The patient’s link to the source EHR is removed for your organization; stored credentials are cleared when no other workspace still uses them. Returns a tombstone confirming the disconnect.
{"name":"APIPage","children":"","attributes":{"document":{"type":"mdxJsxAttributeValueExpression","value":"\"medblocks\"","data":{"estree":{"type":"Program","start":1171,"end":1182,"body":[{"type":"ExpressionStatement","expression":{"type":"Literal","start":1171,"end":1182,"loc":{"start":{"line":27,"column":19,"offset":1171},"end":{"line":27,"column":30,"offset":1182}},"value":"medblocks","raw":"\"medblocks\"","range":[1171,1182]},"start":1171,"end":1182,"loc":{"start":{"line":27,"column":19,"offset":1171},"end":{"line":27,"column":30,"offset":1182}},"range":[1171,1182]}],"sourceType":"module","comments":[],"loc":{"start":{"line":27,"column":19,"offset":1171},"end":{"line":27,"column":30,"offset":1182}},"range":[1171,1182]}}},"operations":{"type":"mdxJsxAttributeValueExpression","value":"[{\"path\":\"/patients/{id}/connections/{connection_id}\",\"method\":\"delete\"}]","data":{"estree":{"type":"Program","start":1196,"end":1269,"body":[{"type":"ExpressionStatement","expression":{"type":"ArrayExpression","start":1196,"end":1269,"loc":{"start":{"line":27,"column":44,"offset":1196},"end":{"line":27,"column":117,"offset":1269}},"elements":[{"type":"ObjectExpression","start":1197,"end":1268,"loc":{"start":{"line":27,"column":45,"offset":1197},"end":{"line":27,"column":116,"offset":1268}},"properties":[{"type":"Property","start":1198,"end":1249,"loc":{"start":{"line":27,"column":46,"offset":1198},"end":{"line":27,"column":97,"offset":1249}},"method":false,"shorthand":false,"computed":false,"key":{"type":"Literal","start":1198,"end":1204,"loc":{"start":{"line":27,"column":46,"offset":1198},"end":{"line":27,"column":52,"offset":1204}},"value":"path","raw":"\"path\"","range":[1198,1204]},"value":{"type":"Literal","start":1205,"end":1249,"loc":{"start":{"line":27,"column":53,"offset":1205},"end":{"line":27,"column":97,"offset":1249}},"value":"/patients/{id}/connections/{connection_id}","raw":"\"/patients/{id}/connections/{connection_id}\"","range":[1205,1249]},"kind":"init","range":[1198,1249]},{"type":"Property","start":1250,"end":1267,"loc":{"start":{"line":27,"column":98,"offset":1250},"end":{"line":27,"column":115,"offset":1267}},"method":false,"shorthand":false,"computed":false,"key":{"type":"Literal","start":1250,"end":1258,"loc":{"start":{"line":27,"column":98,"offset":1250},"end":{"line":27,"column":106,"offset":1258}},"value":"method","raw":"\"method\"","range":[1250,1258]},"value":{"type":"Literal","start":1259,"end":1267,"loc":{"start":{"line":27,"column":107,"offset":1259},"end":{"line":27,"column":115,"offset":1267}},"value":"delete","raw":"\"delete\"","range":[1259,1267]},"kind":"init","range":[1250,1267]}],"range":[1197,1268]}],"range":[1196,1269]},"start":1196,"end":1269,"loc":{"start":{"line":27,"column":44,"offset":1196},"end":{"line":27,"column":117,"offset":1269}},"range":[1196,1269]}],"sourceType":"module","comments":[],"loc":{"start":{"line":27,"column":44,"offset":1196},"end":{"line":27,"column":117,"offset":1269}},"range":[1196,1269]}}}}}
Non-2xx responses use the standard [API error envelope](/docs/reference/errors). Log `error.code` and `error.request_id` for support.
---
# Retrieve a FHIR source
Retrieve a single EHR from the catalog by its fhirsrc_ id or raw fhir_base_url, scoped to your environment.
Source URL: /docs/reference/api/get-fhir-source
# Retrieve a FHIR source
Retrieve a single EHR from the catalog by its fhirsrc_ id or raw fhir_base_url, scoped to your environment.
{/* This file was generated from openapi\/medblocks.json. Do not edit directly. */}
Retrieve a single EHR from the catalog by its `fhirsrc_` id or raw `fhir_base_url`, scoped to your environment.
{"name":"APIPage","children":"","attributes":{"document":{"type":"mdxJsxAttributeValueExpression","value":"\"medblocks\"","data":{"estree":{"type":"Program","start":630,"end":641,"body":[{"type":"ExpressionStatement","expression":{"type":"Literal","start":630,"end":641,"loc":{"start":{"line":22,"column":19,"offset":630},"end":{"line":22,"column":30,"offset":641}},"value":"medblocks","raw":"\"medblocks\"","range":[630,641]},"start":630,"end":641,"loc":{"start":{"line":22,"column":19,"offset":630},"end":{"line":22,"column":30,"offset":641}},"range":[630,641]}],"sourceType":"module","comments":[],"loc":{"start":{"line":22,"column":19,"offset":630},"end":{"line":22,"column":30,"offset":641}},"range":[630,641]}}},"operations":{"type":"mdxJsxAttributeValueExpression","value":"[{\"path\":\"/connections/{id}\",\"method\":\"get\"}]","data":{"estree":{"type":"Program","start":655,"end":700,"body":[{"type":"ExpressionStatement","expression":{"type":"ArrayExpression","start":655,"end":700,"loc":{"start":{"line":22,"column":44,"offset":655},"end":{"line":22,"column":89,"offset":700}},"elements":[{"type":"ObjectExpression","start":656,"end":699,"loc":{"start":{"line":22,"column":45,"offset":656},"end":{"line":22,"column":88,"offset":699}},"properties":[{"type":"Property","start":657,"end":683,"loc":{"start":{"line":22,"column":46,"offset":657},"end":{"line":22,"column":72,"offset":683}},"method":false,"shorthand":false,"computed":false,"key":{"type":"Literal","start":657,"end":663,"loc":{"start":{"line":22,"column":46,"offset":657},"end":{"line":22,"column":52,"offset":663}},"value":"path","raw":"\"path\"","range":[657,663]},"value":{"type":"Literal","start":664,"end":683,"loc":{"start":{"line":22,"column":53,"offset":664},"end":{"line":22,"column":72,"offset":683}},"value":"/connections/{id}","raw":"\"/connections/{id}\"","range":[664,683]},"kind":"init","range":[657,683]},{"type":"Property","start":684,"end":698,"loc":{"start":{"line":22,"column":73,"offset":684},"end":{"line":22,"column":87,"offset":698}},"method":false,"shorthand":false,"computed":false,"key":{"type":"Literal","start":684,"end":692,"loc":{"start":{"line":22,"column":73,"offset":684},"end":{"line":22,"column":81,"offset":692}},"value":"method","raw":"\"method\"","range":[684,692]},"value":{"type":"Literal","start":693,"end":698,"loc":{"start":{"line":22,"column":82,"offset":693},"end":{"line":22,"column":87,"offset":698}},"value":"get","raw":"\"get\"","range":[693,698]},"kind":"init","range":[684,698]}],"range":[656,699]}],"range":[655,700]},"start":655,"end":700,"loc":{"start":{"line":22,"column":44,"offset":655},"end":{"line":22,"column":89,"offset":700}},"range":[655,700]}],"sourceType":"module","comments":[],"loc":{"start":{"line":22,"column":44,"offset":655},"end":{"line":22,"column":89,"offset":700}},"range":[655,700]}}}}}
Non-2xx responses use the standard [API error envelope](/docs/reference/errors). Log `error.code` and `error.request_id` for support.
---
# Retrieve a patient
Retrieve a patient by their patient_id - the developer-provided identifier set on creation.
Source URL: /docs/reference/api/get-patient
# Retrieve a patient
Retrieve a patient by their patient_id - the developer-provided identifier set on creation.
{/* This file was generated from openapi\/medblocks.json. Do not edit directly. */}
Retrieve a patient by their `patient_id` - the developer-provided identifier set on creation.
{"name":"APIPage","children":"","attributes":{"document":{"type":"mdxJsxAttributeValueExpression","value":"\"medblocks\"","data":{"estree":{"type":"Program","start":574,"end":585,"body":[{"type":"ExpressionStatement","expression":{"type":"Literal","start":574,"end":585,"loc":{"start":{"line":22,"column":19,"offset":574},"end":{"line":22,"column":30,"offset":585}},"value":"medblocks","raw":"\"medblocks\"","range":[574,585]},"start":574,"end":585,"loc":{"start":{"line":22,"column":19,"offset":574},"end":{"line":22,"column":30,"offset":585}},"range":[574,585]}],"sourceType":"module","comments":[],"loc":{"start":{"line":22,"column":19,"offset":574},"end":{"line":22,"column":30,"offset":585}},"range":[574,585]}}},"operations":{"type":"mdxJsxAttributeValueExpression","value":"[{\"path\":\"/patients/{id}\",\"method\":\"get\"}]","data":{"estree":{"type":"Program","start":599,"end":641,"body":[{"type":"ExpressionStatement","expression":{"type":"ArrayExpression","start":599,"end":641,"loc":{"start":{"line":22,"column":44,"offset":599},"end":{"line":22,"column":86,"offset":641}},"elements":[{"type":"ObjectExpression","start":600,"end":640,"loc":{"start":{"line":22,"column":45,"offset":600},"end":{"line":22,"column":85,"offset":640}},"properties":[{"type":"Property","start":601,"end":624,"loc":{"start":{"line":22,"column":46,"offset":601},"end":{"line":22,"column":69,"offset":624}},"method":false,"shorthand":false,"computed":false,"key":{"type":"Literal","start":601,"end":607,"loc":{"start":{"line":22,"column":46,"offset":601},"end":{"line":22,"column":52,"offset":607}},"value":"path","raw":"\"path\"","range":[601,607]},"value":{"type":"Literal","start":608,"end":624,"loc":{"start":{"line":22,"column":53,"offset":608},"end":{"line":22,"column":69,"offset":624}},"value":"/patients/{id}","raw":"\"/patients/{id}\"","range":[608,624]},"kind":"init","range":[601,624]},{"type":"Property","start":625,"end":639,"loc":{"start":{"line":22,"column":70,"offset":625},"end":{"line":22,"column":84,"offset":639}},"method":false,"shorthand":false,"computed":false,"key":{"type":"Literal","start":625,"end":633,"loc":{"start":{"line":22,"column":70,"offset":625},"end":{"line":22,"column":78,"offset":633}},"value":"method","raw":"\"method\"","range":[625,633]},"value":{"type":"Literal","start":634,"end":639,"loc":{"start":{"line":22,"column":79,"offset":634},"end":{"line":22,"column":84,"offset":639}},"value":"get","raw":"\"get\"","range":[634,639]},"kind":"init","range":[625,639]}],"range":[600,640]}],"range":[599,641]},"start":599,"end":641,"loc":{"start":{"line":22,"column":44,"offset":599},"end":{"line":22,"column":86,"offset":641}},"range":[599,641]}],"sourceType":"module","comments":[],"loc":{"start":{"line":22,"column":44,"offset":599},"end":{"line":22,"column":86,"offset":641}},"range":[599,641]}}}}}
Non-2xx responses use the standard [API error envelope](/docs/reference/errors). Log `error.code` and `error.request_id` for support.
---
# Get patient records
Return the patient's latest stored FHIR resources with their source EHR, paginated.
Source URL: /docs/reference/api/get-patient-records
# Get patient records
Return the patient's latest stored FHIR resources with their source EHR, paginated.
{/* This file was generated from openapi\/medblocks.json. Do not edit directly. */}
Return the patient’s latest stored FHIR resources with their source EHR, paginated.
{"name":"APIPage","children":"","attributes":{"document":{"type":"mdxJsxAttributeValueExpression","value":"\"medblocks\"","data":{"estree":{"type":"Program","start":547,"end":558,"body":[{"type":"ExpressionStatement","expression":{"type":"Literal","start":547,"end":558,"loc":{"start":{"line":22,"column":19,"offset":547},"end":{"line":22,"column":30,"offset":558}},"value":"medblocks","raw":"\"medblocks\"","range":[547,558]},"start":547,"end":558,"loc":{"start":{"line":22,"column":19,"offset":547},"end":{"line":22,"column":30,"offset":558}},"range":[547,558]}],"sourceType":"module","comments":[],"loc":{"start":{"line":22,"column":19,"offset":547},"end":{"line":22,"column":30,"offset":558}},"range":[547,558]}}},"operations":{"type":"mdxJsxAttributeValueExpression","value":"[{\"path\":\"/patients/{id}/records\",\"method\":\"get\"}]","data":{"estree":{"type":"Program","start":572,"end":622,"body":[{"type":"ExpressionStatement","expression":{"type":"ArrayExpression","start":572,"end":622,"loc":{"start":{"line":22,"column":44,"offset":572},"end":{"line":22,"column":94,"offset":622}},"elements":[{"type":"ObjectExpression","start":573,"end":621,"loc":{"start":{"line":22,"column":45,"offset":573},"end":{"line":22,"column":93,"offset":621}},"properties":[{"type":"Property","start":574,"end":605,"loc":{"start":{"line":22,"column":46,"offset":574},"end":{"line":22,"column":77,"offset":605}},"method":false,"shorthand":false,"computed":false,"key":{"type":"Literal","start":574,"end":580,"loc":{"start":{"line":22,"column":46,"offset":574},"end":{"line":22,"column":52,"offset":580}},"value":"path","raw":"\"path\"","range":[574,580]},"value":{"type":"Literal","start":581,"end":605,"loc":{"start":{"line":22,"column":53,"offset":581},"end":{"line":22,"column":77,"offset":605}},"value":"/patients/{id}/records","raw":"\"/patients/{id}/records\"","range":[581,605]},"kind":"init","range":[574,605]},{"type":"Property","start":606,"end":620,"loc":{"start":{"line":22,"column":78,"offset":606},"end":{"line":22,"column":92,"offset":620}},"method":false,"shorthand":false,"computed":false,"key":{"type":"Literal","start":606,"end":614,"loc":{"start":{"line":22,"column":78,"offset":606},"end":{"line":22,"column":86,"offset":614}},"value":"method","raw":"\"method\"","range":[606,614]},"value":{"type":"Literal","start":615,"end":620,"loc":{"start":{"line":22,"column":87,"offset":615},"end":{"line":22,"column":92,"offset":620}},"value":"get","raw":"\"get\"","range":[615,620]},"kind":"init","range":[606,620]}],"range":[573,621]}],"range":[572,622]},"start":572,"end":622,"loc":{"start":{"line":22,"column":44,"offset":572},"end":{"line":22,"column":94,"offset":622}},"range":[572,622]}],"sourceType":"module","comments":[],"loc":{"start":{"line":22,"column":44,"offset":572},"end":{"line":22,"column":94,"offset":622}},"range":[572,622]}}}}}
Non-2xx responses use the standard [API error envelope](/docs/reference/errors). Log `error.code` and `error.request_id` for support.
---
# Retrieve a webhook endpoint
Retrieve a single webhook endpoint by its wh_ id, including its URL, subscribed events, and status. The secret is never returned.
Source URL: /docs/reference/api/get-webhook
# Retrieve a webhook endpoint
Retrieve a single webhook endpoint by its wh_ id, including its URL, subscribed events, and status. The secret is never returned.
{/* This file was generated from openapi\/medblocks.json. Do not edit directly. */}
Retrieve a single webhook endpoint by its `wh_` id, including its URL, subscribed events, and status. The secret is never returned.
{"name":"APIPage","children":"","attributes":{"document":{"type":"mdxJsxAttributeValueExpression","value":"\"medblocks\"","data":{"estree":{"type":"Program","start":697,"end":708,"body":[{"type":"ExpressionStatement","expression":{"type":"Literal","start":697,"end":708,"loc":{"start":{"line":22,"column":19,"offset":697},"end":{"line":22,"column":30,"offset":708}},"value":"medblocks","raw":"\"medblocks\"","range":[697,708]},"start":697,"end":708,"loc":{"start":{"line":22,"column":19,"offset":697},"end":{"line":22,"column":30,"offset":708}},"range":[697,708]}],"sourceType":"module","comments":[],"loc":{"start":{"line":22,"column":19,"offset":697},"end":{"line":22,"column":30,"offset":708}},"range":[697,708]}}},"operations":{"type":"mdxJsxAttributeValueExpression","value":"[{\"path\":\"/webhooks/{id}\",\"method\":\"get\"}]","data":{"estree":{"type":"Program","start":722,"end":764,"body":[{"type":"ExpressionStatement","expression":{"type":"ArrayExpression","start":722,"end":764,"loc":{"start":{"line":22,"column":44,"offset":722},"end":{"line":22,"column":86,"offset":764}},"elements":[{"type":"ObjectExpression","start":723,"end":763,"loc":{"start":{"line":22,"column":45,"offset":723},"end":{"line":22,"column":85,"offset":763}},"properties":[{"type":"Property","start":724,"end":747,"loc":{"start":{"line":22,"column":46,"offset":724},"end":{"line":22,"column":69,"offset":747}},"method":false,"shorthand":false,"computed":false,"key":{"type":"Literal","start":724,"end":730,"loc":{"start":{"line":22,"column":46,"offset":724},"end":{"line":22,"column":52,"offset":730}},"value":"path","raw":"\"path\"","range":[724,730]},"value":{"type":"Literal","start":731,"end":747,"loc":{"start":{"line":22,"column":53,"offset":731},"end":{"line":22,"column":69,"offset":747}},"value":"/webhooks/{id}","raw":"\"/webhooks/{id}\"","range":[731,747]},"kind":"init","range":[724,747]},{"type":"Property","start":748,"end":762,"loc":{"start":{"line":22,"column":70,"offset":748},"end":{"line":22,"column":84,"offset":762}},"method":false,"shorthand":false,"computed":false,"key":{"type":"Literal","start":748,"end":756,"loc":{"start":{"line":22,"column":70,"offset":748},"end":{"line":22,"column":78,"offset":756}},"value":"method","raw":"\"method\"","range":[748,756]},"value":{"type":"Literal","start":757,"end":762,"loc":{"start":{"line":22,"column":79,"offset":757},"end":{"line":22,"column":84,"offset":762}},"value":"get","raw":"\"get\"","range":[757,762]},"kind":"init","range":[748,762]}],"range":[723,763]}],"range":[722,764]},"start":722,"end":764,"loc":{"start":{"line":22,"column":44,"offset":722},"end":{"line":22,"column":86,"offset":764}},"range":[722,764]}],"sourceType":"module","comments":[],"loc":{"start":{"line":22,"column":44,"offset":722},"end":{"line":22,"column":86,"offset":764}},"range":[722,764]}}}}}
Non-2xx responses use the standard [API error envelope](/docs/reference/errors). Log `error.code` and `error.request_id` for support.
---
# Liveness check
Unauthenticated probe that returns ok and the current server_time to confirm the API is reachable.
Source URL: /docs/reference/api/health
# Liveness check
Unauthenticated probe that returns ok and the current server_time to confirm the API is reachable.
{/* This file was generated from openapi\/medblocks.json. Do not edit directly. */}
Unauthenticated probe that returns `ok` and the current `server_time` to confirm the API is reachable.
{"name":"APIPage","children":"","attributes":{"document":{"type":"mdxJsxAttributeValueExpression","value":"\"medblocks\"","data":{"estree":{"type":"Program","start":595,"end":606,"body":[{"type":"ExpressionStatement","expression":{"type":"Literal","start":595,"end":606,"loc":{"start":{"line":22,"column":19,"offset":595},"end":{"line":22,"column":30,"offset":606}},"value":"medblocks","raw":"\"medblocks\"","range":[595,606]},"start":595,"end":606,"loc":{"start":{"line":22,"column":19,"offset":595},"end":{"line":22,"column":30,"offset":606}},"range":[595,606]}],"sourceType":"module","comments":[],"loc":{"start":{"line":22,"column":19,"offset":595},"end":{"line":22,"column":30,"offset":606}},"range":[595,606]}}},"operations":{"type":"mdxJsxAttributeValueExpression","value":"[{\"path\":\"/health\",\"method\":\"get\"}]","data":{"estree":{"type":"Program","start":620,"end":655,"body":[{"type":"ExpressionStatement","expression":{"type":"ArrayExpression","start":620,"end":655,"loc":{"start":{"line":22,"column":44,"offset":620},"end":{"line":22,"column":79,"offset":655}},"elements":[{"type":"ObjectExpression","start":621,"end":654,"loc":{"start":{"line":22,"column":45,"offset":621},"end":{"line":22,"column":78,"offset":654}},"properties":[{"type":"Property","start":622,"end":638,"loc":{"start":{"line":22,"column":46,"offset":622},"end":{"line":22,"column":62,"offset":638}},"method":false,"shorthand":false,"computed":false,"key":{"type":"Literal","start":622,"end":628,"loc":{"start":{"line":22,"column":46,"offset":622},"end":{"line":22,"column":52,"offset":628}},"value":"path","raw":"\"path\"","range":[622,628]},"value":{"type":"Literal","start":629,"end":638,"loc":{"start":{"line":22,"column":53,"offset":629},"end":{"line":22,"column":62,"offset":638}},"value":"/health","raw":"\"/health\"","range":[629,638]},"kind":"init","range":[622,638]},{"type":"Property","start":639,"end":653,"loc":{"start":{"line":22,"column":63,"offset":639},"end":{"line":22,"column":77,"offset":653}},"method":false,"shorthand":false,"computed":false,"key":{"type":"Literal","start":639,"end":647,"loc":{"start":{"line":22,"column":63,"offset":639},"end":{"line":22,"column":71,"offset":647}},"value":"method","raw":"\"method\"","range":[639,647]},"value":{"type":"Literal","start":648,"end":653,"loc":{"start":{"line":22,"column":72,"offset":648},"end":{"line":22,"column":77,"offset":653}},"value":"get","raw":"\"get\"","range":[648,653]},"kind":"init","range":[639,653]}],"range":[621,654]}],"range":[620,655]},"start":620,"end":655,"loc":{"start":{"line":22,"column":44,"offset":620},"end":{"line":22,"column":79,"offset":655}},"range":[620,655]}],"sourceType":"module","comments":[],"loc":{"start":{"line":22,"column":44,"offset":620},"end":{"line":22,"column":79,"offset":655}},"range":[620,655]}}}}}
Non-2xx responses use the standard [API error envelope](/docs/reference/errors). Log `error.code` and `error.request_id` for support.
---
# Start a patient session
Start a patient session and get back a url to send the patient to so they can connect their records. Track progress with the session's status.
Source URL: /docs/reference/api/init-patient-session
# Start a patient session
Start a patient session and get back a url to send the patient to so they can connect their records. Track progress with the session's status.
{/* This file was generated from openapi\/medblocks.json. Do not edit directly. */}
Start a patient session and get back a `url` to send the patient to so they can connect their records. Track progress with the session’s `status`.
{"name":"APIPage","children":"","attributes":{"document":{"type":"mdxJsxAttributeValueExpression","value":"\"medblocks\"","data":{"estree":{"type":"Program","start":747,"end":758,"body":[{"type":"ExpressionStatement","expression":{"type":"Literal","start":747,"end":758,"loc":{"start":{"line":23,"column":19,"offset":747},"end":{"line":23,"column":30,"offset":758}},"value":"medblocks","raw":"\"medblocks\"","range":[747,758]},"start":747,"end":758,"loc":{"start":{"line":23,"column":19,"offset":747},"end":{"line":23,"column":30,"offset":758}},"range":[747,758]}],"sourceType":"module","comments":[],"loc":{"start":{"line":23,"column":19,"offset":747},"end":{"line":23,"column":30,"offset":758}},"range":[747,758]}}},"operations":{"type":"mdxJsxAttributeValueExpression","value":"[{\"path\":\"/patient-sessions\",\"method\":\"post\"}]","data":{"estree":{"type":"Program","start":772,"end":818,"body":[{"type":"ExpressionStatement","expression":{"type":"ArrayExpression","start":772,"end":818,"loc":{"start":{"line":23,"column":44,"offset":772},"end":{"line":23,"column":90,"offset":818}},"elements":[{"type":"ObjectExpression","start":773,"end":817,"loc":{"start":{"line":23,"column":45,"offset":773},"end":{"line":23,"column":89,"offset":817}},"properties":[{"type":"Property","start":774,"end":800,"loc":{"start":{"line":23,"column":46,"offset":774},"end":{"line":23,"column":72,"offset":800}},"method":false,"shorthand":false,"computed":false,"key":{"type":"Literal","start":774,"end":780,"loc":{"start":{"line":23,"column":46,"offset":774},"end":{"line":23,"column":52,"offset":780}},"value":"path","raw":"\"path\"","range":[774,780]},"value":{"type":"Literal","start":781,"end":800,"loc":{"start":{"line":23,"column":53,"offset":781},"end":{"line":23,"column":72,"offset":800}},"value":"/patient-sessions","raw":"\"/patient-sessions\"","range":[781,800]},"kind":"init","range":[774,800]},{"type":"Property","start":801,"end":816,"loc":{"start":{"line":23,"column":73,"offset":801},"end":{"line":23,"column":88,"offset":816}},"method":false,"shorthand":false,"computed":false,"key":{"type":"Literal","start":801,"end":809,"loc":{"start":{"line":23,"column":73,"offset":801},"end":{"line":23,"column":81,"offset":809}},"value":"method","raw":"\"method\"","range":[801,809]},"value":{"type":"Literal","start":810,"end":816,"loc":{"start":{"line":23,"column":82,"offset":810},"end":{"line":23,"column":88,"offset":816}},"value":"post","raw":"\"post\"","range":[810,816]},"kind":"init","range":[801,816]}],"range":[773,817]}],"range":[772,818]},"start":772,"end":818,"loc":{"start":{"line":23,"column":44,"offset":772},"end":{"line":23,"column":90,"offset":818}},"range":[772,818]}],"sourceType":"module","comments":[],"loc":{"start":{"line":23,"column":44,"offset":772},"end":{"line":23,"column":90,"offset":818}},"range":[772,818]}}}}}
Non-2xx responses use the standard [API error envelope](/docs/reference/errors). Log `error.code` and `error.request_id` for support.
---
# List FHIR sources
Search the catalog of registered EHRs with cursor pagination and optional q text and vendor type filters.
Source URL: /docs/reference/api/list-fhir-sources
# List FHIR sources
Search the catalog of registered EHRs with cursor pagination and optional q text and vendor type filters.
{/* This file was generated from openapi\/medblocks.json. Do not edit directly. */}
Search the catalog of registered EHRs with cursor pagination and optional `q` text and vendor `type` filters.
{"name":"APIPage","children":"","attributes":{"document":{"type":"mdxJsxAttributeValueExpression","value":"\"medblocks\"","data":{"estree":{"type":"Program","start":619,"end":630,"body":[{"type":"ExpressionStatement","expression":{"type":"Literal","start":619,"end":630,"loc":{"start":{"line":22,"column":19,"offset":619},"end":{"line":22,"column":30,"offset":630}},"value":"medblocks","raw":"\"medblocks\"","range":[619,630]},"start":619,"end":630,"loc":{"start":{"line":22,"column":19,"offset":619},"end":{"line":22,"column":30,"offset":630}},"range":[619,630]}],"sourceType":"module","comments":[],"loc":{"start":{"line":22,"column":19,"offset":619},"end":{"line":22,"column":30,"offset":630}},"range":[619,630]}}},"operations":{"type":"mdxJsxAttributeValueExpression","value":"[{\"path\":\"/connections\",\"method\":\"get\"}]","data":{"estree":{"type":"Program","start":644,"end":684,"body":[{"type":"ExpressionStatement","expression":{"type":"ArrayExpression","start":644,"end":684,"loc":{"start":{"line":22,"column":44,"offset":644},"end":{"line":22,"column":84,"offset":684}},"elements":[{"type":"ObjectExpression","start":645,"end":683,"loc":{"start":{"line":22,"column":45,"offset":645},"end":{"line":22,"column":83,"offset":683}},"properties":[{"type":"Property","start":646,"end":667,"loc":{"start":{"line":22,"column":46,"offset":646},"end":{"line":22,"column":67,"offset":667}},"method":false,"shorthand":false,"computed":false,"key":{"type":"Literal","start":646,"end":652,"loc":{"start":{"line":22,"column":46,"offset":646},"end":{"line":22,"column":52,"offset":652}},"value":"path","raw":"\"path\"","range":[646,652]},"value":{"type":"Literal","start":653,"end":667,"loc":{"start":{"line":22,"column":53,"offset":653},"end":{"line":22,"column":67,"offset":667}},"value":"/connections","raw":"\"/connections\"","range":[653,667]},"kind":"init","range":[646,667]},{"type":"Property","start":668,"end":682,"loc":{"start":{"line":22,"column":68,"offset":668},"end":{"line":22,"column":82,"offset":682}},"method":false,"shorthand":false,"computed":false,"key":{"type":"Literal","start":668,"end":676,"loc":{"start":{"line":22,"column":68,"offset":668},"end":{"line":22,"column":76,"offset":676}},"value":"method","raw":"\"method\"","range":[668,676]},"value":{"type":"Literal","start":677,"end":682,"loc":{"start":{"line":22,"column":77,"offset":677},"end":{"line":22,"column":82,"offset":682}},"value":"get","raw":"\"get\"","range":[677,682]},"kind":"init","range":[668,682]}],"range":[645,683]}],"range":[644,684]},"start":644,"end":684,"loc":{"start":{"line":22,"column":44,"offset":644},"end":{"line":22,"column":84,"offset":684}},"range":[644,684]}],"sourceType":"module","comments":[],"loc":{"start":{"line":22,"column":44,"offset":644},"end":{"line":22,"column":84,"offset":684}},"range":[644,684]}}}}}
Non-2xx responses use the standard [API error envelope](/docs/reference/errors). Log `error.code` and `error.request_id` for support.
---
# List patient sessions for a patient
List a patient's sessions with cursor pagination and an optional status filter, identified by their patient_id.
Source URL: /docs/reference/api/list-patient-sessions-for-patient
# List patient sessions for a patient
List a patient's sessions with cursor pagination and an optional status filter, identified by their patient_id.
{/* This file was generated from openapi\/medblocks.json. Do not edit directly. */}
List a patient’s sessions with cursor pagination and an optional `status` filter, identified by their `patient_id`.
{"name":"APIPage","children":"","attributes":{"document":{"type":"mdxJsxAttributeValueExpression","value":"\"medblocks\"","data":{"estree":{"type":"Program","start":655,"end":666,"body":[{"type":"ExpressionStatement","expression":{"type":"Literal","start":655,"end":666,"loc":{"start":{"line":22,"column":19,"offset":655},"end":{"line":22,"column":30,"offset":666}},"value":"medblocks","raw":"\"medblocks\"","range":[655,666]},"start":655,"end":666,"loc":{"start":{"line":22,"column":19,"offset":655},"end":{"line":22,"column":30,"offset":666}},"range":[655,666]}],"sourceType":"module","comments":[],"loc":{"start":{"line":22,"column":19,"offset":655},"end":{"line":22,"column":30,"offset":666}},"range":[655,666]}}},"operations":{"type":"mdxJsxAttributeValueExpression","value":"[{\"path\":\"/patients/{id}/patient-sessions\",\"method\":\"get\"}]","data":{"estree":{"type":"Program","start":680,"end":739,"body":[{"type":"ExpressionStatement","expression":{"type":"ArrayExpression","start":680,"end":739,"loc":{"start":{"line":22,"column":44,"offset":680},"end":{"line":22,"column":103,"offset":739}},"elements":[{"type":"ObjectExpression","start":681,"end":738,"loc":{"start":{"line":22,"column":45,"offset":681},"end":{"line":22,"column":102,"offset":738}},"properties":[{"type":"Property","start":682,"end":722,"loc":{"start":{"line":22,"column":46,"offset":682},"end":{"line":22,"column":86,"offset":722}},"method":false,"shorthand":false,"computed":false,"key":{"type":"Literal","start":682,"end":688,"loc":{"start":{"line":22,"column":46,"offset":682},"end":{"line":22,"column":52,"offset":688}},"value":"path","raw":"\"path\"","range":[682,688]},"value":{"type":"Literal","start":689,"end":722,"loc":{"start":{"line":22,"column":53,"offset":689},"end":{"line":22,"column":86,"offset":722}},"value":"/patients/{id}/patient-sessions","raw":"\"/patients/{id}/patient-sessions\"","range":[689,722]},"kind":"init","range":[682,722]},{"type":"Property","start":723,"end":737,"loc":{"start":{"line":22,"column":87,"offset":723},"end":{"line":22,"column":101,"offset":737}},"method":false,"shorthand":false,"computed":false,"key":{"type":"Literal","start":723,"end":731,"loc":{"start":{"line":22,"column":87,"offset":723},"end":{"line":22,"column":95,"offset":731}},"value":"method","raw":"\"method\"","range":[723,731]},"value":{"type":"Literal","start":732,"end":737,"loc":{"start":{"line":22,"column":96,"offset":732},"end":{"line":22,"column":101,"offset":737}},"value":"get","raw":"\"get\"","range":[732,737]},"kind":"init","range":[723,737]}],"range":[681,738]}],"range":[680,739]},"start":680,"end":739,"loc":{"start":{"line":22,"column":44,"offset":680},"end":{"line":22,"column":103,"offset":739}},"range":[680,739]}],"sourceType":"module","comments":[],"loc":{"start":{"line":22,"column":44,"offset":680},"end":{"line":22,"column":103,"offset":739}},"range":[680,739]}}}}}
Non-2xx responses use the standard [API error envelope](/docs/reference/errors). Log `error.code` and `error.request_id` for support.
---
# List patients
List your organization's patients with cursor pagination and optional exact-match filters on patient_id or email.
Source URL: /docs/reference/api/list-patients
# List patients
List your organization's patients with cursor pagination and optional exact-match filters on patient_id or email.
{/* This file was generated from openapi\/medblocks.json. Do not edit directly. */}
List your organization’s patients with cursor pagination and optional exact-match filters on `patient_id` or `email`.
{"name":"APIPage","children":"","attributes":{"document":{"type":"mdxJsxAttributeValueExpression","value":"\"medblocks\"","data":{"estree":{"type":"Program","start":639,"end":650,"body":[{"type":"ExpressionStatement","expression":{"type":"Literal","start":639,"end":650,"loc":{"start":{"line":22,"column":19,"offset":639},"end":{"line":22,"column":30,"offset":650}},"value":"medblocks","raw":"\"medblocks\"","range":[639,650]},"start":639,"end":650,"loc":{"start":{"line":22,"column":19,"offset":639},"end":{"line":22,"column":30,"offset":650}},"range":[639,650]}],"sourceType":"module","comments":[],"loc":{"start":{"line":22,"column":19,"offset":639},"end":{"line":22,"column":30,"offset":650}},"range":[639,650]}}},"operations":{"type":"mdxJsxAttributeValueExpression","value":"[{\"path\":\"/patients\",\"method\":\"get\"}]","data":{"estree":{"type":"Program","start":664,"end":701,"body":[{"type":"ExpressionStatement","expression":{"type":"ArrayExpression","start":664,"end":701,"loc":{"start":{"line":22,"column":44,"offset":664},"end":{"line":22,"column":81,"offset":701}},"elements":[{"type":"ObjectExpression","start":665,"end":700,"loc":{"start":{"line":22,"column":45,"offset":665},"end":{"line":22,"column":80,"offset":700}},"properties":[{"type":"Property","start":666,"end":684,"loc":{"start":{"line":22,"column":46,"offset":666},"end":{"line":22,"column":64,"offset":684}},"method":false,"shorthand":false,"computed":false,"key":{"type":"Literal","start":666,"end":672,"loc":{"start":{"line":22,"column":46,"offset":666},"end":{"line":22,"column":52,"offset":672}},"value":"path","raw":"\"path\"","range":[666,672]},"value":{"type":"Literal","start":673,"end":684,"loc":{"start":{"line":22,"column":53,"offset":673},"end":{"line":22,"column":64,"offset":684}},"value":"/patients","raw":"\"/patients\"","range":[673,684]},"kind":"init","range":[666,684]},{"type":"Property","start":685,"end":699,"loc":{"start":{"line":22,"column":65,"offset":685},"end":{"line":22,"column":79,"offset":699}},"method":false,"shorthand":false,"computed":false,"key":{"type":"Literal","start":685,"end":693,"loc":{"start":{"line":22,"column":65,"offset":685},"end":{"line":22,"column":73,"offset":693}},"value":"method","raw":"\"method\"","range":[685,693]},"value":{"type":"Literal","start":694,"end":699,"loc":{"start":{"line":22,"column":74,"offset":694},"end":{"line":22,"column":79,"offset":699}},"value":"get","raw":"\"get\"","range":[694,699]},"kind":"init","range":[685,699]}],"range":[665,700]}],"range":[664,701]},"start":664,"end":701,"loc":{"start":{"line":22,"column":44,"offset":664},"end":{"line":22,"column":81,"offset":701}},"range":[664,701]}],"sourceType":"module","comments":[],"loc":{"start":{"line":22,"column":44,"offset":664},"end":{"line":22,"column":81,"offset":701}},"range":[664,701]}}}}}
Non-2xx responses use the standard [API error envelope](/docs/reference/errors). Log `error.code` and `error.request_id` for support.
---
# List recent webhook events for an endpoint
List recent delivery records for one endpoint with cursor pagination and an optional delivered filter for the delivery audit.
Source URL: /docs/reference/api/list-webhook-events
# List recent webhook events for an endpoint
List recent delivery records for one endpoint with cursor pagination and an optional delivered filter for the delivery audit.
{/* This file was generated from openapi\/medblocks.json. Do not edit directly. */}
List recent delivery records for one endpoint with cursor pagination and an optional `delivered` filter for the delivery audit.
{"name":"APIPage","children":"","attributes":{"document":{"type":"mdxJsxAttributeValueExpression","value":"\"medblocks\"","data":{"estree":{"type":"Program","start":700,"end":711,"body":[{"type":"ExpressionStatement","expression":{"type":"Literal","start":700,"end":711,"loc":{"start":{"line":22,"column":19,"offset":700},"end":{"line":22,"column":30,"offset":711}},"value":"medblocks","raw":"\"medblocks\"","range":[700,711]},"start":700,"end":711,"loc":{"start":{"line":22,"column":19,"offset":700},"end":{"line":22,"column":30,"offset":711}},"range":[700,711]}],"sourceType":"module","comments":[],"loc":{"start":{"line":22,"column":19,"offset":700},"end":{"line":22,"column":30,"offset":711}},"range":[700,711]}}},"operations":{"type":"mdxJsxAttributeValueExpression","value":"[{\"path\":\"/webhooks/{id}/events\",\"method\":\"get\"}]","data":{"estree":{"type":"Program","start":725,"end":774,"body":[{"type":"ExpressionStatement","expression":{"type":"ArrayExpression","start":725,"end":774,"loc":{"start":{"line":22,"column":44,"offset":725},"end":{"line":22,"column":93,"offset":774}},"elements":[{"type":"ObjectExpression","start":726,"end":773,"loc":{"start":{"line":22,"column":45,"offset":726},"end":{"line":22,"column":92,"offset":773}},"properties":[{"type":"Property","start":727,"end":757,"loc":{"start":{"line":22,"column":46,"offset":727},"end":{"line":22,"column":76,"offset":757}},"method":false,"shorthand":false,"computed":false,"key":{"type":"Literal","start":727,"end":733,"loc":{"start":{"line":22,"column":46,"offset":727},"end":{"line":22,"column":52,"offset":733}},"value":"path","raw":"\"path\"","range":[727,733]},"value":{"type":"Literal","start":734,"end":757,"loc":{"start":{"line":22,"column":53,"offset":734},"end":{"line":22,"column":76,"offset":757}},"value":"/webhooks/{id}/events","raw":"\"/webhooks/{id}/events\"","range":[734,757]},"kind":"init","range":[727,757]},{"type":"Property","start":758,"end":772,"loc":{"start":{"line":22,"column":77,"offset":758},"end":{"line":22,"column":91,"offset":772}},"method":false,"shorthand":false,"computed":false,"key":{"type":"Literal","start":758,"end":766,"loc":{"start":{"line":22,"column":77,"offset":758},"end":{"line":22,"column":85,"offset":766}},"value":"method","raw":"\"method\"","range":[758,766]},"value":{"type":"Literal","start":767,"end":772,"loc":{"start":{"line":22,"column":86,"offset":767},"end":{"line":22,"column":91,"offset":772}},"value":"get","raw":"\"get\"","range":[767,772]},"kind":"init","range":[758,772]}],"range":[726,773]}],"range":[725,774]},"start":725,"end":774,"loc":{"start":{"line":22,"column":44,"offset":725},"end":{"line":22,"column":93,"offset":774}},"range":[725,774]}],"sourceType":"module","comments":[],"loc":{"start":{"line":22,"column":44,"offset":725},"end":{"line":22,"column":93,"offset":774}},"range":[725,774]}}}}}
Non-2xx responses use the standard [API error envelope](/docs/reference/errors). Log `error.code` and `error.request_id` for support.
---
# List webhook endpoints
List your organization's webhook endpoints with cursor pagination and an optional status filter. Secrets are never returned.
Source URL: /docs/reference/api/list-webhooks
# List webhook endpoints
List your organization's webhook endpoints with cursor pagination and an optional status filter. Secrets are never returned.
{/* This file was generated from openapi\/medblocks.json. Do not edit directly. */}
List your organization’s webhook endpoints with cursor pagination and an optional `status` filter. Secrets are never returned.
{"name":"APIPage","children":"","attributes":{"document":{"type":"mdxJsxAttributeValueExpression","value":"\"medblocks\"","data":{"estree":{"type":"Program","start":677,"end":688,"body":[{"type":"ExpressionStatement","expression":{"type":"Literal","start":677,"end":688,"loc":{"start":{"line":22,"column":19,"offset":677},"end":{"line":22,"column":30,"offset":688}},"value":"medblocks","raw":"\"medblocks\"","range":[677,688]},"start":677,"end":688,"loc":{"start":{"line":22,"column":19,"offset":677},"end":{"line":22,"column":30,"offset":688}},"range":[677,688]}],"sourceType":"module","comments":[],"loc":{"start":{"line":22,"column":19,"offset":677},"end":{"line":22,"column":30,"offset":688}},"range":[677,688]}}},"operations":{"type":"mdxJsxAttributeValueExpression","value":"[{\"path\":\"/webhooks\",\"method\":\"get\"}]","data":{"estree":{"type":"Program","start":702,"end":739,"body":[{"type":"ExpressionStatement","expression":{"type":"ArrayExpression","start":702,"end":739,"loc":{"start":{"line":22,"column":44,"offset":702},"end":{"line":22,"column":81,"offset":739}},"elements":[{"type":"ObjectExpression","start":703,"end":738,"loc":{"start":{"line":22,"column":45,"offset":703},"end":{"line":22,"column":80,"offset":738}},"properties":[{"type":"Property","start":704,"end":722,"loc":{"start":{"line":22,"column":46,"offset":704},"end":{"line":22,"column":64,"offset":722}},"method":false,"shorthand":false,"computed":false,"key":{"type":"Literal","start":704,"end":710,"loc":{"start":{"line":22,"column":46,"offset":704},"end":{"line":22,"column":52,"offset":710}},"value":"path","raw":"\"path\"","range":[704,710]},"value":{"type":"Literal","start":711,"end":722,"loc":{"start":{"line":22,"column":53,"offset":711},"end":{"line":22,"column":64,"offset":722}},"value":"/webhooks","raw":"\"/webhooks\"","range":[711,722]},"kind":"init","range":[704,722]},{"type":"Property","start":723,"end":737,"loc":{"start":{"line":22,"column":65,"offset":723},"end":{"line":22,"column":79,"offset":737}},"method":false,"shorthand":false,"computed":false,"key":{"type":"Literal","start":723,"end":731,"loc":{"start":{"line":22,"column":65,"offset":723},"end":{"line":22,"column":73,"offset":731}},"value":"method","raw":"\"method\"","range":[723,731]},"value":{"type":"Literal","start":732,"end":737,"loc":{"start":{"line":22,"column":74,"offset":732},"end":{"line":22,"column":79,"offset":737}},"value":"get","raw":"\"get\"","range":[732,737]},"kind":"init","range":[723,737]}],"range":[703,738]}],"range":[702,739]},"start":702,"end":739,"loc":{"start":{"line":22,"column":44,"offset":702},"end":{"line":22,"column":81,"offset":739}},"range":[702,739]}],"sourceType":"module","comments":[],"loc":{"start":{"line":22,"column":44,"offset":702},"end":{"line":22,"column":81,"offset":739}},"range":[702,739]}}}}}
Non-2xx responses use the standard [API error envelope](/docs/reference/errors). Log `error.code` and `error.request_id` for support.
---
# Manually redeliver a webhook event
Re-enqueue a webhook event for delivery by its evt_ id. Limited to one redelivery per event each minute.
Source URL: /docs/reference/api/redeliver-webhook-event
# Manually redeliver a webhook event
Re-enqueue a webhook event for delivery by its evt_ id. Limited to one redelivery per event each minute.
{/* This file was generated from openapi\/medblocks.json. Do not edit directly. */}
Re-enqueue a webhook event for delivery by its `evt_` id. Limited to one redelivery per event each minute.
{"name":"APIPage","children":"","attributes":{"document":{"type":"mdxJsxAttributeValueExpression","value":"\"medblocks\"","data":{"estree":{"type":"Program","start":630,"end":641,"body":[{"type":"ExpressionStatement","expression":{"type":"Literal","start":630,"end":641,"loc":{"start":{"line":22,"column":19,"offset":630},"end":{"line":22,"column":30,"offset":641}},"value":"medblocks","raw":"\"medblocks\"","range":[630,641]},"start":630,"end":641,"loc":{"start":{"line":22,"column":19,"offset":630},"end":{"line":22,"column":30,"offset":641}},"range":[630,641]}],"sourceType":"module","comments":[],"loc":{"start":{"line":22,"column":19,"offset":630},"end":{"line":22,"column":30,"offset":641}},"range":[630,641]}}},"operations":{"type":"mdxJsxAttributeValueExpression","value":"[{\"path\":\"/events/{id}/redeliver\",\"method\":\"post\"}]","data":{"estree":{"type":"Program","start":655,"end":706,"body":[{"type":"ExpressionStatement","expression":{"type":"ArrayExpression","start":655,"end":706,"loc":{"start":{"line":22,"column":44,"offset":655},"end":{"line":22,"column":95,"offset":706}},"elements":[{"type":"ObjectExpression","start":656,"end":705,"loc":{"start":{"line":22,"column":45,"offset":656},"end":{"line":22,"column":94,"offset":705}},"properties":[{"type":"Property","start":657,"end":688,"loc":{"start":{"line":22,"column":46,"offset":657},"end":{"line":22,"column":77,"offset":688}},"method":false,"shorthand":false,"computed":false,"key":{"type":"Literal","start":657,"end":663,"loc":{"start":{"line":22,"column":46,"offset":657},"end":{"line":22,"column":52,"offset":663}},"value":"path","raw":"\"path\"","range":[657,663]},"value":{"type":"Literal","start":664,"end":688,"loc":{"start":{"line":22,"column":53,"offset":664},"end":{"line":22,"column":77,"offset":688}},"value":"/events/{id}/redeliver","raw":"\"/events/{id}/redeliver\"","range":[664,688]},"kind":"init","range":[657,688]},{"type":"Property","start":689,"end":704,"loc":{"start":{"line":22,"column":78,"offset":689},"end":{"line":22,"column":93,"offset":704}},"method":false,"shorthand":false,"computed":false,"key":{"type":"Literal","start":689,"end":697,"loc":{"start":{"line":22,"column":78,"offset":689},"end":{"line":22,"column":86,"offset":697}},"value":"method","raw":"\"method\"","range":[689,697]},"value":{"type":"Literal","start":698,"end":704,"loc":{"start":{"line":22,"column":87,"offset":698},"end":{"line":22,"column":93,"offset":704}},"value":"post","raw":"\"post\"","range":[698,704]},"kind":"init","range":[689,704]}],"range":[656,705]}],"range":[655,706]},"start":655,"end":706,"loc":{"start":{"line":22,"column":44,"offset":655},"end":{"line":22,"column":95,"offset":706}},"range":[655,706]}],"sourceType":"module","comments":[],"loc":{"start":{"line":22,"column":44,"offset":655},"end":{"line":22,"column":95,"offset":706}},"range":[655,706]}}}}}
Non-2xx responses use the standard [API error envelope](/docs/reference/errors). Log `error.code` and `error.request_id` for support.
---
# Retrieve an EHR launch context
Resolve the mb_launch handle (appended to your app's launch URL after an EHR launch) into the patient / encounter / practitioner / EHR the app was launched in.
Source URL: /docs/reference/api/retrieve-launch-context
# Retrieve an EHR launch context
Resolve the mb_launch handle (appended to your app's launch URL after an EHR launch) into the patient / encounter / practitioner / EHR the app was launched in.
{/* This file was generated from openapi\/medblocks.json. Do not edit directly. */}
Resolve the `mb_launch` handle (appended to your app’s launch URL after an EHR launch) into the patient / encounter / practitioner / EHR the app was launched in.
{"name":"APIPage","children":"","attributes":{"document":{"type":"mdxJsxAttributeValueExpression","value":"\"medblocks\"","data":{"estree":{"type":"Program","start":802,"end":813,"body":[{"type":"ExpressionStatement","expression":{"type":"Literal","start":802,"end":813,"loc":{"start":{"line":24,"column":19,"offset":802},"end":{"line":24,"column":30,"offset":813}},"value":"medblocks","raw":"\"medblocks\"","range":[802,813]},"start":802,"end":813,"loc":{"start":{"line":24,"column":19,"offset":802},"end":{"line":24,"column":30,"offset":813}},"range":[802,813]}],"sourceType":"module","comments":[],"loc":{"start":{"line":24,"column":19,"offset":802},"end":{"line":24,"column":30,"offset":813}},"range":[802,813]}}},"operations":{"type":"mdxJsxAttributeValueExpression","value":"[{\"path\":\"/launch-contexts/{id}\",\"method\":\"get\"}]","data":{"estree":{"type":"Program","start":827,"end":876,"body":[{"type":"ExpressionStatement","expression":{"type":"ArrayExpression","start":827,"end":876,"loc":{"start":{"line":24,"column":44,"offset":827},"end":{"line":24,"column":93,"offset":876}},"elements":[{"type":"ObjectExpression","start":828,"end":875,"loc":{"start":{"line":24,"column":45,"offset":828},"end":{"line":24,"column":92,"offset":875}},"properties":[{"type":"Property","start":829,"end":859,"loc":{"start":{"line":24,"column":46,"offset":829},"end":{"line":24,"column":76,"offset":859}},"method":false,"shorthand":false,"computed":false,"key":{"type":"Literal","start":829,"end":835,"loc":{"start":{"line":24,"column":46,"offset":829},"end":{"line":24,"column":52,"offset":835}},"value":"path","raw":"\"path\"","range":[829,835]},"value":{"type":"Literal","start":836,"end":859,"loc":{"start":{"line":24,"column":53,"offset":836},"end":{"line":24,"column":76,"offset":859}},"value":"/launch-contexts/{id}","raw":"\"/launch-contexts/{id}\"","range":[836,859]},"kind":"init","range":[829,859]},{"type":"Property","start":860,"end":874,"loc":{"start":{"line":24,"column":77,"offset":860},"end":{"line":24,"column":91,"offset":874}},"method":false,"shorthand":false,"computed":false,"key":{"type":"Literal","start":860,"end":868,"loc":{"start":{"line":24,"column":77,"offset":860},"end":{"line":24,"column":85,"offset":868}},"value":"method","raw":"\"method\"","range":[860,868]},"value":{"type":"Literal","start":869,"end":874,"loc":{"start":{"line":24,"column":86,"offset":869},"end":{"line":24,"column":91,"offset":874}},"value":"get","raw":"\"get\"","range":[869,874]},"kind":"init","range":[860,874]}],"range":[828,875]}],"range":[827,876]},"start":827,"end":876,"loc":{"start":{"line":24,"column":44,"offset":827},"end":{"line":24,"column":93,"offset":876}},"range":[827,876]}],"sourceType":"module","comments":[],"loc":{"start":{"line":24,"column":44,"offset":827},"end":{"line":24,"column":93,"offset":876}},"range":[827,876]}}}}}
Non-2xx responses use the standard [API error envelope](/docs/reference/errors). Log `error.code` and `error.request_id` for support.
---
# Retrieve a patient session
Retrieve a patient session by its ps_ id, including its current status and the connections created during it.
Source URL: /docs/reference/api/retrieve-patient-session
# Retrieve a patient session
Retrieve a patient session by its ps_ id, including its current status and the connections created during it.
{/* This file was generated from openapi\/medblocks.json. Do not edit directly. */}
Retrieve a patient session by its `ps_` id, including its current status and the connections created during it.
{"name":"APIPage","children":"","attributes":{"document":{"type":"mdxJsxAttributeValueExpression","value":"\"medblocks\"","data":{"estree":{"type":"Program","start":636,"end":647,"body":[{"type":"ExpressionStatement","expression":{"type":"Literal","start":636,"end":647,"loc":{"start":{"line":22,"column":19,"offset":636},"end":{"line":22,"column":30,"offset":647}},"value":"medblocks","raw":"\"medblocks\"","range":[636,647]},"start":636,"end":647,"loc":{"start":{"line":22,"column":19,"offset":636},"end":{"line":22,"column":30,"offset":647}},"range":[636,647]}],"sourceType":"module","comments":[],"loc":{"start":{"line":22,"column":19,"offset":636},"end":{"line":22,"column":30,"offset":647}},"range":[636,647]}}},"operations":{"type":"mdxJsxAttributeValueExpression","value":"[{\"path\":\"/patient-sessions/{id}\",\"method\":\"get\"}]","data":{"estree":{"type":"Program","start":661,"end":711,"body":[{"type":"ExpressionStatement","expression":{"type":"ArrayExpression","start":661,"end":711,"loc":{"start":{"line":22,"column":44,"offset":661},"end":{"line":22,"column":94,"offset":711}},"elements":[{"type":"ObjectExpression","start":662,"end":710,"loc":{"start":{"line":22,"column":45,"offset":662},"end":{"line":22,"column":93,"offset":710}},"properties":[{"type":"Property","start":663,"end":694,"loc":{"start":{"line":22,"column":46,"offset":663},"end":{"line":22,"column":77,"offset":694}},"method":false,"shorthand":false,"computed":false,"key":{"type":"Literal","start":663,"end":669,"loc":{"start":{"line":22,"column":46,"offset":663},"end":{"line":22,"column":52,"offset":669}},"value":"path","raw":"\"path\"","range":[663,669]},"value":{"type":"Literal","start":670,"end":694,"loc":{"start":{"line":22,"column":53,"offset":670},"end":{"line":22,"column":77,"offset":694}},"value":"/patient-sessions/{id}","raw":"\"/patient-sessions/{id}\"","range":[670,694]},"kind":"init","range":[663,694]},{"type":"Property","start":695,"end":709,"loc":{"start":{"line":22,"column":78,"offset":695},"end":{"line":22,"column":92,"offset":709}},"method":false,"shorthand":false,"computed":false,"key":{"type":"Literal","start":695,"end":703,"loc":{"start":{"line":22,"column":78,"offset":695},"end":{"line":22,"column":86,"offset":703}},"value":"method","raw":"\"method\"","range":[695,703]},"value":{"type":"Literal","start":704,"end":709,"loc":{"start":{"line":22,"column":87,"offset":704},"end":{"line":22,"column":92,"offset":709}},"value":"get","raw":"\"get\"","range":[704,709]},"kind":"init","range":[695,709]}],"range":[662,710]}],"range":[661,711]},"start":661,"end":711,"loc":{"start":{"line":22,"column":44,"offset":661},"end":{"line":22,"column":94,"offset":711}},"range":[661,711]}],"sourceType":"module","comments":[],"loc":{"start":{"line":22,"column":44,"offset":661},"end":{"line":22,"column":94,"offset":711}},"range":[661,711]}}}}}
Non-2xx responses use the standard [API error envelope](/docs/reference/errors). Log `error.code` and `error.request_id` for support.
---
# Rotate the signing secret for a webhook endpoint
Generate a new signing secret for a webhook endpoint, invalidating the old one. The new secret is returned once in this response.
Source URL: /docs/reference/api/rotate-webhook-secret
# Rotate the signing secret for a webhook endpoint
Generate a new signing secret for a webhook endpoint, invalidating the old one. The new secret is returned once in this response.
{/* This file was generated from openapi\/medblocks.json. Do not edit directly. */}
Generate a new signing secret for a webhook endpoint, invalidating the old one. The new secret is returned once in this response.
{"name":"APIPage","children":"","attributes":{"document":{"type":"mdxJsxAttributeValueExpression","value":"\"medblocks\"","data":{"estree":{"type":"Program","start":715,"end":726,"body":[{"type":"ExpressionStatement","expression":{"type":"Literal","start":715,"end":726,"loc":{"start":{"line":22,"column":19,"offset":715},"end":{"line":22,"column":30,"offset":726}},"value":"medblocks","raw":"\"medblocks\"","range":[715,726]},"start":715,"end":726,"loc":{"start":{"line":22,"column":19,"offset":715},"end":{"line":22,"column":30,"offset":726}},"range":[715,726]}],"sourceType":"module","comments":[],"loc":{"start":{"line":22,"column":19,"offset":715},"end":{"line":22,"column":30,"offset":726}},"range":[715,726]}}},"operations":{"type":"mdxJsxAttributeValueExpression","value":"[{\"path\":\"/webhooks/{id}/rotate-secret\",\"method\":\"post\"}]","data":{"estree":{"type":"Program","start":740,"end":797,"body":[{"type":"ExpressionStatement","expression":{"type":"ArrayExpression","start":740,"end":797,"loc":{"start":{"line":22,"column":44,"offset":740},"end":{"line":22,"column":101,"offset":797}},"elements":[{"type":"ObjectExpression","start":741,"end":796,"loc":{"start":{"line":22,"column":45,"offset":741},"end":{"line":22,"column":100,"offset":796}},"properties":[{"type":"Property","start":742,"end":779,"loc":{"start":{"line":22,"column":46,"offset":742},"end":{"line":22,"column":83,"offset":779}},"method":false,"shorthand":false,"computed":false,"key":{"type":"Literal","start":742,"end":748,"loc":{"start":{"line":22,"column":46,"offset":742},"end":{"line":22,"column":52,"offset":748}},"value":"path","raw":"\"path\"","range":[742,748]},"value":{"type":"Literal","start":749,"end":779,"loc":{"start":{"line":22,"column":53,"offset":749},"end":{"line":22,"column":83,"offset":779}},"value":"/webhooks/{id}/rotate-secret","raw":"\"/webhooks/{id}/rotate-secret\"","range":[749,779]},"kind":"init","range":[742,779]},{"type":"Property","start":780,"end":795,"loc":{"start":{"line":22,"column":84,"offset":780},"end":{"line":22,"column":99,"offset":795}},"method":false,"shorthand":false,"computed":false,"key":{"type":"Literal","start":780,"end":788,"loc":{"start":{"line":22,"column":84,"offset":780},"end":{"line":22,"column":92,"offset":788}},"value":"method","raw":"\"method\"","range":[780,788]},"value":{"type":"Literal","start":789,"end":795,"loc":{"start":{"line":22,"column":93,"offset":789},"end":{"line":22,"column":99,"offset":795}},"value":"post","raw":"\"post\"","range":[789,795]},"kind":"init","range":[780,795]}],"range":[741,796]}],"range":[740,797]},"start":740,"end":797,"loc":{"start":{"line":22,"column":44,"offset":740},"end":{"line":22,"column":101,"offset":797}},"range":[740,797]}],"sourceType":"module","comments":[],"loc":{"start":{"line":22,"column":44,"offset":740},"end":{"line":22,"column":101,"offset":797}},"range":[740,797]}}}}}
Non-2xx responses use the standard [API error envelope](/docs/reference/errors). Log `error.code` and `error.request_id` for support.
---
# Update a patient
Update a patient by id. Omitted optional fields are cleared. patient_id in the body must match the URL.
Source URL: /docs/reference/api/update-patient
# Update a patient
Update a patient by id. Omitted optional fields are cleared. patient_id in the body must match the URL.
{/* This file was generated from openapi\/medblocks.json. Do not edit directly. */}
Update a patient by id. Omitted optional fields are cleared. `patient_id` in the body must match the URL.
{"name":"APIPage","children":"","attributes":{"document":{"type":"mdxJsxAttributeValueExpression","value":"\"medblocks\"","data":{"estree":{"type":"Program","start":608,"end":619,"body":[{"type":"ExpressionStatement","expression":{"type":"Literal","start":608,"end":619,"loc":{"start":{"line":22,"column":19,"offset":608},"end":{"line":22,"column":30,"offset":619}},"value":"medblocks","raw":"\"medblocks\"","range":[608,619]},"start":608,"end":619,"loc":{"start":{"line":22,"column":19,"offset":608},"end":{"line":22,"column":30,"offset":619}},"range":[608,619]}],"sourceType":"module","comments":[],"loc":{"start":{"line":22,"column":19,"offset":608},"end":{"line":22,"column":30,"offset":619}},"range":[608,619]}}},"operations":{"type":"mdxJsxAttributeValueExpression","value":"[{\"path\":\"/patients/{id}\",\"method\":\"put\"}]","data":{"estree":{"type":"Program","start":633,"end":675,"body":[{"type":"ExpressionStatement","expression":{"type":"ArrayExpression","start":633,"end":675,"loc":{"start":{"line":22,"column":44,"offset":633},"end":{"line":22,"column":86,"offset":675}},"elements":[{"type":"ObjectExpression","start":634,"end":674,"loc":{"start":{"line":22,"column":45,"offset":634},"end":{"line":22,"column":85,"offset":674}},"properties":[{"type":"Property","start":635,"end":658,"loc":{"start":{"line":22,"column":46,"offset":635},"end":{"line":22,"column":69,"offset":658}},"method":false,"shorthand":false,"computed":false,"key":{"type":"Literal","start":635,"end":641,"loc":{"start":{"line":22,"column":46,"offset":635},"end":{"line":22,"column":52,"offset":641}},"value":"path","raw":"\"path\"","range":[635,641]},"value":{"type":"Literal","start":642,"end":658,"loc":{"start":{"line":22,"column":53,"offset":642},"end":{"line":22,"column":69,"offset":658}},"value":"/patients/{id}","raw":"\"/patients/{id}\"","range":[642,658]},"kind":"init","range":[635,658]},{"type":"Property","start":659,"end":673,"loc":{"start":{"line":22,"column":70,"offset":659},"end":{"line":22,"column":84,"offset":673}},"method":false,"shorthand":false,"computed":false,"key":{"type":"Literal","start":659,"end":667,"loc":{"start":{"line":22,"column":70,"offset":659},"end":{"line":22,"column":78,"offset":667}},"value":"method","raw":"\"method\"","range":[659,667]},"value":{"type":"Literal","start":668,"end":673,"loc":{"start":{"line":22,"column":79,"offset":668},"end":{"line":22,"column":84,"offset":673}},"value":"put","raw":"\"put\"","range":[668,673]},"kind":"init","range":[659,673]}],"range":[634,674]}],"range":[633,675]},"start":633,"end":675,"loc":{"start":{"line":22,"column":44,"offset":633},"end":{"line":22,"column":86,"offset":675}},"range":[633,675]}],"sourceType":"module","comments":[],"loc":{"start":{"line":22,"column":44,"offset":633},"end":{"line":22,"column":86,"offset":675}},"range":[633,675]}}}}}
Non-2xx responses use the standard [API error envelope](/docs/reference/errors). Log `error.code` and `error.request_id` for support.
---
# Update a webhook endpoint
Partially update a webhook endpoint's URL, subscribed events, description, or metadata, or re-enable it with status active.
Source URL: /docs/reference/api/update-webhook
# Update a webhook endpoint
Partially update a webhook endpoint's URL, subscribed events, description, or metadata, or re-enable it with status active.
{/* This file was generated from openapi\/medblocks.json. Do not edit directly. */}
Partially update a webhook endpoint’s URL, subscribed events, description, or metadata, or re-enable it with `status` active.
{"name":"APIPage","children":"","attributes":{"document":{"type":"mdxJsxAttributeValueExpression","value":"\"medblocks\"","data":{"estree":{"type":"Program","start":679,"end":690,"body":[{"type":"ExpressionStatement","expression":{"type":"Literal","start":679,"end":690,"loc":{"start":{"line":22,"column":19,"offset":679},"end":{"line":22,"column":30,"offset":690}},"value":"medblocks","raw":"\"medblocks\"","range":[679,690]},"start":679,"end":690,"loc":{"start":{"line":22,"column":19,"offset":679},"end":{"line":22,"column":30,"offset":690}},"range":[679,690]}],"sourceType":"module","comments":[],"loc":{"start":{"line":22,"column":19,"offset":679},"end":{"line":22,"column":30,"offset":690}},"range":[679,690]}}},"operations":{"type":"mdxJsxAttributeValueExpression","value":"[{\"path\":\"/webhooks/{id}\",\"method\":\"patch\"}]","data":{"estree":{"type":"Program","start":704,"end":748,"body":[{"type":"ExpressionStatement","expression":{"type":"ArrayExpression","start":704,"end":748,"loc":{"start":{"line":22,"column":44,"offset":704},"end":{"line":22,"column":88,"offset":748}},"elements":[{"type":"ObjectExpression","start":705,"end":747,"loc":{"start":{"line":22,"column":45,"offset":705},"end":{"line":22,"column":87,"offset":747}},"properties":[{"type":"Property","start":706,"end":729,"loc":{"start":{"line":22,"column":46,"offset":706},"end":{"line":22,"column":69,"offset":729}},"method":false,"shorthand":false,"computed":false,"key":{"type":"Literal","start":706,"end":712,"loc":{"start":{"line":22,"column":46,"offset":706},"end":{"line":22,"column":52,"offset":712}},"value":"path","raw":"\"path\"","range":[706,712]},"value":{"type":"Literal","start":713,"end":729,"loc":{"start":{"line":22,"column":53,"offset":713},"end":{"line":22,"column":69,"offset":729}},"value":"/webhooks/{id}","raw":"\"/webhooks/{id}\"","range":[713,729]},"kind":"init","range":[706,729]},{"type":"Property","start":730,"end":746,"loc":{"start":{"line":22,"column":70,"offset":730},"end":{"line":22,"column":86,"offset":746}},"method":false,"shorthand":false,"computed":false,"key":{"type":"Literal","start":730,"end":738,"loc":{"start":{"line":22,"column":70,"offset":730},"end":{"line":22,"column":78,"offset":738}},"value":"method","raw":"\"method\"","range":[730,738]},"value":{"type":"Literal","start":739,"end":746,"loc":{"start":{"line":22,"column":79,"offset":739},"end":{"line":22,"column":86,"offset":746}},"value":"patch","raw":"\"patch\"","range":[739,746]},"kind":"init","range":[730,746]}],"range":[705,747]}],"range":[704,748]},"start":704,"end":748,"loc":{"start":{"line":22,"column":44,"offset":704},"end":{"line":22,"column":88,"offset":748}},"range":[704,748]}],"sourceType":"module","comments":[],"loc":{"start":{"line":22,"column":44,"offset":704},"end":{"line":22,"column":88,"offset":748}},"range":[704,748]}}}}}
Non-2xx responses use the standard [API error envelope](/docs/reference/errors). Log `error.code` and `error.request_id` for support.
---
# Changelog
Release history of the medblocks SDK, newest first.
Source URL: /docs/reference/changelog
# Changelog
Release history of the medblocks SDK, newest first.
{/* GENERATED FROM sdk/connect/CHANGELOG.md - do not edit here. */}
## v1.2.0 (Aug 4, 2026) [#v120-aug-4-2026]
### Breaking Changes [#breaking-changes]
* Removed the eight typed error subclasses (`MedblocksAuthenticationError`,
`MedblocksPermissionError`, `MedblocksInvalidRequestError`,
`MedblocksNotFoundError`, `MedblocksConflictError`, `MedblocksRateLimitError`,
`MedblocksEhrError`, `MedblocksApiError`) and the `errorClassForType` helper.
Every failed request now throws a single `MedblocksError`. Discriminate on
`err.type` and `err.code`, the same strings the API envelope returns. Replace
`err instanceof MedblocksAuthenticationError` with
`isMedblocksError(err) && err.type === "authentication_error"`.
* `retryAfter` moved from `MedblocksRateLimitError` onto the base
`MedblocksError` (set on `rate_limit_error`, `null` otherwise).
* Removed `mb.patients.getConnections(patientId)`. Read connections from
`mb.patients.retrieve(id).connections[]` instead. The full `facility`
object is inlined per entry, so migrate callsites from
`facilities.map((facility) => facility.name)` to
`patient.connections.map((connection) => connection.facility.name)`.
### Features [#features]
* Added the `isMedblocksError(err)` type guard for separating API errors from
native or network failures at the catch site.
* Added the `MedblocksErrorCode` string-literal type and extended
`MedblocksErrorType` with `billing_error`, so `err.type` / `err.code` branches
autocomplete against the full public taxonomy.
## v1.1.0 (Jul 18, 2026) [#v110-jul-18-2026]
### Features [#features-1]
* Added `mb.patients.disconnectConnection(patientId, connectionId)` for org-side
disconnect of a patient connection. Revokes your organization’s access to that
source and returns a tombstone
(`{ id, resource_type: "connection", disconnected: true }`).
## v1.0.0 (Jul 8, 2026) [#v100-jul-8-2026]
### Features [#features-2]
* Initial release of the Medblocks TypeScript SDK, covering patient sessions,
patients, the connections catalog, webhook management, event redelivery,
webhook signature verification, and return-URL parsing.
* `mb.patients.records(id)` returns a connected patient’s stored FHIR resources
as a cursor-paginated page. Every Patient resource carries your `patient_id`
in its FHIR `identifier` array under `urn:medblocks:patient-id`.
* Record pages use short, fixed-length opaque cursors that stay valid for 7 days
from the response that issued them.
---
# API conventions
Base URL, authentication, the error envelope, idempotency, and pagination.
Source URL: /docs/reference/conventions
# API conventions
Base URL, authentication, the error envelope, idempotency, and pagination.
This page is being written as part of the docs restructure. Outline and intent live in
`docs/superpowers/specs/2026-06-13-docs-restructure-from-scratch-design.md`
.
---
# API Errors
Standard error envelope, HTTP statuses, and the stable type and code the API and SDK share.
Source URL: /docs/reference/errors
# API Errors
Standard error envelope, HTTP statuses, and the stable type and code the API and SDK share.
Every non-2xx Platform API response returns the same envelope shape.
```json
{
"error": {
"type": "authentication_error",
"code": "invalid_api_key",
"message": "API key invalid",
"param": null,
"doc_url": "https://medblocks.com/docs/reference/errors",
"request_id": "9c9b6f7a-8e4f-4a3b-9c1e-6f3a2d8b7c4d"
}
}
```
Log `error.code`, `error.message`, the HTTP status, and `error.request_id`. Show patients a friendly retry message instead of raw portal or OAuth text.
## Error Fields [#error-fields]
Every error carries the same fields. The wire envelope names them in snake\_case under `error`, and the SDK exposes them as camelCase properties on the thrown `MedblocksError`. The values are identical, so branch on the same `type` and `code` either way.
| Wire (JSON) | SDK | Type | Description |
| -------------------- | ------------ | ------------------ | --------------------------------------------------------------------------------------- |
| `error.type` | `type` | `string` | Broad category such as `authentication_error`, `invalid_request_error`, or `ehr_error`. |
| `error.code` | `code` | `string` | Stable machine-readable code. Branch on this. |
| `error.message` | `message` | `string` | Human-readable explanation for developers and logs. |
| `error.param` | `param` | `string` or `null` | Request field or parameter related to the error, when available. |
| `error.request_id` | `requestId` | `string` | Correlation ID. Include it in support tickets. |
| `error.doc_url` | `docUrl` | `string` | Link to this API errors reference. Same URL for every code. |
| HTTP status | `statusCode` | `number` | The HTTP status. Read from the status line, not the JSON body. |
| `Retry-After` header | `retryAfter` | `number` or `null` | Seconds to wait, set on `rate_limit_error`, `null` otherwise. |
## HTTP Statuses [#http-statuses]
| Status | Meaning |
| ------ | ------------------------------------------------------------------------------------------------------------------------------------------------------ |
| `400` | Validation error, malformed request, or unsupported API version. |
| `401` | Missing, invalid, or expired API key. |
| `402` | Your plan doesn’t cover this. Either the feature isn’t part of your plan (`feature_not_enabled`), or you’ve hit your patient limit (`quota_exceeded`). |
| `403` | API key is valid but does not have permission for the resource. |
| `404` | Resource was not found in your organization. |
| `409` | Resource conflict, such as a duplicate identifier. |
| `413` | Request payload is too large. |
| `429` | Rate limit or quota exceeded. |
| `500` | Unexpected Medblocks server error. Retry with backoff. |
| `502` | Upstream EHR, OAuth, email, token, or storage service failed. |
## Error Codes [#error-codes]
`type` is the broad category, `code` is the exact reason, and each row lists the HTTP status the response carries. Branch on `code`, the same string in the wire envelope and the SDK.
| Type | Code | HTTP | Typical Cause |
| ----------------------- | ---------------------------- | ----- | ------------------------------------------------------------------------------ |
| `authentication_error` | `not_authenticated` | `401` | The request is not authenticated. |
| `authentication_error` | `invalid_credentials` | `401` | Login or credential verification failed. |
| `authentication_error` | `session_expired` | `401` | A user session expired. |
| `authentication_error` | `missing_api_key` | `401` | `Authorization` header is missing. |
| `authentication_error` | `invalid_api_key` | `401` | API key is invalid. |
| `authentication_error` | `expired_api_key` | `401` | API key is expired. |
| `permission_error` | `forbidden` | `403` | Authenticated caller cannot access the operation. |
| `permission_error` | `org_access_denied` | `403` | Caller is not a member of the active organization. |
| `permission_error` | `role_insufficient` | `403` | User role is not allowed to perform the operation. |
| `permission_error` | `patient_access_denied` | `403` | Patient session is required or invalid. |
| `permission_error` | `scope_violation` | `403` | Resource is outside the active organization. |
| `permission_error` | `insufficient_scope` | `403` | API key lacks the required scope. |
| `invalid_request_error` | `bad_request` | `400` | Request is malformed or missing required fields. |
| `invalid_request_error` | `invalid_data` | `400` | Request data failed validation. |
| `invalid_request_error` | `payload_too_large` | `413` | Request body is too large. |
| `invalid_request_error` | `invalid_image` | `400` | Image data or format is invalid. |
| `invalid_request_error` | `unsupported_api_version` | `400` | `Version` header is not supported. |
| `invalid_request_error` | `oauth_state_expired` | `400` | OAuth state expired before callback completion. |
| `not_found_error` | `resource_not_found` | `404` | Patient, patient session, or source was not found. |
| `conflict_error` | `resource_conflict` | `409` | Request conflicts with existing data. |
| `conflict_error` | `already_linked` | `409` | Resource is already linked to another entity. |
| `conflict_error` | `external_id_already_exists` | `409` | External identifier already exists in the organization. |
| `rate_limit_error` | `throttled` | `429` | Too many requests. |
| `rate_limit_error` | `quota_exceeded` | `429` | API key quota is exceeded. |
| `rate_limit_error` | `api_key_limit_exceeded` | `429` | Organization has reached its active API key cap. Revoke an existing key first. |
| `billing_error` | `feature_not_enabled` | `402` | Workspace plan does not include the requested feature. |
| `billing_error` | `quota_exceeded` | `402` | Free-tier active-patient limit has been reached. |
| `ehr_error` | `fhir_error` | `502` | Upstream FHIR service failed. |
| `ehr_error` | `oauth_error` | `502` | Upstream OAuth provider failed. |
| `ehr_error` | `email_error` | `502` | Email delivery failed. |
| `ehr_error` | `token_exchange_failed` | `502` | Medblocks could not exchange an OAuth code for tokens. |
| `ehr_error` | `token_unavailable` | `502` | No valid token is available for the upstream service. |
| `ehr_error` | `storage_error` | `502` | Cloud storage operation failed. |
| `api_error` | `internal_error` | `500` | Unexpected Medblocks server error. |
| `api_error` | `db_error` | `500` | Database operation failed. |
| `api_error` | `config_missing` | `500` | Required server configuration is missing. |
## Handling Errors [#handling-errors]
The SDK throws a single `MedblocksError` for every failed request. Discriminate on `err.type` and `err.code`, the same strings the API returns. Use the `isMedblocksError` guard to tell an API error apart from a native or network failure, then re-throw what the guard rejects.
```ts title="handle-errors.ts"
import { isMedblocksError } from "medblocks";
try {
await mb.patientSession.init(input);
} catch (err) {
if (!isMedblocksError(err)) throw err; // a native error, such as a network failure
if (err.type === "authentication_error") {
// 401, alert on a bad or expired key
} else if (err.type === "invalid_request_error") {
console.error("invalid", { param: err.param, code: err.code });
} else if (err.type === "rate_limit_error") {
// 429, wait err.retryAfter seconds
} else {
console.error("medblocks error", { code: err.code, requestId: err.requestId });
}
}
```
A `type` this SDK version predates still arrives as a `MedblocksError`, so the final `else` catches it and a future category never slips past `isMedblocksError`. A transport failure that outlives the SDK’s retries is the exception. A dropped connection, a DNS failure, or a timeout surfaces as the runtime’s own error, such as a `TypeError` or an abort, not a `MedblocksError`, which is why the example re-throws it.
Log the request id on every error path. It’s the most useful field in a support ticket, because it lets us find your exact call.
```ts title="log-errors.ts"
import { isMedblocksError } from "medblocks";
catch (err) {
if (isMedblocksError(err)) {
logger.error("medblocks api error", {
type: err.type,
code: err.code,
requestId: err.requestId,
statusCode: err.statusCode,
param: err.param,
});
}
throw err;
}
```
`MedblocksSignatureError` is separate. It comes from webhook verification, never from an API call, and has no HTTP status. See [Webhook Signature Errors](#webhook-signature-errors).
## Retries [#retries]
The SDK retries transient failures for you before it throws. That covers rate limits (`429`), upstream errors (`502`, `503`, `504`), and network-level failures. It doesn’t retry other `4xx` errors or `500`, since retrying those won’t help. By the time an error reaches your `catch`, it has already been retried up to `maxNetworkRetries` times, three by default.
On a `429`, the SDK honors the server’s `Retry-After` during its own retries. If those run out, the final `MedblocksError` still carries `retryAfter` for your own backoff.
## Webhook Signature Errors [#webhook-signature-errors]
`MedblocksSignatureError` is not an API response error. `Medblocks.webhooks.constructEvent` throws it while verifying a webhook delivery, entirely client-side, so it has no HTTP status, no envelope, and no `doc_url`. Read `err.reason` to tell the failure modes apart, and return `400` on any of them.
The full reason table and a `constructEvent` handler live on the [webhook signatures](/docs/webhooks/signatures) page.
## Related Articles [#related-articles]
* [API Overview](/docs/reference/conventions) for authentication and versioning.
* [Pagination](/docs/patient-access/get-the-data/pagination) for cursor paging on list endpoints.
* [Medblocks-hosted page](/docs/patient-access/create-patient-session/medblocks-hosted-page) for the hosted patient session flow.
* [Your own UI](/docs/patient-access/create-patient-session/your-own-ui) for source search and return URL handling.
* [Generated API Reference](/docs/reference/api) for exact endpoint schemas.
---
# Versioning and upgrades
Date-pinned API versions, the upgrade policy, and the changelog.
Source URL: /docs/reference/versioning
# Versioning and upgrades
Date-pinned API versions, the upgrade policy, and the changelog.
This page is being written as part of the docs restructure. Outline and intent live in
`docs/superpowers/specs/2026-06-13-docs-restructure-from-scratch-design.md`
.
---
# Test with sandboxes
Integrate with Synthetic Hospital and public EHR sandboxes.
Source URL: /docs/sandboxes
# Test with sandboxes
Integrate with Synthetic Hospital and public EHR sandboxes.
Use the Synthetic Hospital to test your integration with synthetic patient data. It gives you a safe, production-like environment to build and validate your integration before connecting to real systems.
If you want to test EHR-specific workflows, you can connect to public sandboxes such as Epic, Cerner, or Athena.
## Create a Sandbox workspace [#create-a-sandbox-workspace]
Follow [Set up your workspace](/docs/workspace) to sign in and reach the **Create your workspace** dialog shown below. Choose **Sandbox** as the environment. A Sandbox workspace can only see the sources scoped to it. Use a separate **Production** workspace when you are ready for live credentials, live patients, and production export destinations.
Create a new Sandbox workspace.
## Synthetic Hospital [#synthetic-hospital]
The Synthetic Hospital is a test facility inside the Medblocks patient portal. It has pre-seeded sample patients. It also allows you to upload your own FHIR R4 bundle.
### Add a sample patient [#1-add-a-sample-patient]
Click on the `+` button next to Patients to open the “Add New Patient” dialog box. In the “Add New Patient” dialog box, enter a patient name and an email, and then click on the **Add Patient** button.
Fill in the patient details and click Add Patient.
You can now see the newly added sample patient in the Patients list.
### Generate a magic link [#2-generate-a-magic-link]
Click the patient you just added, or any other sample patient in your workspace, to open the patient detail panel. Find the **Onboarding link** section and click **Generate Magic Link**. Once the link is generated, you will see that the **Copy Link** button is now enabled. Click on it to copy the generated URL and open it in a new browser tab. You are now logged in as that sample patient.
Click Generate Magic Link, then copy the URL.
### Connect to the Synthetic Hospital [#3-connect-to-the-synthetic-hospital]
Search for **Synthetic Hospital** in the search bar, then click on the **Connect** button. After you click on the Connect button, you will be redirected to the Synthetic Hospital login page.
The Synthetic Hospital in the search results.
### Log in to the Synthetic Hospital [#4-log-in-to-the-synthetic-hospital]
On the login page, you can see two options. You can log in using a pre-seeded patient or choose to **Upload your own patient bundle** to test with your own patient data. After that, you authorize the app to access the patient data by clicking on the **Approve** button.
**A. Log in with a pre-seeded patient**
Log in with any sample patient of your choice from the **Patient** dropdown. The password is `demopass`, which will be pre-filled. You can click **Login** to proceed.
Picking a patient, then logging in and approving the requested scopes.
**B. Upload your own patient bundle**
If you want to test with your own patient data, click on the **Upload your own patient bundle** button and then upload a FHIR R4 bundle file from your system. The bundle must contain a Patient resource. Click on the “Sign in as this” button to proceed.
Uploading a FHIR R4 bundle file, then signing in and approving the requested scopes.
In case you do not want to proceed, click on the **Deny** button, and you’ll get redirected back to the patient portal and the sample patient will not be linked to your workspace.
The **Synthetic Hospital** is now connected, and the sample patient’s bundle has been added to your workspace.
The sample patient’s records in your workspace.
You can now test your integration with the sample patient bundle or your own uploaded patient data.
### Preloaded patients [#preloaded-patients]
Each sample patient in the preloaded data set is a full FHIR R4 bundle, spanning a few years of history, with Encounters, Conditions, Observations, MedicationRequests, and Procedures. Every sample patient uses the password `demopass`.
| Patient Name | Patient Username |
| ------------------ | ------------------------------------------------- |
| Angel Konopelski | angel.konopelski@synthetic.medblocks.com |
| Augusta Homenick | augusta.homenick@synthetic.medblocks.com |
| Clarinda O’Connell | clarinda.oconnell@synthetic.medblocks.com |
| Cristobal Montero | cristobal.montero@synthetic.medblocks.com |
| Dwana Tremblay | dwana.tremblay@synthetic.medblocks.com |
| Eliseo Nader | eliseo.nader@synthetic.medblocks.com |
| Ethyl Medhurst | ethyl.medhurst@synthetic.medblocks.com |
| Eunice Fay | eunice.fay@synthetic.medblocks.com |
| Ezekiel Walter | ezekiel.walter@synthetic.medblocks.com |
| Jody Hickle | jody.hickle@synthetic.medblocks.com |
## SMART Health IT Sandbox [#smart-health-it-sandbox]
SMART Health IT runs a free, no-registration reference sandbox at [launch.smarthealthit.org](https://launch.smarthealthit.org/). It is a full SMART on FHIR authorization server backed by synthetic patient bundles.
Unlike vendor sandboxes, it has no developer portal, no client registration, and no username or password to remember.
### Connect to the SMART Health IT Sandbox [#connect-to-the-smart-health-it-sandbox]
Using the [magic link](#2-generate-a-magic-link), open the patient portal for any sample patient. Under **Link your patient portals**, search for **SMART Health IT Sandbox**, then click on the **Connect** button. You will get redirected to [launch.smarthealthit.org](https://launch.smarthealthit.org/). Pick a sample patient from the dropdown and click **Login**. Any password works, so leave the field as it is. On the Authorize App page, click on the **Approve** button. You will get redirected to the Medblocks patient portal, and Medblocks starts pulling records in the background.
Finding the SMART Health IT sandbox, signing in, and approving the scopes.
## Aetna [#aetna]
For Aetna’s sandbox credentials, you can use `VTETestUser` as the username appended with numbers ranging from 01 to 19. All the usernames have the same password `FHIRdemo2020`. Register on the [Aetna developer portal](https://developerportal.aetna.com/) to get a sandbox Client ID.
| Username | Password |
| ------------- | ------------ |
| VTETestUser01 | FHIRdemo2020 |
| VTETestUser02 | FHIRdemo2020 |
| VTETestUser03 | FHIRdemo2020 |
## Cerner (Oracle Health) [#cerner-oracle-health]
For the Cerner Code Sandbox, you can use any of the following usernames with the password `Cerner01`.
| Username | Password |
| ------------- | -------- |
| nancysmart | Cerner01 |
| joesmart | Cerner01 |
| wilmasmart | Cerner01 |
| valeriesmart | Cerner01 |
| fredricksmart | Cerner01 |
| sandysmart | Cerner01 |
| timmysmart | Cerner01 |
| babyboysmart | Cerner01 |
| haileysmart | Cerner01 |
| timpeters | Cerner01 |
## Epic [#epic]
MyChart is Epic’s patient-facing application, and the following are the test patients. If you need more test patients, you can refer to their [Sandbox Test Data](https://fhir.epic.com/Documentation?docId=testpatients).
| Username | Password |
| ----------- | --------- |
| fhircamila | epicepic1 |
| fhirderrick | epicepic1 |
| fhirdesiree | epicepic1 |
## Athenahealth [#athenahealth]
The Athenahealth preview environment provides a sandbox for testing with the set of credentials given below. Follow the [athenahealth onboarding guide](https://docs.athenahealth.com/api/guides/onboarding-overview) to connect a sandbox app to it.
| Username | Password |
| --------------------------------------- | --------- |
| phrtest\_preview@mailinator.com | Password1 |
## eClinicalWorks (healow) [#eclinicalworks-healow]
eClinicalWorks provides credentials for one test patient. Register a sandbox app through the [healow FHIR R4 developer docs](https://connect4.healow.com/apps/jsp/dev/r4/fhirClinicalDocumentation.jsp).
| Username | Password |
| --------------- | ---------- |
| AdultFemaleFHIR | e\@CWFHIR1 |
## Medicare [#medicare]
Medicare’s Blue Button sandbox accepts `BBUser` as the username followed by any 5-digit number. The password starts with `PW` followed by the same 5-digit number and an exclamation mark (`!`). For example, a username `BBUser00042` will have the password `PW00042!`. For the sandbox app setup, see the [CMS Blue Button developer guidelines](https://bluebutton.cms.gov/developers/).
| Username | Password |
| ----------- | -------- |
| BBUser00000 | PW00000! |
| BBUser00001 | PW00001! |
| BBUser00002 | PW00002! |
| BBUser00003 | PW00003! |
| BBUser00004 | PW00004! |
## Meditech [#meditech]
To get the sandbox credentials for Meditech, you can ask your Meditech representative for a Traverse sandbox tenant, then register a developer app on the [Traverse developer portal](https://home.mymeditech.com/).
## UnitedHealthcare [#unitedhealthcare]
UnitedHealthcare’s Optum FLEX sandbox requires an app registration. Sign up on the [UHC developer portal](https://developer.uhc.com/) to get sandbox credentials.
## Enable the Client ID for your sandbox [#enable-the-client-id-for-your-sandbox]
Each EHR issues its own sandbox Client ID and Client Secret when you register an app on its developer portal. You can find the registration steps in the setup guide for each EHR under [Patient access](/docs/patient-access).
Once you have those credentials, plug them into your Medblocks workspace. Go to [**Settings → Connections**](/docs/configure-connections), pick the EHR from the list, and paste the Client ID and Client Secret into the form.
Settings, then Connections in the workspace dashboard. Click any EHR to enable your own Client ID.
From here, the flow is the same as the one you use in production.
1. Start a patient session for a sample patient against that EHR’s sandbox source.
2. On the EHR’s hosted login screen, sign in with a patient credential from one of the tables above.
3. Click **Approve**. Medblocks catches the callback and starts pulling records, exactly as it would for a real patient.
Records pulled from sandbox accounts land in your workspace. Delete or archive the patient you added when you are done.
## Test dashboard workflows [#test-dashboard-workflows]
Use synthetic patients when you need realistic records without Protected Health Information (PHI). Synthetic records are useful for UI states, mapping logic, exports, and webhook handlers.
Check for these in your sandbox workspace.
* Patient lists and patient detail pages.
* Record status and pull history.
* Export destination setup and retry behavior.
* Webhook endpoint setup, event delivery, retries, and redelivery.
* Support workflows such as auth event history.
Synthetic records should not be used to assess source coverage or evaluate production data quality.
## Test source-specific flows [#test-source-specific-flows]
Some EHR vendors provide public or partner sandbox portals. Their behavior is close enough to test OAuth and SMART on FHIR, but they may not match every production scenario.
Some sources have their own sandbox guide.
* [Epic](/docs/patient-access/epic)
* [Cerner](/docs/patient-access/cerner)
* [athenahealth](/docs/patient-access/athena)
* [eClinicalWorks](/docs/patient-access/ecw)
* [Meditech](/docs/patient-access/meditech)
* [CMS Blue Button](/docs/patient-access/cms-blue-button)
## Things to verify before production [#things-to-verify-before-production]
Before switching to production, confirm each of these.
* Your Production workspace exists.
* Production credentials are configured from [Configure connections](/docs/configure-connections).
* Your return URLs are HTTPS and match the configured apps.
* Webhook signature verification uses the raw request body.
* API keys and webhook secrets live in server-side secret storage.
* Your UI or dashboard workflow handles failed authorization and reconnect prompts.
* Export destinations have been tested with non-production data.
## See also [#see-also]
* [Workspace](/docs/workspace)
* [Configure connections](/docs/configure-connections)
* [Patient access quickstart](/docs/patient-access/quickstart)
* [Webhooks](/docs/webhooks)
---
# Security and compliance
HIPAA, SOC 2, ISO, BAAs, and the controls around healthcare data workflows.
Source URL: /docs/security-and-compliance
# Security and compliance
HIPAA, SOC 2, ISO, BAAs, and the controls around healthcare data workflows.
Medblocks is built for teams that need healthcare data integrations to pass security, compliance, and commercial review. Public Medblocks materials list HIPAA, SOC 2 Type II, ISO 27001, and GDPR, and commercial plans include BAA support.
Use this page to understand the controls your implementation should preserve. For formal review, request the current Medblocks security packet, agreements, and compliance materials from the Medblocks team.
## Healthcare-grade compliance [#healthcare-grade-compliance]
Medblocks sits in the path of PHI, patient authorization, source credentials, export credentials, webhooks, and operational audit trails. The platform is designed around healthcare integration work, not generic file transfer.
The compliance posture matters before you go live: customers often need a BAA, evidence of security controls, and clarity on where records, credentials, and webhook payloads move.
## PHI handling [#phi-handling]
Medblocks handles patient data as integration infrastructure. Records can arrive through patient access, clinical workflows, backend connections, or network-based workflows, then move to destinations such as your FHIR server, S3 bucket, warehouse, webhook receiver, or API client.
Your implementation should decide what data to store, how long to retain it, who can access it, and where it should be delivered. Keep raw PHI out of logs unless your compliance program explicitly allows it.
## Server-side secrets [#server-side-secrets]
Treat Medblocks as backend infrastructure. Keep these values out of browser code, mobile apps, and client-side bundles:
* Medblocks API keys.
* Webhook signing secrets.
* Source client secrets and private keys.
* Private keys used for SMART on FHIR client authentication.
* Export destination credentials.
Your frontend calls your backend. Your backend calls Medblocks.
## Workspace separation [#workspace-separation]
Use separate Sandbox and Production workspaces. Sandbox workspaces use `mb_sk_sbx_` keys and sandbox-scoped sources. Production workspaces use `mb_sk_live_` keys and production credentials.
That separation keeps synthetic patients, development webhooks, trial export destinations, and sandbox credentials away from live patient workflows.
## Customer-owned destinations [#customer-owned-destinations]
Exports should land in destinations you control, such as your FHIR server, object storage, or data platform. Configure production destinations only after you have confirmed the receiving system, access controls, retention policy, and incident response path.
Keep destination credentials server-side in Medblocks, rotate them when ownership changes, and test exports in a Sandbox workspace before using live records.
## Webhook verification [#webhook-verification]
Webhook receivers must verify the `Medblocks-Signature` header against the raw request body before trusting an event. Do not parse JSON before computing the signature. Return a 2xx response quickly and process longer work asynchronously.
[Webhooks](/docs/webhooks) covers endpoint setup, retries, redelivery, and signatures.
## Production readiness [#production-readiness]
Before going live, confirm:
* A BAA and required commercial agreements are in place.
* Production source credentials are configured in a Production workspace.
* API keys and webhook secrets live in server-side secret storage.
* Return URLs and webhook receivers use HTTPS.
* Export destinations are owned by your organization and tested.
* Your app has access controls, audit logging, retention rules, and support workflows for data it receives from Medblocks.
* Application logs avoid raw PHI unless your compliance program explicitly allows it.
## See also [#see-also]
* [Set up your workspace](/docs/workspace)
* [Test with sandboxes](/docs/sandboxes)
* [Configure connections](/docs/configure-connections)
* [Webhooks](/docs/webhooks)
---
# Sources and connections
How Medblocks names the systems you connect to and the live links created from them.
Source URL: /docs/sources-and-connections
# Sources and connections
How Medblocks names the systems you connect to and the live links created from them.
Medblocks connects your product to healthcare systems such as EHRs, payers, networks, and patient portals. These systems are called **sources**.
A **connection** is the live link to a source after it has been configured or authorized. A patient approving access, a clinician launching your app, or an organization adding credentials can all create connections.
Most docs start with the source you want to reach, then show how a connection is created and monitored.
## Sources [#sources]
Sources are catalog entries: Epic, Oracle Health, athenahealth, eClinicalWorks, Meditech, CMS Blue Button, payer APIs, networks, and other systems that expose healthcare data or workflow surfaces.
A source can have a display name, logo, portal URL, FHIR base URL, vendor type, and setup requirements. The source exists before any patient or organization authorizes access.
Medblocks keeps the source-specific details on its side, like OAuth, SMART on FHIR, endpoint discovery, token refresh, rate limits, and portal differences. Your app works with one connection model instead of one implementation per source.
Use the [Directory](/docs/directory) to browse and search available sources.
## Connections [#connections]
A connection exists after authorization. How it is created depends on the integration pattern.
| Pattern | Who authorizes | What it unlocks |
| ------------------ | ------------------------- | ---------------------------------------------------------------------- |
| Patient access | The patient | Their own records from EHRs, payers, and other patient-facing systems. |
| Clinician workflow | The provider organization | Your app inside the clinician’s EHR workflow. |
| Backend | The provider organization | Server-to-server sync without a user present. |
| Network | A treatment relationship | Records across exchange networks. |
Each pattern is unlocked by a real relationship you already have, not one enterprise contract that bundles every surface.
Connections have a lifecycle.
| State | Meaning |
| ---------------- | ---------------------------------------------------------------- |
| `active` | Access works and records can flow. |
| `failed` | Authorization did not complete. |
| `refresh_failed` | Access worked before, but the refresh token stopped working. |
| `expired` | Access is no longer usable. |
| `disconnected` | Access was revoked for your workspace, by you or by the patient. |
Your app should act on connection state, not just on whether a browser flow finished.
## Bring your own credentials [#bring-your-own-credentials]
Medblocks is designed around direct integration. Some sources need credentials from your app or organization before they can be used.
That matters for two reasons.
* **Your relationship stays yours.** The access is tied to your app, your customer relationship, and your compliance workflow.
* **Your branding stays yours.** Patients and clinicians approve the app you registered, not a generic brokered bundle.
Configure these credentials in [Configure connections](/docs/configure-connections). Medblocks stores and uses them server-side to operate the connection, refresh access, and run the right integration pattern.
## In the docs [#in-the-docs]
* [Find connections](/docs/patient-access/find-connections) shows how patient-facing apps search the connection catalog.
* [Authorization](/docs/patient-access/authorization) explains how patient approval turns into an active connection.
* [After connection](/docs/patient-access/after-connection) shows how to read connection state.
* [Configure connections](/docs/configure-connections) shows where workspace credentials live in the dashboard.
## See also [#see-also]
* [Integration patterns](/docs/integration-patterns)
* [Configure connections](/docs/configure-connections)
* [Patient session](/docs/patient-access/patient-session)
* [Find connections](/docs/patient-access/find-connections)
---
# Webhooks
Push notifications for patient session completion, refresh failures, and background-pull events. Build a verified receiver in minutes.
Source URL: /docs/webhooks
# Webhooks
Push notifications for patient session completion, refresh failures, and background-pull events. Build a verified receiver in minutes.
Webhooks let Medblocks notify your backend the instant something happens in patient access. A [patient session](/docs/patient-access/patient-session) finishes, a refresh token stops working, a background pull settles. Your server registers an HTTPS endpoint and Medblocks delivers signed JSON payloads to it.
This section covers everything you need to consume webhooks: building a receiver, verifying signatures, managing endpoints from your backend, retries, and replaying events.
## Event Catalog [#event-catalog]
| Event type | Fires when | Use it for |
| --------------------------------- | --------------------------------------------------------- | ---------------------------------------------------------- |
| `patient_session.completed` | Patient finished the hosted flow (success or failure). | Update your “connected” UI, kick off downstream workflows. |
| `connection.token_refresh_failed` | A previously active connection lost its refresh token. | Prompt the patient to reconnect. |
| `records.sync.completed` | A background pull finished and new records are available. | Trigger downstream processing, refresh dashboards. |
| `records.sync.failed` | A background pull errored. | Page the on-call team. |
## In This Section [#in-this-section]
## Receiver Contract [#receiver-contract]
At a glance, here is what your receiver must do.
1. Accept `POST` requests over HTTPS with a JSON body.
2. Read the **raw** request body (no JSON pre-parsing) before computing the signature.
3. Verify the `Medblocks-Signature` header against the raw body and your endpoint’s signing secret.
4. Return a 2xx response within 5 seconds (otherwise Medblocks retries).
5. Be **idempotent**. The same `event.id` may be delivered more than once.
Everything else is the SDK’s job. `Medblocks.webhooks.constructEvent(rawBody, signature, secret)` does steps 3 and returns a typed `WebhookEvent` you can `switch` over.
## Quick Sketch [#quick-sketch]
```ts
import { Medblocks, MedblocksSignatureError } from "medblocks";
async function handle(req: Request): Promise {
const rawBody = await req.text();
const signature = req.headers.get("Medblocks-Signature");
try {
const event = await Medblocks.webhooks.constructEvent(
rawBody,
signature,
process.env.MEDBLOCKS_WEBHOOK_SECRET!,
);
if (event.type === "patient_session.completed") {
const flow = event.data.object;
// ...your business logic
}
return new Response("ok", { status: 200 });
} catch (err) {
if (err instanceof MedblocksSignatureError) {
return new Response("bad signature", { status: 400 });
}
throw err;
}
}
```
The [Quickstart](/docs/webhooks/quickstart) expands this with route wiring, raw-body handling per framework, and `event.type` discrimination.
## Related [#related]
* [Managing Endpoints](/docs/webhooks/managing-endpoints). `mb.webhooks.*` reference.
* [Reference · Register a webhook endpoint](/docs/reference/api/create-webhook).
---
# Events Catalog
Every event type Medblocks delivers, when it fires, and the shape of event.data.object.
Source URL: /docs/webhooks/events
# Events Catalog
Every event type Medblocks delivers, when it fires, and the shape of event.data.object.
The four event types and their payloads. `event.type` is the discriminator. After `Medblocks.webhooks.constructEvent`, TypeScript narrows `event.data.object` to the right shape.
## Envelope [#envelope]
Every delivery uses the same envelope.
```json
{
"id": "evt_01J9YR9N3X4VZ6P2K5RH7M3LMP",
"object": "event",
"type": "patient_session.completed",
"api_version": "2026-04-25",
"created_at": "2026-04-25T14:35:00.000Z",
"data": { "object": { /* payload shaped by type */ } }
}
```
| Field | Type | Notes |
| ------------- | --------- | -------------------------------------------- |
| `id` | `string` | Prefixed `evt_*`. Dedupe by this. |
| `object` | `"event"` | Constant. |
| `type` | enum | One of the four values below. |
| `api_version` | `string` | The version pinned at endpoint registration. |
| `created_at` | ISO 8601 | When the event was fired. |
| `data.object` | object | Per-type payload. |
The `WebhookEvent` type re-exported from `medblocks` is a discriminated union over `type`.
## `patient_session.completed` [#patient_sessioncompleted]
Fires when a patient finishes the hosted flow. Whether they connected an EHR, failed authorization, or just clicked **Done**. `data.object` is the full patient session.
```ts title="webhook-handler.ts"
import type { WebhookEvent } from "medblocks";
function handle(event: WebhookEvent) {
if (event.type !== "patient_session.completed") return;
const flow = event.data.object;
const active = flow.connections.filter((c) => c.status === "active");
const failed = flow.connections.filter((c) => c.status === "failed");
console.log(`patient ${flow.patient_id}: ${active.length} active, ${failed.length} failed`);
}
```
| `data.object` field | Type | Notes |
| ---------------------------- | ----------------------------------- | ------------------------------------------------------------------------------------------------------------------------------- |
| `id` | `string` | `ps_*` |
| `status` | `"open" \| "complete" \| "expired"` | Browser-flow lifecycle. |
| `patient_id` | `string` | Your patient id. |
| `connection_id` | `string \| null` | Set when the flow was direct mode. |
| `recommended_connection_ids` | `string[] \| null` | Set when the flow was picker mode with hints. |
| `connections` | array | Authorization attempts inside the flow. See [patient session](/docs/reference/api/retrieve-patient-session) for the field list. |
| `metadata` | object | Whatever you passed at init. |
**Use it for** updating your “connected” UI, kicking off downstream onboarding, sending a welcome email.
## `connection.token_refresh_failed` [#connectiontoken_refresh_failed]
Fires when a previously `active` connection’s refresh token stops working. The EHR rejected the refresh and we cleared the stored tokens. The patient needs to reconnect.
`data.object` is the single `PatientSessionConnection` that failed (the same shape you see inside `PatientSession.connections`).
```ts title="webhook-handler.ts"
function handle(event: WebhookEvent) {
if (event.type !== "connection.token_refresh_failed") return;
const conn = event.data.object;
console.warn(`connection ${conn.connection_id} needs reauth`);
// Trigger a "please reconnect" email / push notification
}
```
| `data.object` field | Type | Notes |
| ------------------- | ---------------- | -------------------------------------------------------- |
| `id` | `string \| null` | `conn_*`. Null only on the original failed-auth attempt. |
| `connection_id` | `string` | `fhirsrc_*`. Which EHR. |
| `status` | enum | At fire time, `refresh_failed`. |
| `failure_code` | `string \| null` | Stable code. |
| `failure_at` | ISO 8601 \| null | Timestamp of failure. |
| `created_at` | ISO 8601 | When this connection record was first created. |
**Use it for** prompting the patient to start a new patient session against the same source.
## `records.sync.completed` [#recordssynccompleted]
Fires when a background pull for one (patient, connection) pair finishes successfully and new records have landed.
```ts title="webhook-handler.ts"
function handle(event: WebhookEvent) {
if (event.type !== "records.sync.completed") return;
const sync = event.data.object;
console.log(
`patient ${sync.patient_id}: pulled ${sync.total} resources in ${sync.duration_ms ?? "?"}ms`,
);
}
```
| `data.object` field | Type | Notes |
| ------------------- | ---------------- | ------------------------------------- |
| `resource_type` | `"records_sync"` | Constant discriminator. |
| `patient_id` | `string` | Your patient id. |
| `connection_id` | `string` | `fhirsrc_*`. |
| `total` | `number` | Resources synced this run. |
| `errors` | `number` | Sub-resource failures inside the run. |
| `duration_ms` | `number \| null` | Pull duration, when measurable. |
**Use it for** triggering downstream processing, refreshing dashboards, telling a workflow the patient is ready.
## `records.sync.failed` [#recordssyncfailed]
Fires when a background pull errored without recovering.
```ts title="webhook-handler.ts"
function handle(event: WebhookEvent) {
if (event.type !== "records.sync.failed") return;
const failure = event.data.object;
alerting.page("medblocks sync failed", {
patient: failure.patient_id,
connection: failure.connection_id,
error: failure.error_message,
});
}
```
| `data.object` field | Type | Notes |
| ------------------- | ---------------- | --------------------------------- |
| `resource_type` | `"records_sync"` | Constant. |
| `patient_id` | `string` | Your patient id. |
| `connection_id` | `string` | `fhirsrc_*`. |
| `error_message` | `string \| null` | Best-effort human-readable cause. |
**Use it for** paging on-call, surfacing the failure in your ops dashboard, retrying via Medblocks support.
## Endpoint Auto-Disable [#endpoint-auto-disable]
After the delivery worker exhausts retries on one of your endpoints, that endpoint is flipped to `status: "disabled"`, with no event emitted for this transition. Detect it by reading `status` on the endpoint via [`GET /webhooks/{id}`](/docs/reference/api/get-webhook) or [`mb.webhooks.retrieve(id)`](/docs/webhooks/managing-endpoints#retrieve), or by polling [`mb.webhooks.list()`](/docs/webhooks/managing-endpoints#list) on a cron and alerting on any row with `status === "disabled"`. Re-enable via [`mb.webhooks.update(id, { status: "active" })`](/docs/webhooks/managing-endpoints#update). See [Retries & Auto-Disable](/docs/webhooks/retries-and-disable).
## Picking The Right Subscription [#picking-the-right-subscription]
| You want to know when… | Subscribe to |
| ------------------------------------------------------ | --------------------------------- |
| The patient finished the browser flow. | `patient_session.completed` |
| A connection broke and needs the patient to reconnect. | `connection.token_refresh_failed` |
| The patient’s records are ready to query. | `records.sync.completed` |
| Background pull failed for this patient. | `records.sync.failed` |
Subscribing to `["*"]` delivers all four. Subscribing to a narrow list (max 4 types) is cheaper for your receiver to handle.
## Related [#related]
* [Signatures](/docs/webhooks/signatures). Verifying the delivery.
* [Managing Endpoints · Create](/docs/webhooks/managing-endpoints#create). Programmatic subscription.
* [Reference · Register a webhook endpoint](/docs/reference/api/create-webhook). Exact request schema.
---
# Local Development
Tunneling, replaying real events, and unit-testing your receiver without leaving your laptop.
Source URL: /docs/webhooks/local-development
# Local Development
Tunneling, replaying real events, and unit-testing your receiver without leaving your laptop.
Webhooks need a public HTTPS URL. Medblocks can’t reach `localhost:3000`. There are three workable patterns for developing receivers locally.
## Tunnel A Public URL To Your Laptop [#1-tunnel-a-public-url-to-your-laptop]
`cloudflared` and `ngrok` both work. Pick one, get a HTTPS URL, register it as a webhook endpoint pointing at your local port.
```bash
# install once: brew install cloudflared
cloudflared tunnel --url http://localhost:3000
# → https://.trycloudflare.com
```
```bash
# install once: brew install ngrok
ngrok http 3000
# → https://.ngrok.app
```
Register the URL.
```ts title="server/scripts/register-dev-endpoint.ts"
import { Medblocks } from "medblocks";
const mb = new Medblocks(process.env.MEDBLOCKS_API_KEY!);
const endpoint = await mb.webhooks.create({
url: "https://.trycloudflare.com/api/webhook",
events: ["*"],
description: "Dev tunnel",
});
console.log("MEDBLOCKS_WEBHOOK_SECRET=" + endpoint.secret);
```
Drop the secret in your `.env.local`, start your receiver, and trigger a real patient session against test data.
Delete the endpoint when you’re done. Leaving stale tunnels registered counts against your endpoint limit and noisily 502s.
```ts
await mb.webhooks.delete("wh_...");
```
## Replay A Captured Delivery [#2-replay-a-captured-delivery]
If you have a real delivery you captured during a prior run, you can replay it against your local receiver without going through Medblocks. The signature is reproducible from the raw body and the timestamp.
```ts title="scripts/replay-locally.ts"
const captured = {
rawBody: '{"id":"evt_...","object":"event","type":"patient_session.completed","..."}',
signature: "t=1714060800,v1=8d1b3c...",
};
const response = await fetch("http://localhost:3000/api/webhook", {
method: "POST",
headers: {
"Content-Type": "application/json",
"Medblocks-Signature": captured.signature,
},
body: captured.rawBody,
});
console.log(response.status, await response.text());
```
The signature only verifies if your receiver’s `MEDBLOCKS_WEBHOOK_SECRET` matches the secret that signed the captured delivery. Typically your dev tunnel’s secret. If you rotated since capture, the signature won’t match.
You can also fetch a recent delivery directly via the SDK to capture one.
```ts
const page = await mb.webhooks.listEvents("wh_...", { limit: 5 });
for (const evt of page.data) {
console.log(evt.id, evt.last_status_code, evt.last_response_body);
}
```
The body itself isn’t returned by the API. Capture it at delivery time from your tunnel’s logs (cloudflared and ngrok both have inspector UIs that show the raw request).
## Unit-Test Without A Tunnel [#3-unit-test-without-a-tunnel]
For unit tests, sign a payload yourself with the same algorithm `constructEvent` verifies. This is the same approach the SDK’s own integration tests use.
```ts title="test/webhook.test.ts"
import { describe, expect, test } from "bun:test";
import { handle } from "../src/webhook";
const SECRET = "whsec_test_only";
async function sign(body: string, t: number): Promise {
const key = await crypto.subtle.importKey(
"raw",
new TextEncoder().encode(SECRET),
{ name: "HMAC", hash: "SHA-256" },
false,
["sign"],
);
const sig = await crypto.subtle.sign(
"HMAC",
key,
new TextEncoder().encode(`${t}.${body}`),
);
return Array.from(new Uint8Array(sig))
.map((b) => b.toString(16).padStart(2, "0"))
.join("");
}
describe("webhook handler", () => {
test("accepts a valid patient_session.completed delivery", async () => {
const t = Math.floor(Date.now() / 1000);
const body = JSON.stringify({
id: "evt_test",
object: "event",
type: "patient_session.completed",
api_version: "2026-04-25",
created_at: new Date(t * 1000).toISOString(),
data: {
object: {
id: "ps_test",
resource_type: "patient_session",
status: "complete",
patient_id: "user_42",
/* ...rest of PatientSession shape */
},
},
});
const v1 = await sign(body, t);
const req = new Request("http://test/api/webhook", {
method: "POST",
headers: { "Medblocks-Signature": `t=${t},v1=${v1}` },
body,
});
const res = await handle(req);
expect(res.status).toBe(200);
});
});
```
Set `MEDBLOCKS_WEBHOOK_SECRET=whsec_test_only` in your test env. The `constructEvent` call inside `handle` will verify against that fake secret.
For a complete fixture covering all four event types, see `sdk/connect/test/server/constructEvent.test.ts` in the repo.
## Triggering Real Events On Dev [#triggering-real-events-on-dev]
To exercise the full delivery loop end-to-end against your tunnel.
| Event you want | How to trigger |
| --------------------------------- | ------------------------------------------------------------------------------------------------------------------------------ |
| `patient_session.completed` | Run a complete patient session against an Epic sandbox (or another supported sandbox source). |
| `connection.token_refresh_failed` | Hard to trigger on demand. Usually surfaces hours after a real refresh failure. Capture one in a tunnel session and replay it. |
| `records.sync.completed` | Triggers automatically after a successful `patient_session.completed` once the background pull settles. |
| `records.sync.failed` | Run a flow against a source you’ve mis-configured (wrong scope, expired client secret) so the pull fails. |
For routine local work, the realistic loop is a tunnel plus a sandbox patient session, and a real `patient_session.completed` event hits your receiver in seconds.
## Related [#related]
* [Quickstart](/docs/webhooks/quickstart). Start here.
* [Signatures](/docs/webhooks/signatures). What `constructEvent` is verifying.
* [Events Catalog](/docs/webhooks/events). What payloads to expect.
---
# Managing Endpoints
Create, list, update, rotate, and delete webhook endpoints from your backend with mb.webhooks.
Source URL: /docs/webhooks/managing-endpoints
# Managing Endpoints
Create, list, update, rotate, and delete webhook endpoints from your backend with mb.webhooks.
`mb.webhooks` is the resource on `medblocks` for managing endpoints. Registering new ones, listing what you have, rotating secrets, and inspecting recent deliveries. For receiving and verifying incoming events, see [Quickstart](/docs/webhooks/quickstart) and [Signatures](/docs/webhooks/signatures).
| Method | HTTP |
| ------------------------------------- | ----------------------------------- |
| `mb.webhooks.create(input)` | `POST /webhooks` |
| `mb.webhooks.retrieve(id)` | `GET /webhooks/{id}` |
| `mb.webhooks.list(params?)` | `GET /webhooks` |
| `mb.webhooks.update(id, input)` | `PATCH /webhooks/{id}` |
| `mb.webhooks.delete(id)` | `DELETE /webhooks/{id}` |
| `mb.webhooks.rotateSecret(id)` | `POST /webhooks/{id}/rotate-secret` |
| `mb.webhooks.listEvents(id, params?)` | `GET /webhooks/{id}/events` |
## Create [#create]
`create` returns the endpoint **with** the plaintext signing secret. The secret is returned exactly once. Store it server-side immediately.
The `secret` field on the response is returned only on create and on `rotateSecret`. There is no endpoint that returns it again. Persist it before doing anything else.
```ts title="server/scripts/register-webhook.ts"
import { mb } from "../medblocks";
const endpoint = await mb.webhooks.create({
url: "https://api.example.com/medblocks/webhook",
events: ["patient_session.completed", "records.sync.completed"],
description: "Production webhook",
});
console.log(endpoint.id); // wh_*
console.log(endpoint.secret); // whsec_* - store me!
```
### Subscribing To All Events [#subscribing-to-all-events]
Pass `["*"]` to deliver every event type. Otherwise list the explicit event types you want; any unknown type is rejected.
```ts
await mb.webhooks.create({
url: "https://api.example.com/medblocks/webhook",
events: ["*"],
});
```
## Retrieve [#retrieve]
```ts
const endpoint = await mb.webhooks.retrieve("wh_01J9YR9N3X4VZ6P2K5RH7M3LMP");
```
Returns the endpoint without the secret.
## List [#list]
Cursor-paginated. Filter by `status` (`active` or `disabled`).
```ts title="server/scripts/list-webhooks.ts"
const page = await mb.webhooks.list({ limit: 50 });
for (const ep of page.data) console.log(ep.id, ep.url, ep.status);
for await (const ep of mb.webhooks.list({ status: "active" }).autoPagingIterator()) {
console.log(ep.id);
}
```
## Update [#update]
Partial update via `PATCH`. Only the fields you pass are changed. Use `status: "active"` to re-enable an endpoint that was auto-disabled after retry exhaustion.
```ts title="server/scripts/reenable-webhook.ts"
const updated = await mb.webhooks.update("wh_01J9YR9N3X4VZ6P2K5RH7M3LMP", {
status: "active",
});
```
Updatable fields: `url`, `events`, `description`, `metadata`, `status`. The endpoint’s `api_version` is immutable.
## Delete [#delete]
Drops any pending deliveries for this endpoint. Returns a tombstone.
```ts
const tombstone = await mb.webhooks.delete("wh_01J9YR9N3X4VZ6P2K5RH7M3LMP");
// { id: "wh_*", resource_type: "webhook_endpoint", deleted: true }
```
## Rotate Secret [#rotate-secret]
Generates a new signing secret and returns it. **The old secret stops verifying immediately**. There is no grace period.
Sequence to avoid downtime. Deploy code that reads the new secret from a configurable location → call `rotateSecret` → write the returned `secret` to that location. The deploy must be ready to accept the new secret before you rotate.
```ts title="server/scripts/rotate-webhook-secret.ts"
const rotated = await mb.webhooks.rotateSecret("wh_01J9YR9N3X4VZ6P2K5RH7M3LMP");
await secrets.put("MEDBLOCKS_WEBHOOK_SECRET", rotated.secret);
```
## List Recent Deliveries [#list-recent-deliveries]
`listEvents` returns the per-endpoint delivery log. Useful for a dashboard view or for debugging a flaky receiver.
```ts title="server/scripts/inspect-deliveries.ts"
const page = await mb.webhooks.listEvents("wh_01J9YR9N3X4VZ6P2K5RH7M3LMP", { limit: 20 });
for (const evt of page.data) {
console.log(evt.id, evt.type, evt.last_status_code, evt.attempts);
}
```
Each `WebhookEventRecord` carries `attempts`, `next_attempt_at`, `delivered_at`, `last_status_code`, `last_response_body` (truncated to 4 KB), and `last_redelivered_at`. Use these to spot endpoints climbing toward auto-disable.
## Errors [#errors]
| `error.type` | When |
| ----------------------- | ----------------------------------------------------------------------------------------------------- |
| `invalid_request_error` | `url` not HTTPS (outside localhost), unknown event type, or `events` empty. |
| `conflict_error` | Organization has reached its webhook endpoint limit (`webhook_endpoint_limit_reached`). |
| `not_found_error` | `retrieve`, `update`, `del`, `rotateSecret`, `listEvents` with an id that doesn’t exist for your org. |
See [SDK · Errors](/docs/reference/errors).
## Related [#related]
* [Webhooks](/docs/webhooks). Model and lifecycle.
* [Quickstart](/docs/webhooks/quickstart). Register, receive, verify, respond.
* [Signatures](/docs/webhooks/signatures). `Medblocks.webhooks.constructEvent` and the raw-body trap.
* [Redelivery](/docs/webhooks/redelivery). Manual re-enqueue via `mb.events.redeliver`.
* [Reference · Register a webhook endpoint](/docs/reference/api/create-webhook). Exact schema.
---
# Quickstart
Register an endpoint, verify the signature, switch on event.type, respond 2xx. Five steps.
Source URL: /docs/webhooks/quickstart
# Quickstart
Register an endpoint, verify the signature, switch on event.type, respond 2xx. Five steps.
Build a working webhook receiver in five steps.
## Register An Endpoint [#2-register-an-endpoint]
Pick the URL where Medblocks should `POST` deliveries. Register it from a server script. You get the signing secret back **once**, so persist it immediately.
```ts title="server/scripts/register-webhook.ts"
import { Medblocks } from "medblocks";
const mb = new Medblocks(process.env.MEDBLOCKS_API_KEY!);
const endpoint = await mb.webhooks.create({
url: "https://api.example.com/api/webhook",
events: ["patient_session.completed", "records.sync.completed"],
description: "Production webhook",
});
console.log("Endpoint id:", endpoint.id);
console.log("Save this secret:", endpoint.secret);
```
`endpoint.secret` is returned only here and from `mb.webhooks.rotateSecret`. There is no endpoint that returns it again. Store it in your secrets manager before doing anything else.
Set it on the server that will receive deliveries.
```bash title=".env"
MEDBLOCKS_WEBHOOK_SECRET="whsec_..."
```
## Write The Receiver [#3-write-the-receiver]
The SDK’s `Medblocks.webhooks.constructEvent` reads the raw request body and the `Medblocks-Signature` header, verifies the HMAC, checks the timestamp window, and returns a typed `WebhookEvent` you can `switch` on.
```ts title="src/webhook.ts"
import { Medblocks, MedblocksSignatureError } from "medblocks";
function requireEnv(name: string): string {
const value = process.env[name];
if (!value) throw new Error(`${name} is not configured`);
return value;
}
const SECRET = requireEnv("MEDBLOCKS_WEBHOOK_SECRET");
export async function webhook(req: Request): Promise {
const rawBody = await req.text();
const signature = req.headers.get("Medblocks-Signature");
try {
const event = await Medblocks.webhooks.constructEvent(rawBody, signature, SECRET);
switch (event.type) {
case "patient_session.completed":
console.log("patient session complete", event.data.object.id);
break;
case "connection.token_refresh_failed":
console.warn("refresh failed", event.data.object.connection_id);
break;
case "records.sync.completed":
console.log("sync done", event.data.object.patient_id, event.data.object.total);
break;
case "records.sync.failed":
console.error("sync failed", event.data.object.error_message);
break;
}
return new Response("ok", { status: 200 });
} catch (err) {
if (err instanceof MedblocksSignatureError) {
console.warn("signature verification failed", err.reason);
return new Response("bad signature", { status: 400 });
}
throw err;
}
}
```
The `switch` narrows `event.data.object` to the right payload shape for each `type`. See [Events Catalog](/docs/webhooks/events) for the full list of payload shapes.
## Wire The Route [#4-wire-the-route]
Wire the receiver to a route handler. Each framework reads the raw body slightly differently. Pick yours.
```ts title="src/server.ts"
import { webhook } from "./webhook";
Bun.serve({
port: 3000,
routes: {
"/api/webhook": { POST: webhook },
},
});
```
```ts title="app/api/webhook/route.ts"
import { Medblocks, MedblocksSignatureError } from "medblocks";
export async function POST(req: Request) {
const rawBody = await req.text();
const signature = req.headers.get("Medblocks-Signature");
try {
const event = await Medblocks.webhooks.constructEvent(
rawBody,
signature,
process.env.MEDBLOCKS_WEBHOOK_SECRET!,
);
// handle event...
return new Response("ok", { status: 200 });
} catch (err) {
if (err instanceof MedblocksSignatureError) {
return new Response("bad signature", { status: 400 });
}
throw err;
}
}
```
Calling `req.text()` is mandatory. Do **not** read `await req.json()`. That re-serializes and the signature breaks.
```ts title="src/index.ts"
import { Hono } from "hono";
import { Medblocks, MedblocksSignatureError } from "medblocks";
const app = new Hono();
app.post("/api/webhook", async (c) => {
const rawBody = await c.req.text();
const signature = c.req.header("Medblocks-Signature") ?? null;
try {
const event = await Medblocks.webhooks.constructEvent(
rawBody,
signature,
process.env.MEDBLOCKS_WEBHOOK_SECRET!,
);
// handle event...
return c.text("ok");
} catch (err) {
if (err instanceof MedblocksSignatureError) {
return c.text("bad signature", 400);
}
throw err;
}
});
export default app;
```
## Be Idempotent [#5-be-idempotent]
The same `event.id` can be delivered more than once. Medblocks retries on non-2xx responses and supports [manual redelivery](/docs/webhooks/redelivery). Dedupe by `event.id` before applying side effects.
```ts title="server/webhook-handler.ts"
async function handle(event: WebhookEvent) {
const seen = await store.get(`evt:${event.id}`);
if (seen) return;
await applySideEffect(event);
await store.set(`evt:${event.id}`, "ok", { ttl: 90 * 24 * 60 * 60 });
}
```
90 days covers the longest plausible window in which Medblocks would still be retrying or you might manually redeliver.
## What Could Go Wrong [#what-could-go-wrong]
| You see | Cause | Fix |
| ------------------------------------------------------------- | -------------------------------------------------------------------- | ---------------------------------------------------------------------------------------------------------------------------- |
| `MedblocksSignatureError` with `reason: "missing_header"` | Endpoint URL is reachable but the request didn’t include the header. | The endpoint URL receiving traffic isn’t ours. Check what’s calling. |
| `MedblocksSignatureError` with `reason: "signature_mismatch"` | Wrong secret in env, or the framework re-serialized the body. | Verify `MEDBLOCKS_WEBHOOK_SECRET` matches and you’re reading the raw body. |
| `MedblocksSignatureError` with `reason: "timestamp_expired"` | Clock drift > 5 minutes. | Fix NTP. As a temporary mitigation, raise `tolerance` (see [Signatures](/docs/webhooks/signatures)). |
| Endpoint auto-disabled | Your receiver returned non-2xx repeatedly. | Fix the receiver, re-enable via `mb.webhooks.update(id, { status: "active" })`, then [redeliver](/docs/webhooks/redelivery). |
## Related [#related]
* [Events Catalog](/docs/webhooks/events). Every payload shape.
* [Signatures](/docs/webhooks/signatures). The verification step in detail.
* [Retries & Auto-Disable](/docs/webhooks/retries-and-disable).
* [Redelivery](/docs/webhooks/redelivery). After fixing a bug.
* [Local Development](/docs/webhooks/local-development). Tunneling and replay.
---
# Redelivery
Manually re-enqueue a webhook event after fixing a receiver bug. Same event.id, dedupe by it.
Source URL: /docs/webhooks/redelivery
# Redelivery
Manually re-enqueue a webhook event after fixing a receiver bug. Same event.id, dedupe by it.
`mb.events.redeliver(eventId)` re-enqueues a single delivery for another attempt. Use it after fixing a bug in your receiver, or after dropping an event you didn’t process correctly.
## Usage [#usage]
```ts title="server/scripts/redeliver-event.ts"
import { Medblocks } from "medblocks";
const mb = new Medblocks(process.env.MEDBLOCKS_API_KEY!);
const evt = await mb.events.redeliver("evt_01J9YR9N3X4VZ6P2K5RH7M3LMP");
console.log(evt.attempts, evt.last_status_code, evt.delivered_at);
```
The returned `WebhookEventRecord` reflects state **after** the redelivery attempt, with updated `attempts`, `delivered_at` if it succeeded, `last_status_code`, `last_response_body`, and `last_redelivered_at`.
## Same `event.id` Is Reused [#same-eventid-is-reused]
Redelivery does not generate a new event id. Your receiver must dedupe by `event.id`. Otherwise the redelivery applies whatever side effect the original would have.
```ts title="server/webhook-handler.ts"
import type { WebhookEvent } from "medblocks";
async function handle(event: WebhookEvent) {
const seen = await store.get(`evt:${event.id}`);
if (seen) return;
await applySideEffect(event);
await store.set(`evt:${event.id}`, "ok", { ttl: 90 * 24 * 60 * 60 });
}
```
90 days covers the longest plausible window. Medblocks’ retry schedule runs \~3.6 days; manual redelivery extends that, but anything beyond 90 days is almost certainly a real bug worth investigating.
## Rate Limit [#rate-limit]
Redelivery is rate-limited to **one call per minute per event**. A second call within 60 seconds throws a `MedblocksError` with `type` `rate_limit_error` and the `Retry-After` header parsed onto `err.retryAfter`.
```ts title="server/scripts/redeliver-with-backoff.ts"
import { Medblocks, isMedblocksError } from "medblocks";
const mb = new Medblocks(process.env.MEDBLOCKS_API_KEY!);
try {
await mb.events.redeliver(eventId);
} catch (err) {
if (isMedblocksError(err) && err.type === "rate_limit_error") {
console.log(`retry after ${err.retryAfter ?? 60}s`);
} else {
throw err;
}
}
```
For bulk replay after a bad deploy, walk the events list with a sleep between calls. See below.
## Finding Events To Redeliver [#finding-events-to-redeliver]
Use `mb.webhooks.listEvents` to list deliveries for a specific endpoint, then redeliver the ones you need.
```ts title="server/scripts/replay-failed-on-endpoint.ts"
import { Medblocks } from "medblocks";
const mb = new Medblocks(process.env.MEDBLOCKS_API_KEY!);
const ENDPOINT_ID = "wh_01J9YR9N3X4VZ6P2K5RH7M3LMP";
for await (const evt of mb.webhooks.listEvents(ENDPOINT_ID).autoPagingIterator()) {
if (evt.delivered_at !== null) continue; // already delivered
if (evt.last_status_code !== 500) continue; // only replay the 500s
await mb.events.redeliver(evt.id);
await new Promise((r) => setTimeout(r, 1100)); // respect the 1/min limit
}
```
Filter by whichever fields fit your situation.
* `delivered_at !== null` → already delivered, skip.
* `next_attempt_at !== null` → still retrying on its own, no need to force.
* `last_status_code` → narrow to the failure mode you fixed.
* `attempts` → events that exhausted are terminal until you redeliver them.
## When To Redeliver [#when-to-redeliver]
* After fixing a bug that caused your receiver to 5xx or 400.
* After reactivating a disabled endpoint, to catch up on events whose retries already exhausted during the outage.
* After a downstream system that depends on your webhook handler comes back up.
## When Not To [#when-not-to]
* During the active retry window. Medblocks will retry on its own. Manual redelivery skips the back-off and burns the per-minute rate limit for no reason.
* For events you simply don’t want to handle. There is no “discard” call; just return 2xx and dedupe-by-id will keep you idempotent.
## Errors [#errors]
| `error.type` | When |
| ------------------ | ------------------------------------------------------------------- |
| `not_found_error` | The `evt_*` id does not exist for your organization. |
| `rate_limit_error` | Already redelivered within the last 60 s. Inspect `err.retryAfter`. |
## Related [#related]
* [Retries & Auto-Disable](/docs/webhooks/retries-and-disable). The automatic schedule before you’d reach for redelivery.
* [Managing Endpoints · List Recent Deliveries](/docs/webhooks/managing-endpoints#list-recent-deliveries). Find the `evt_*` to redeliver.
* [Reference · Redeliver a webhook event](/docs/reference/api/redeliver-webhook-event).
---
# Retries & Auto-Disable
How Medblocks retries failed deliveries, when an endpoint gets auto-disabled, and how to bring it back.
Source URL: /docs/webhooks/retries-and-disable
# Retries & Auto-Disable
How Medblocks retries failed deliveries, when an endpoint gets auto-disabled, and how to bring it back.
If your receiver returns a non-2xx status, or times out, Medblocks retries on a back-off curve. After enough consecutive failures on one endpoint, that endpoint is auto-disabled.
## The Retry Schedule [#the-retry-schedule]
Medblocks retries each event up to **9 times**. Delays between attempts.
| Attempt | Delay since last attempt |
| ------- | ------------------------ |
| 1 | immediate |
| 2 | 1 minute |
| 3 | 5 minutes |
| 4 | 30 minutes |
| 5 | 2 hours |
| 6 | 12 hours |
| 7 | 24 hours |
| 8 | 24 hours |
| 9 | 24 hours |
End-to-end, the worst case from first failure to exhaustion is about **3.6 days**. That gives you enough time to be paged, deploy a fix, and let the retries themselves recover any in-flight events without redelivery.
`event.attempts` and `event.next_attempt_at` on each `WebhookEventRecord` reflect the current state. Inspect them with [`mb.webhooks.listEvents`](/docs/webhooks/managing-endpoints#list-recent-deliveries).
## What Counts As A Failure [#what-counts-as-a-failure]
* HTTP response with a status code outside `200`–`299`.
* The connection times out (default 5 seconds from Medblocks’ side).
* TLS handshake fails or the connection is refused.
A `400 Bad Signature` from your receiver counts as a failure. But if your signing secret is wrong, every event will fail. Auto-disable is the safety valve.
## Auto-Disable [#auto-disable]
After the 9th attempt fails, the endpoint’s `status` flips to `disabled`. **No event is emitted** for this transition, because auto-disable is a status change, not a notification.
Detect a disabled endpoint by reading `status` via `mb.webhooks.retrieve(id)` (or `GET /webhooks/{id}`), or by polling `mb.webhooks.list()` on a cron and alerting on any row where `status === "disabled"`.
```ts title="server/scripts/check-disabled-webhooks.ts"
import { Medblocks } from "medblocks";
const mb = new Medblocks(process.env.MEDBLOCKS_API_KEY!);
for await (const ep of mb.webhooks.list({ status: "disabled" }).autoPagingIterator()) {
alerting.page("medblocks webhook endpoint auto-disabled", {
id: ep.id,
url: ep.url,
});
}
```
Run this on a short interval (every few minutes is reasonable) so a disabled endpoint surfaces quickly. The disabled state itself is permanent until you re-enable it, so there’s no race against re-disable in between polls.
## Reactivating A Disabled Endpoint [#reactivating-a-disabled-endpoint]
Once your receiver is fixed, flip the endpoint back to `active`.
```ts title="server/scripts/reenable-webhook.ts"
import { Medblocks } from "medblocks";
const mb = new Medblocks(process.env.MEDBLOCKS_API_KEY!);
await mb.webhooks.update("wh_01J9YR9N3X4VZ6P2K5RH7M3LMP", {
status: "active",
});
```
New events delivered after this update will go through. Events that exhausted retries during the outage are **not** automatically redelivered. They’re terminal. Use [manual redelivery](/docs/webhooks/redelivery) to replay the specific events you need.
## Reading Delivery Health [#reading-delivery-health]
`mb.webhooks.listEvents` returns recent deliveries with state per event. Use it to spot endpoints that are climbing toward auto-disable before they get there.
```ts title="server/scripts/check-webhook-health.ts"
const page = await mb.webhooks.listEvents("wh_01J9YR9N3X4VZ6P2K5RH7M3LMP", { limit: 50 });
const climbing = page.data.filter((evt) => evt.attempts > 1 && evt.delivered_at === null);
for (const evt of climbing) {
console.warn(`evt ${evt.id} on attempt ${evt.attempts}, last status ${evt.last_status_code}`);
}
```
Fields worth looking at.
| Field | Meaning |
| -------------------- | --------------------------------------------------------------------- |
| `attempts` | How many times we’ve tried, including the current one. |
| `next_attempt_at` | When we’ll try again. `null` means terminal (delivered or exhausted). |
| `delivered_at` | Successful delivery timestamp. `null` until a 2xx. |
| `last_status_code` | Status of the most recent attempt. |
| `last_response_body` | Body of the most recent attempt, truncated to 4 KB. |
## Designing A Resilient Receiver [#designing-a-resilient-receiver]
A few things that pay off in practice.
* **Accept 2xx early.** Acknowledge the delivery, then process asynchronously. A slow upstream dependency shouldn’t burn retry budget.
* **Dedupe by `event.id`.** Retries and redeliveries reuse the same id; idempotency is the only safe contract.
* **Don’t return non-2xx for business-rule failures.** “I already processed this” is a 200, not a 409. Returning 4xx for cases Medblocks can’t fix wastes retries.
* **Poll endpoint status periodically.** Run a short-interval job (`mb.webhooks.list({ status: "disabled" })`) so an auto-disabled endpoint surfaces in your monitoring within minutes, not hours.
## Related [#related]
* [Quickstart](/docs/webhooks/quickstart). Wire up a working receiver.
* [Redelivery](/docs/webhooks/redelivery). Replay specific events after fixing a bug.
* [Managing Endpoints · Update](/docs/webhooks/managing-endpoints#update). Flip `status` back to `active`.
* [Managing Endpoints · List Recent Deliveries](/docs/webhooks/managing-endpoints#list-recent-deliveries).
---
# Signatures
The Medblocks-Signature header, constructEvent, the raw-body trap, and the five failure reasons.
Source URL: /docs/webhooks/signatures
# Signatures
The Medblocks-Signature header, constructEvent, the raw-body trap, and the five failure reasons.
Every webhook delivery from Medblocks includes a `Medblocks-Signature` header. Verifying it before trusting the payload is non-negotiable. Without verification, anyone who knows your endpoint URL can fire fake events at it.
## The Header Format [#the-header-format]
```text
Medblocks-Signature: t=1714060800,v1=8d1b3c...
```
* `t` is the unix-seconds timestamp when Medblocks signed the request.
* `v1` is the hex-encoded HMAC-SHA256 of `${t}.${rawBody}` keyed by your endpoint’s signing secret.
`Medblocks.webhooks.constructEvent` parses this header, checks the timestamp window, recomputes the HMAC, and constant-time compares.
## Verifying With The SDK [#verifying-with-the-sdk]
`constructEvent` is a static method on `Medblocks.webhooks`. It is pure. No network, no SDK instance needed.
```ts title="server/webhook.ts"
import { Medblocks, MedblocksSignatureError } from "medblocks";
async function handle(req: Request): Promise {
const rawBody = await req.text();
const signature = req.headers.get("Medblocks-Signature");
try {
const event = await Medblocks.webhooks.constructEvent(
rawBody,
signature,
process.env.MEDBLOCKS_WEBHOOK_SECRET!,
);
// event is now a typed WebhookEvent - safe to act on
return new Response("ok", { status: 200 });
} catch (err) {
if (err instanceof MedblocksSignatureError) {
console.warn("signature failed", err.reason);
return new Response("bad signature", { status: 400 });
}
throw err;
}
}
```
## The Raw-Body Trap [#the-raw-body-trap]
The signature is computed over the **raw** request body. If your framework parses the JSON before you see it, the re-serialized string will not match. Different whitespace, different key order, different escaping rules. The HMAC fails even though the payload is genuine.
| Framework | How to read the raw body |
| ------------------ | ----------------------------------------------------------------------------------- |
| Bun.serve | `await req.text()` |
| Next.js App Router | `await req.text()` (do **not** call `req.json()`) |
| Hono | `await c.req.text()` |
| Express | `app.use(express.raw({ type: "application/json" }))`. Body is a `Buffer`, decode it |
If you mix middleware that parses JSON globally (`express.json()`, Fastify’s auto-parsing, etc.) put the webhook route **before** the JSON parser so it sees the unparsed body.
## What `constructEvent` Does [#what-constructevent-does]
Internally, in order.
1. Parse the `Medblocks-Signature` header into `{ t, v1 }`.
2. Reject if `t` is outside the tolerance window (default 5 minutes. See below).
3. HMAC-SHA256 over `${t}.${rawBody}` with the secret, constant-time compare against `v1`.
4. JSON-parse the body; reject if the envelope shape is wrong.
5. Return the typed `WebhookEvent`.
Any step’s failure throws `MedblocksSignatureError` with a `reason` describing which one.
## Timestamp Tolerance [#timestamp-tolerance]
Defaults to 300 seconds (5 minutes). Raise it only if your clock drift really is larger than that. Usually a sign of an NTP problem worth fixing rather than papering over.
```ts
const event = await Medblocks.webhooks.constructEvent(
rawBody,
signature,
secret,
{ tolerance: 600 }, // 10 minutes - only if you really need it
);
```
The tolerance window protects against replay, so an attacker who captures a single delivery cannot replay it forever.
## Accepting Bytes Instead Of A String [#accepting-bytes-instead-of-a-string]
`constructEvent` accepts `string` or `Uint8Array`. Use the byte form when your runtime exposes the body as bytes already (e.g., Express’s `raw` middleware).
```ts
const rawBytes: Uint8Array = req.body; // from express.raw()
const event = await Medblocks.webhooks.constructEvent(rawBytes, signature, secret);
```
## Failure Reasons [#failure-reasons]
`MedblocksSignatureError.reason` is one of the following.
| `reason` | What happened | What to do |
| -------------------- | --------------------------------------------- | ------------------------------------------------------------------------- |
| `missing_header` | No `Medblocks-Signature` on the request. | Confirm the request is actually from Medblocks. Return 400. |
| `malformed_header` | Header didn’t match `t=,v1=`. | Something is rewriting the header. Check load balancers and proxies. |
| `timestamp_expired` | `t` outside the tolerance window. | Fix clock drift on your server, or raise `tolerance` short-term. |
| `signature_mismatch` | HMAC didn’t match. | Wrong secret, or you’re not reading the raw body. |
| `malformed_body` | Body wasn’t valid JSON in the event envelope. | Confirm nothing between Medblocks and your handler is rewriting the body. |
Always log `err.reason`. It’s the fastest way to tell what’s wrong.
## Rotating The Secret [#rotating-the-secret]
`mb.webhooks.rotateSecret(id)` returns a new signing secret and the old one **stops verifying immediately**. There is no grace period. Sequence to avoid downtime.
1. Deploy code that reads the new secret from a configurable secret store.
2. Call `mb.webhooks.rotateSecret(endpointId)`.
3. Write the returned `secret` to that store.
Any delivery in flight during step 2 will fail verification with `signature_mismatch`. Medblocks retries those, so set up retries to absorb the gap.
## Verifying In Other Languages [#verifying-in-other-languages]
For non-TypeScript receivers, the algorithm is the same. HMAC-SHA256 over `${t}.${rawBody}` keyed by the secret, hex-compare against `v1`, reject if `t` is outside the tolerance window. The SDK is the canonical implementation; if you need a port to Python, Go, Ruby, etc., open a support ticket and we’ll publish a reference snippet.
## Related [#related]
* [Quickstart](/docs/webhooks/quickstart). Register, receive, verify in 5 steps.
* [Events Catalog](/docs/webhooks/events). Payload shape per `event.type`.
* [SDK Errors](/docs/reference/errors). The error class hierarchy, fields, and stable codes.
* [Managing Endpoints · Rotate Secret](/docs/webhooks/managing-endpoints#rotate-secret).
---
# Use Medblocks without code
Use the dashboard as a complete control plane for setup, monitoring, exports, and support.
Source URL: /docs/without-code
# Use Medblocks without code
Use the dashboard as a complete control plane for setup, monitoring, exports, and support.
Medblocks is not only an API. The dashboard is a platform surface for teams that want to configure integrations, monitor activity, deliver records, and support users without building every workflow into their own app.
Use this path when an operations, implementation, support, or data team needs to run Medblocks directly from the dashboard.
### Create the workspace [#create-the-workspace]
Create a Sandbox workspace for development or a Production workspace for live work. The workspace controls API keys, connection credentials, patients, exports, webhooks, and monitoring.
### Add or import patients [#add-or-import-patients]
Use the Patients page to inspect records, connection history, pull status, and support context. In a Sandbox workspace, use **Load sample patients** to populate synthetic patients without PHI.
### Configure connections [#configure-connections]
Use [Configure connections](/docs/configure-connections) to add credentials for patient access, clinical workflows, backend sync, or network access.
This is where your team brings its own client IDs, app registrations, and backend credentials instead of waiting for product code to exist.
### Send data out [#send-data-out]
Use Settings > Export to configure a FHIR server or object storage destination. Medblocks can run the first backfill and continue sending deltas after future pulls.
### Monitor and support the workflow [#monitor-and-support-the-workflow]
Use dashboard history to answer operational questions:
* Did authorization succeed?
* Did records finish pulling?
* Did an export run fail?
* Which webhook deliveries retried?
* Does the patient need to reconnect?
## When to add code [#when-to-add-code]
Add code when your product needs to trigger Medblocks from its own user experience: a patient-facing button, an embedded clinician workflow, a backend job, or custom business logic after a webhook.
The dashboard remains useful after you add code. It is where your team monitors the integration, configures destinations, handles support, and checks failed work.
## See also [#see-also]
* [Set up your workspace](/docs/workspace)
* [Configure connections](/docs/configure-connections)
* [Data out](/docs/data-out)
* [Webhooks](/docs/webhooks)
---
# Set up your workspace
Create a Sandbox or Production workspace, mint an API key, and authenticate your first request.
Source URL: /docs/workspace
# Set up your workspace
Create a Sandbox or Production workspace, mint an API key, and authenticate your first request.
Your workspace is the boundary for everything your team configures in Medblocks: API keys, patients, patient sessions, connection credentials, exports, webhooks, and dashboard monitoring.
### Sign in [#sign-in]
Open [app.medblocks.com](https://app.medblocks.com) and sign in with your work email. If this is your first time, Medblocks asks you to create a workspace before you continue.
### Create a Sandbox or Production workspace [#create-a-sandbox-or-production-workspace]
Give the workspace a real team or product name, such as `TrialMatched` or `Acme Health`. The workspace name appears in the dashboard, workspace switcher, invitations, and operational views.
Setting up a Sandbox workspace.
A workspace owns:
* API keys.
* Patients and patient sessions.
* Connection and authorization history.
* Export destinations.
* Webhook endpoints.
* Source configuration.
Every workspace is either **Sandbox** or **Production**.
| Environment | Use it for | API key prefix |
| ----------- | ------------------------------------------------------------------- | -------------- |
| Sandbox | Development, demos, synthetic patients, and vendor sandbox sources. | `mb_sk_sbx_` |
| Production | Live credentials, live patient data, and production exports. | `mb_sk_live_` |
The environment scopes which sources the workspace can see. A sandbox key cannot start sessions against production sources, and a production key cannot route patients to sandbox sources.
### Open the API Keys page [#open-the-api-keys-page]
From Settings, open API Keys to see active, revoked, and expired keys. Every workspace member can view the list.
### Create an API key [#create-an-api-key]
Click Create API Key, give it a descriptive name like `Production API` or `Sandbox Backend`, and confirm. The dashboard returns the full key once.
Only workspace owners and admins can create keys. A member sees the list without the Create API Key button, so ask an owner or admin for a key.
### Use the API key in your backend [#use-the-api-key-in-your-backend]
Copy the key immediately and store it in your server-side secret manager. API keys are server-side secrets; do not put them in browser code, mobile apps, or client-side bundles.
```bash title=".env"
MEDBLOCKS_API_KEY="mb_sk_sbx_..."
```
Load that environment variable in your backend or shell before calling Medblocks.
```bash
curl https://app.medblocks.com/patients \
-H "Authorization: Bearer $MEDBLOCKS_API_KEY" \
-H "Content-Type: application/json"
```
### Pick the next setup path [#pick-the-next-setup-path]
After the workspace exists, choose the setup path that matches what you want to do first.
| Goal | Next page |
| -------------------------------- | ------------------------------------------------------------ |
| Configure source credentials | [Configure connections](/docs/configure-connections) |
| Build with synthetic data | [Test with sandboxes](/docs/sandboxes) |
| Use the dashboard first | [Use Medblocks without code](/docs/without-code) |
| Build patient access in your app | [Patient access quickstart](/docs/patient-access/quickstart) |
## Rotate or revoke keys [#rotate-or-revoke-keys]
Manage key lifecycle from Settings, API Keys. Create the replacement key before revoking the old one so nothing breaks.
Workspace owners and admins can create, revoke, and delete keys. Members can view the keys and nothing more.
## See also [#see-also]
* [Configure connections](/docs/configure-connections)
* [Test with sandboxes](/docs/sandboxes)
* [Patient access quickstart](/docs/patient-access/quickstart)
* [Security and compliance](/docs/security-and-compliance)
* [API reference](/docs/reference/api)
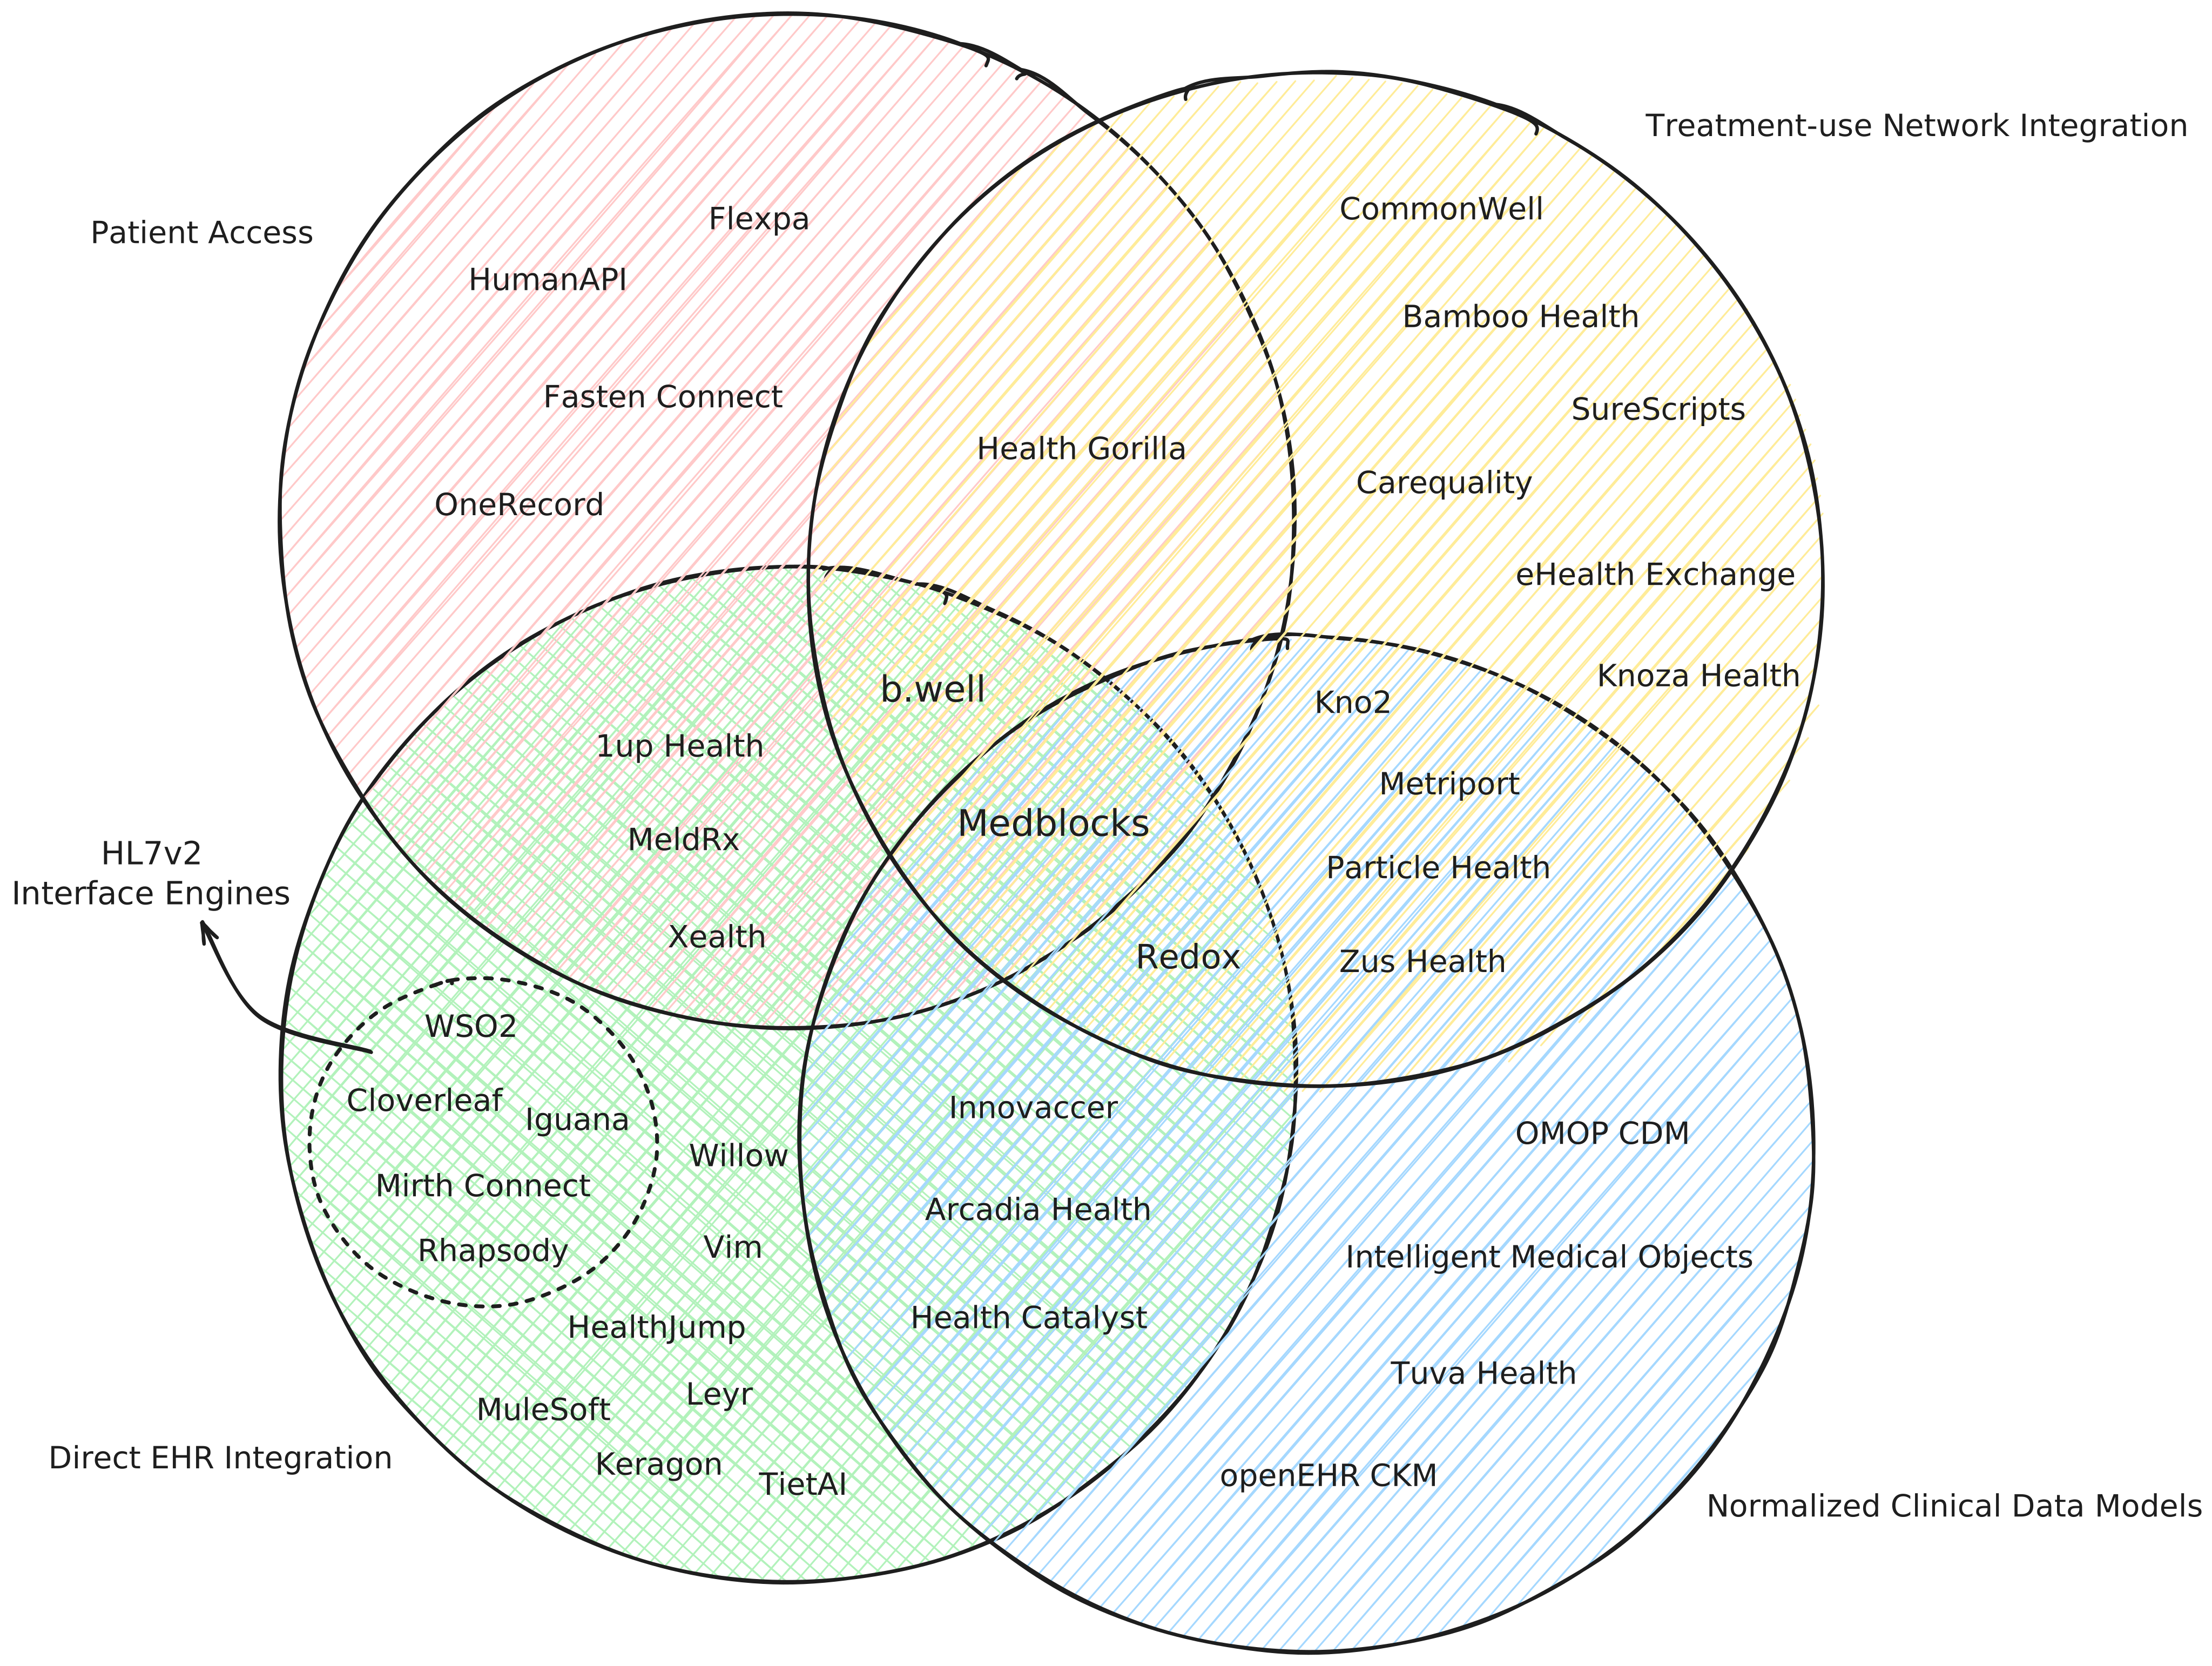
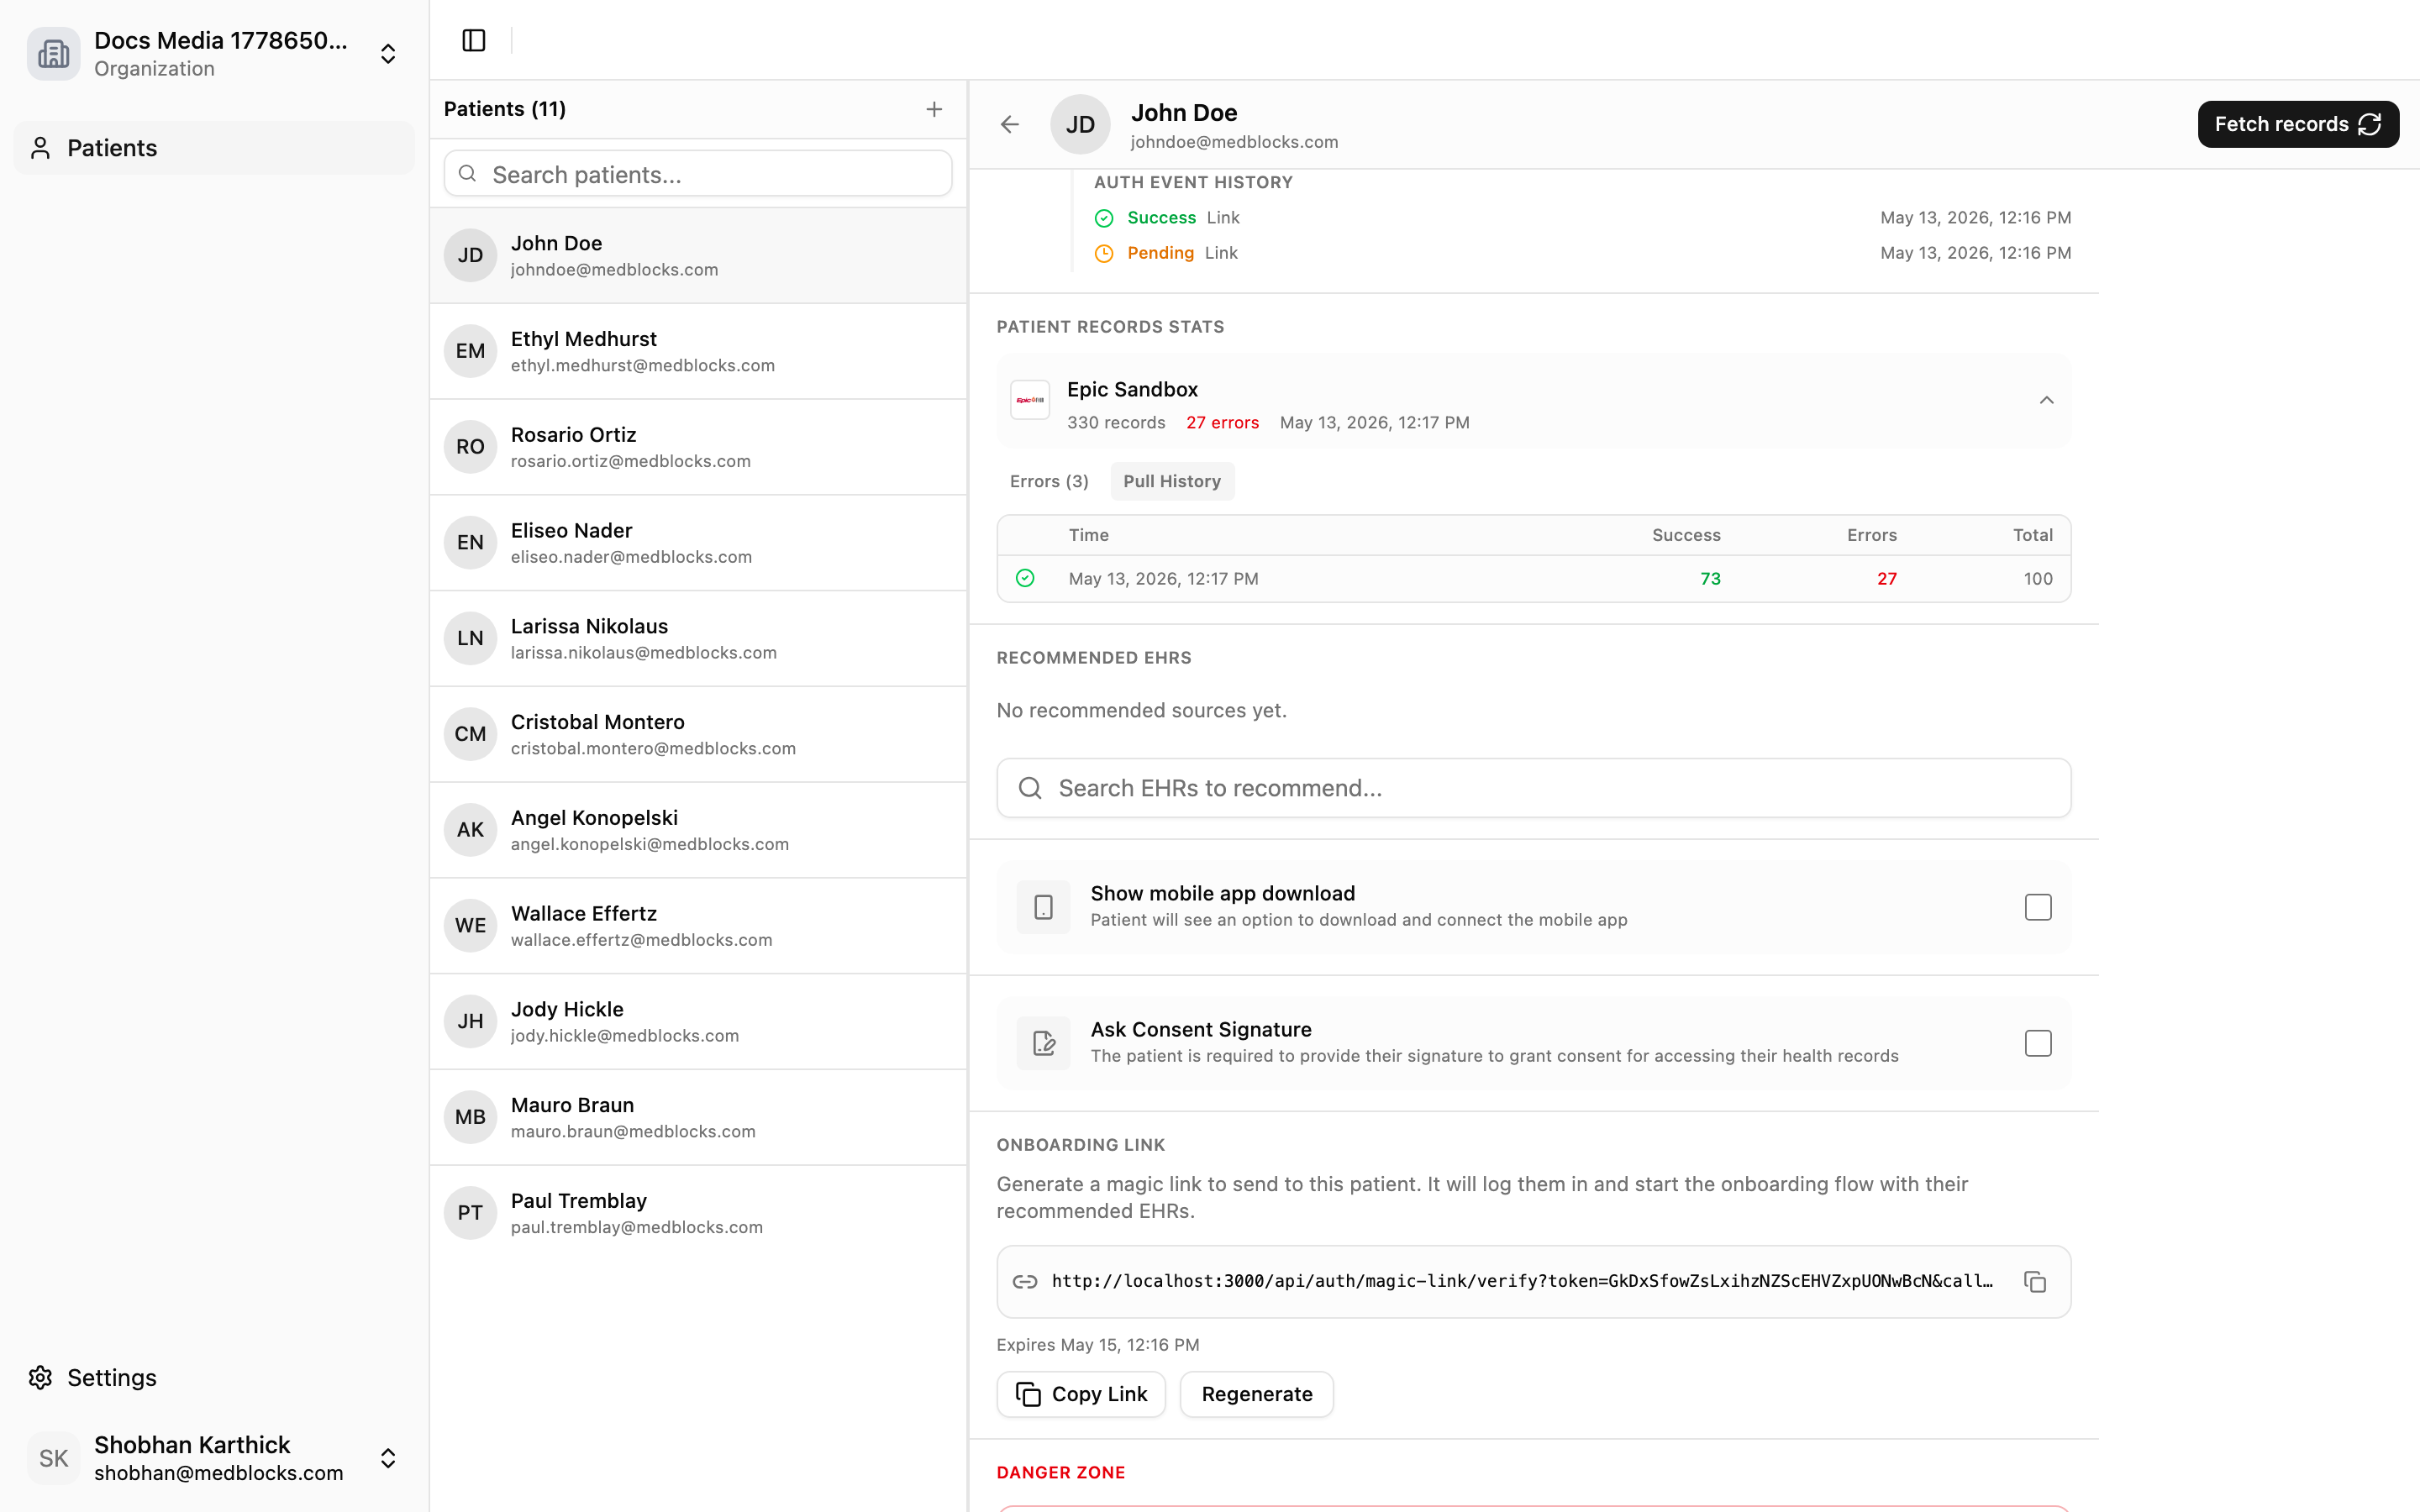 ## What to look for [#what-to-look-for]
| Field | What it tells you |
| ----------------- | ----------------------------------------------------------- |
| Source name | Which EHR or payer the attempt was against |
| Event status | Whether the attempt succeeded or which failure state it hit |
| Error code | A stable code you can quote to support |
| Error description | The human-readable detail |
| Timestamp | When the attempt happened |
Quote the stable error code and timestamp when you contact support. The human-readable description is useful for operators, but the code is what makes the event searchable.
## Common outcomes [#common-outcomes]
| Scenario | Interpretation |
| ---------------------------------------- | --------------------------------------------------------------------- |
| Success with an active connection | The patient authorized and Medblocks stored usable access |
| The patient denied consent at the portal | The patient reached the portal but declined to approve access |
| The portal returned an OAuth error | The source rejected the request during authorization |
| A later refresh-token failure | A previously active connection lost its access and needs reconnecting |
## How this differs from pull history [#how-this-differs-from-pull-history]
Auth event history answers “what happened during authorization?” Pull history answers “what happened while retrieving records after authorization?”
| Dashboard view | Best for |
| ------------------ | ----------------------------------------------------------------- |
| Auth event history | Sign-in, consent, OAuth, token exchange, refresh-token issues. |
| Pull history | FHIR retrieval, pagination, resource errors, record availability. |
## What your app should log [#what-your-app-should-log]
Log these fields so your application logs line up with what the dashboard shows.
* `session_id`
* `connection_id`
* `success`
* `error`
* `error_description`
* the Medblocks `request_id` for any failed API call
## See also [#see-also]
## What to look for [#what-to-look-for]
| Field | What it tells you |
| ----------------- | ----------------------------------------------------------- |
| Source name | Which EHR or payer the attempt was against |
| Event status | Whether the attempt succeeded or which failure state it hit |
| Error code | A stable code you can quote to support |
| Error description | The human-readable detail |
| Timestamp | When the attempt happened |
Quote the stable error code and timestamp when you contact support. The human-readable description is useful for operators, but the code is what makes the event searchable.
## Common outcomes [#common-outcomes]
| Scenario | Interpretation |
| ---------------------------------------- | --------------------------------------------------------------------- |
| Success with an active connection | The patient authorized and Medblocks stored usable access |
| The patient denied consent at the portal | The patient reached the portal but declined to approve access |
| The portal returned an OAuth error | The source rejected the request during authorization |
| A later refresh-token failure | A previously active connection lost its access and needs reconnecting |
## How this differs from pull history [#how-this-differs-from-pull-history]
Auth event history answers “what happened during authorization?” Pull history answers “what happened while retrieving records after authorization?”
| Dashboard view | Best for |
| ------------------ | ----------------------------------------------------------------- |
| Auth event history | Sign-in, consent, OAuth, token exchange, refresh-token issues. |
| Pull history | FHIR retrieval, pagination, resource errors, record availability. |
## What your app should log [#what-your-app-should-log]
Log these fields so your application logs line up with what the dashboard shows.
* `session_id`
* `connection_id`
* `success`
* `error`
* `error_description`
* the Medblocks `request_id` for any failed API call
## See also [#see-also]
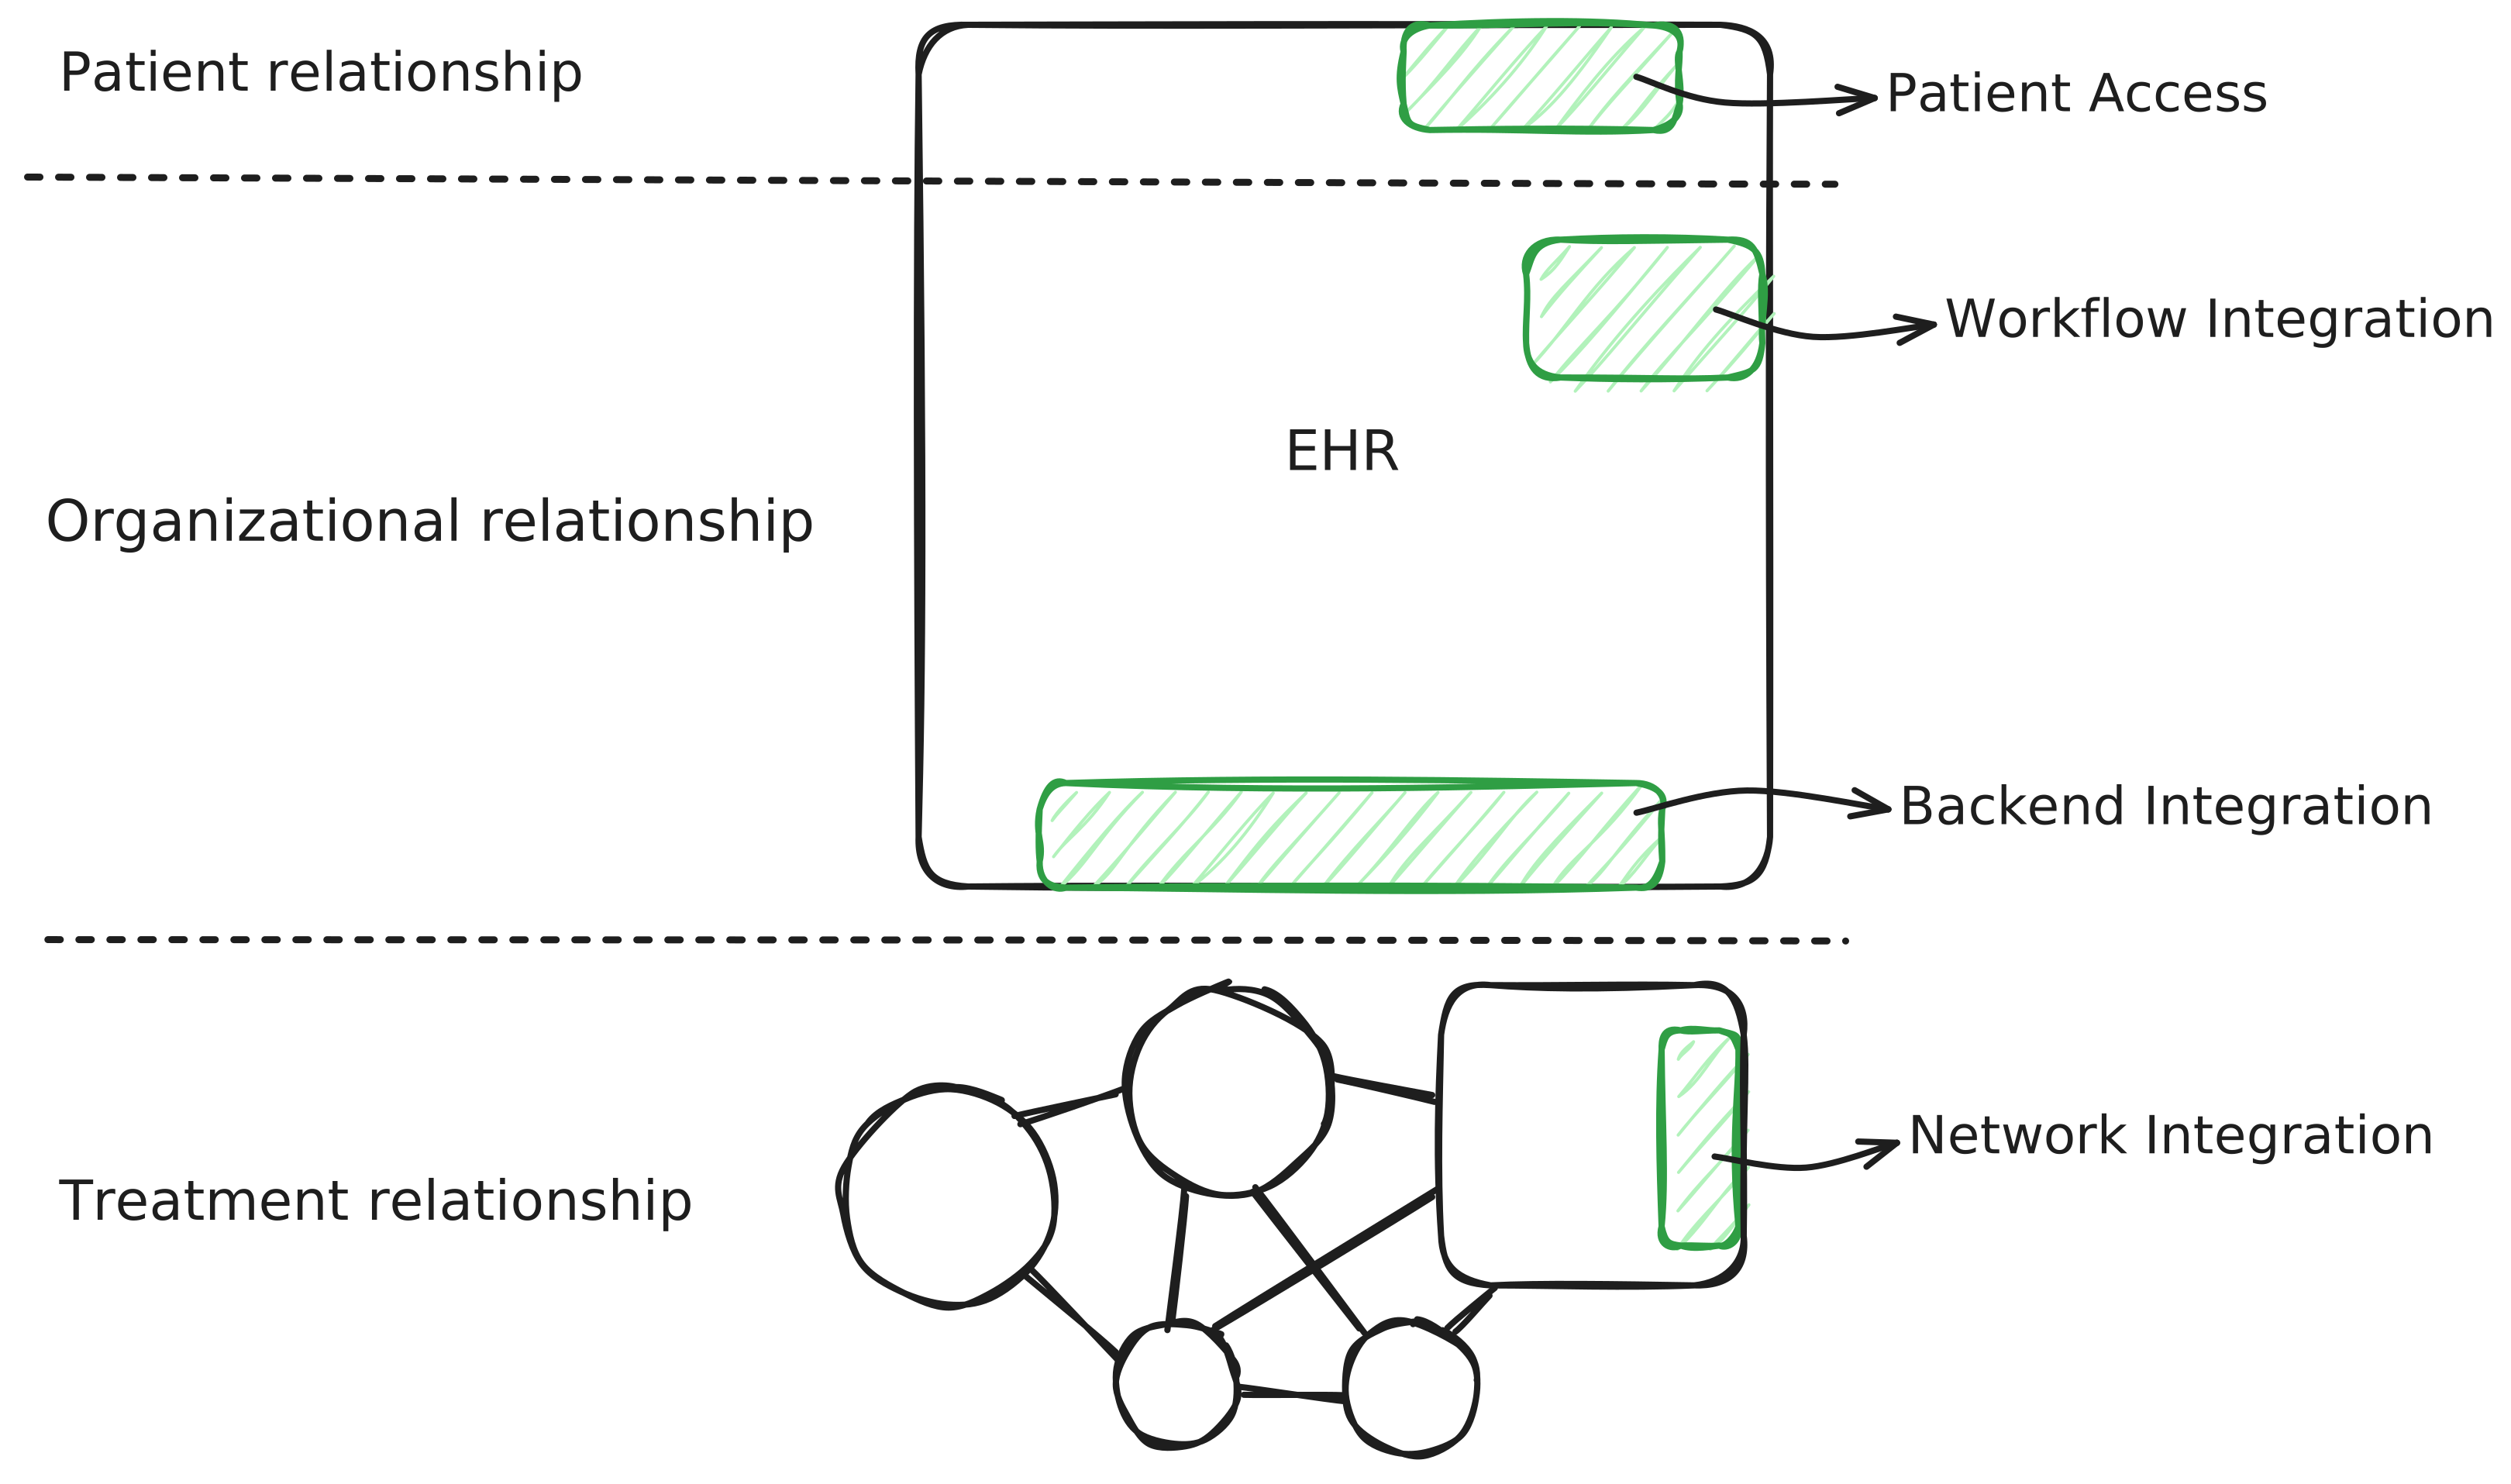
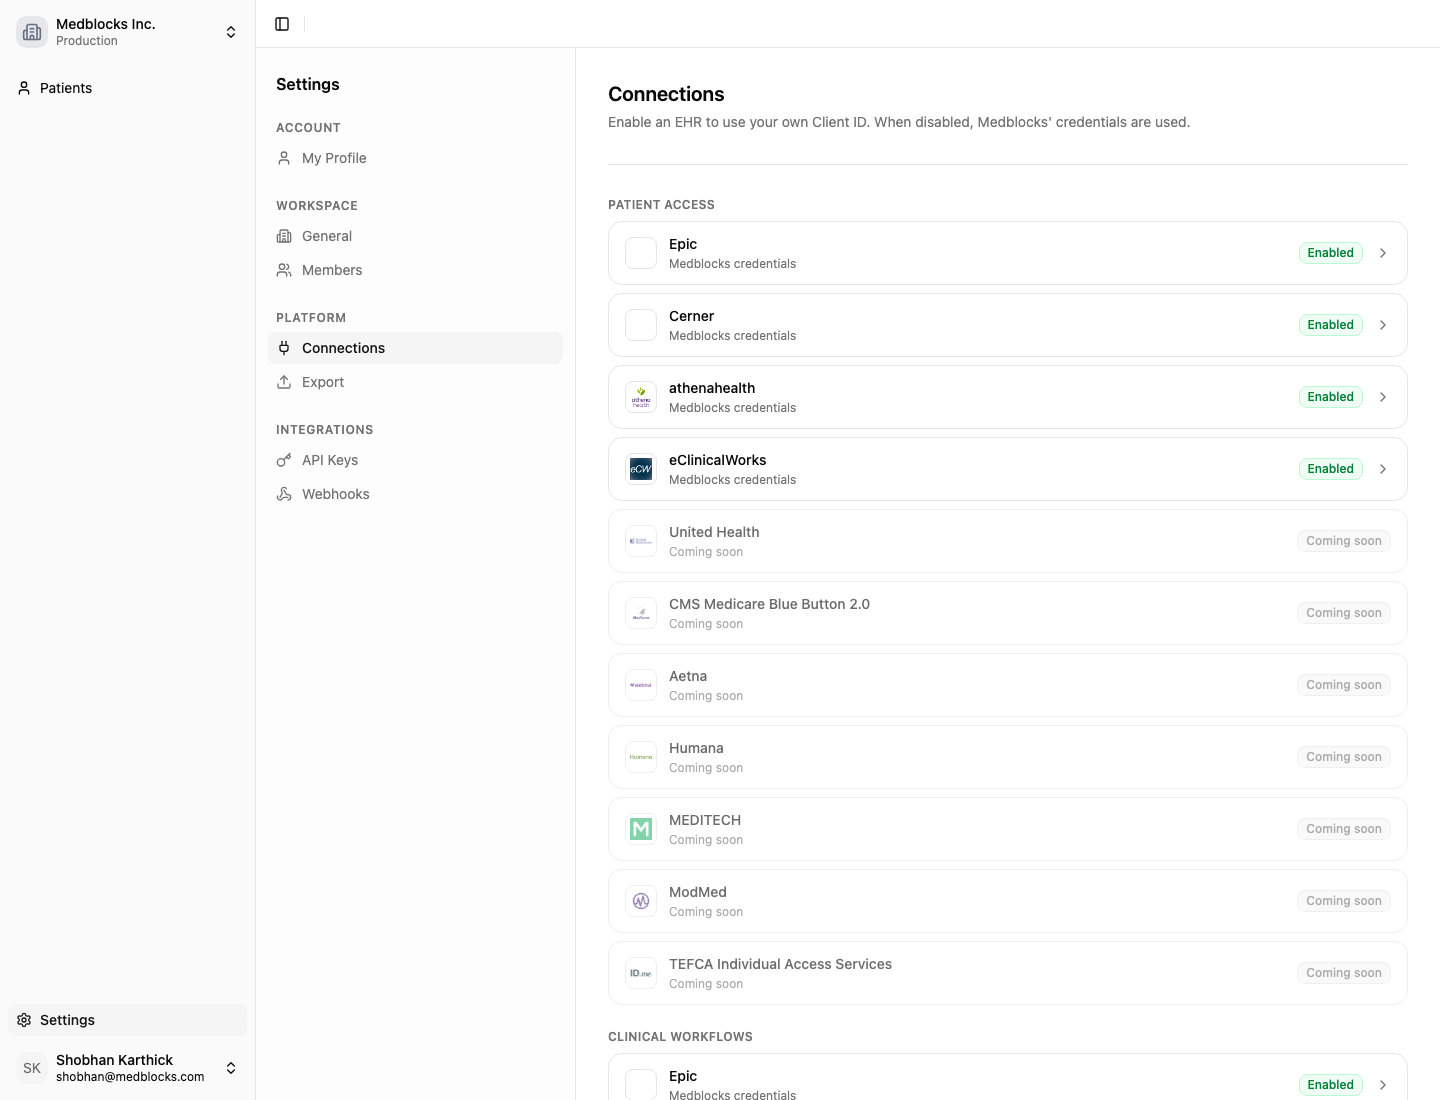 ## Integration patterns [#integration-patterns]
| Group | What it configures |
| ------------------ | --------------------------------------------------------------------- |
| Patient Access | Patient-facing SMART on FHIR and portal connections. |
| Clinical Workflows | SMART app launch and CDS Hooks inside an EHR workflow. |
| Backend | Server-to-server access such as SMART Backend Services and bulk data. |
| Network | Network and exchange access such as CommonWell. |
Each provider tile shows whether your workspace is using Medblocks credentials, custom credentials, or whether that provider is not configurable yet.
## Guides [#guides]
## Integration patterns [#integration-patterns]
| Group | What it configures |
| ------------------ | --------------------------------------------------------------------- |
| Patient Access | Patient-facing SMART on FHIR and portal connections. |
| Clinical Workflows | SMART app launch and CDS Hooks inside an EHR workflow. |
| Backend | Server-to-server access such as SMART Backend Services and bulk data. |
| Network | Network and exchange access such as CommonWell. |
Each provider tile shows whether your workspace is using Medblocks credentials, custom credentials, or whether that provider is not configurable yet.
## Guides [#guides]
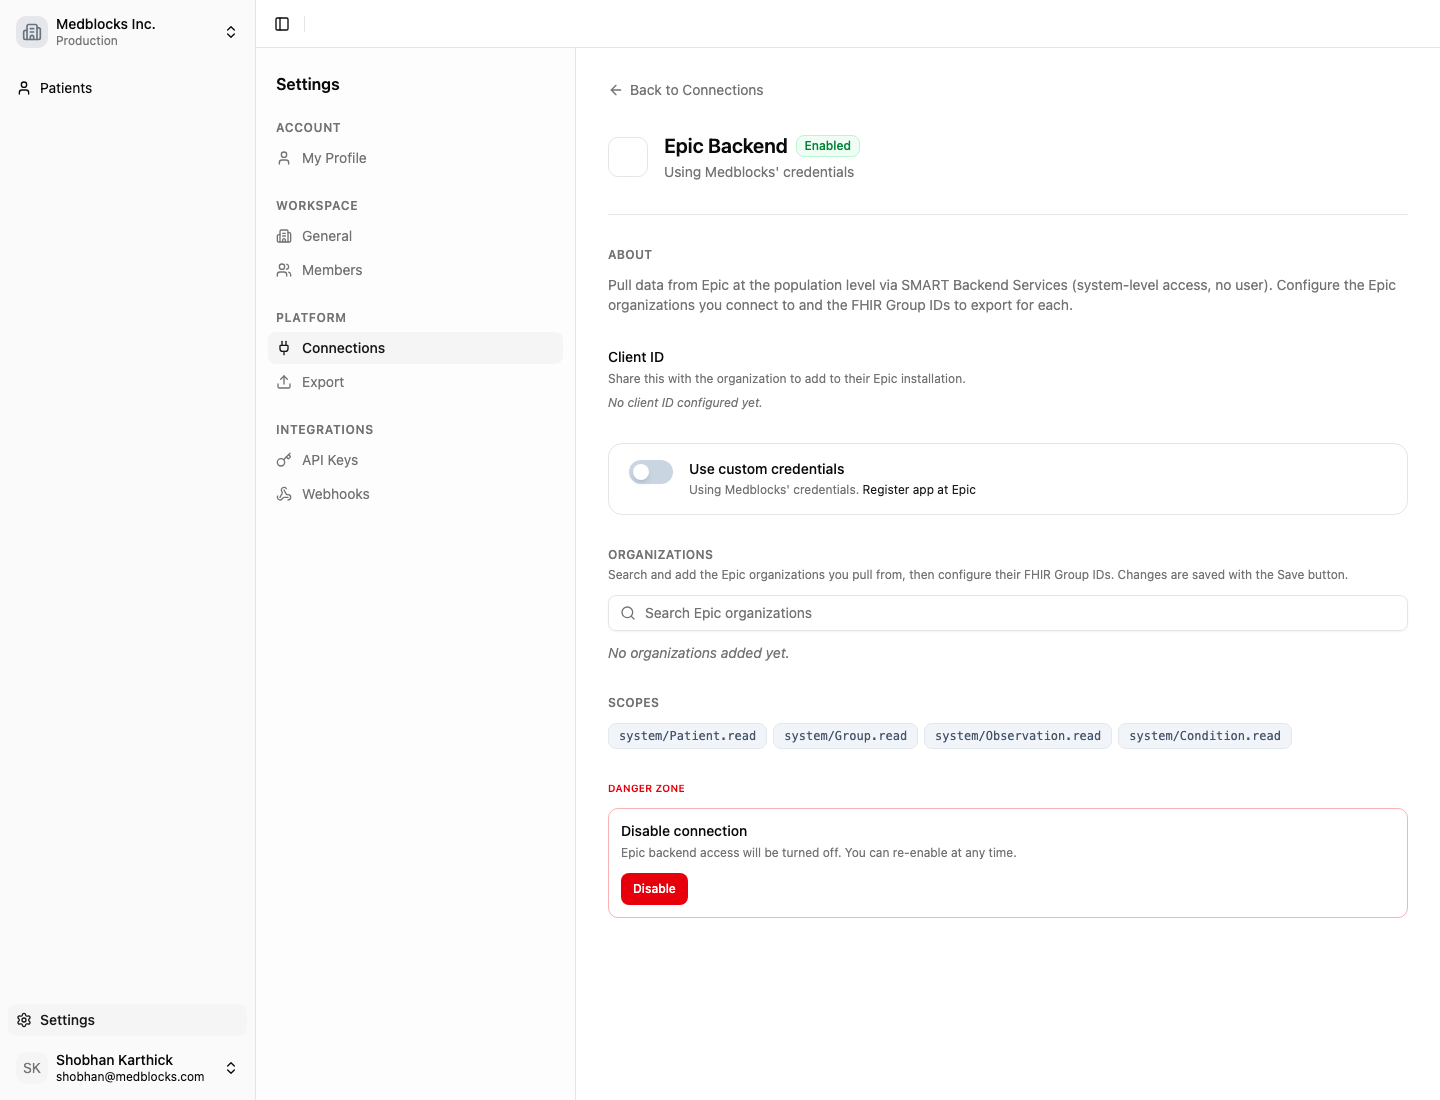 ## What the page shows [#what-the-page-shows]
The credential section shows the backend services Client ID and JWKS URI used for Epic. When you bring your own Epic backend app, copy the JWKS URI from Medblocks into the EHR developer setup, then save the Epic Client ID back in Medblocks.
Organizations are the Epic sites this workspace can pull from. Add only the organizations approved for this workspace and environment.
FHIR Group IDs define the Epic groups used for population-level retrieval. They are often different between Sandbox and Production, so keep them scoped to the right workspace.
The credential mode tells you whether the connection runs with Medblocks-managed credentials or credentials owned by your organization.
## Configure Epic backend access [#configure-epic-backend-access]
1. Register or open the Epic backend app.
2. Copy the JWKS URI from Medblocks into the Epic app configuration.
3. Copy the Epic backend Client ID back into Medblocks if you are using your own credentials.
4. Search for and add the Epic organizations you pull from.
5. Add the FHIR Group IDs for each organization.
6. Save the connection.
Backend configuration feeds population-level retrieval and downstream exports. Keep Sandbox and Production workspaces separate so test Group IDs and production Group IDs do not mix.
## What the page shows [#what-the-page-shows]
The credential section shows the backend services Client ID and JWKS URI used for Epic. When you bring your own Epic backend app, copy the JWKS URI from Medblocks into the EHR developer setup, then save the Epic Client ID back in Medblocks.
Organizations are the Epic sites this workspace can pull from. Add only the organizations approved for this workspace and environment.
FHIR Group IDs define the Epic groups used for population-level retrieval. They are often different between Sandbox and Production, so keep them scoped to the right workspace.
The credential mode tells you whether the connection runs with Medblocks-managed credentials or credentials owned by your organization.
## Configure Epic backend access [#configure-epic-backend-access]
1. Register or open the Epic backend app.
2. Copy the JWKS URI from Medblocks into the Epic app configuration.
3. Copy the Epic backend Client ID back into Medblocks if you are using your own credentials.
4. Search for and add the Epic organizations you pull from.
5. Add the FHIR Group IDs for each organization.
6. Save the connection.
Backend configuration feeds population-level retrieval and downstream exports. Keep Sandbox and Production workspaces separate so test Group IDs and production Group IDs do not mix.
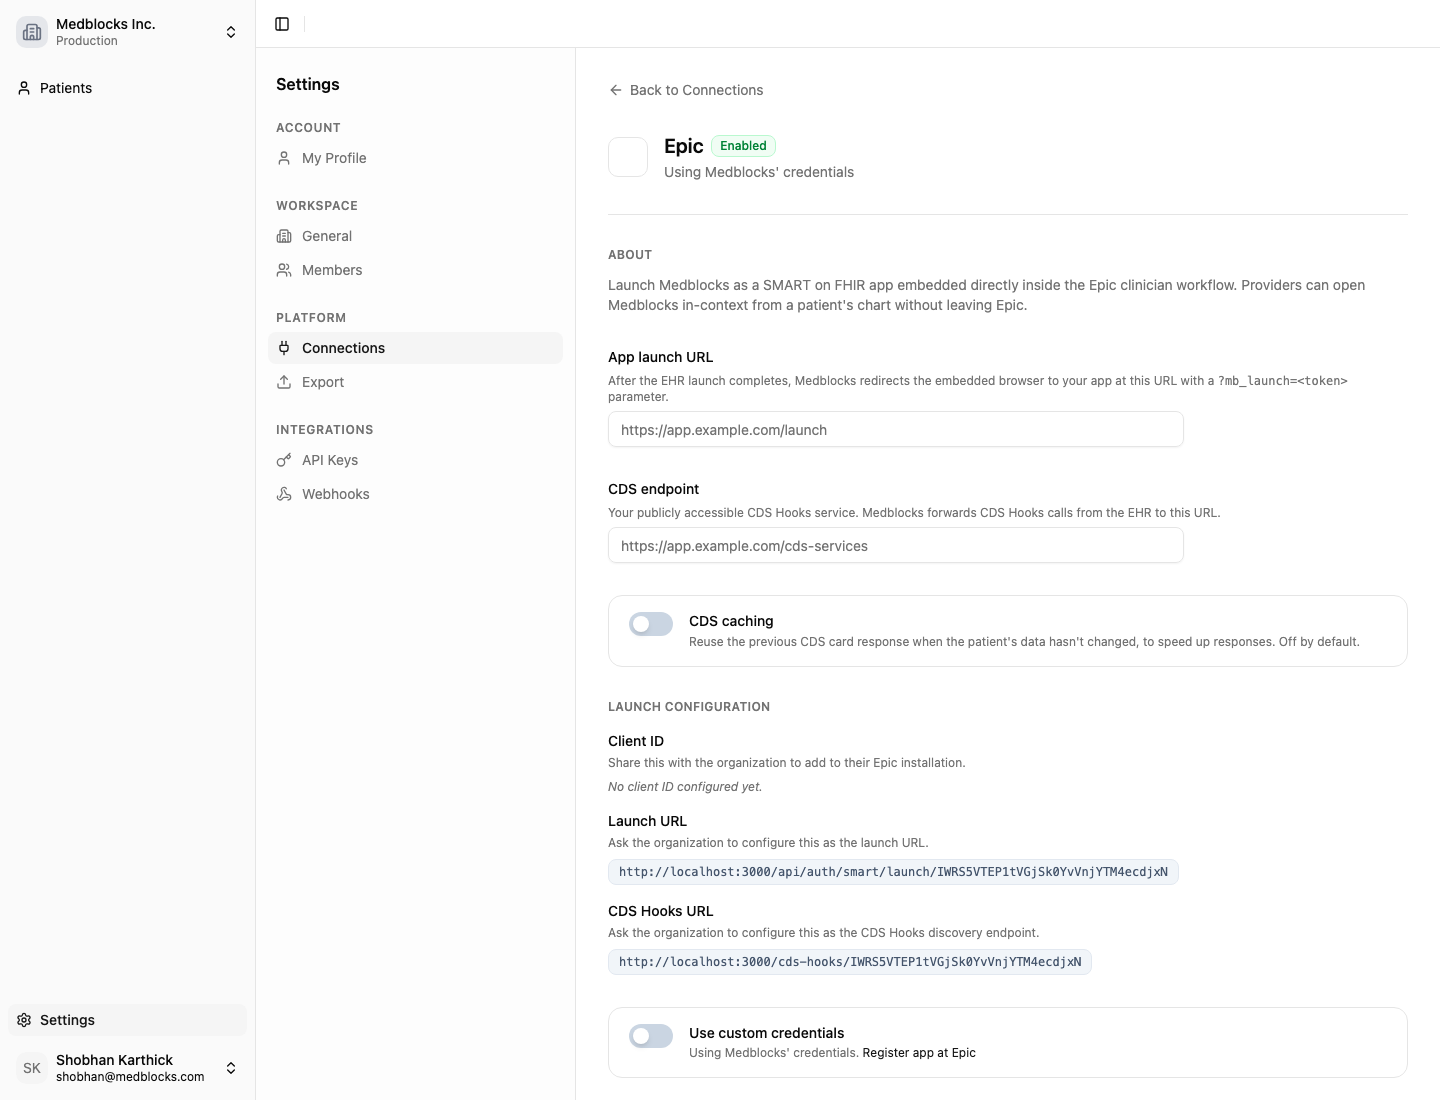 ## What the page shows [#what-the-page-shows]
The app launch URL is where Medblocks sends the clinician after the EHR launch succeeds. This is usually a route in your app that accepts a Medblocks launch token and loads the clinical workflow with patient context already attached.
The CDS endpoint is your service for returning CDS Hooks cards. If your product only needs a full embedded app, you can start with SMART launch. If it also needs to show recommendations inside native EHR moments, add CDS Hooks.
The Launch URL and CDS Hooks URL are the values to share with the EHR administrator. They are generated for this workspace and provider, so keep Sandbox and Production values separate.
When the connection uses your own credentials, Medblocks shows the Redirect URI, JWKS URI, and Client ID values needed by the EHR developer setup. Medblocks still handles the server-side launch exchange, but the upstream app identity belongs to your organization.
## Configure the Epic launch [#configure-the-epic-launch]
1. Add your app launch URL. This is where Medblocks sends the clinician after the EHR launch succeeds.
2. Add your CDS endpoint if you want Medblocks to forward CDS Hooks calls to your service.
3. Share the Launch URL and CDS Hooks URL with the Epic administrator.
4. Turn on custom credentials if your organization owns the Epic app registration.
5. Save the connection.
The launch returns to your app with a Medblocks launch token. Your backend can use that token to resolve the launch context and continue the clinician workflow.
## What the page shows [#what-the-page-shows]
The app launch URL is where Medblocks sends the clinician after the EHR launch succeeds. This is usually a route in your app that accepts a Medblocks launch token and loads the clinical workflow with patient context already attached.
The CDS endpoint is your service for returning CDS Hooks cards. If your product only needs a full embedded app, you can start with SMART launch. If it also needs to show recommendations inside native EHR moments, add CDS Hooks.
The Launch URL and CDS Hooks URL are the values to share with the EHR administrator. They are generated for this workspace and provider, so keep Sandbox and Production values separate.
When the connection uses your own credentials, Medblocks shows the Redirect URI, JWKS URI, and Client ID values needed by the EHR developer setup. Medblocks still handles the server-side launch exchange, but the upstream app identity belongs to your organization.
## Configure the Epic launch [#configure-the-epic-launch]
1. Add your app launch URL. This is where Medblocks sends the clinician after the EHR launch succeeds.
2. Add your CDS endpoint if you want Medblocks to forward CDS Hooks calls to your service.
3. Share the Launch URL and CDS Hooks URL with the Epic administrator.
4. Turn on custom credentials if your organization owns the Epic app registration.
5. Save the connection.
The launch returns to your app with a Medblocks launch token. Your backend can use that token to resolve the launch context and continue the clinician workflow.
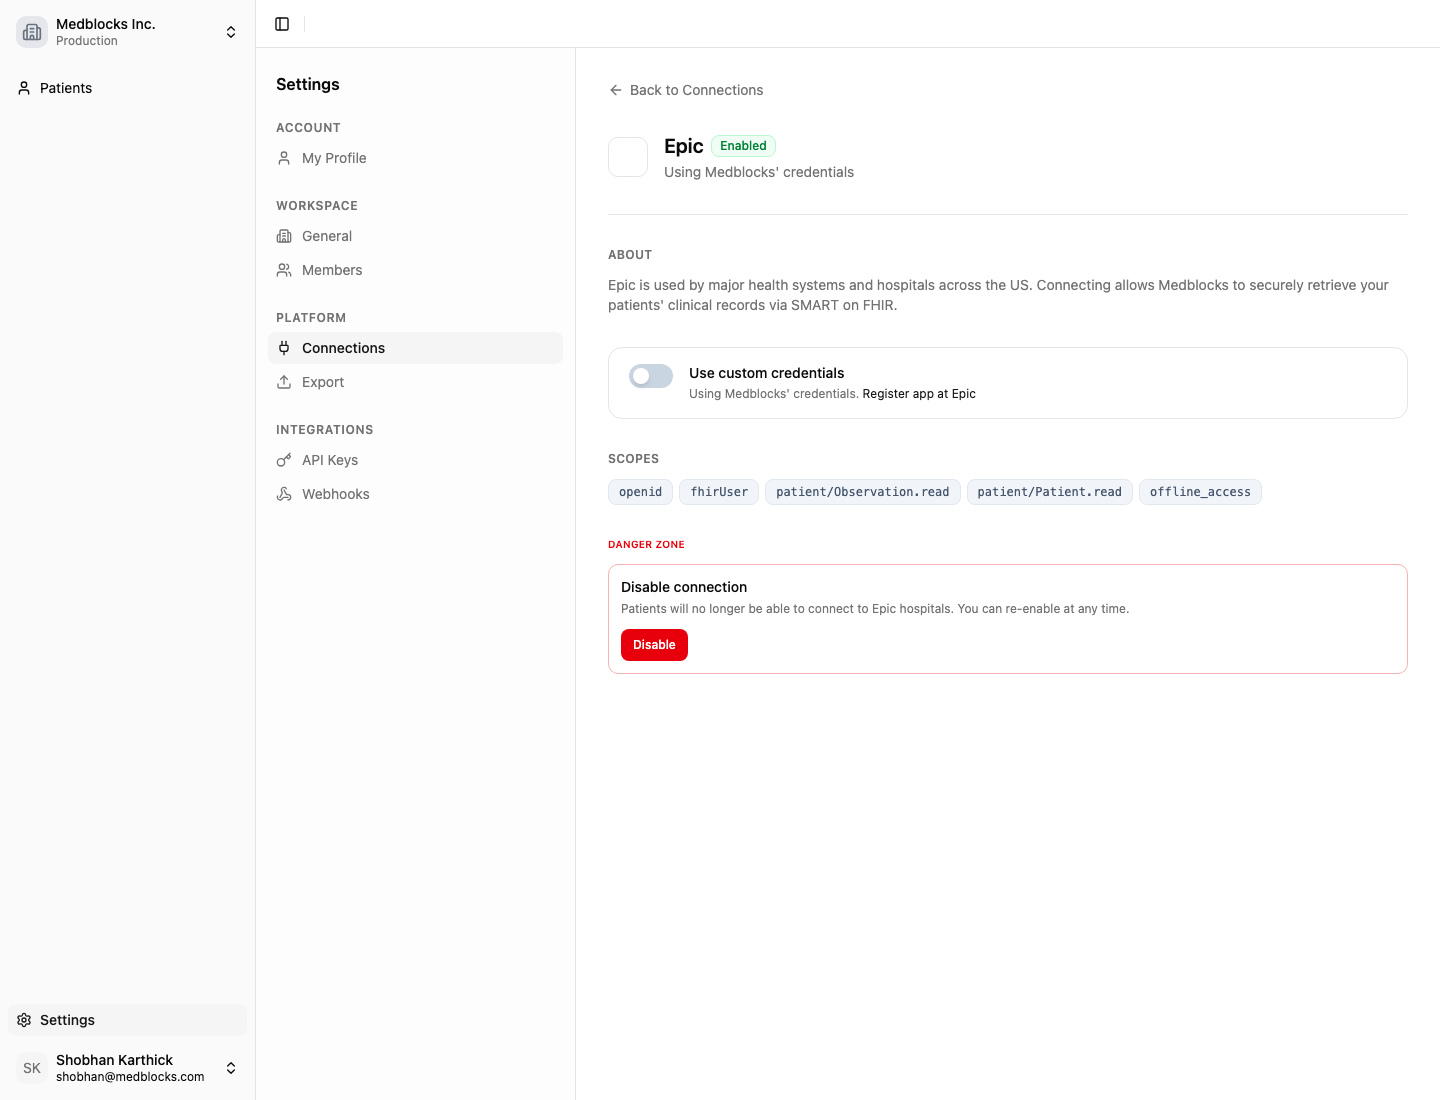 ## What the page shows [#what-the-page-shows]
The status shows whether patients can connect to Epic from this workspace. When the connection is enabled, patient sessions can route patients to Epic portals.
The credential mode tells you whether the workspace is using Medblocks credentials or your own Epic app credentials. If you use your own credentials, the page shows the Redirect URI and JWKS URI to copy into the Epic developer configuration.
The scopes section lists the SMART scopes Medblocks requests during patient authorization. These are the permissions Epic shows as part of the patient approval flow.
## Credentials [#credentials]
By default this connection uses Medblocks-supplied credentials, so patients can connect to Epic right away without you registering an Epic app. This is the quickest way to start.
Turn on **Use custom credentials** when patients should approve your own registered Epic app instead. Use the [Epic patient access guide](/docs/patient-access/epic) for the current Epic developer setup. After the Epic app is ready, copy the Redirect URI and JWKS URI from Medblocks into the EHR developer configuration, then copy the Epic Client ID back into Medblocks and save the connection.
Patients keep using the same patient session flow after this change. The only difference is which upstream Epic app identity handles the approval.
## See also [#see-also]
## What the page shows [#what-the-page-shows]
The status shows whether patients can connect to Epic from this workspace. When the connection is enabled, patient sessions can route patients to Epic portals.
The credential mode tells you whether the workspace is using Medblocks credentials or your own Epic app credentials. If you use your own credentials, the page shows the Redirect URI and JWKS URI to copy into the Epic developer configuration.
The scopes section lists the SMART scopes Medblocks requests during patient authorization. These are the permissions Epic shows as part of the patient approval flow.
## Credentials [#credentials]
By default this connection uses Medblocks-supplied credentials, so patients can connect to Epic right away without you registering an Epic app. This is the quickest way to start.
Turn on **Use custom credentials** when patients should approve your own registered Epic app instead. Use the [Epic patient access guide](/docs/patient-access/epic) for the current Epic developer setup. After the Epic app is ready, copy the Redirect URI and JWKS URI from Medblocks into the EHR developer configuration, then copy the Epic Client ID back into Medblocks and save the connection.
Patients keep using the same patient session flow after this change. The only difference is which upstream Epic app identity handles the approval.
## See also [#see-also]
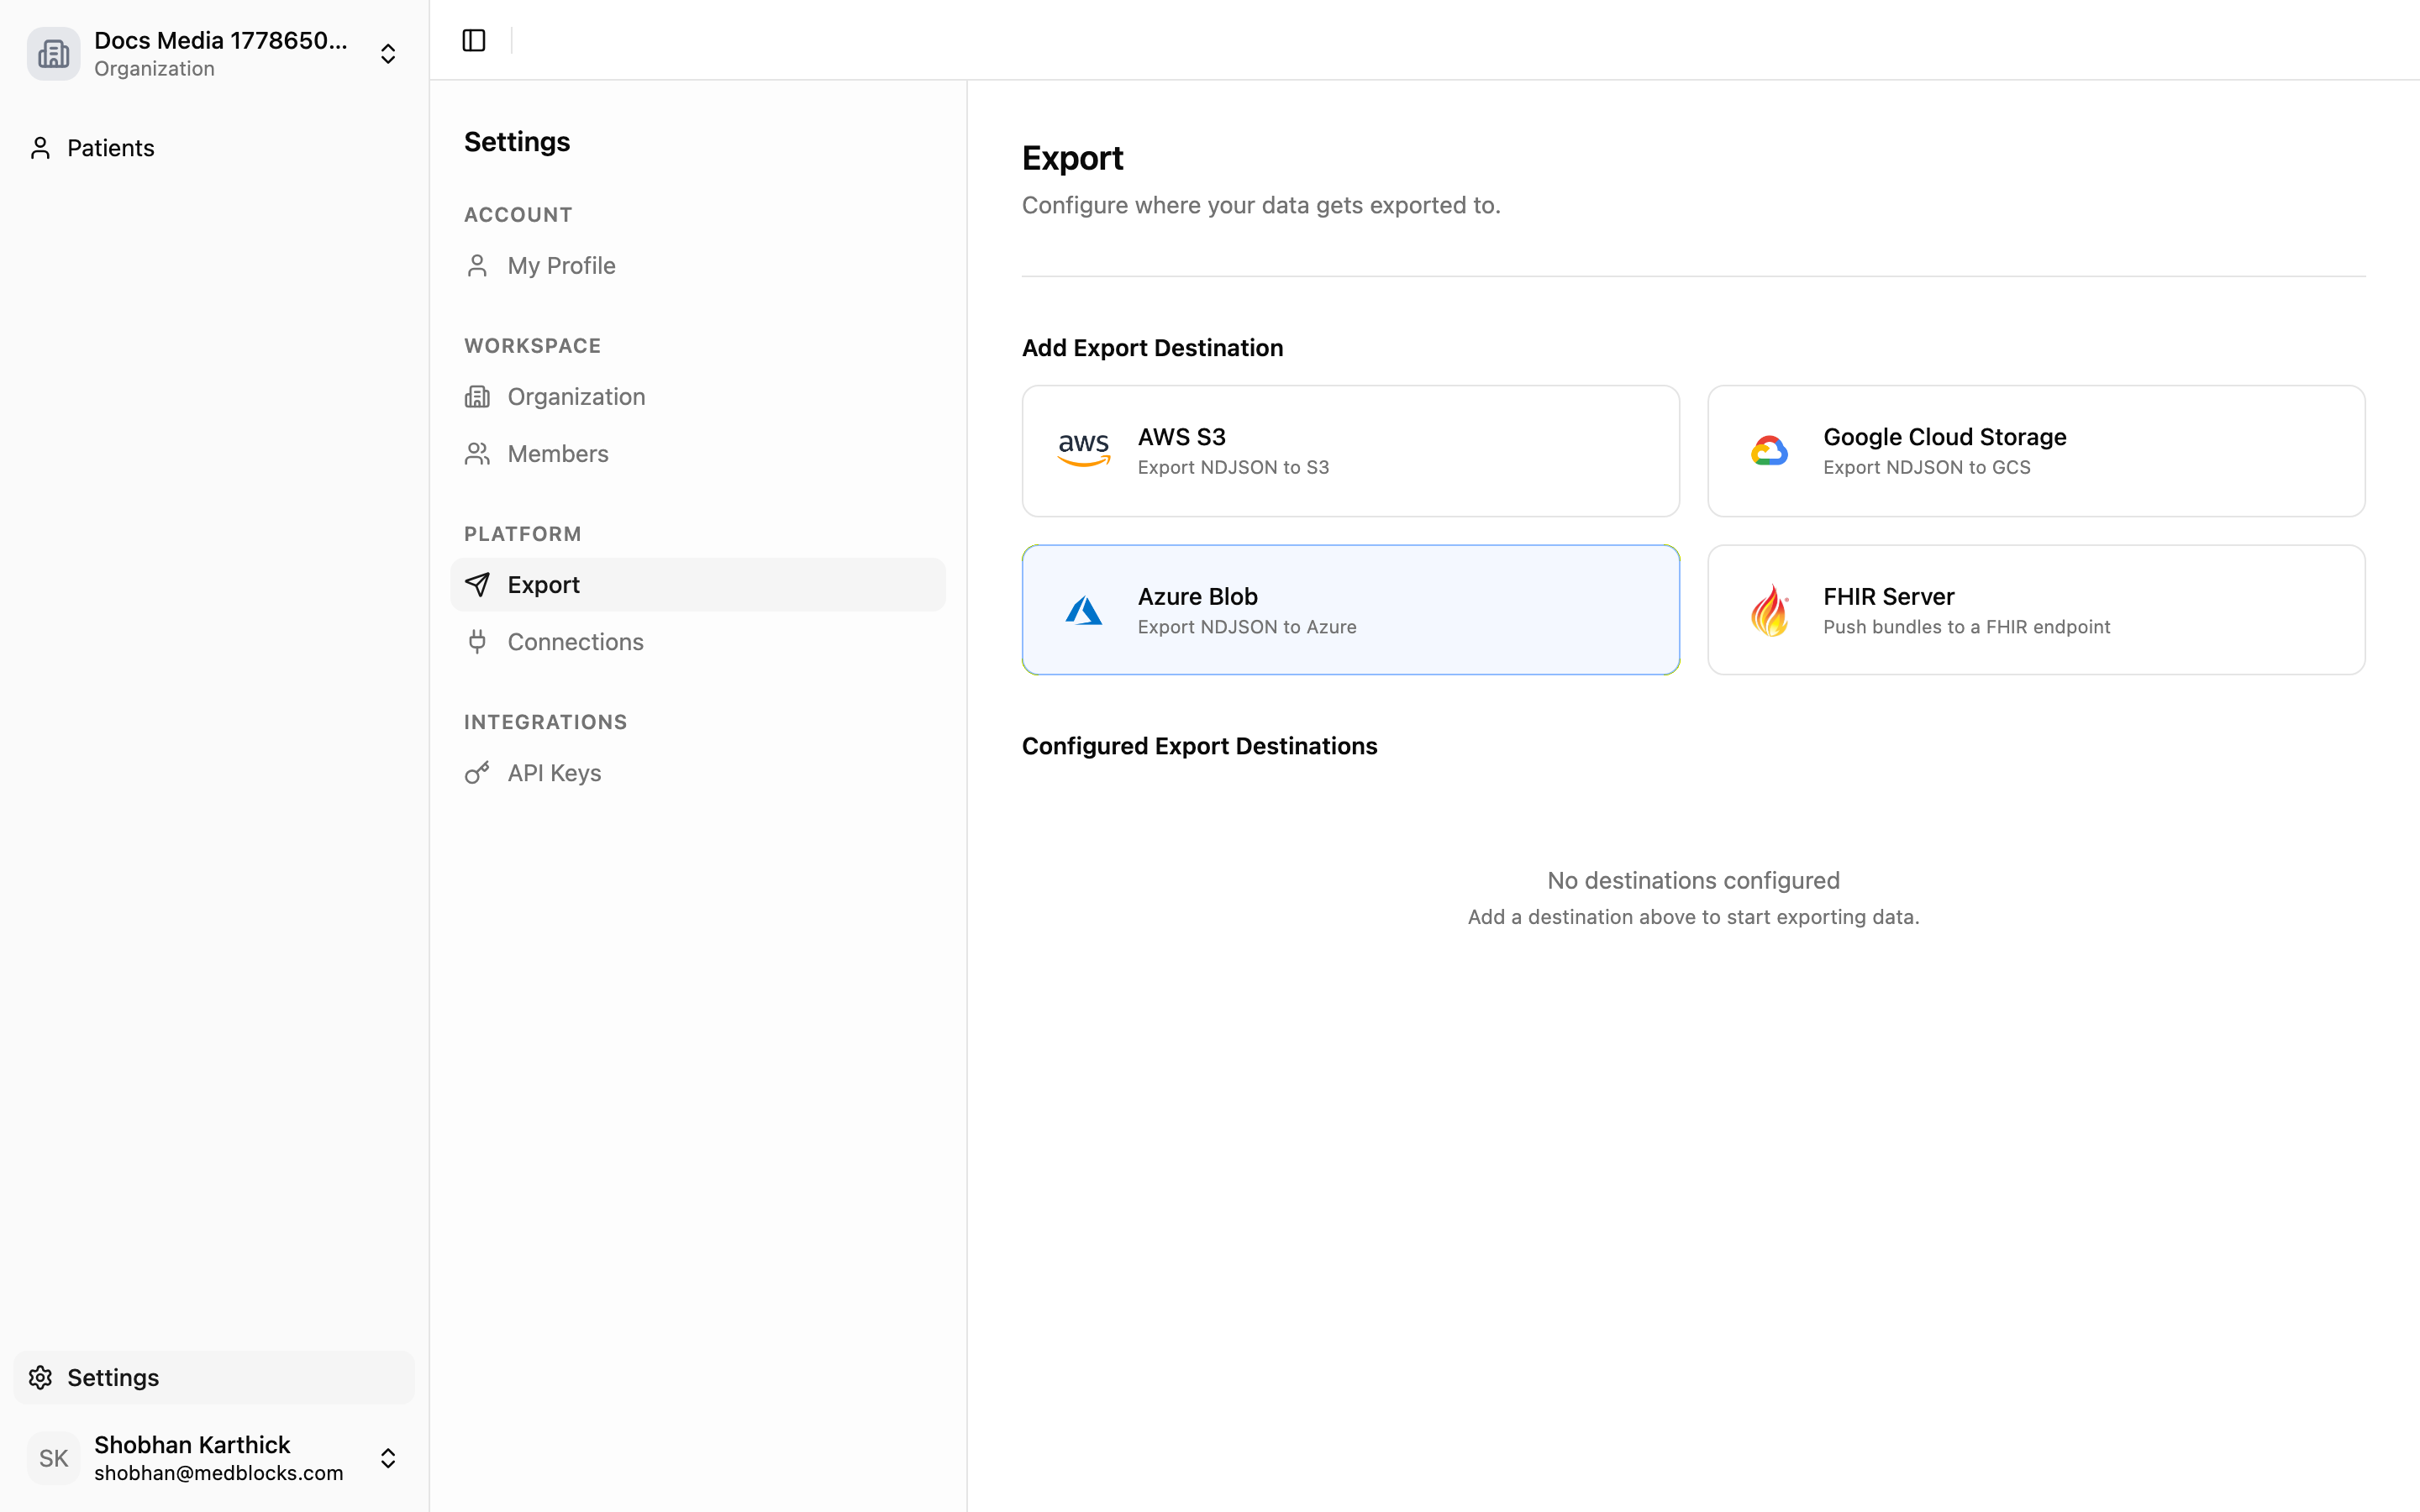 ## Background Pull Comes First [#background-pull-comes-first]
A patient session can finish before every record is available. After a connection becomes active, Medblocks schedules retrieval jobs for the resources supported by that source. Those jobs can take time because real portals paginate slowly, return large histories, vary by resource support, and enforce different rate limits.
When the pull settles, enabled destinations can export the data. Treat the patient-facing return as “access was granted” and use [Pull monitoring](/docs/pull-monitoring) for record availability.
## Export destinations and runs [#export-destinations-and-runs]
An export destination stores where records should go and how Medblocks should authenticate to that destination.
| Field | Purpose |
| ------------------ | ------------------------------------------------ |
| Destination name | Human-readable label in the dashboard. |
| Destination type | FHIR server or object storage. |
| Credentials | Stored server-side and used only by export jobs. |
| Enabled state | Disabled destinations are skipped. |
| Last exported time | Watermark for delta exports. |
Each time Medblocks exports records, it creates an export run. A run records what destination was used, why it started, how many patients and resources were processed, when it started and finished, and any errors that happened.
## Triggers [#triggers]
Exports can start from these events.
| Trigger | Behavior |
| ----------------------- | -------------------------------------------------------- |
| Destination added | Runs a first backfill for that destination. |
| Pull completed | Sends new or changed data after patient data has landed. |
| Destination reactivated | Catches up from the previous watermark. |
| Manual retry | Reprocesses failed items from a failed or partial run. |
Each destination runs independently. One destination can fail without blocking another.
## Events [#events]
Events tell your backend that something happened. Webhooks are useful when you do not want to poll:
* A patient session completed.
* A background pull finished.
* A background pull failed.
* A connection lost access and needs the patient to reconnect.
Use [Webhooks](/docs/webhooks) to register a receiver and verify signatures.
## API And SDK Reads [#api-and-sdk-reads]
The public API and TypeScript SDK handle operational reads such as patients, patient sessions, connections, webhooks, errors, and pagination.
For patient records, call `mb.patients.records`. Medblocks returns the patient’s latest stored resources as a paginated list, and each item names the EHR source it came from. The SDK calls [`GET /patients/{id}/records`](/docs/reference/api/get-patient-records) under the hood.
```ts
import { Medblocks } from "medblocks";
const mb = new Medblocks(process.env.MEDBLOCKS_API_KEY!);
const page = await mb.patients.records("user_42", { count: 100 });
```
Use direct reads when your backend needs one patient’s current record on demand. Use exports when Medblocks should keep a destination current automatically.
## Choosing A Path [#choosing-a-path]
| Need | Use |
| ---------------------------------- | --------------------- |
| Keep another system current | Exports |
| Trigger work when records arrive | Webhooks |
| Inspect integration state | API or SDK |
| Pull a patient’s records on demand | `mb.patients.records` |
## See also [#see-also]
## Background Pull Comes First [#background-pull-comes-first]
A patient session can finish before every record is available. After a connection becomes active, Medblocks schedules retrieval jobs for the resources supported by that source. Those jobs can take time because real portals paginate slowly, return large histories, vary by resource support, and enforce different rate limits.
When the pull settles, enabled destinations can export the data. Treat the patient-facing return as “access was granted” and use [Pull monitoring](/docs/pull-monitoring) for record availability.
## Export destinations and runs [#export-destinations-and-runs]
An export destination stores where records should go and how Medblocks should authenticate to that destination.
| Field | Purpose |
| ------------------ | ------------------------------------------------ |
| Destination name | Human-readable label in the dashboard. |
| Destination type | FHIR server or object storage. |
| Credentials | Stored server-side and used only by export jobs. |
| Enabled state | Disabled destinations are skipped. |
| Last exported time | Watermark for delta exports. |
Each time Medblocks exports records, it creates an export run. A run records what destination was used, why it started, how many patients and resources were processed, when it started and finished, and any errors that happened.
## Triggers [#triggers]
Exports can start from these events.
| Trigger | Behavior |
| ----------------------- | -------------------------------------------------------- |
| Destination added | Runs a first backfill for that destination. |
| Pull completed | Sends new or changed data after patient data has landed. |
| Destination reactivated | Catches up from the previous watermark. |
| Manual retry | Reprocesses failed items from a failed or partial run. |
Each destination runs independently. One destination can fail without blocking another.
## Events [#events]
Events tell your backend that something happened. Webhooks are useful when you do not want to poll:
* A patient session completed.
* A background pull finished.
* A background pull failed.
* A connection lost access and needs the patient to reconnect.
Use [Webhooks](/docs/webhooks) to register a receiver and verify signatures.
## API And SDK Reads [#api-and-sdk-reads]
The public API and TypeScript SDK handle operational reads such as patients, patient sessions, connections, webhooks, errors, and pagination.
For patient records, call `mb.patients.records`. Medblocks returns the patient’s latest stored resources as a paginated list, and each item names the EHR source it came from. The SDK calls [`GET /patients/{id}/records`](/docs/reference/api/get-patient-records) under the hood.
```ts
import { Medblocks } from "medblocks";
const mb = new Medblocks(process.env.MEDBLOCKS_API_KEY!);
const page = await mb.patients.records("user_42", { count: 100 });
```
Use direct reads when your backend needs one patient’s current record on demand. Use exports when Medblocks should keep a destination current automatically.
## Choosing A Path [#choosing-a-path]
| Need | Use |
| ---------------------------------- | --------------------- |
| Keep another system current | Exports |
| Trigger work when records arrive | Webhooks |
| Inspect integration state | API or SDK |
| Pull a patient’s records on demand | `mb.patients.records` |
## See also [#see-also]
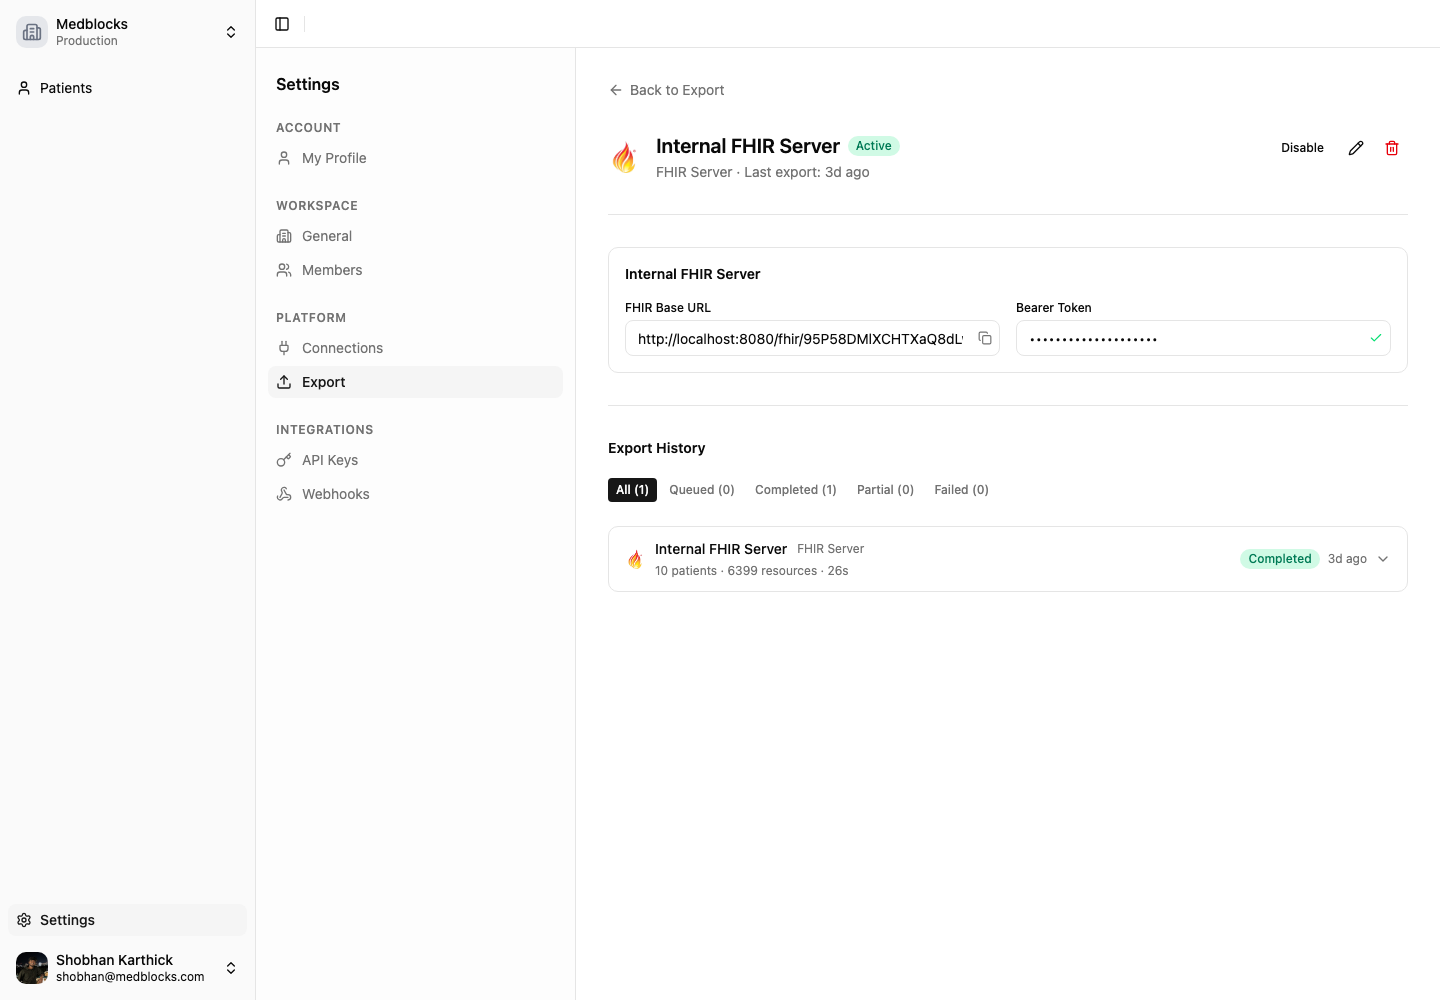 Use the copied values with any FHIR client. Send the bearer token in the `Authorization` header.
```bash
curl \
-H "Authorization: Bearer {bearer-token}" \
"{internal-fhir-base-url}/Patient?_count=10"
```
Use the Patient identifier pattern below to find the record that belongs to your app user.
## Custom FHIR server [#custom-fhir-server]
A custom FHIR server is a destination you host or control. Use it when records should land in your own FHIR store, customer tenant, data platform, or downstream clinical workflow.
Medblocks can authenticate to a custom destination with no auth, bearer token auth, or OAuth 2.0 client credentials. Medblocks validates connectivity before saving. If the test fails, fix the URL, credentials, or network allowlist before creating the destination.
## Set up the export [#set-up-the-export]
Use the copied values with any FHIR client. Send the bearer token in the `Authorization` header.
```bash
curl \
-H "Authorization: Bearer {bearer-token}" \
"{internal-fhir-base-url}/Patient?_count=10"
```
Use the Patient identifier pattern below to find the record that belongs to your app user.
## Custom FHIR server [#custom-fhir-server]
A custom FHIR server is a destination you host or control. Use it when records should land in your own FHIR store, customer tenant, data platform, or downstream clinical workflow.
Medblocks can authenticate to a custom destination with no auth, bearer token auth, or OAuth 2.0 client credentials. Medblocks validates connectivity before saving. If the test fails, fix the URL, credentials, or network allowlist before creating the destination.
## Set up the export [#set-up-the-export]
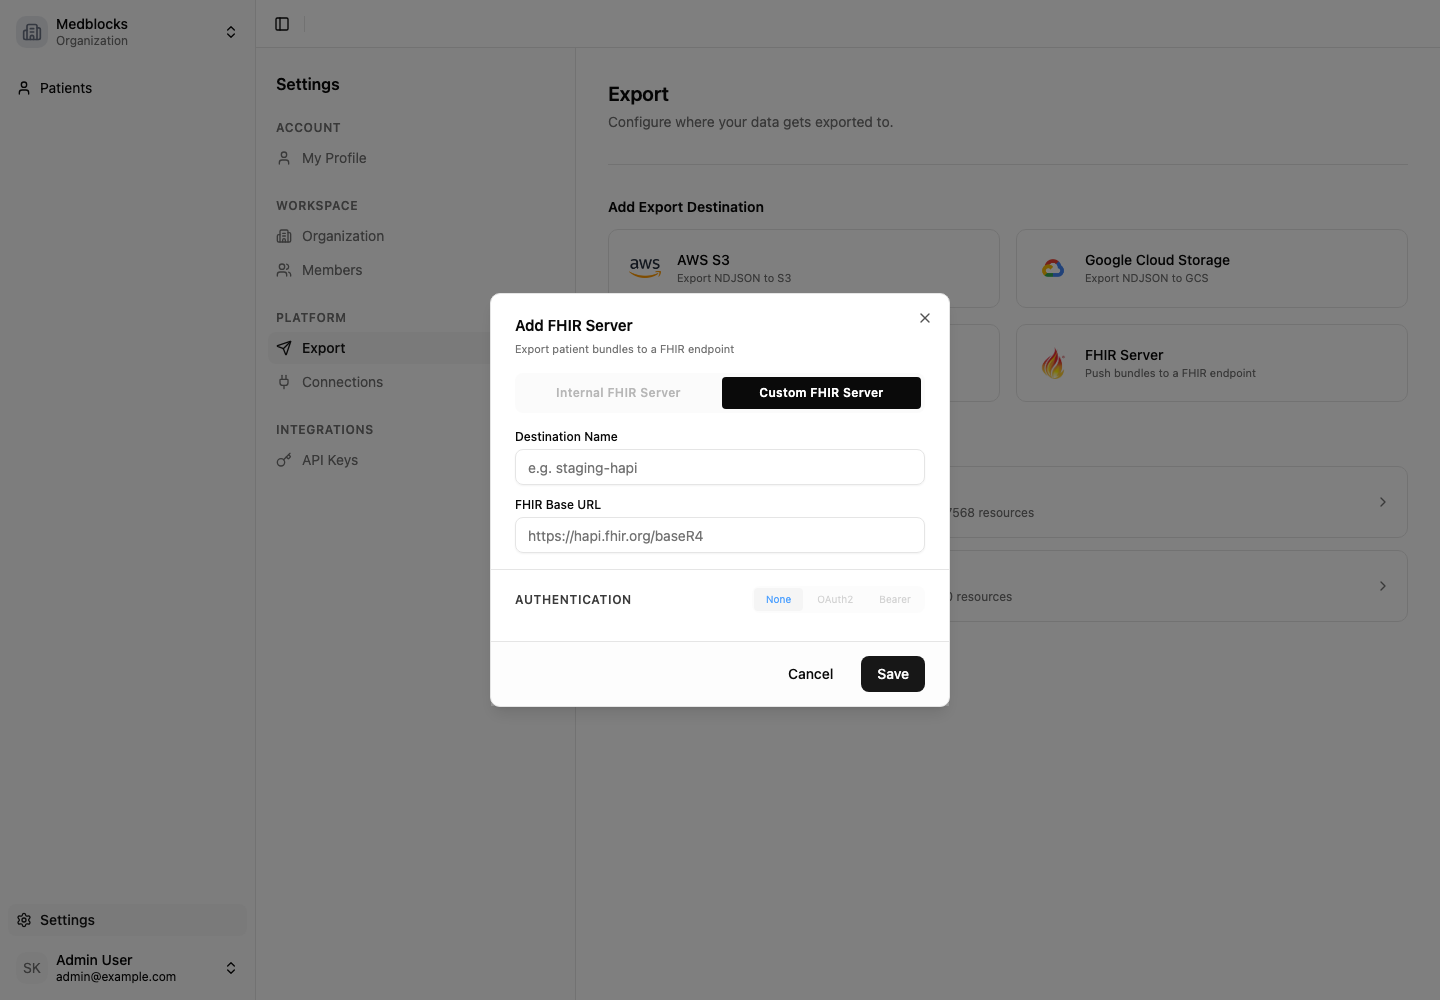
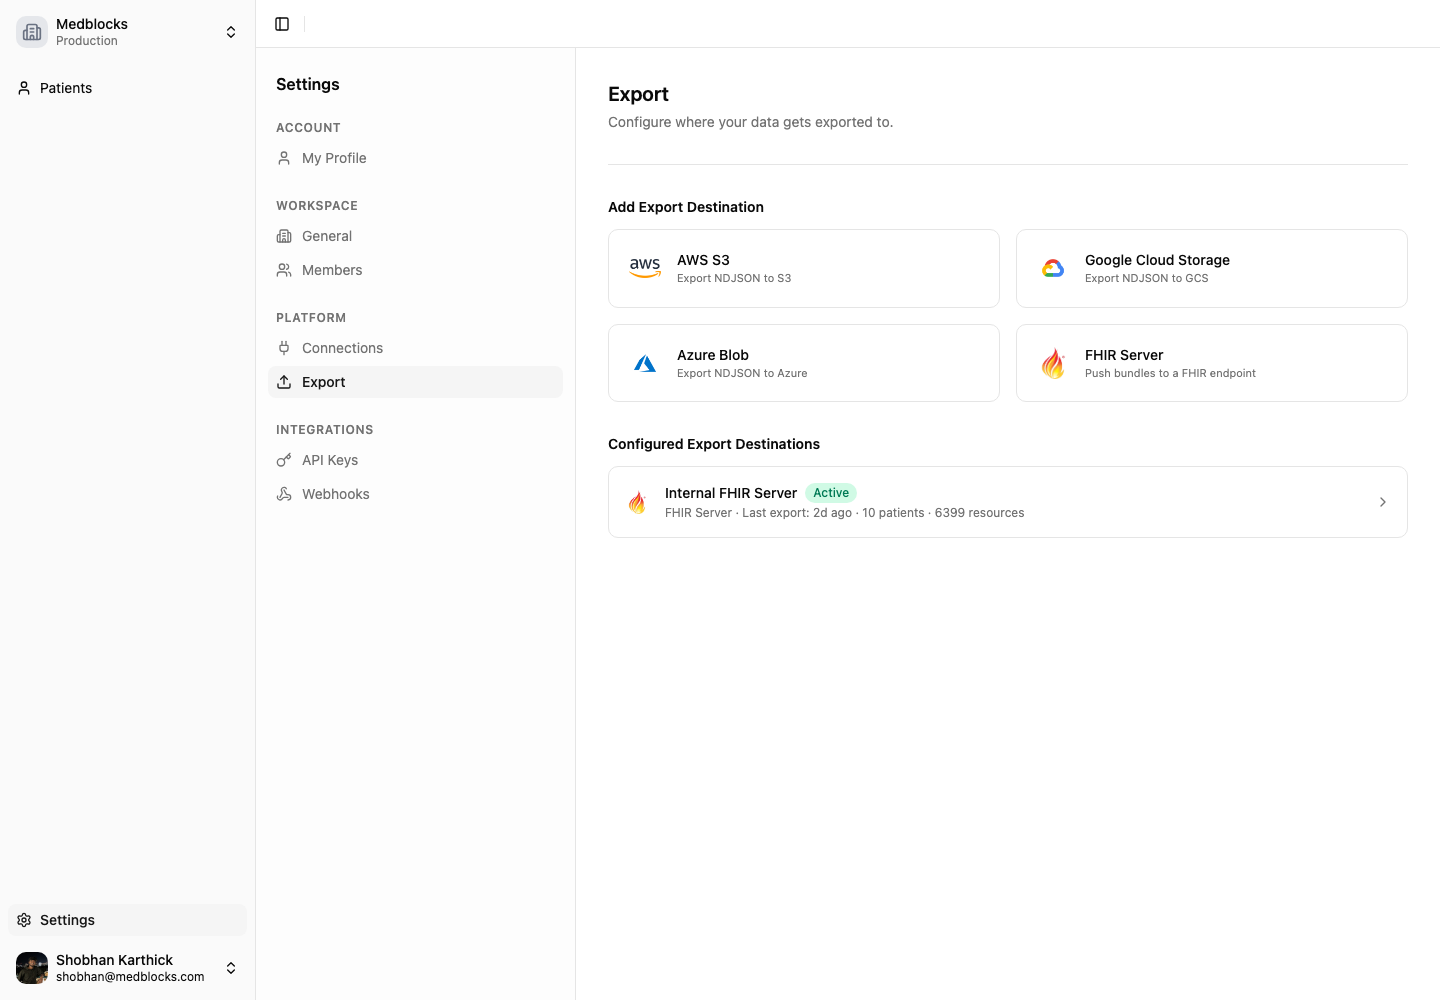
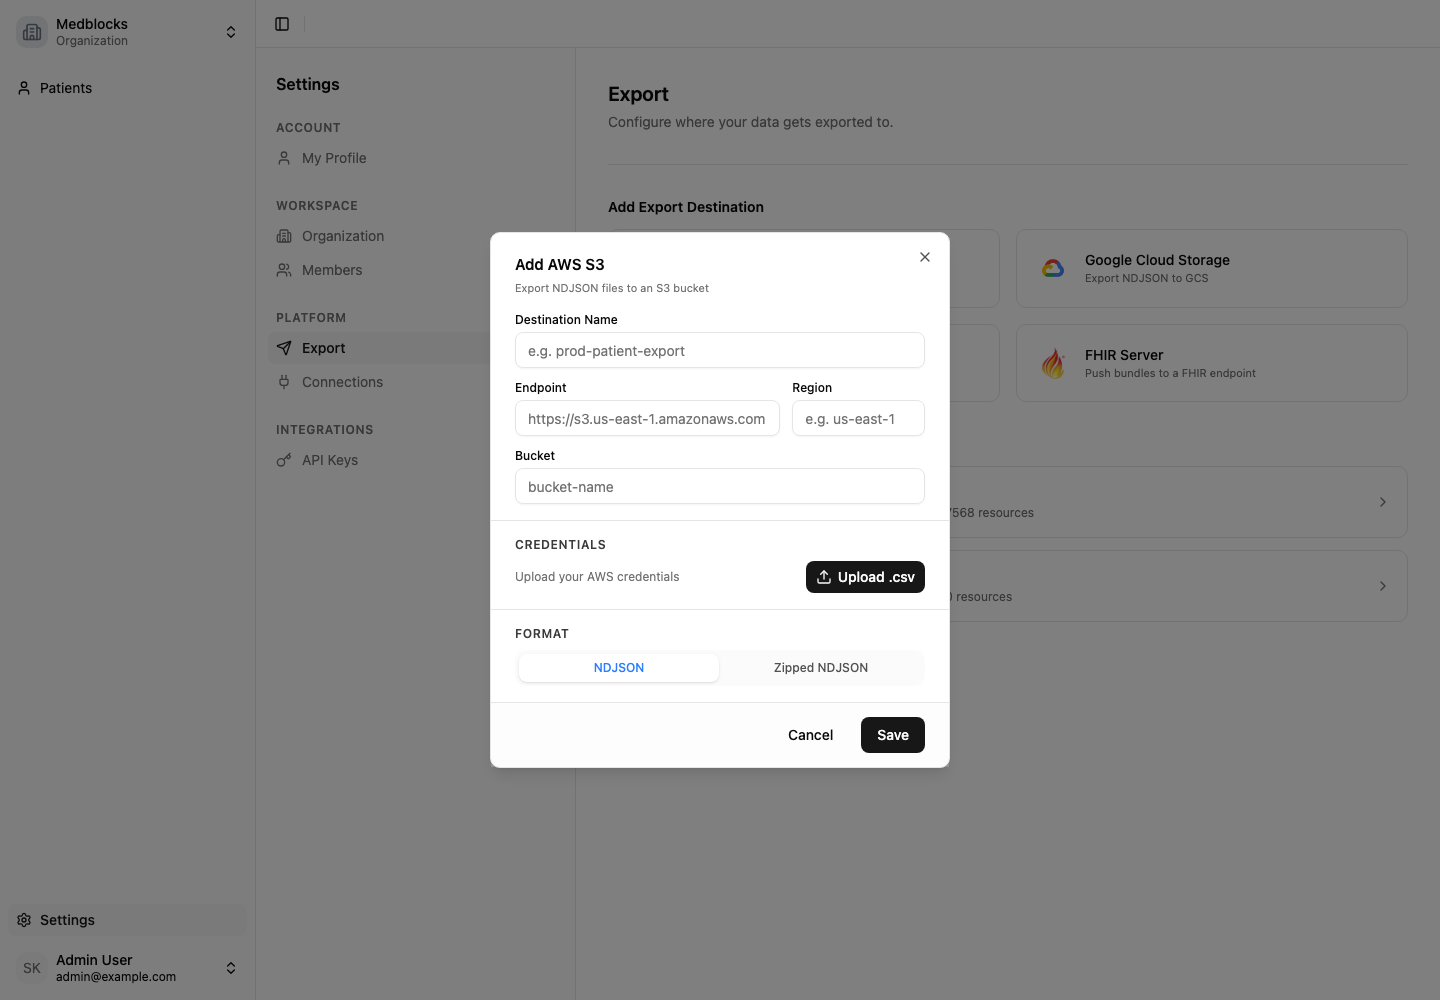
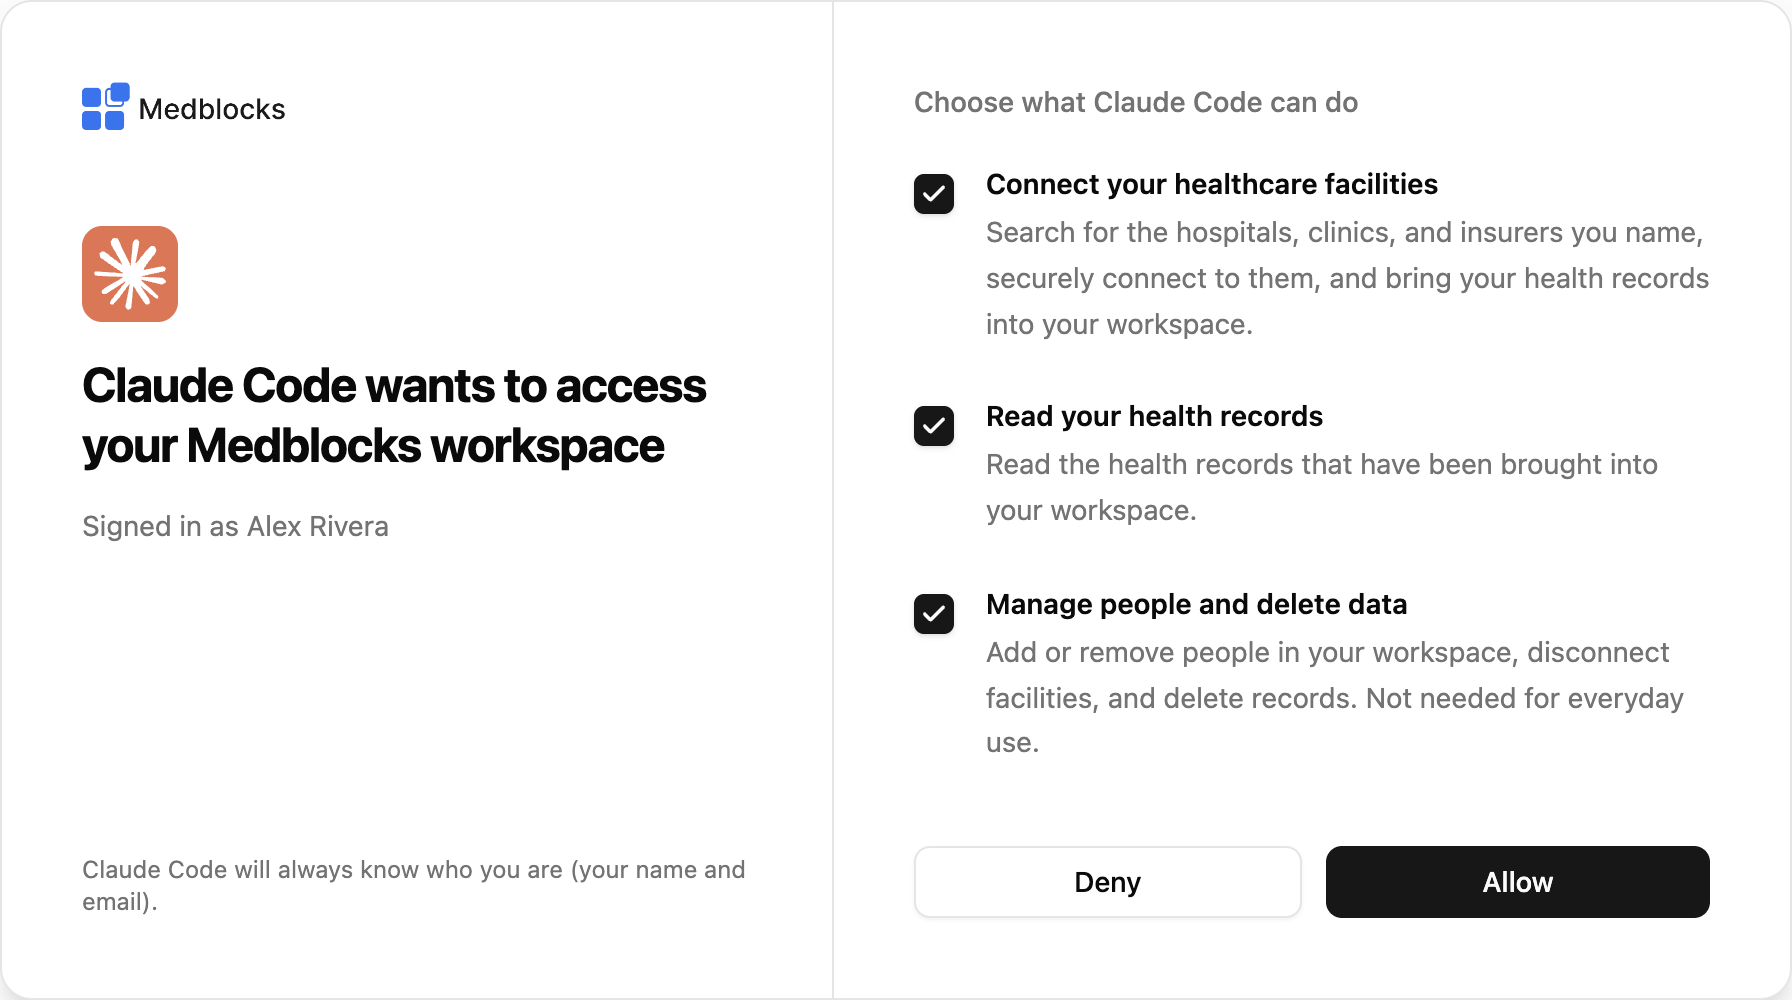 ## Connect Claude Code [#connect-claude-code]
Connect the [Claude Code](https://claude.com/claude-code) CLI to your workspace.
## Connect Claude Code [#connect-claude-code]
Connect the [Claude Code](https://claude.com/claude-code) CLI to your workspace.
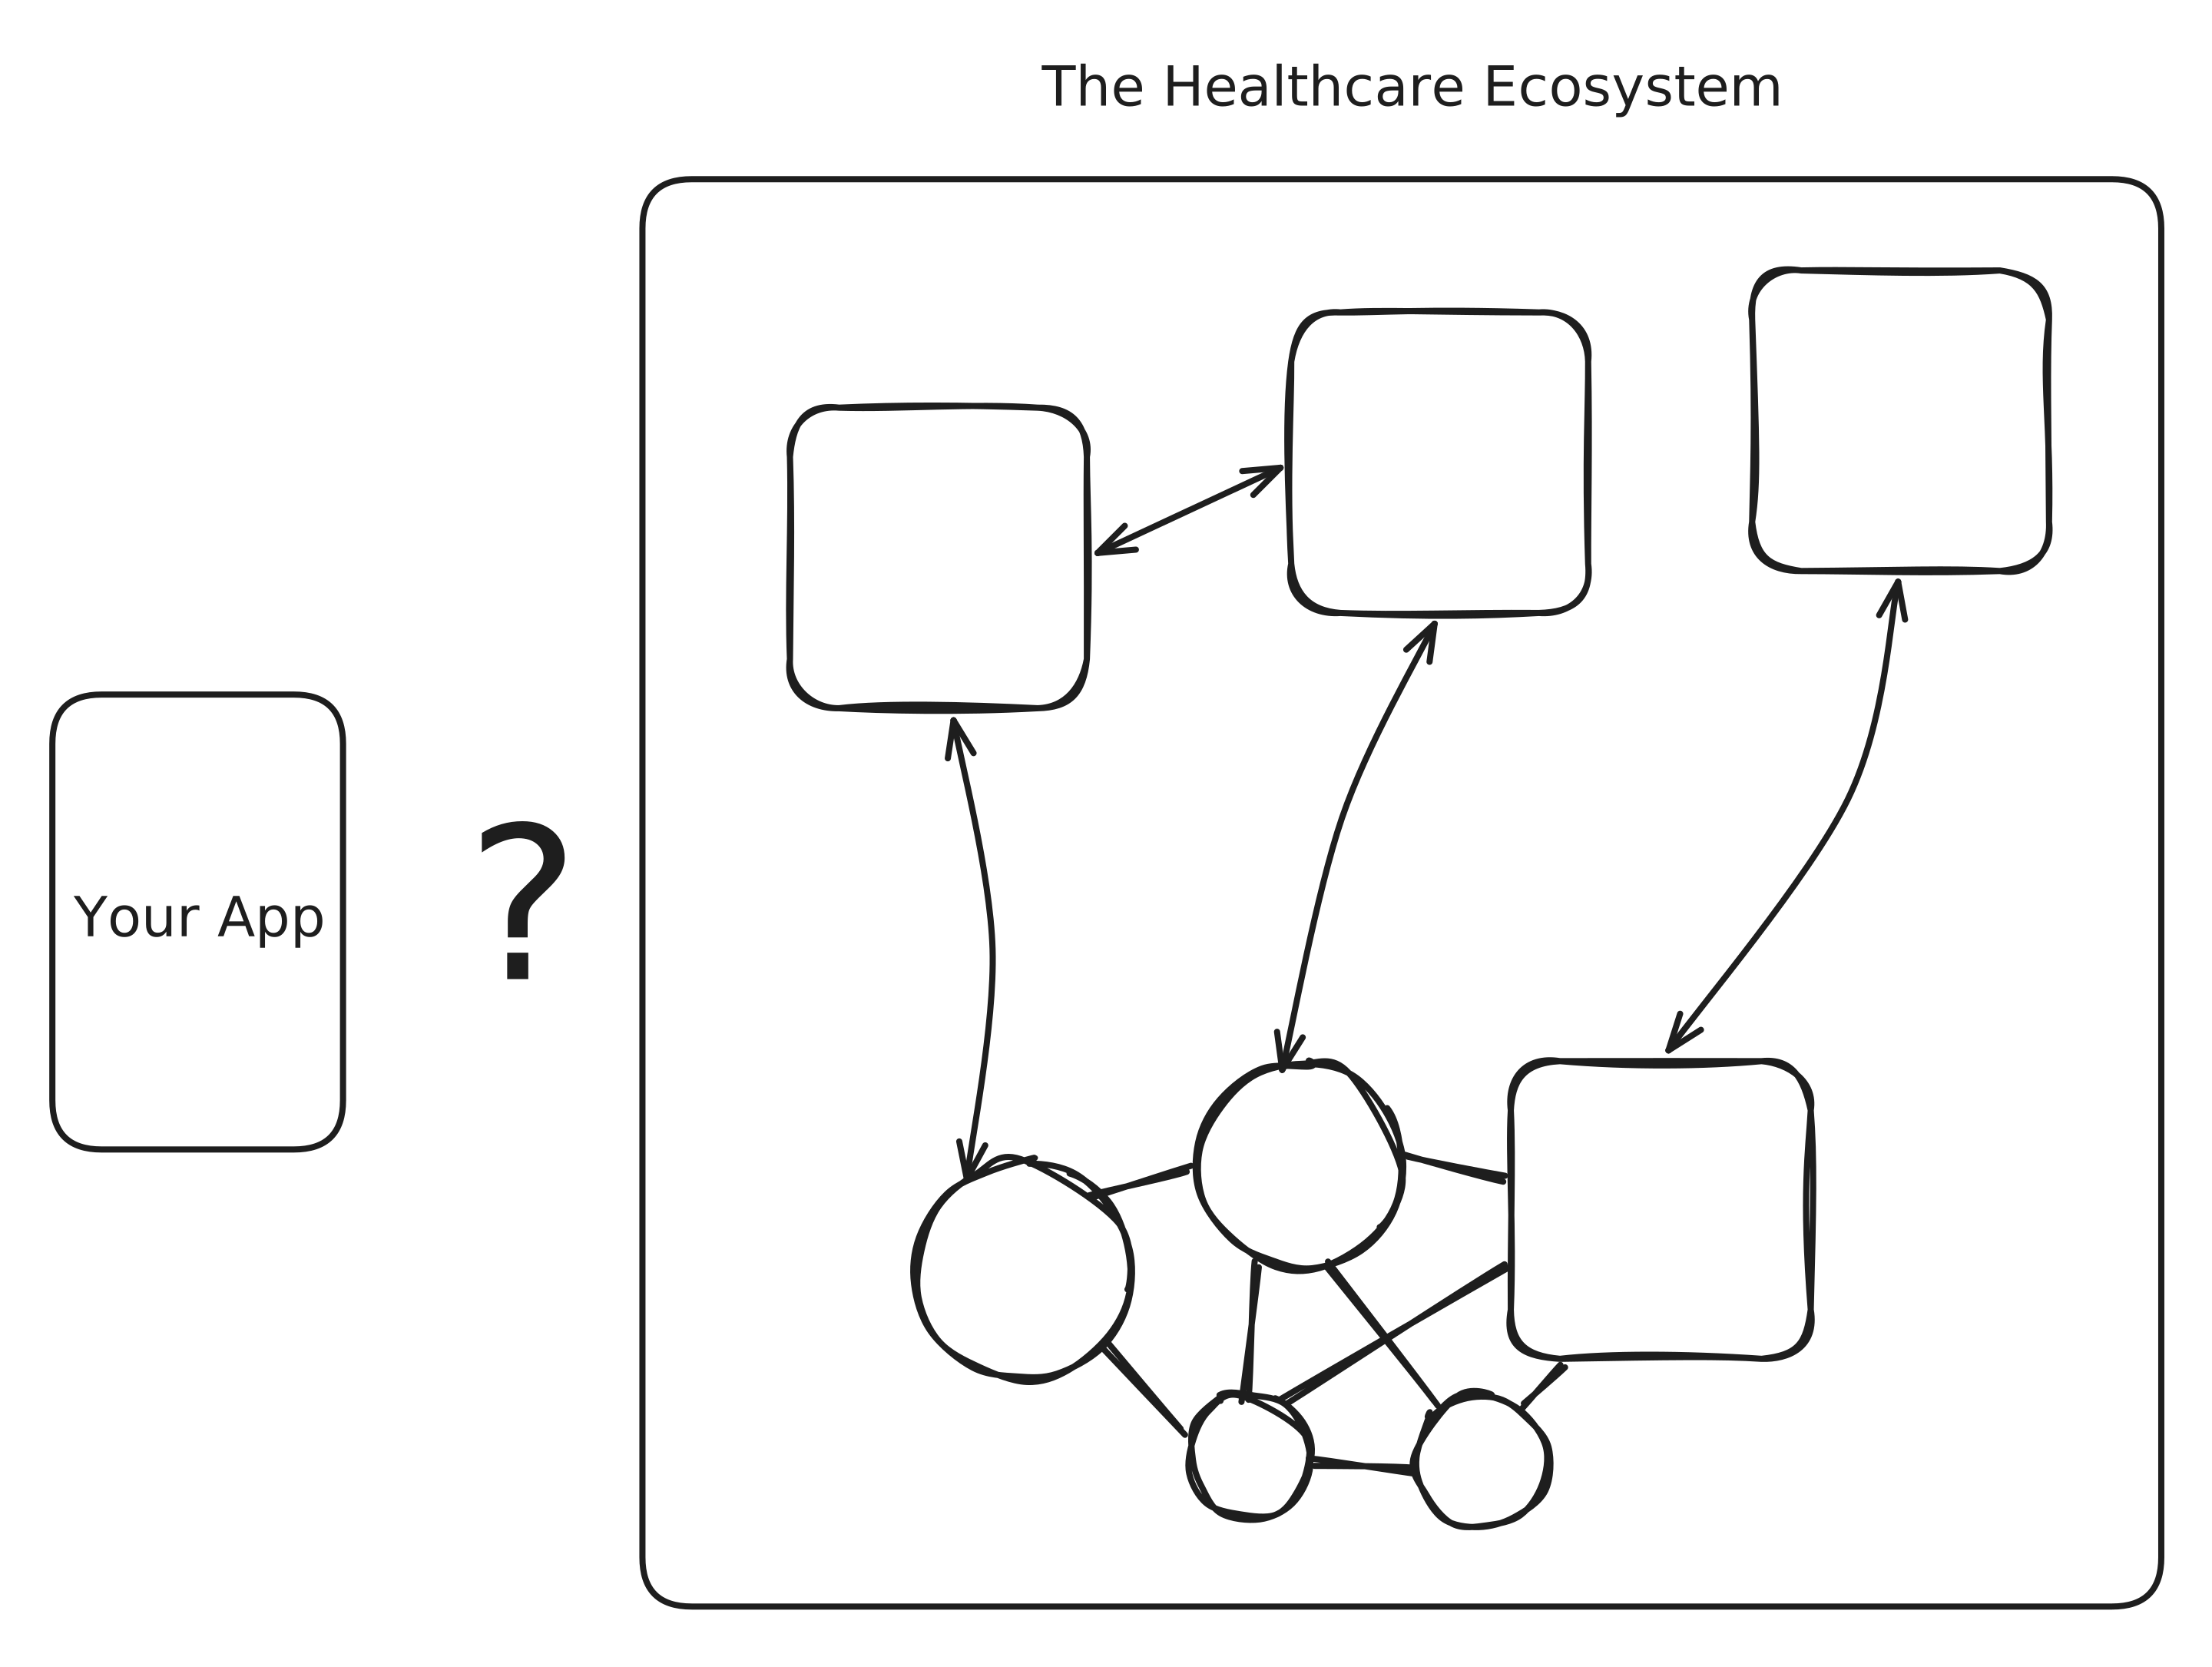 ## The cost of buying access [#the-cost-of-buying-access]
There’s no shortage of vendors who will sell you “integration solutions” in healthcare. So why are we building another one? Because most of them aren’t selling you integration. **They’re selling you access.**
## The cost of buying access [#the-cost-of-buying-access]
There’s no shortage of vendors who will sell you “integration solutions” in healthcare. So why are we building another one? Because most of them aren’t selling you integration. **They’re selling you access.**
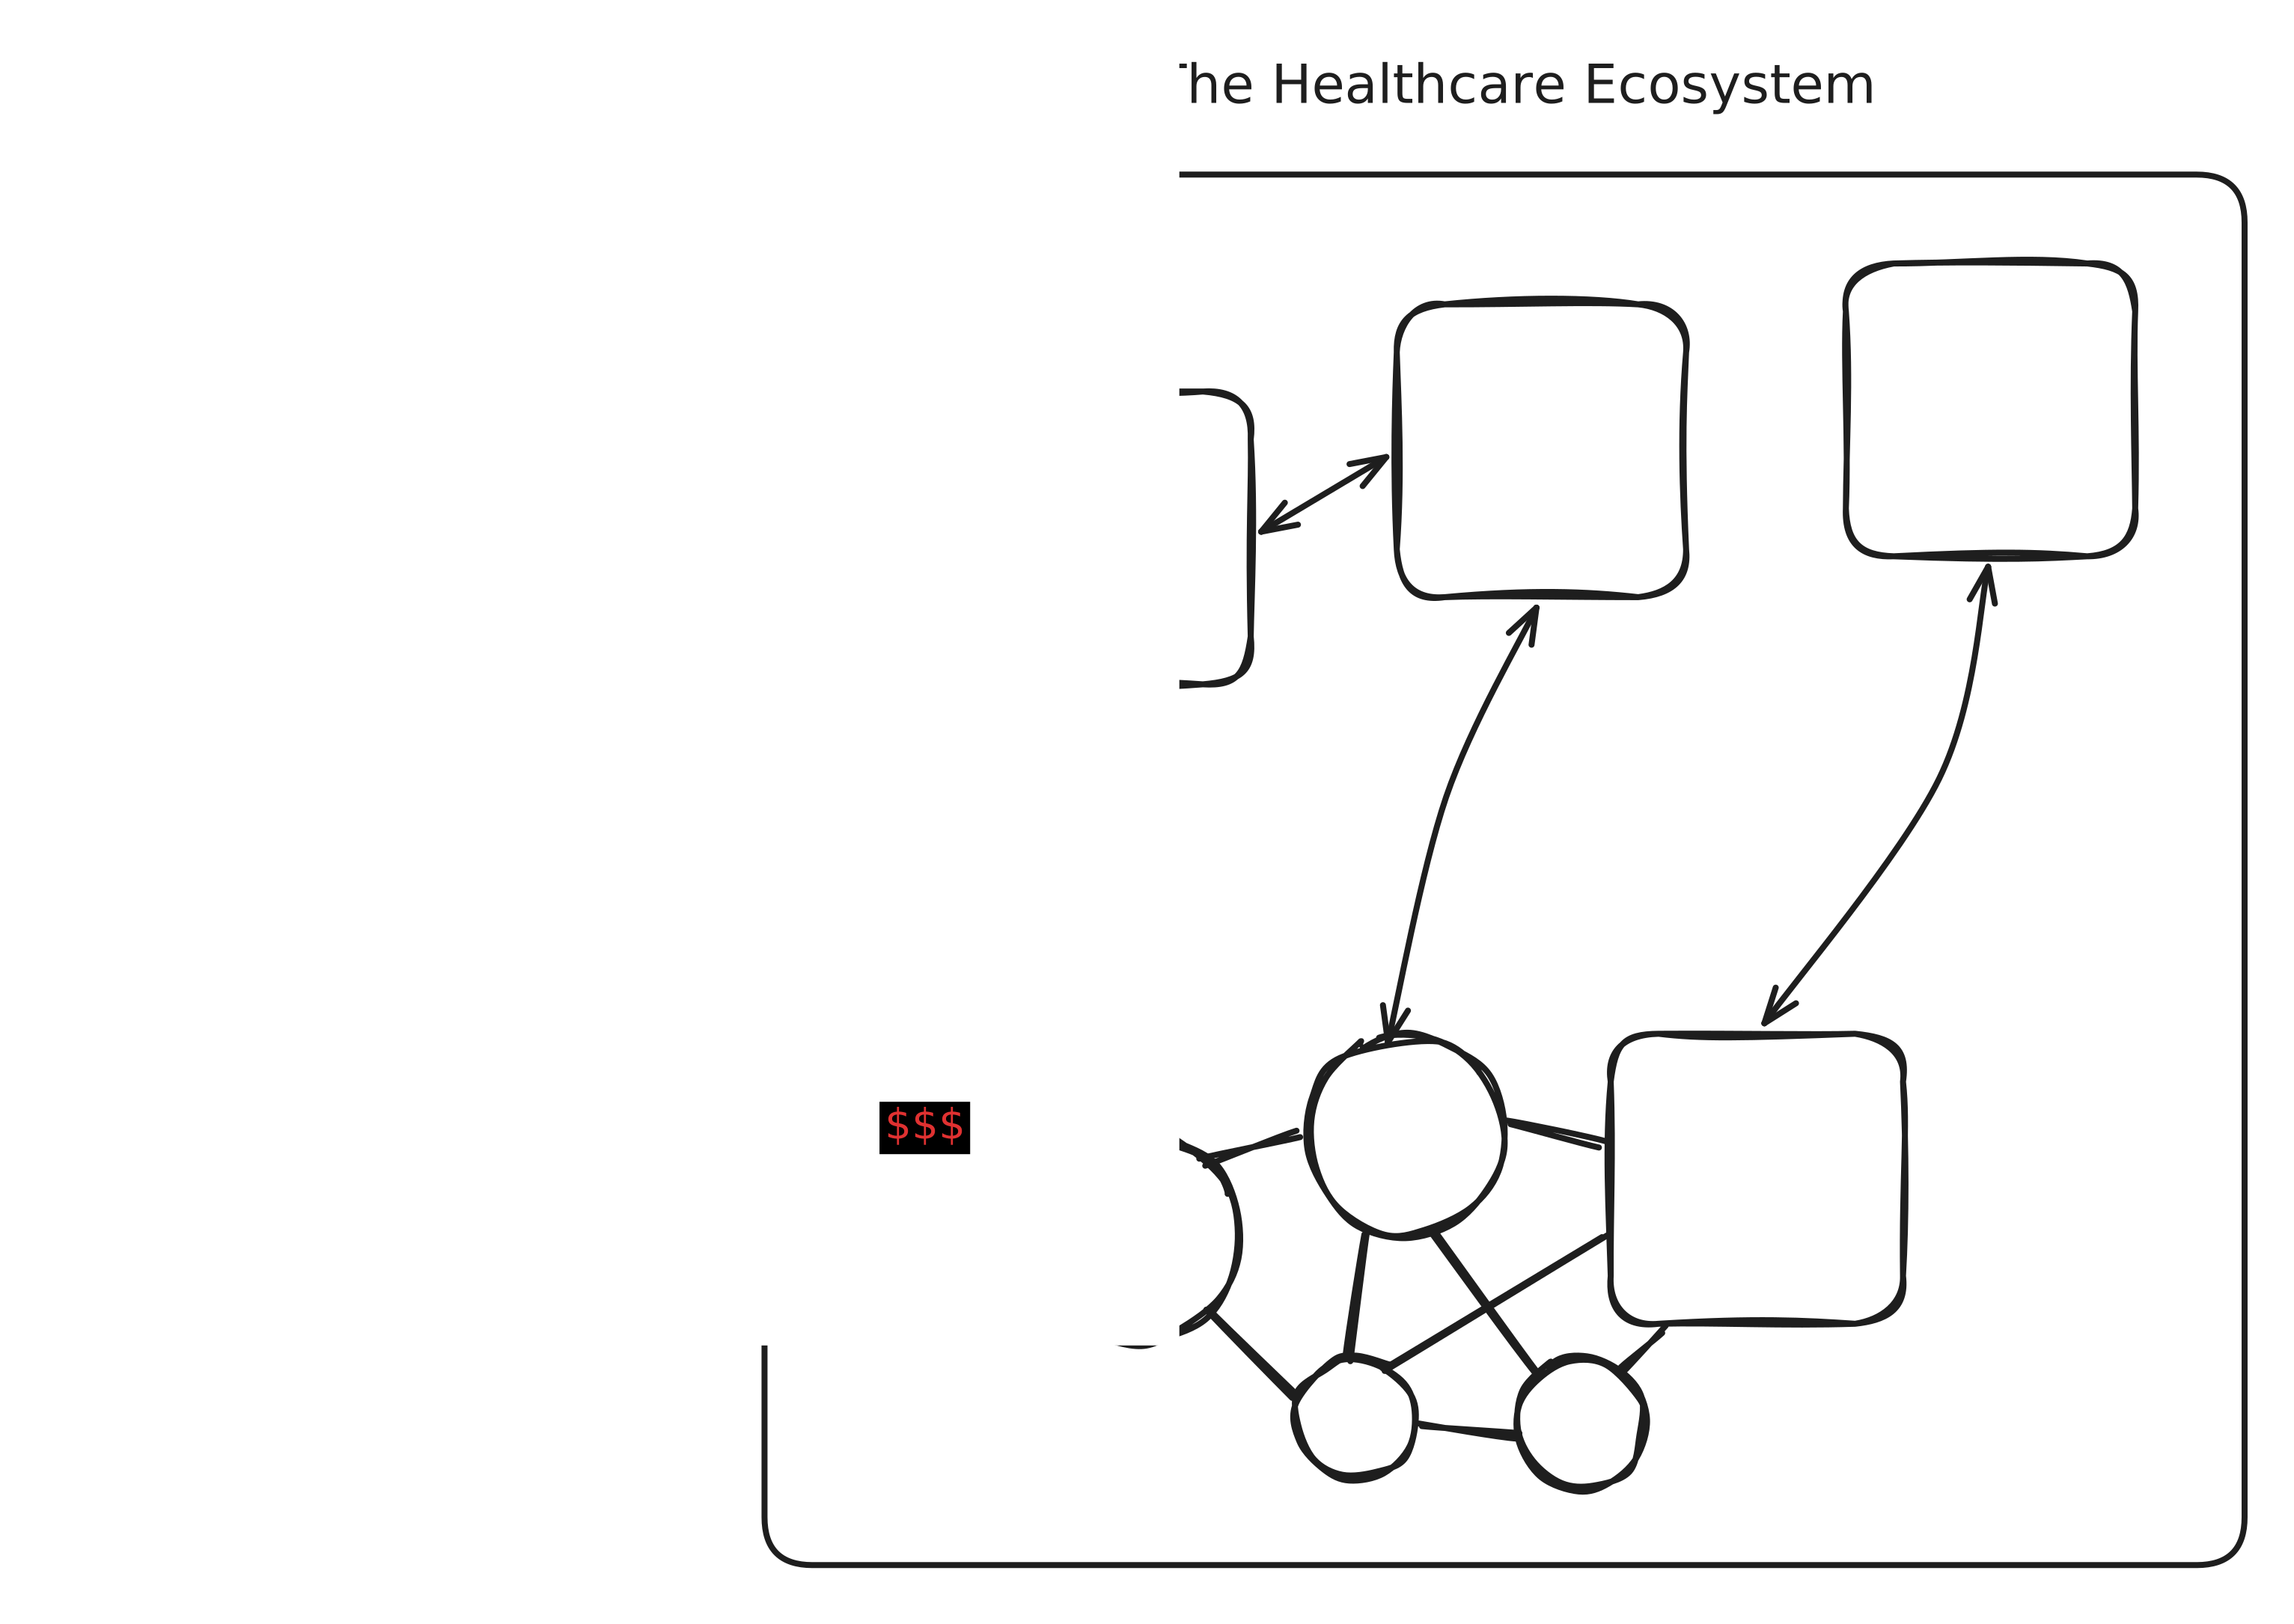 That access usually comes in one of two shapes: a narrow slice of the ecosystem with no path to the rest, or a bundle of the whole thing where you pay for all of it at once, whether you use it or not.
Reaching an EHR, a system of record, or a Health Information Exchange has traditionally meant bespoke, one-off connections, because every system speaks its own dialect: as the old line goes, if you’ve seen one HL7v2 implementation, you’ve seen exactly one. The companies holding the data are notorious for gatekeeping it, so each connection takes months to stand up, and most of your bill goes to the negotiation, the red tape, and the proprietary glue holding brittle connections together.
And you’re renting a broker, not building on a technology vendor you control. The access sits on their side, not yours, so you’re never really free to leave.
We break down the main ones in our [comparisons](/docs/comparisons).
That access usually comes in one of two shapes: a narrow slice of the ecosystem with no path to the rest, or a bundle of the whole thing where you pay for all of it at once, whether you use it or not.
Reaching an EHR, a system of record, or a Health Information Exchange has traditionally meant bespoke, one-off connections, because every system speaks its own dialect: as the old line goes, if you’ve seen one HL7v2 implementation, you’ve seen exactly one. The companies holding the data are notorious for gatekeeping it, so each connection takes months to stand up, and most of your bill goes to the negotiation, the red tape, and the proprietary glue holding brittle connections together.
And you’re renting a broker, not building on a technology vendor you control. The access sits on their side, not yours, so you’re never really free to leave.
We break down the main ones in our [comparisons](/docs/comparisons).
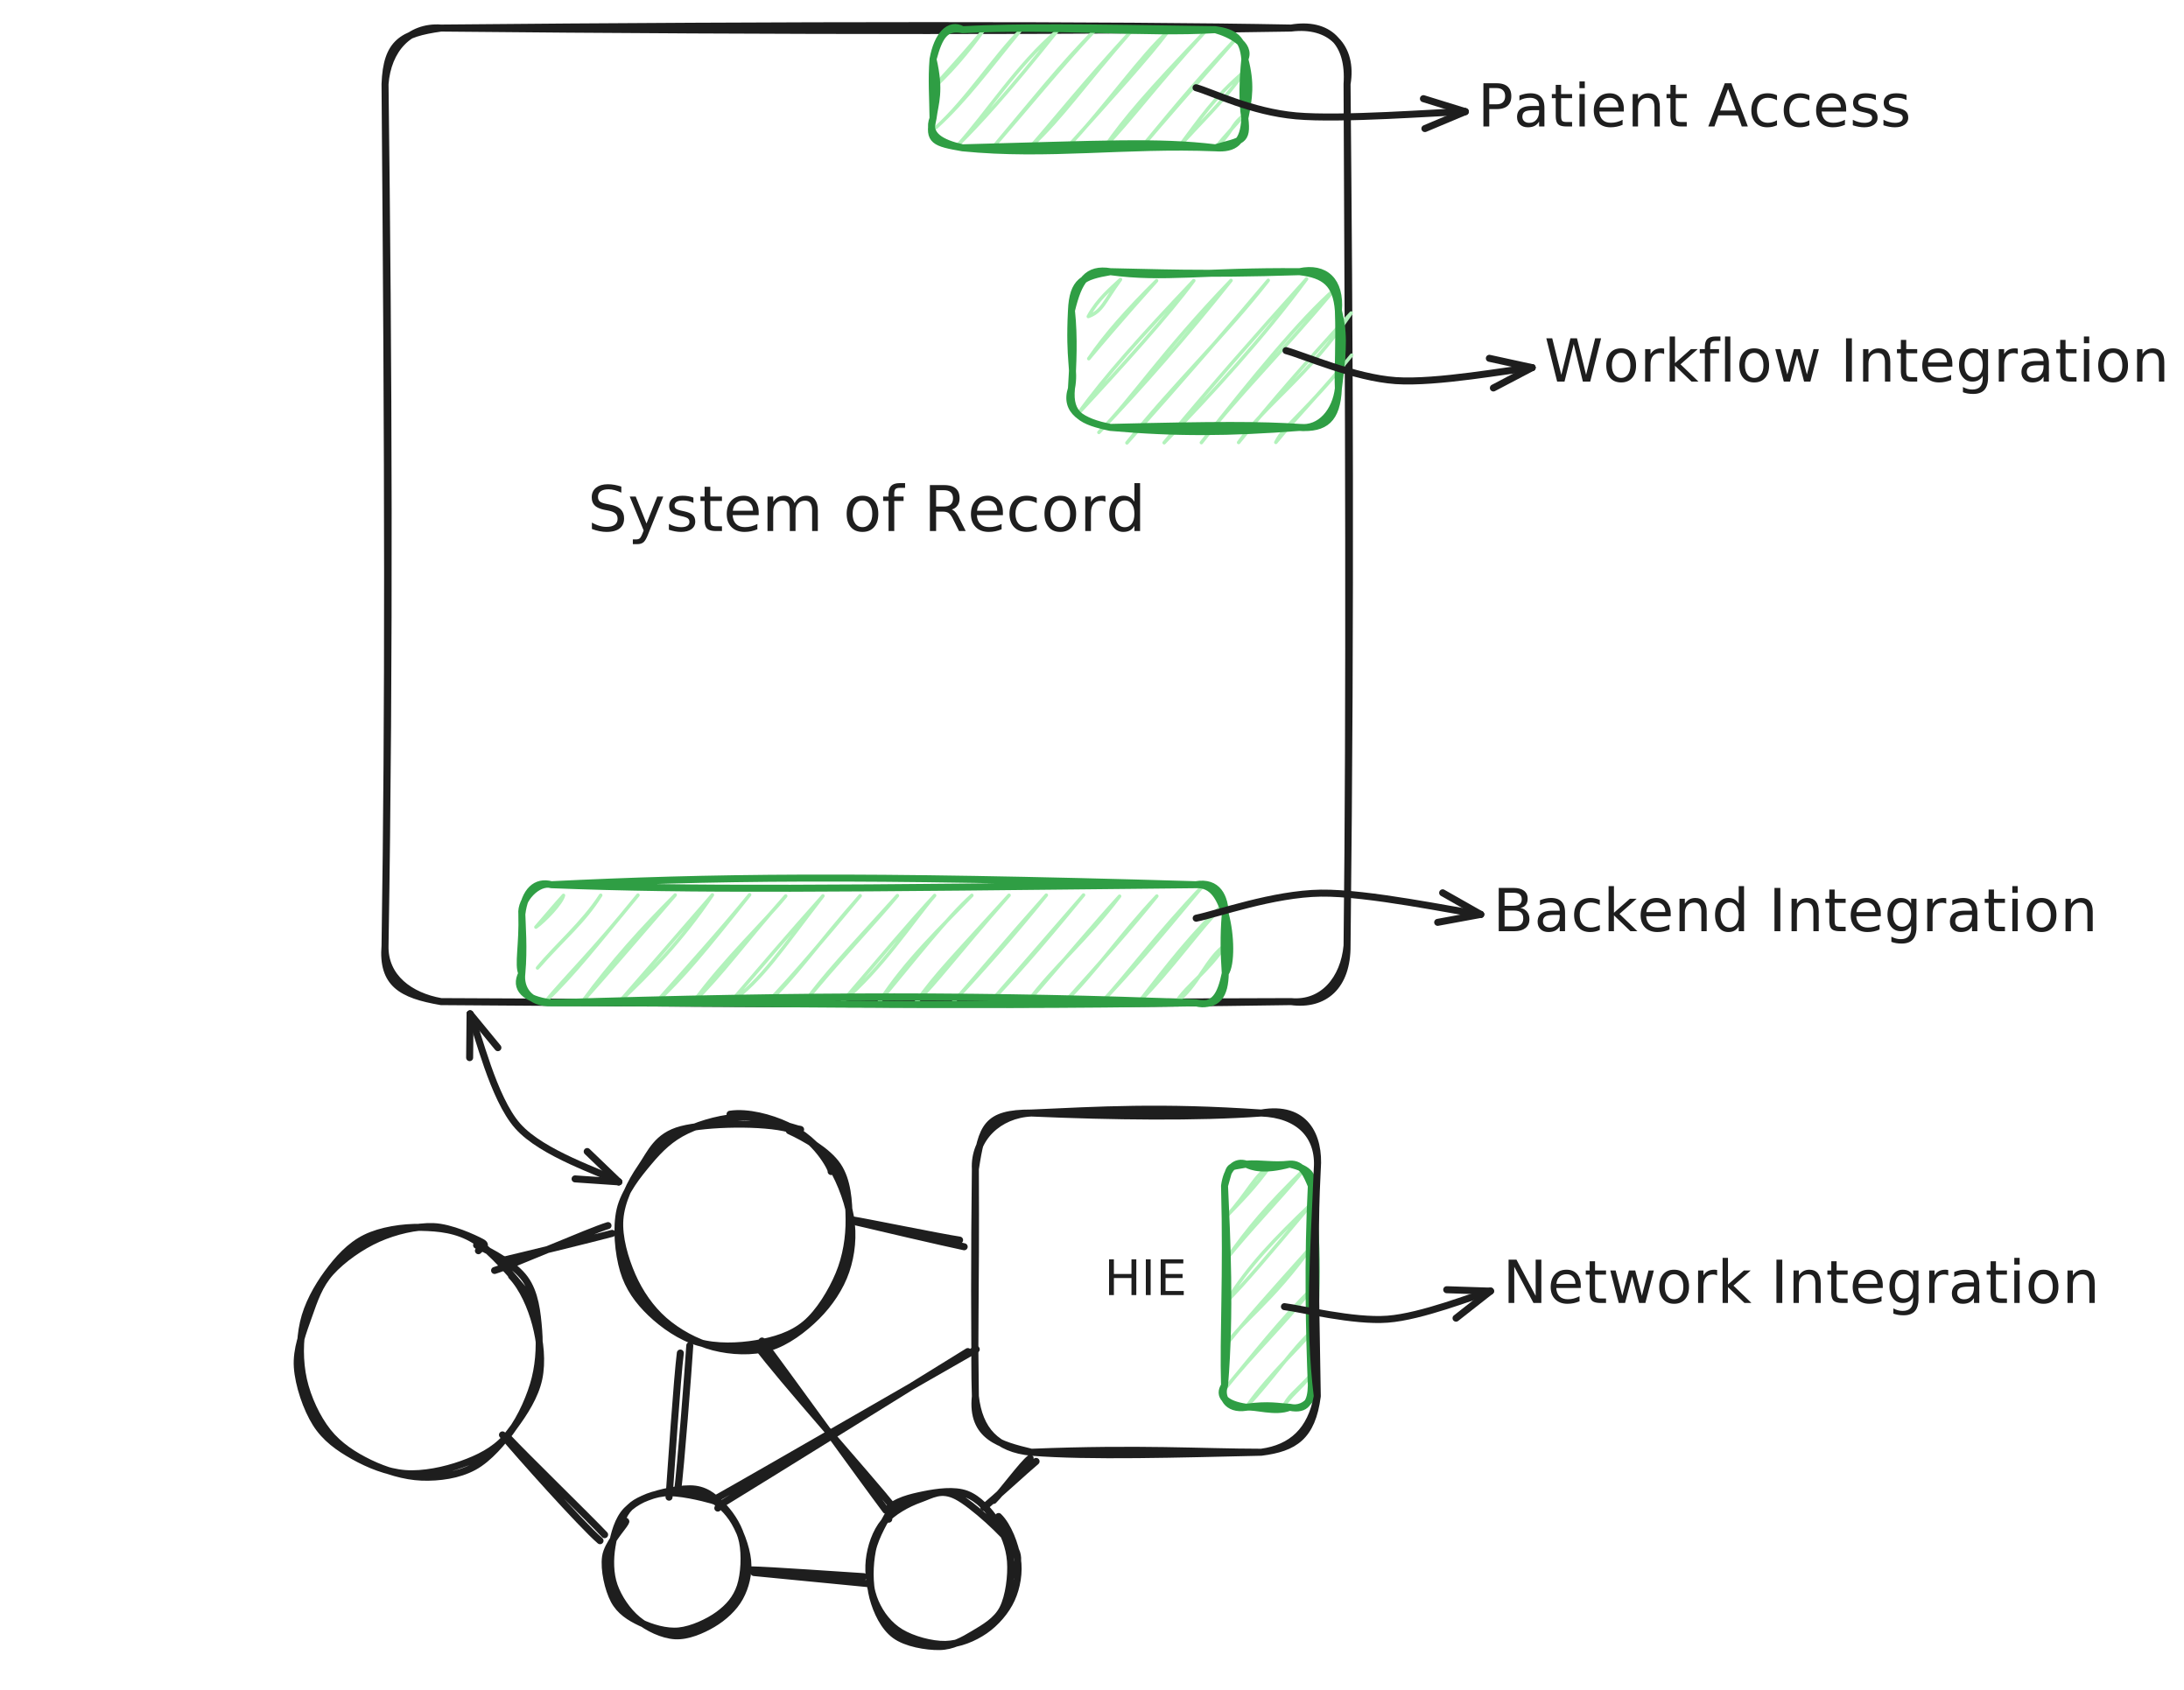 ### Patient access [#patient-access]
The patient’s own right to their data is the most powerful key you have, because it opens far more than their EHR. With a single authorization, the same patient can unlock the data every system holds about them.
It starts with the EHR. [ONC g(10)](https://docs.smarthealthit.org/) requires certified EHRs to let a patient pull their own records in minutes, from a single link. The patient signs in to their portal, like Epic MyChart, and authorizes your app directly.
### Patient access [#patient-access]
The patient’s own right to their data is the most powerful key you have, because it opens far more than their EHR. With a single authorization, the same patient can unlock the data every system holds about them.
It starts with the EHR. [ONC g(10)](https://docs.smarthealthit.org/) requires certified EHRs to let a patient pull their own records in minutes, from a single link. The patient signs in to their portal, like Epic MyChart, and authorizes your app directly.
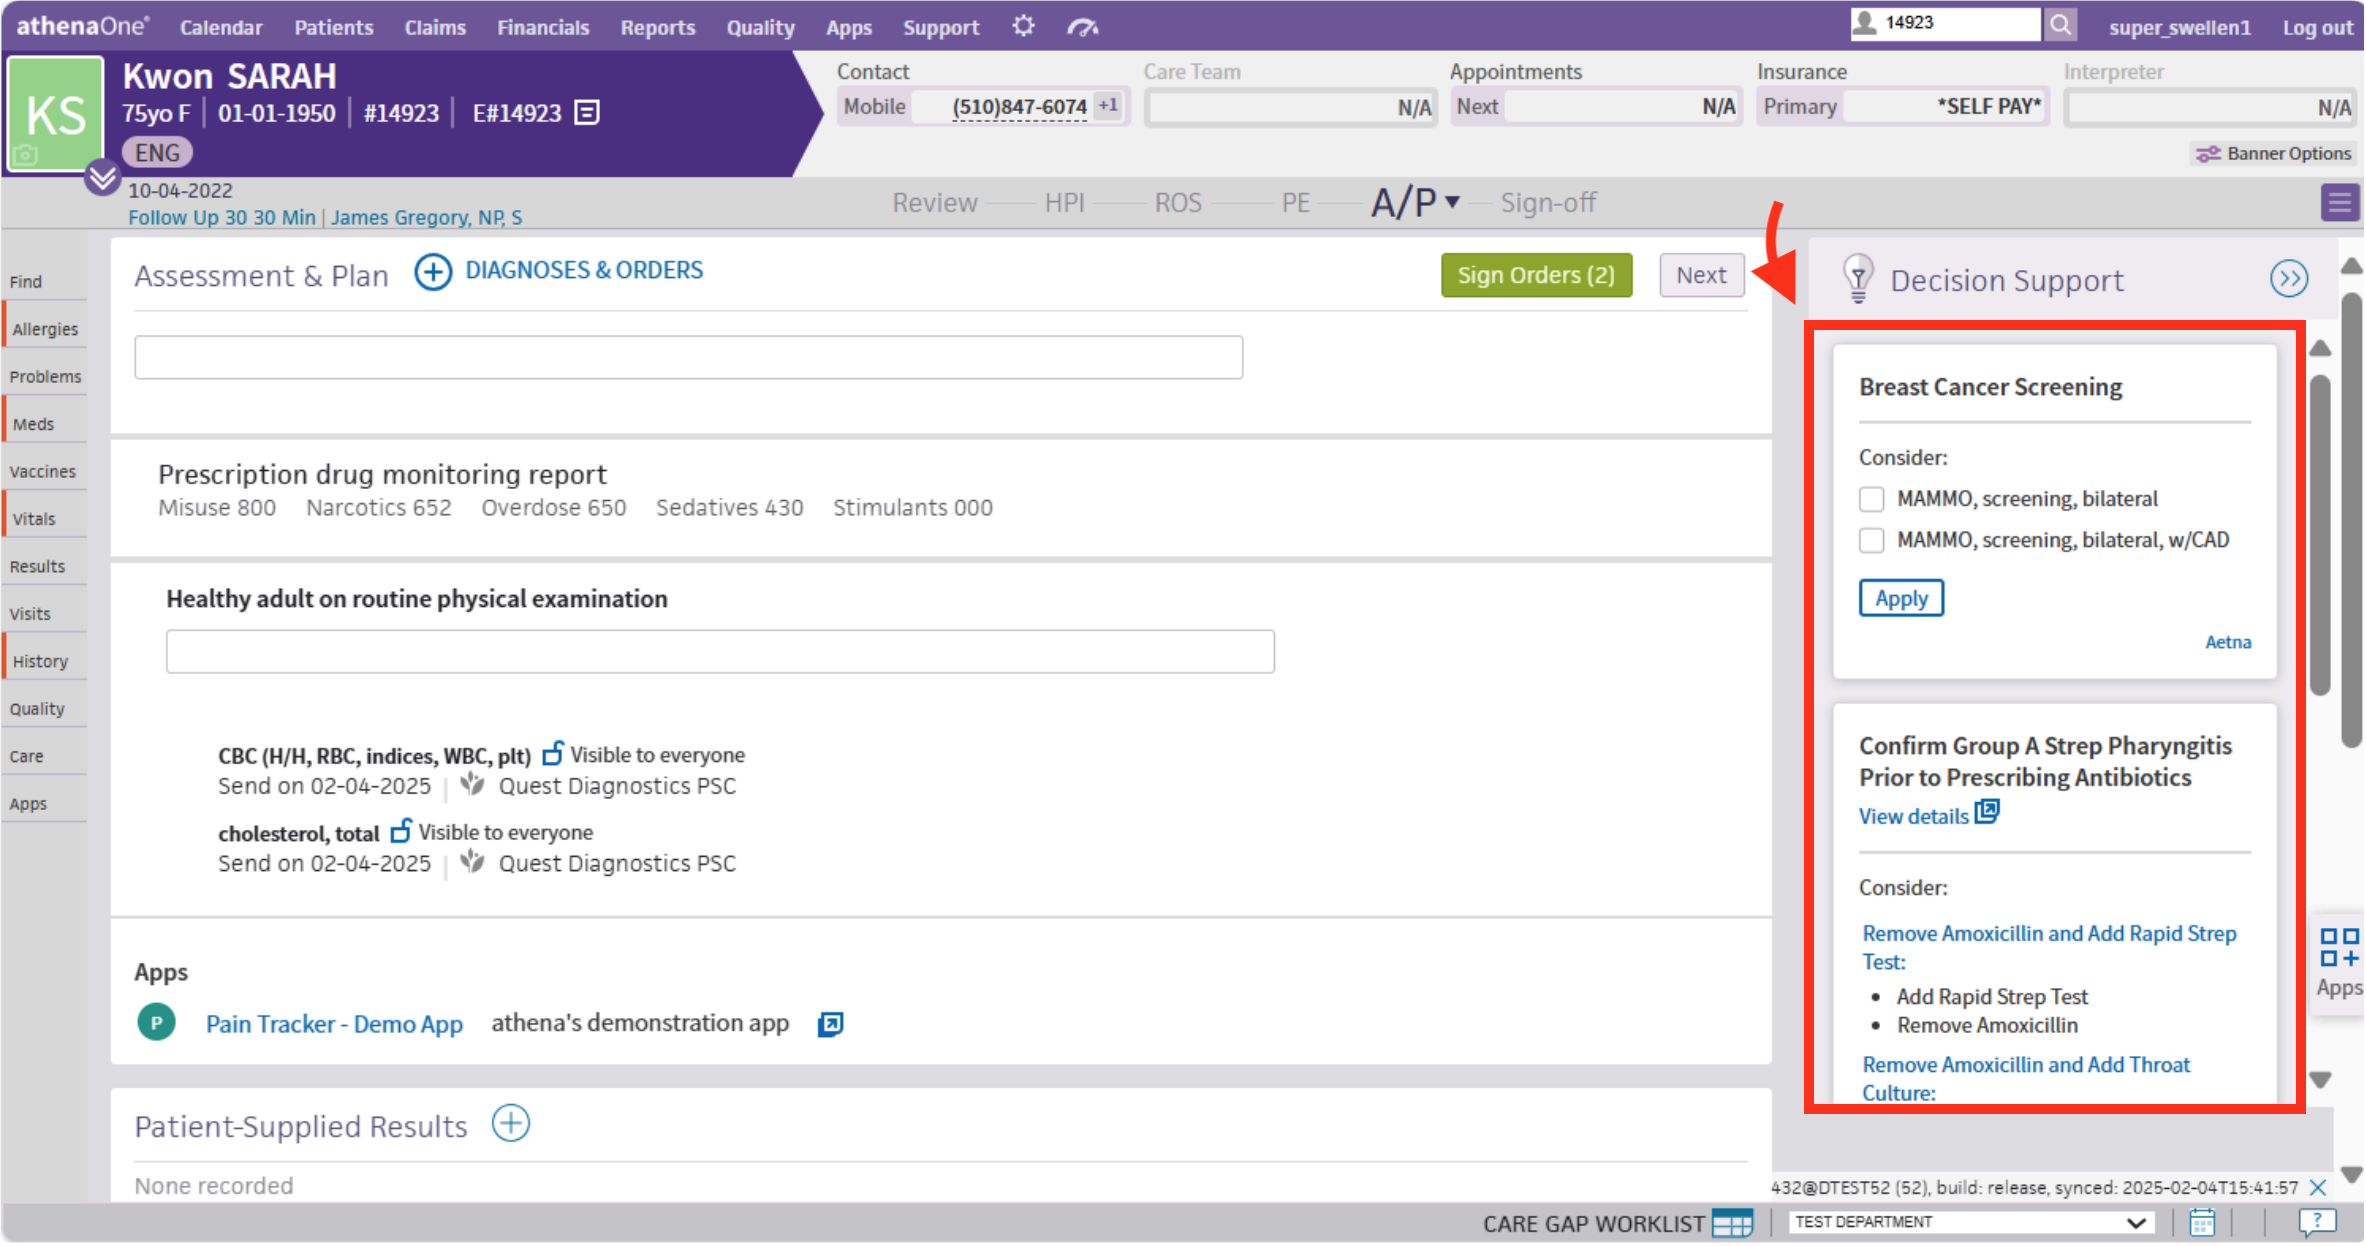
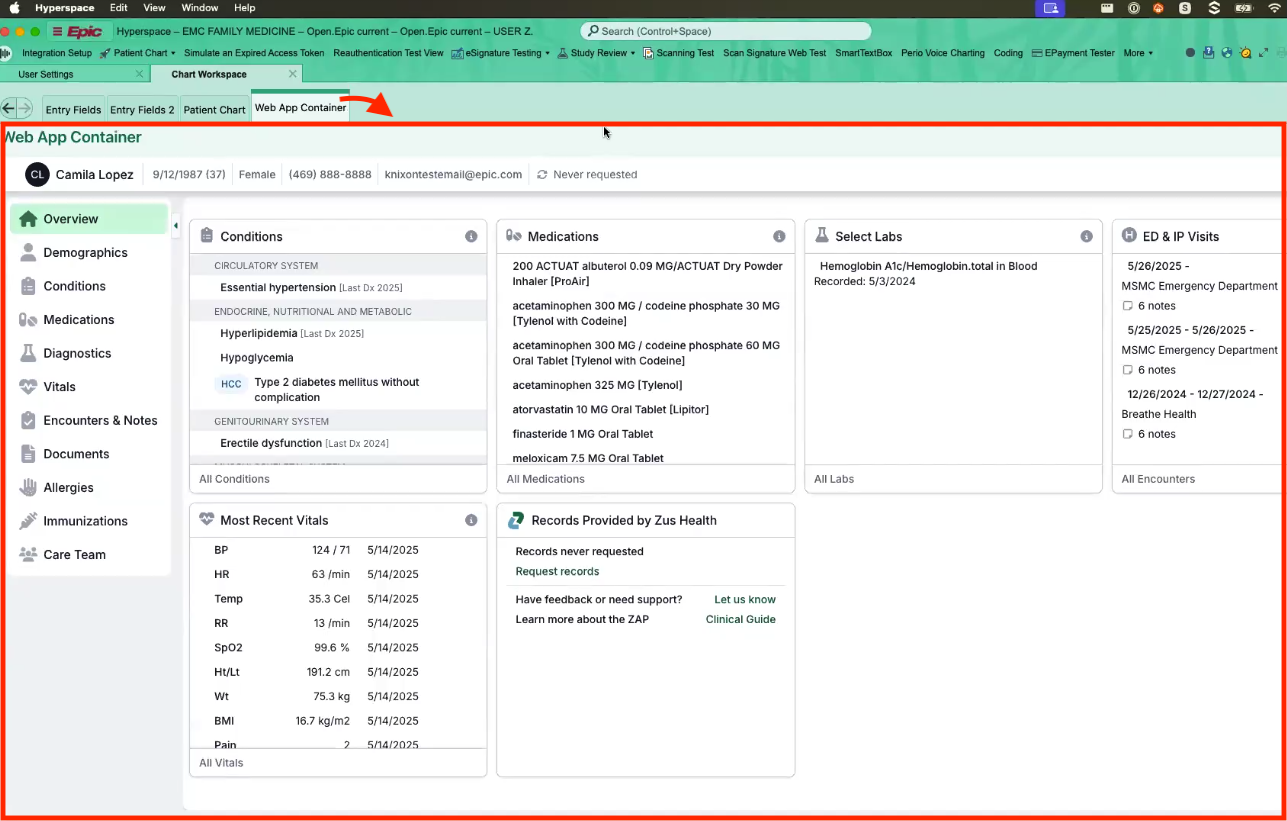
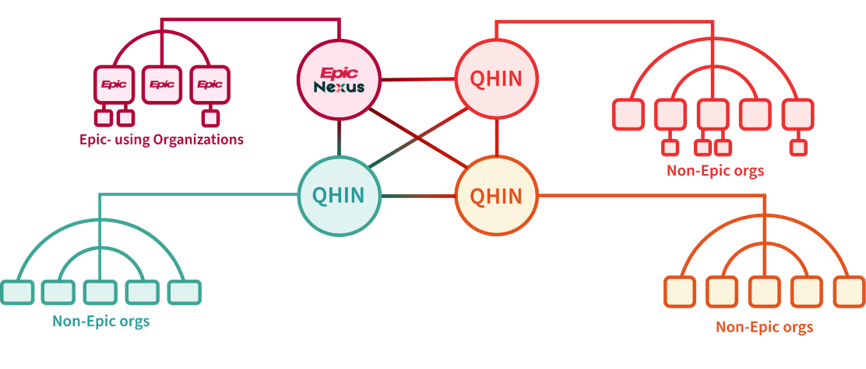
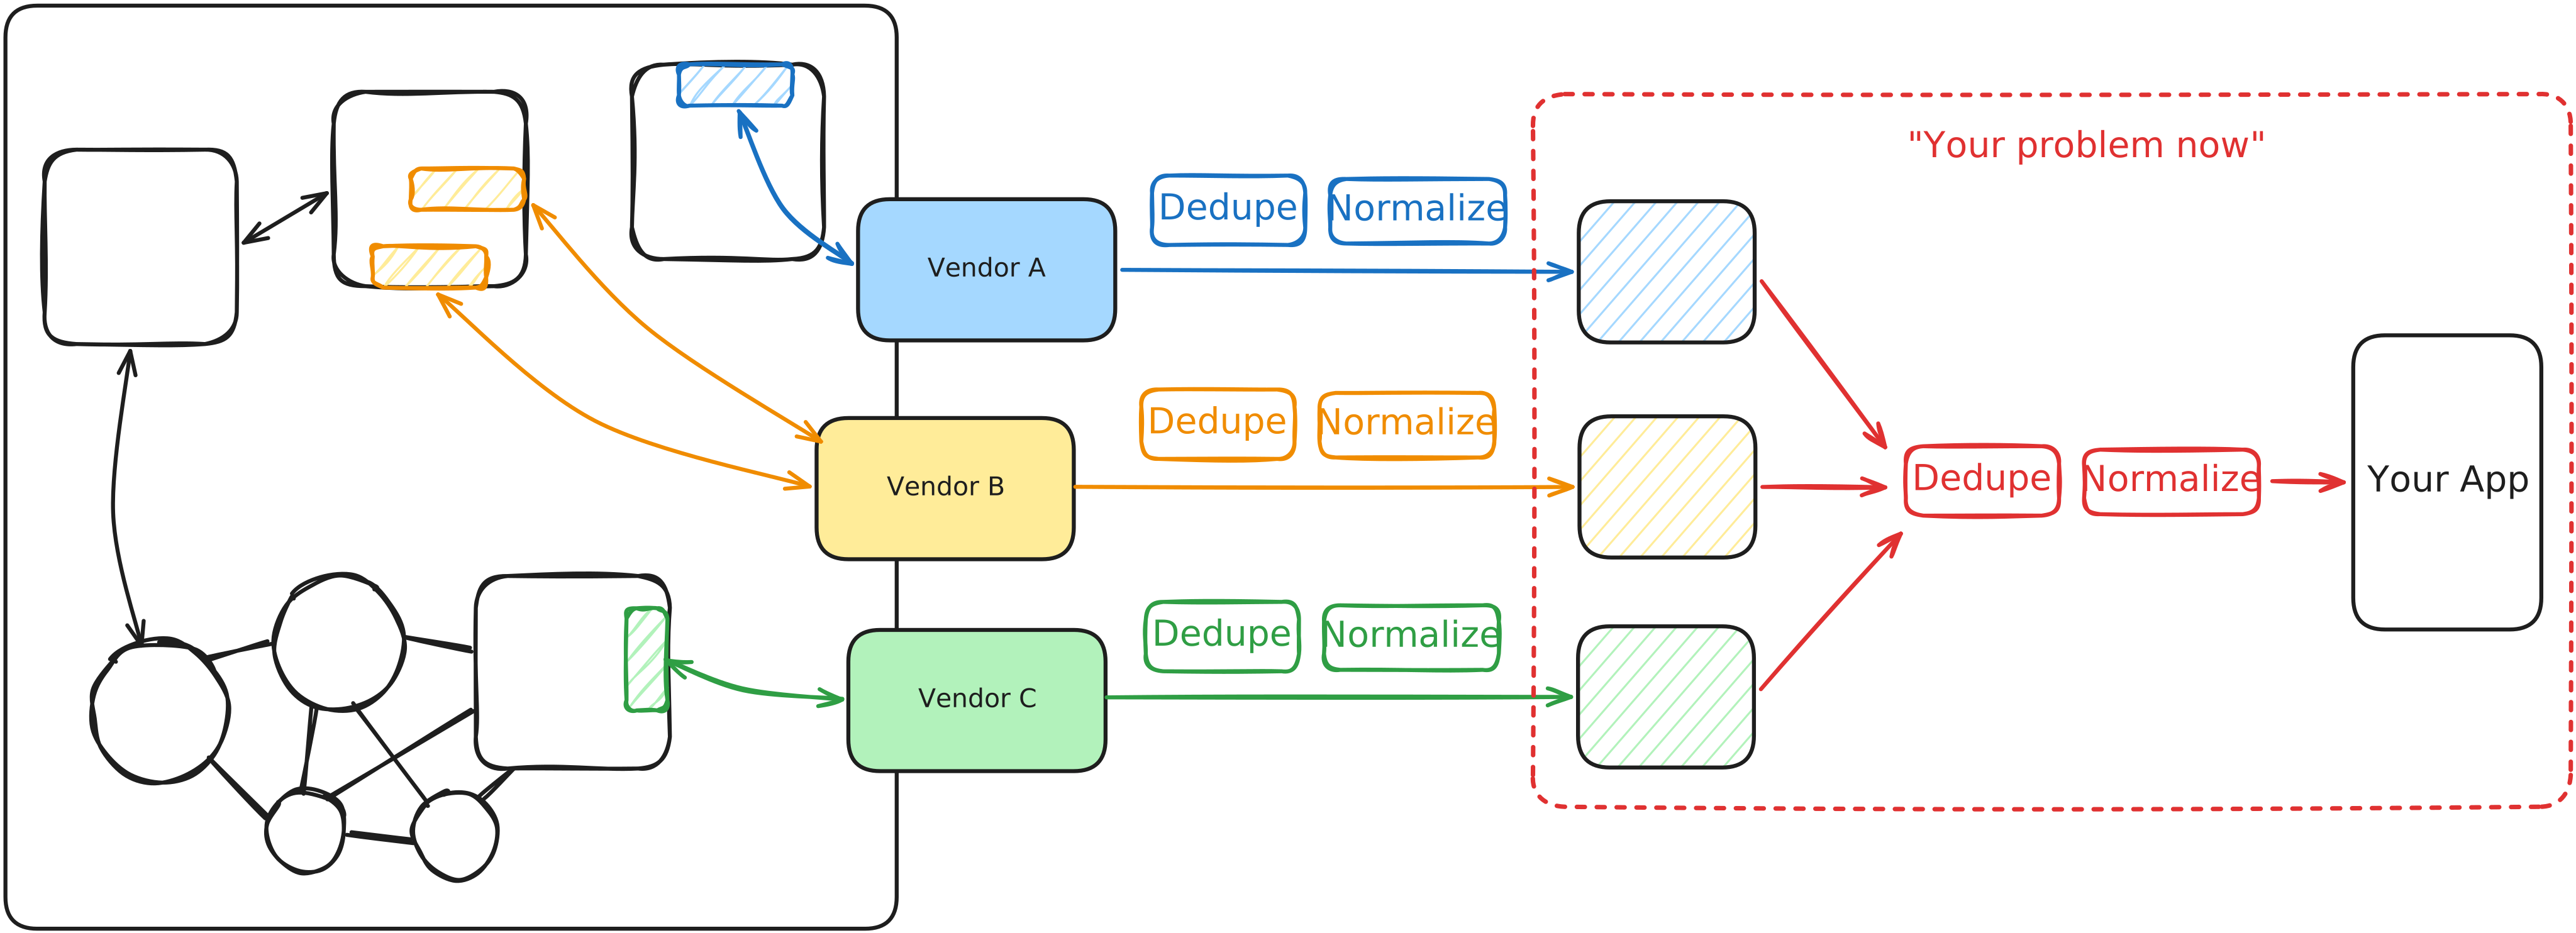
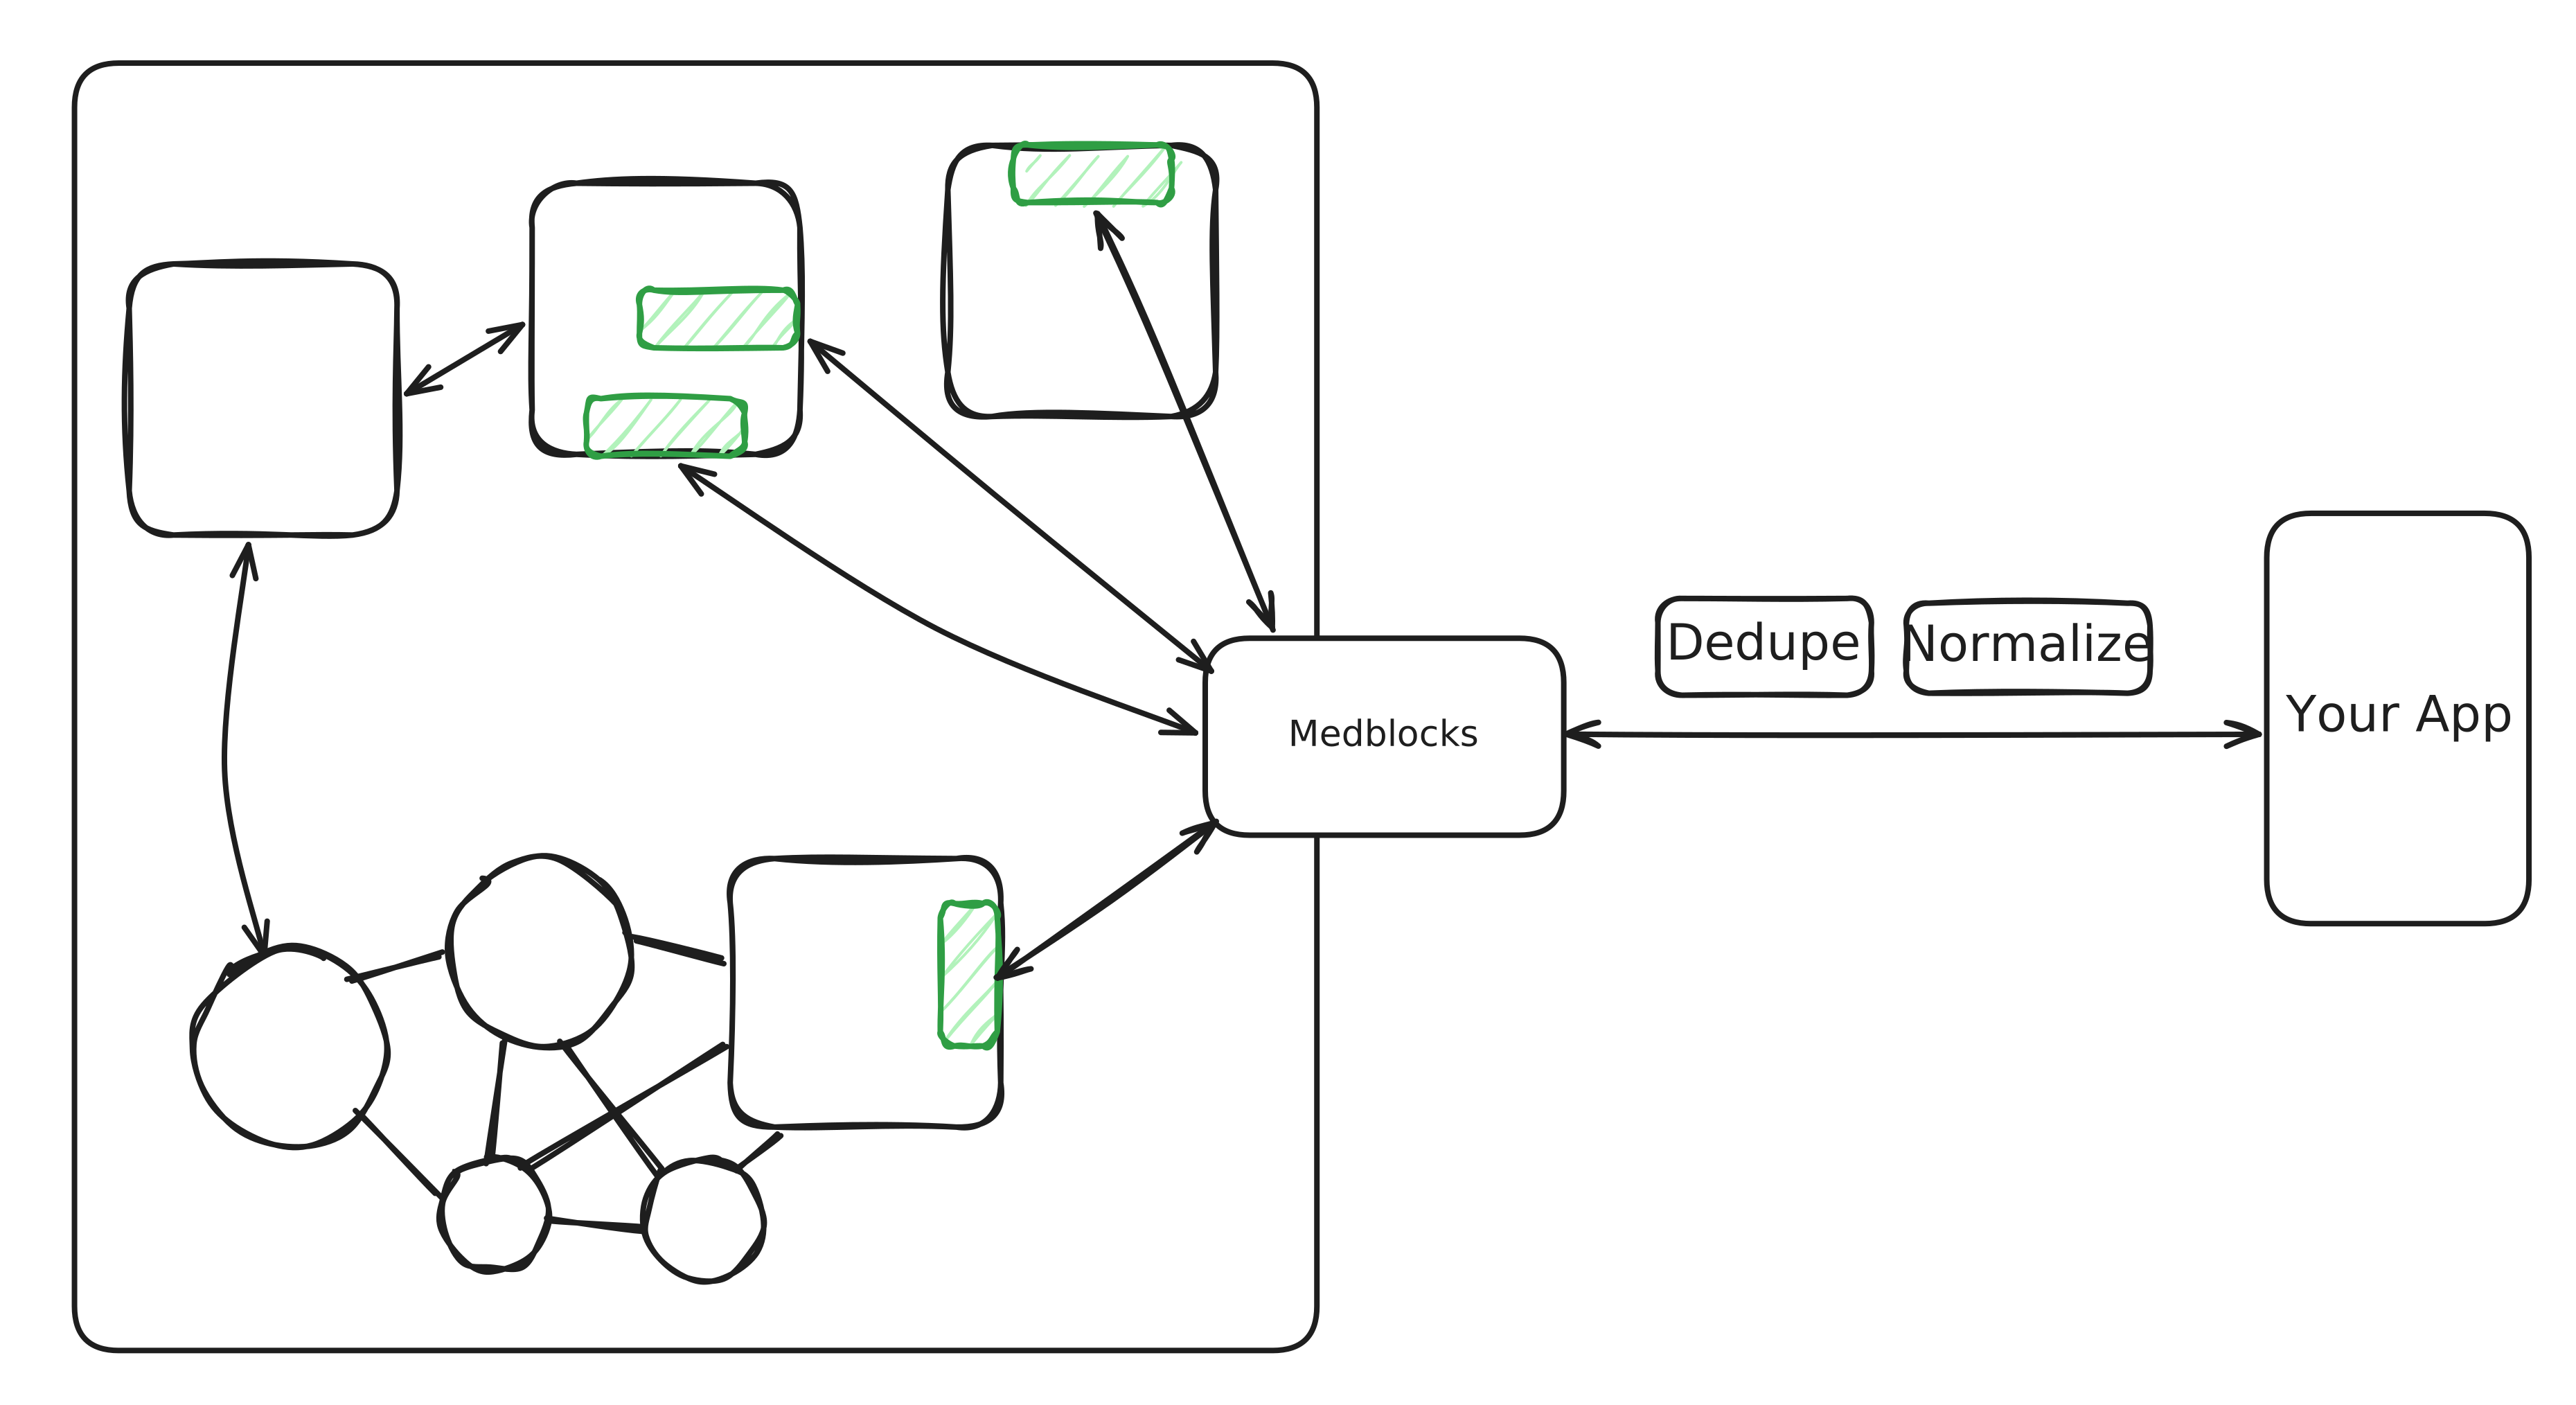
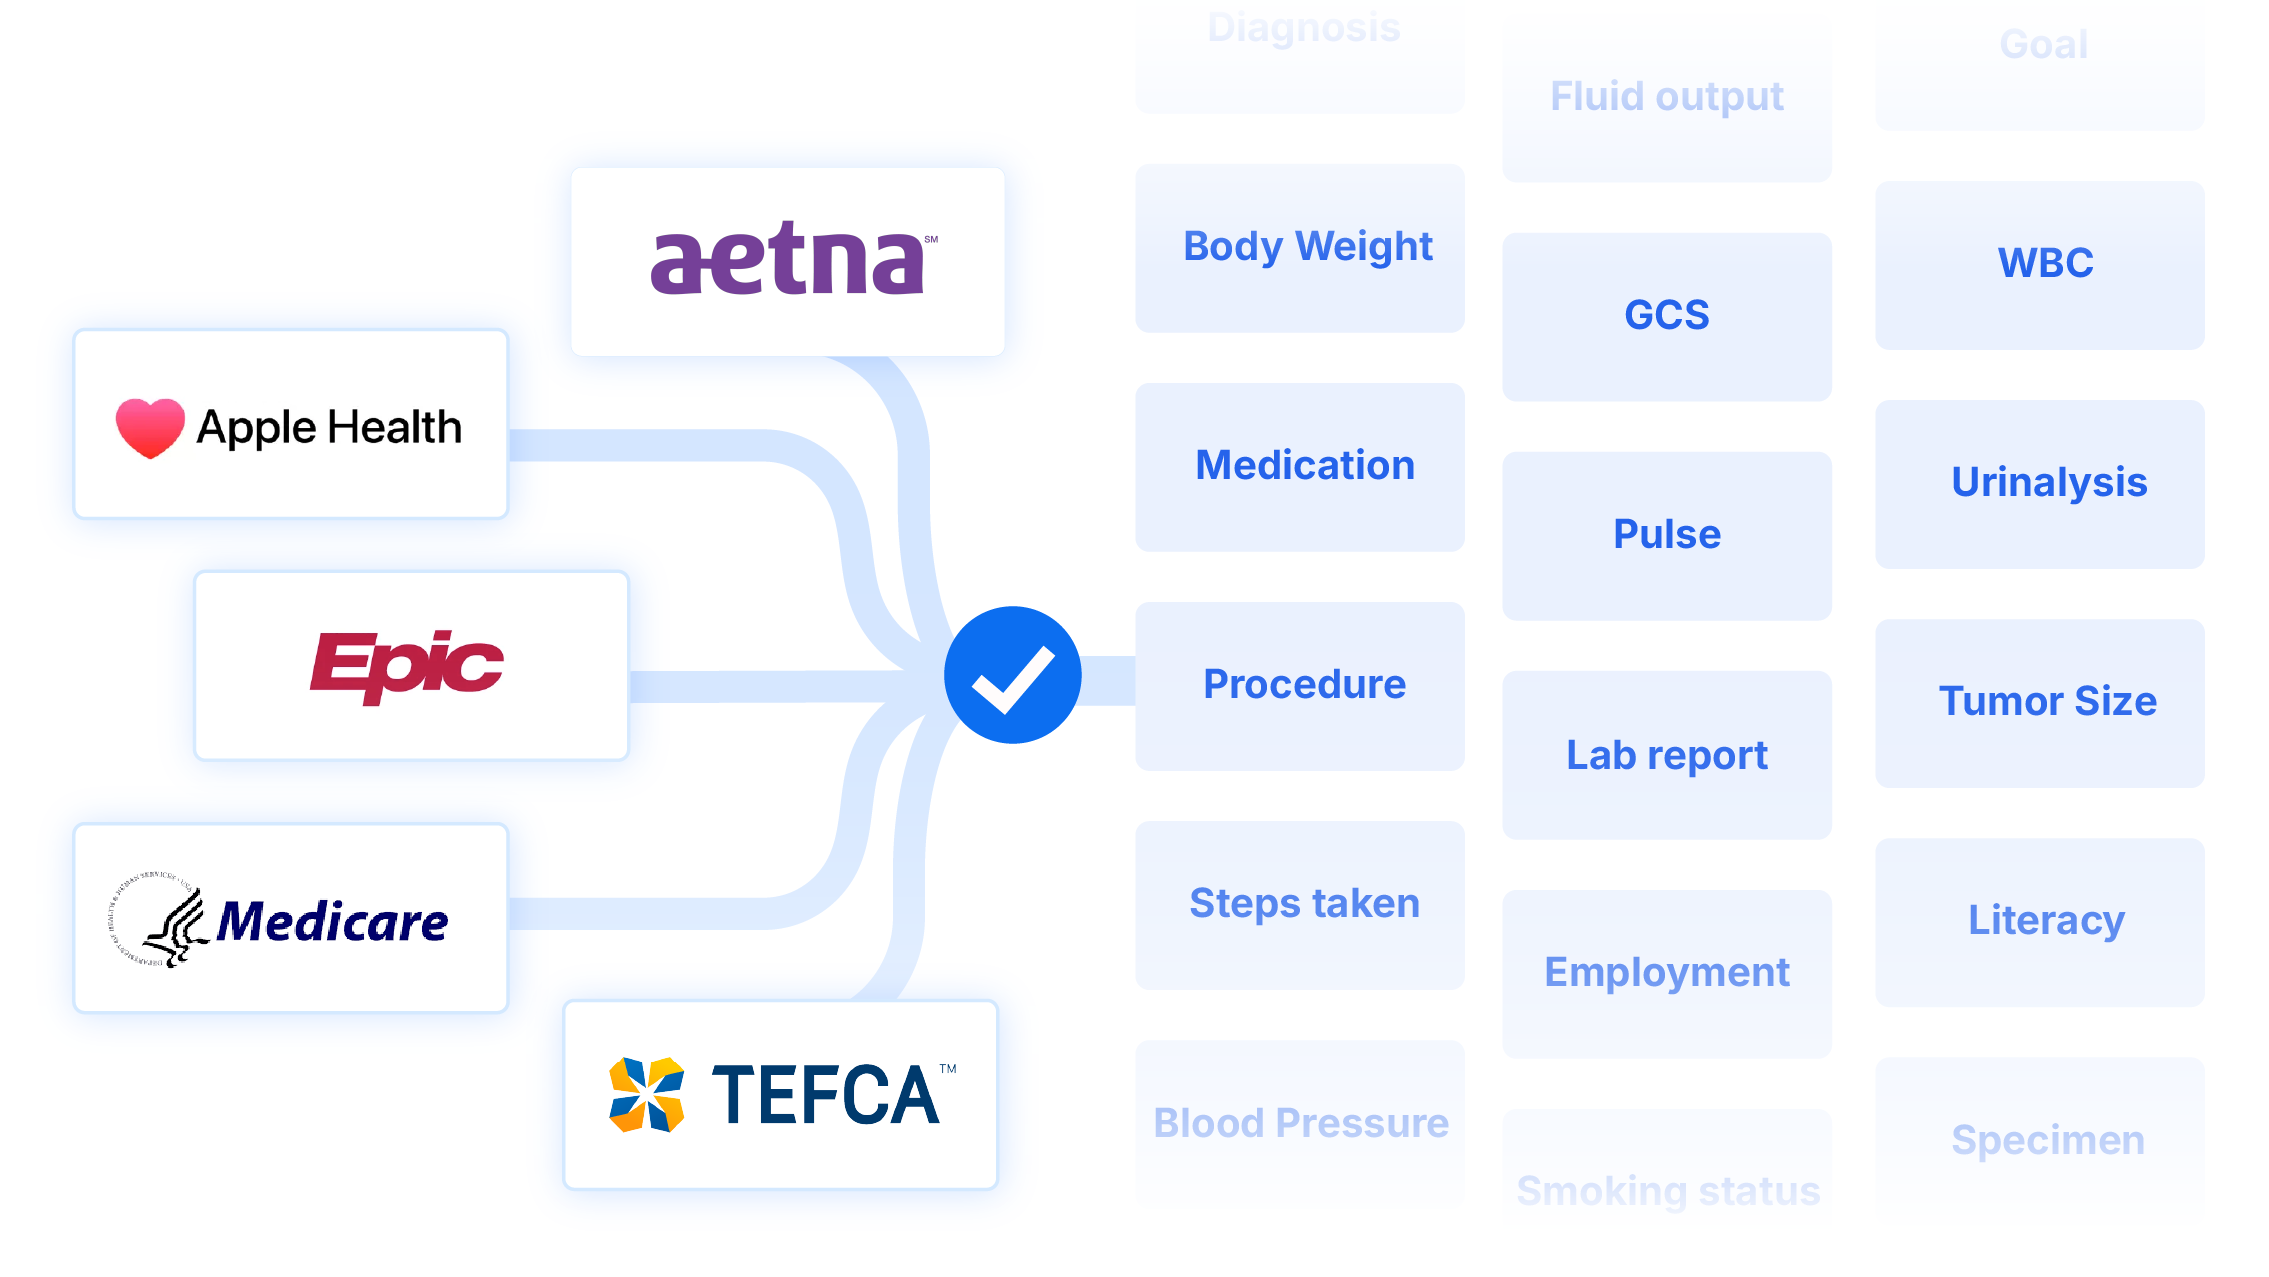
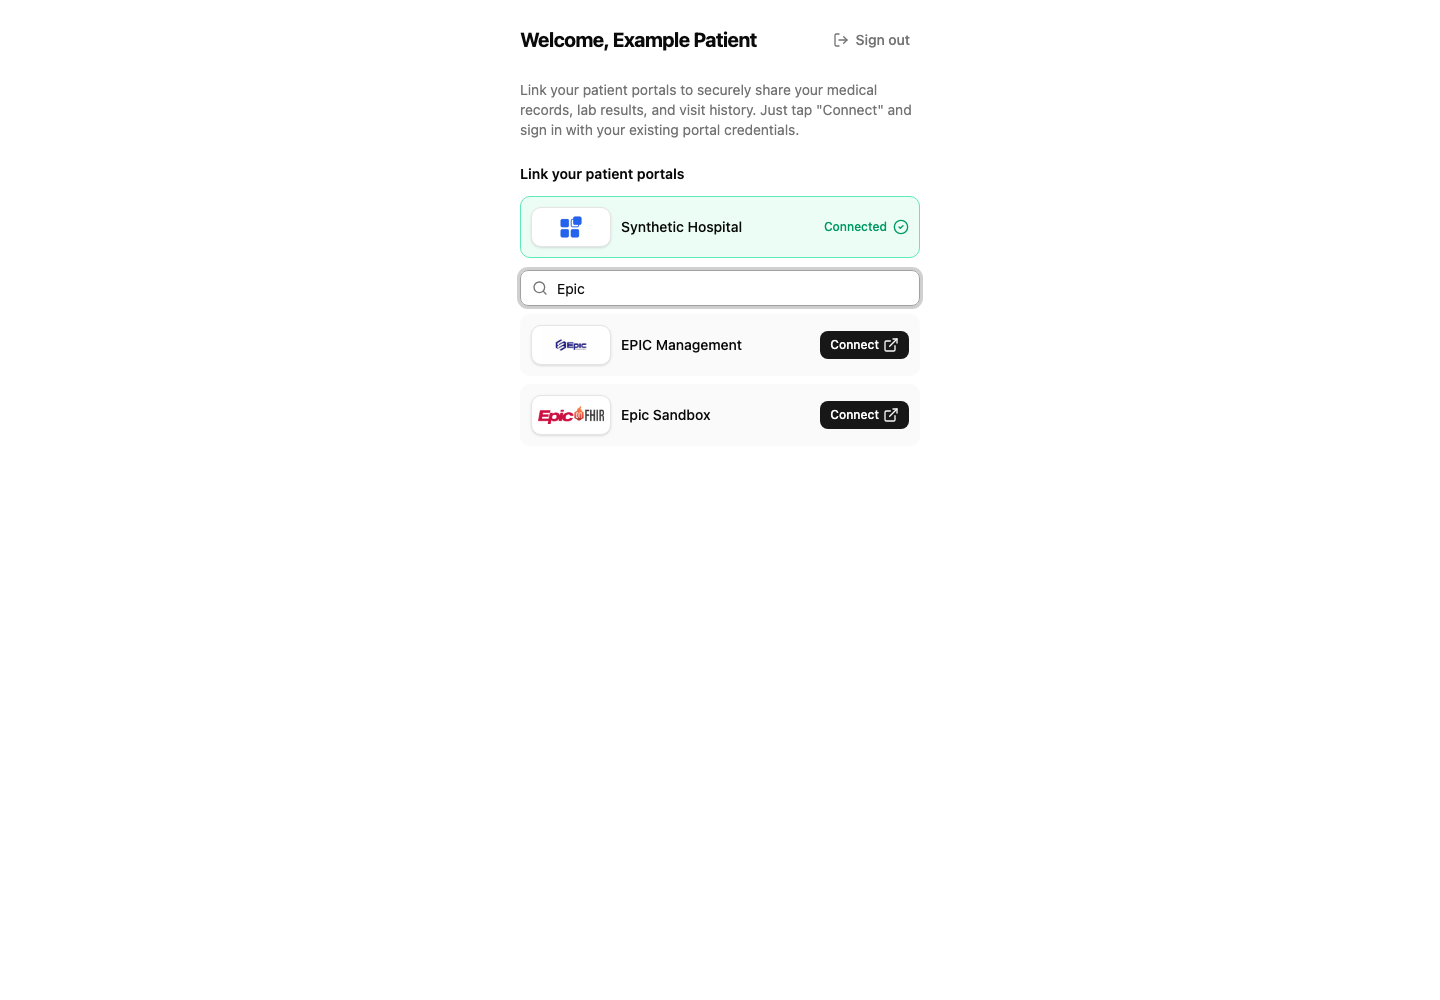 ## SMART on FHIR in one minute [#smart-on-fhir-in-one-minute]
SMART on FHIR is OAuth 2.0 shaped for healthcare, and OAuth is the same pattern as “Sign in with Google”. The patient signs in at their hospital, not in your app, and grants you limited, revocable access to their data. Two things follow from that, and both matter to you.
* Your app never sees the patient’s hospital password. They type it on their hospital’s own page.
* The hospital decides what you can read and can revoke it at any time. You ask, the patient approves, and the hospital grants access on its terms.
## What the patient is approving [#what-the-patient-is-approving]
Your app asks for a set of permissions, called scopes. For patient access these cover reading the patient’s own clinical data, confirming who they are, and keeping access alive after they leave. You do not assemble them, Medblocks requests the right scopes for each source. The one worth knowing by name is `offline_access`, because it is what lets Medblocks keep pulling records after the patient closes the tab. Without it you would get a single snapshot and nothing after.
## What Medblocks handles for you [#what-medblocks-handles-for-you]
Once the patient approves, Medblocks and the hospital run a short exchange to turn that approval into usable access. Medblocks builds the request, uses a technique called PKCE to keep the exchange safe so an intercepted approval cannot be reused, trades the approval for an access token, and stores that token on its own side. Your app never handles the token, and you never write token storage or refresh code.
None of this is yours to build. It is here so you know what “Medblocks runs the sign-in” actually means.
## Keeping access alive [#keeping-access-alive]
Access tokens are short lived by design, often under an hour. So along with the access token, `offline_access` gives Medblocks a longer-lived refresh token, and Medblocks uses it to renew access quietly in the background. Records keep flowing without asking the patient to sign in again.
Renewal can stop working, usually because the patient revoked access or too long passed. When it does, the connection moves to `refresh_failed`. That is the one case that comes back to you. When you see it, prompt the patient to connect again.
## When something goes wrong [#when-something-goes-wrong]
The patient signs in on a system you do not control, so a connection can fail in a few ordinary ways. Treat these as normal states in your UI, not errors to bury.
| What happened | What your app should do |
| --------------------------------------------------- | ------------------------------------------------------------------------- |
| The patient cancelled or declined at their hospital | Offer to try again |
| The hospital returned an error | Log the patient session ID, show a retry, read the session for the reason |
| The session link expired before they finished | Start a new patient session |
| Access lapsed later (`refresh_failed`) | Prompt the patient to reconnect |
## Debugging a connection [#debugging-a-connection]
Every attempt a patient makes leaves a trail you can read in the dashboard. It shows which source they tried, whether they reached the hospital, whether consent went through, and a stable error code when it did not. When a patient tells you it did not work, that history is where you see why, and whether the problem was at the hospital or in how your app set up the session.
## See also [#see-also]
## SMART on FHIR in one minute [#smart-on-fhir-in-one-minute]
SMART on FHIR is OAuth 2.0 shaped for healthcare, and OAuth is the same pattern as “Sign in with Google”. The patient signs in at their hospital, not in your app, and grants you limited, revocable access to their data. Two things follow from that, and both matter to you.
* Your app never sees the patient’s hospital password. They type it on their hospital’s own page.
* The hospital decides what you can read and can revoke it at any time. You ask, the patient approves, and the hospital grants access on its terms.
## What the patient is approving [#what-the-patient-is-approving]
Your app asks for a set of permissions, called scopes. For patient access these cover reading the patient’s own clinical data, confirming who they are, and keeping access alive after they leave. You do not assemble them, Medblocks requests the right scopes for each source. The one worth knowing by name is `offline_access`, because it is what lets Medblocks keep pulling records after the patient closes the tab. Without it you would get a single snapshot and nothing after.
## What Medblocks handles for you [#what-medblocks-handles-for-you]
Once the patient approves, Medblocks and the hospital run a short exchange to turn that approval into usable access. Medblocks builds the request, uses a technique called PKCE to keep the exchange safe so an intercepted approval cannot be reused, trades the approval for an access token, and stores that token on its own side. Your app never handles the token, and you never write token storage or refresh code.
None of this is yours to build. It is here so you know what “Medblocks runs the sign-in” actually means.
## Keeping access alive [#keeping-access-alive]
Access tokens are short lived by design, often under an hour. So along with the access token, `offline_access` gives Medblocks a longer-lived refresh token, and Medblocks uses it to renew access quietly in the background. Records keep flowing without asking the patient to sign in again.
Renewal can stop working, usually because the patient revoked access or too long passed. When it does, the connection moves to `refresh_failed`. That is the one case that comes back to you. When you see it, prompt the patient to connect again.
## When something goes wrong [#when-something-goes-wrong]
The patient signs in on a system you do not control, so a connection can fail in a few ordinary ways. Treat these as normal states in your UI, not errors to bury.
| What happened | What your app should do |
| --------------------------------------------------- | ------------------------------------------------------------------------- |
| The patient cancelled or declined at their hospital | Offer to try again |
| The hospital returned an error | Log the patient session ID, show a retry, read the session for the reason |
| The session link expired before they finished | Start a new patient session |
| Access lapsed later (`refresh_failed`) | Prompt the patient to reconnect |
## Debugging a connection [#debugging-a-connection]
Every attempt a patient makes leaves a trail you can read in the dashboard. It shows which source they tried, whether they reached the hospital, whether consent went through, and a stable error code when it did not. When a patient tells you it did not work, that history is where you see why, and whether the problem was at the hospital or in how your app set up the session.
## See also [#see-also]
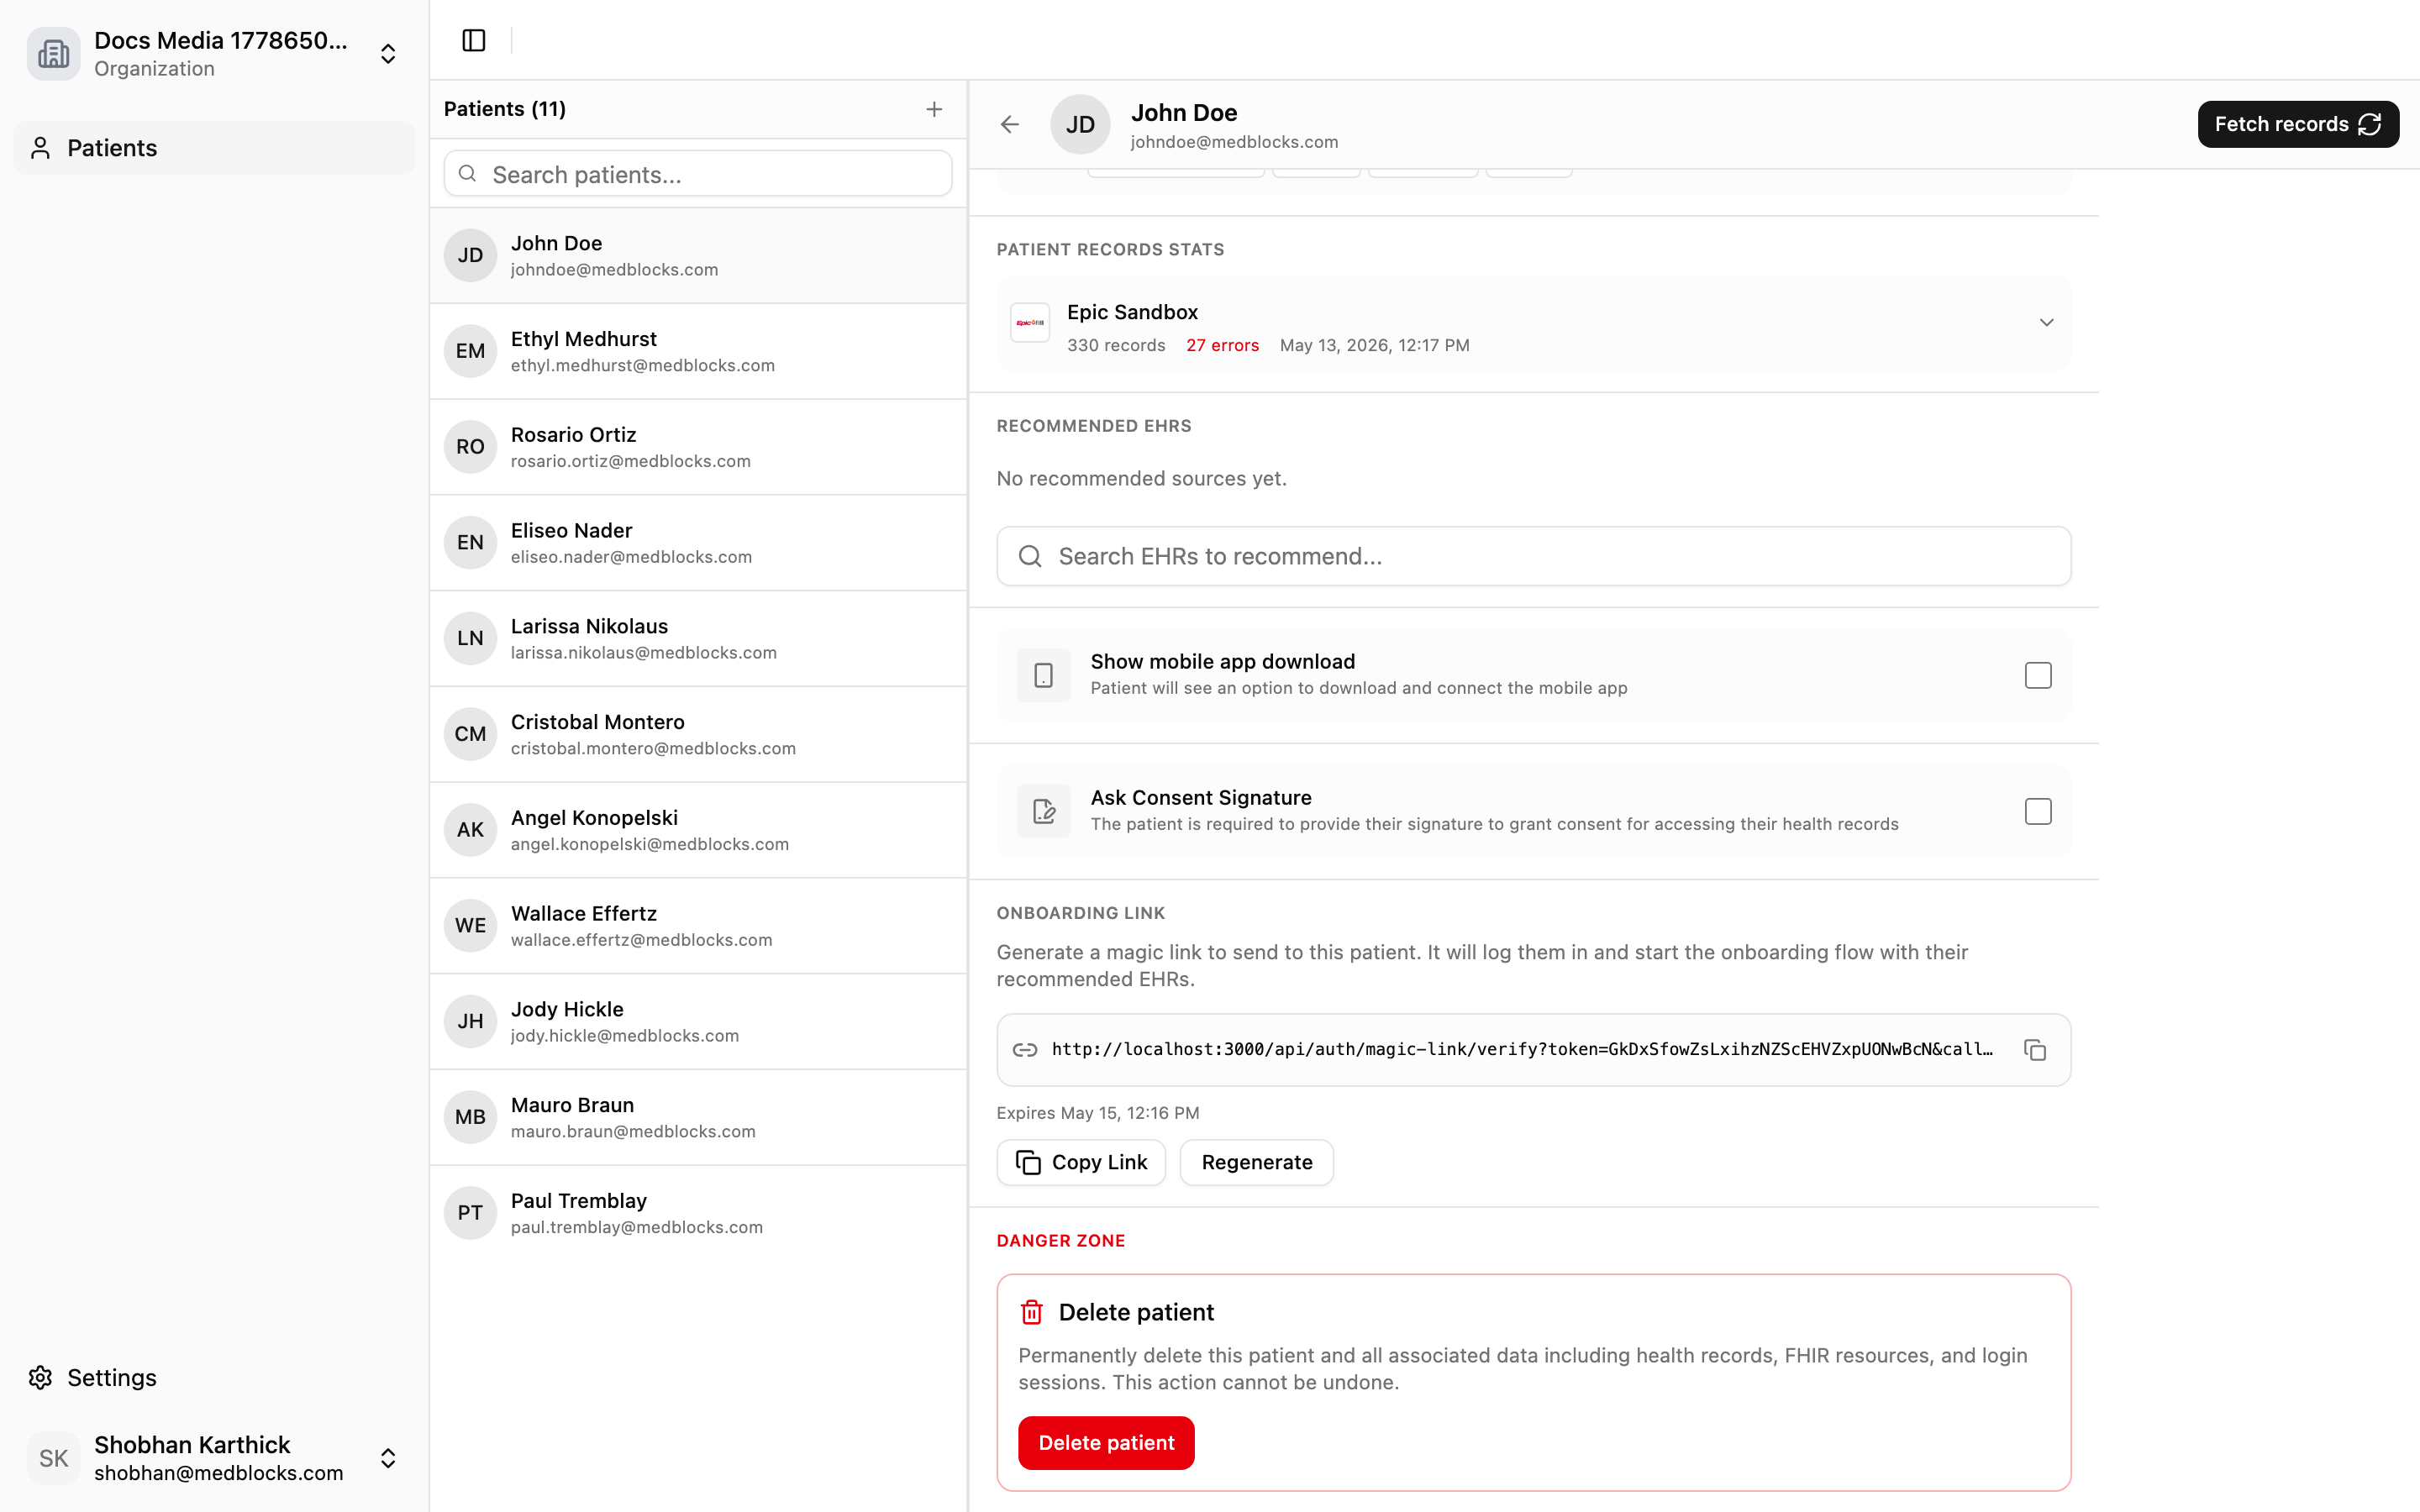 ## It keeps running [#it-keeps-running]
The pull is not a one-time import. Medblocks re-pulls so the record stays current as new data appears at the source, for as long as the access holds. When the access finally lapses, the connection becomes `refresh_failed`, and the patient reconnects to resume.
## See also [#see-also]
## It keeps running [#it-keeps-running]
The pull is not a one-time import. Medblocks re-pulls so the record stays current as new data appears at the source, for as long as the access holds. When the access finally lapses, the connection becomes `refresh_failed`, and the patient reconnects to resume.
## See also [#see-also]
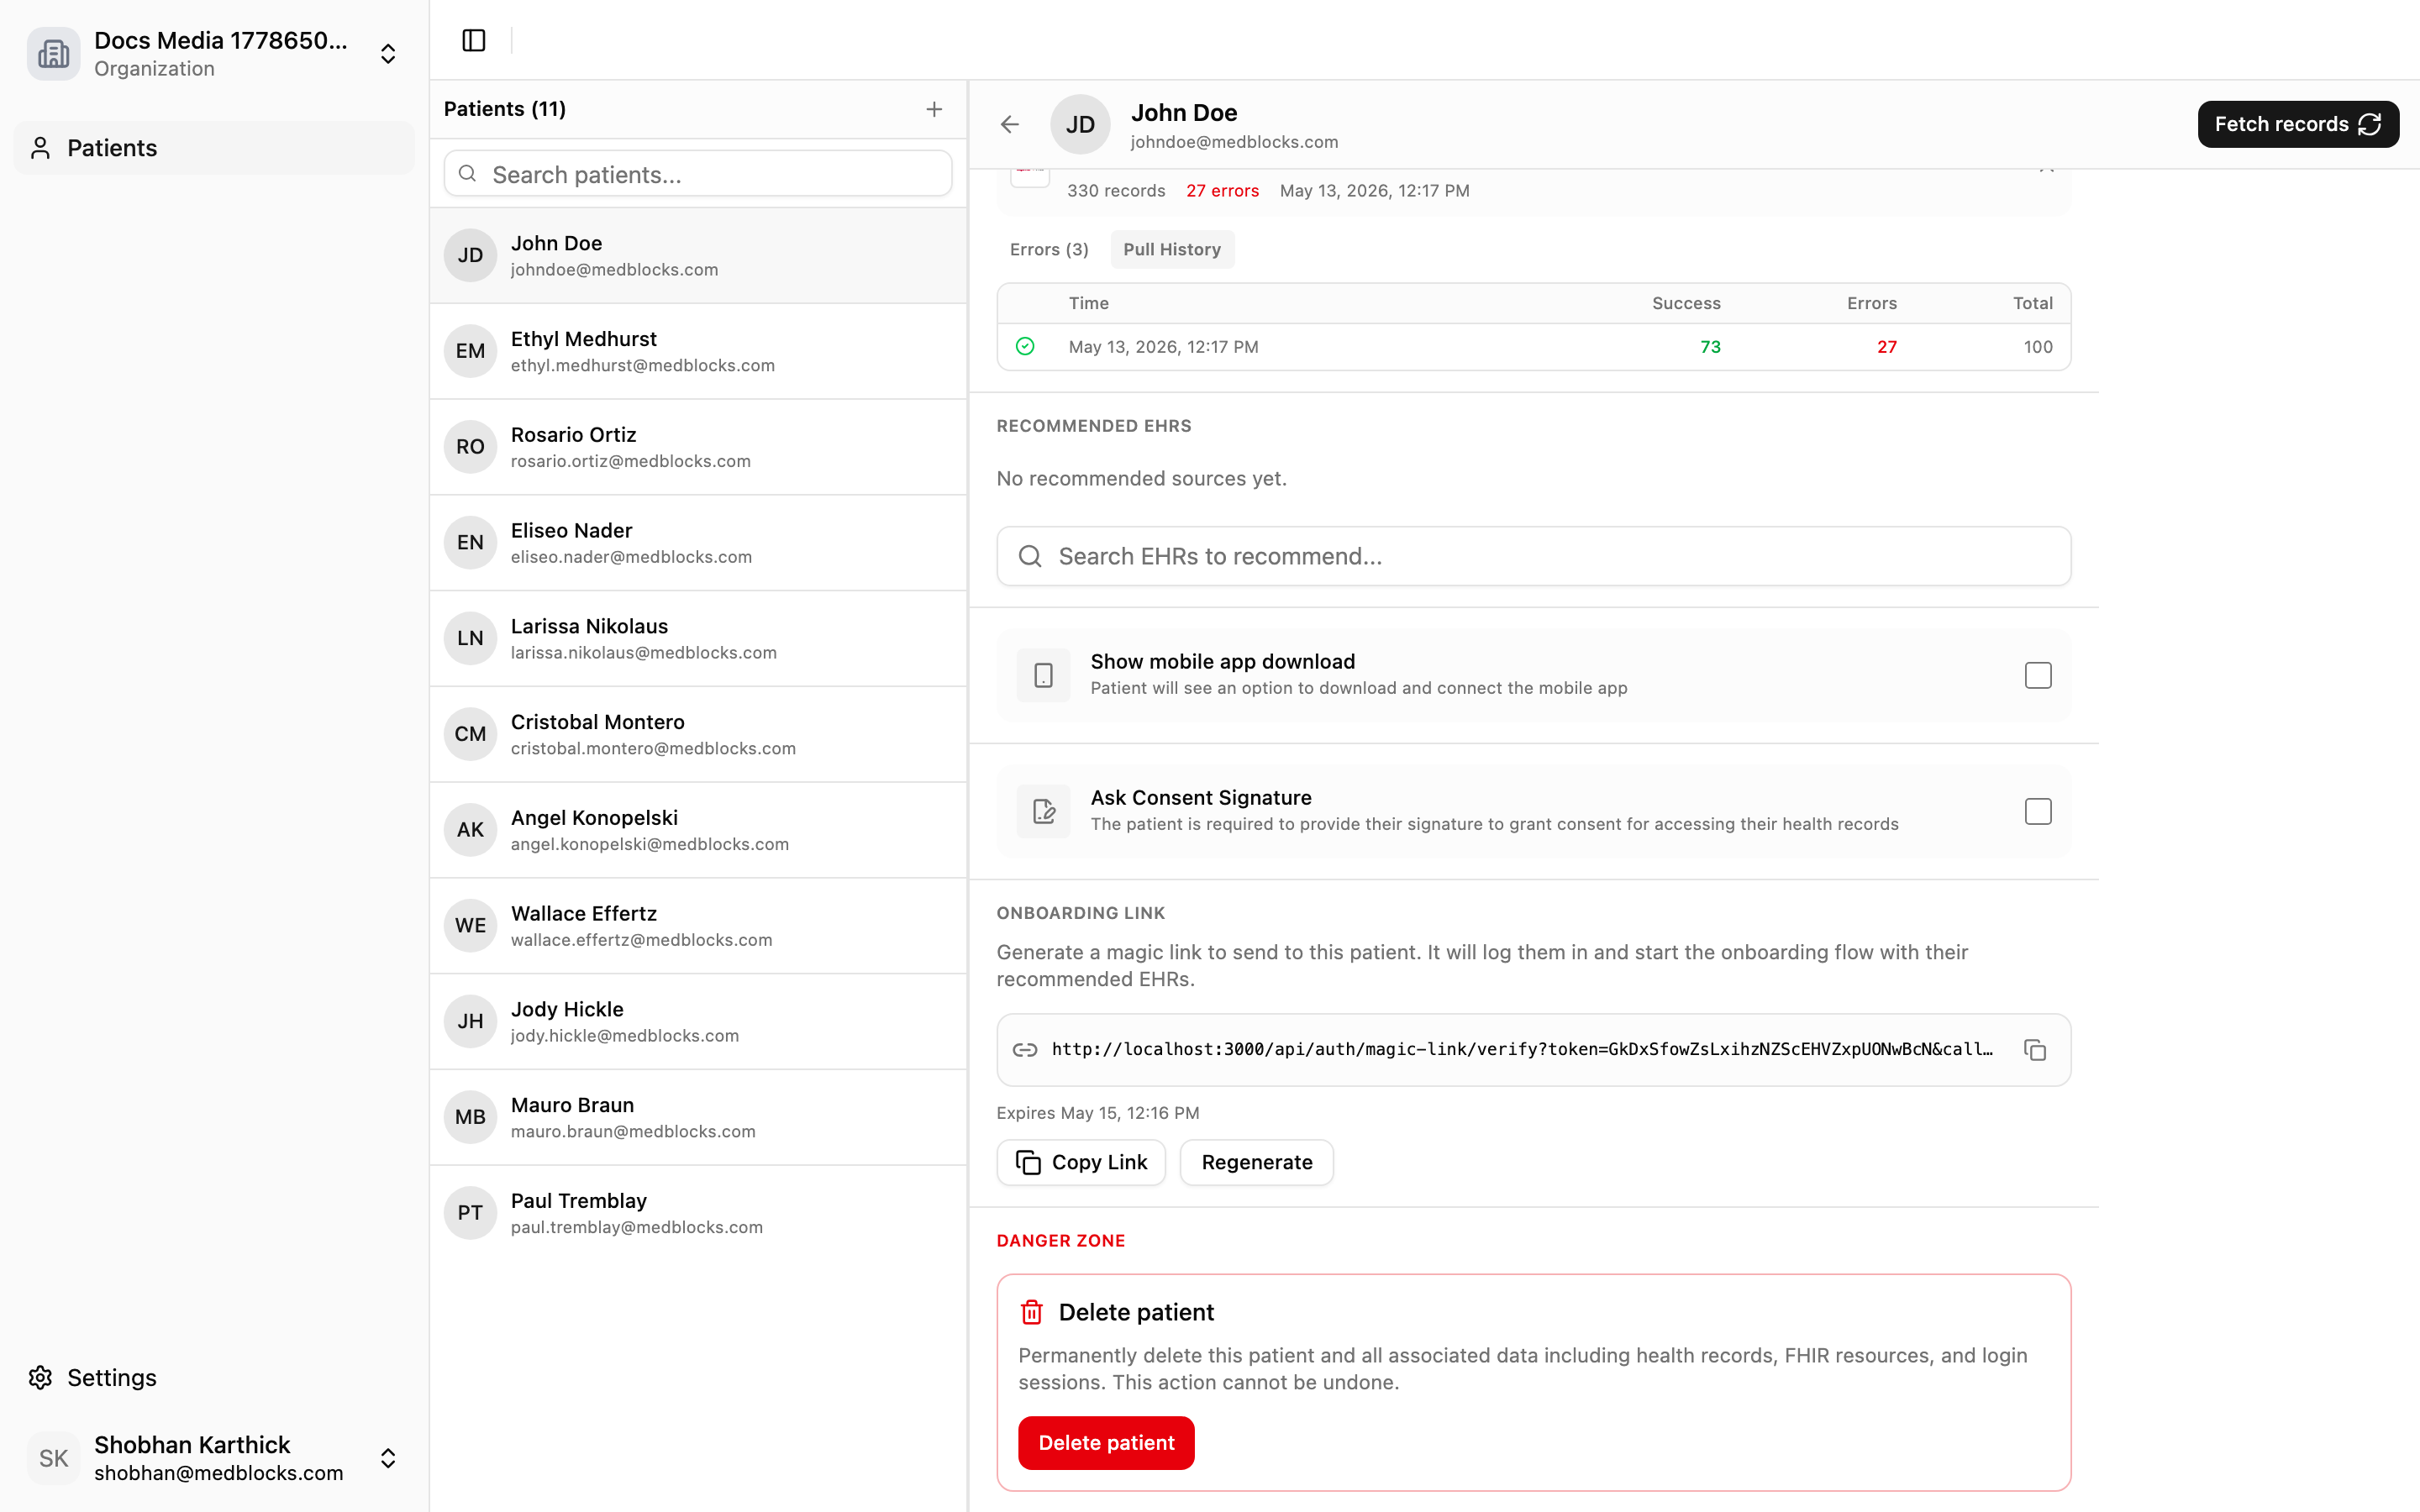 ## Failure handling [#failure-handling]
| Failure | What it means | What to do |
| -------------------- | ------------------------------------------------- | -------------------------------------- |
| Portal auth failed | The patient did not grant usable access | Ask the patient to retry |
| Retrieval error | The portal returned an error during FHIR calls | Review the patient’s pull history |
| Token refresh failed | The stored refresh token is no longer usable | Ask the patient to reconnect |
| Export failed | Data arrived but delivery to a destination failed | Retry from the export destination page |
## When to use webhooks [#when-to-use-webhooks]
Use dashboard monitoring when a human needs to investigate a patient or destination. Use [Webhooks](/docs/webhooks) when your backend should react automatically.
| Event | Use it for |
| --------------------------------- | -------------------------------------------------- |
| `records.sync.completed` | Start downstream processing after a pull finishes. |
| `records.sync.failed` | Alert operations or show a support task. |
| `connection.token_refresh_failed` | Ask the patient to reconnect. |
## How it relates to export [#how-it-relates-to-export]
Background pull brings data into Medblocks. Export sends it out. When a pull completes, enabled export destinations can receive the new data. A patient connection can succeed even if an export destination later fails.
## See also [#see-also]
## Failure handling [#failure-handling]
| Failure | What it means | What to do |
| -------------------- | ------------------------------------------------- | -------------------------------------- |
| Portal auth failed | The patient did not grant usable access | Ask the patient to retry |
| Retrieval error | The portal returned an error during FHIR calls | Review the patient’s pull history |
| Token refresh failed | The stored refresh token is no longer usable | Ask the patient to reconnect |
| Export failed | Data arrived but delivery to a destination failed | Retry from the export destination page |
## When to use webhooks [#when-to-use-webhooks]
Use dashboard monitoring when a human needs to investigate a patient or destination. Use [Webhooks](/docs/webhooks) when your backend should react automatically.
| Event | Use it for |
| --------------------------------- | -------------------------------------------------- |
| `records.sync.completed` | Start downstream processing after a pull finishes. |
| `records.sync.failed` | Alert operations or show a support task. |
| `connection.token_refresh_failed` | Ask the patient to reconnect. |
## How it relates to export [#how-it-relates-to-export]
Background pull brings data into Medblocks. Export sends it out. When a pull completes, enabled export destinations can receive the new data. A patient connection can succeed even if an export destination later fails.
## See also [#see-also]