Introduction
This version of Medblocks UI is now depreciated. We have moved to web components. For reference on the web components version, please read the documentation.
It is a common need to automatically generate forms from openEHR templates. A well-known example is the Better EHR Studio. It offers a Form Builder and an AQL Builder. However, there is no open-source alternative, especially for low-resource environments, where paying an expensive openEHR provider is not affordable. I have been working on this problem for a while, and today I’m happy to announce Medblocks UI under the Apache 2 license.

Tutorial
A video version of the tutorial is available here:
If you prefer reading, read on!
1. Create a template
The first step is to create a template. We’ll be using the Archetype Designer. We’ll be creating an Initial Assessment Template with the Glasgow Coma Scale and Pulse of the patient.
For this template, we need the following archetypes:
Click on Export ADL for the above archetypes and keep them ready.
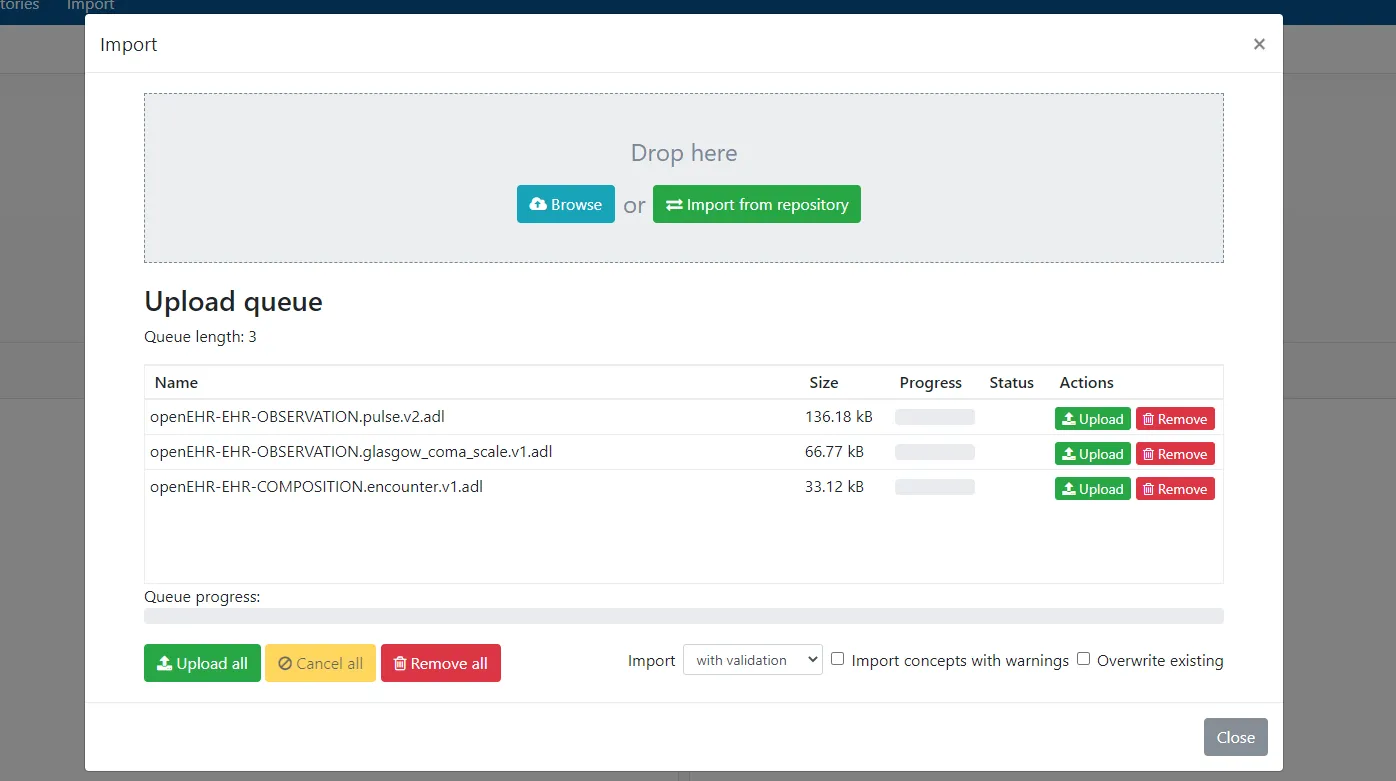
Go to the Archetype Designer and sign in or sign up. Upload all the archetypes we just exported like so:
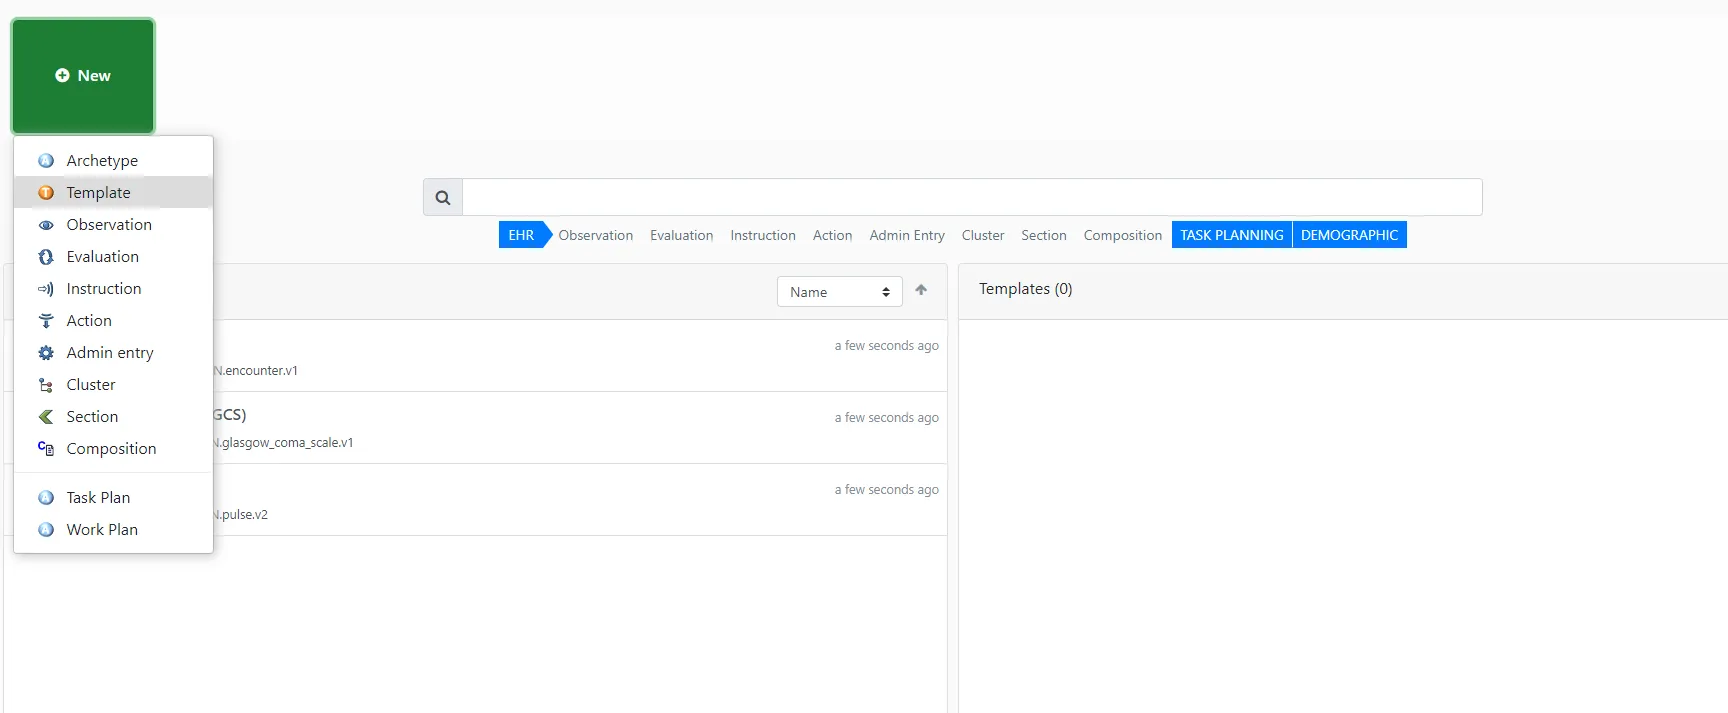
First, we’ll create a new template for our Initial assessment:
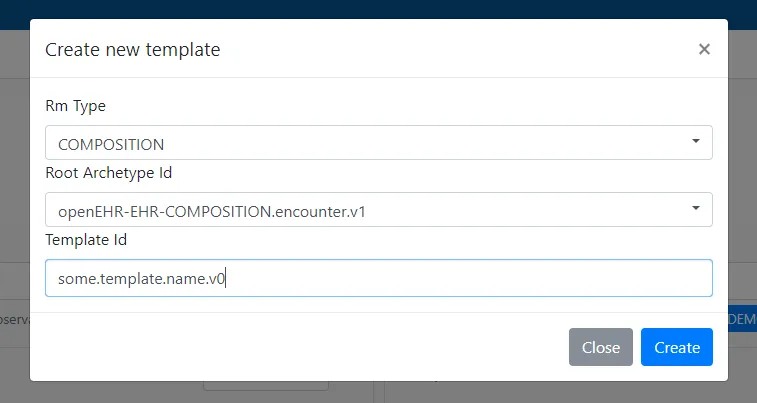
Next, we’ll inherit from the encounter archetype we just uploaded:
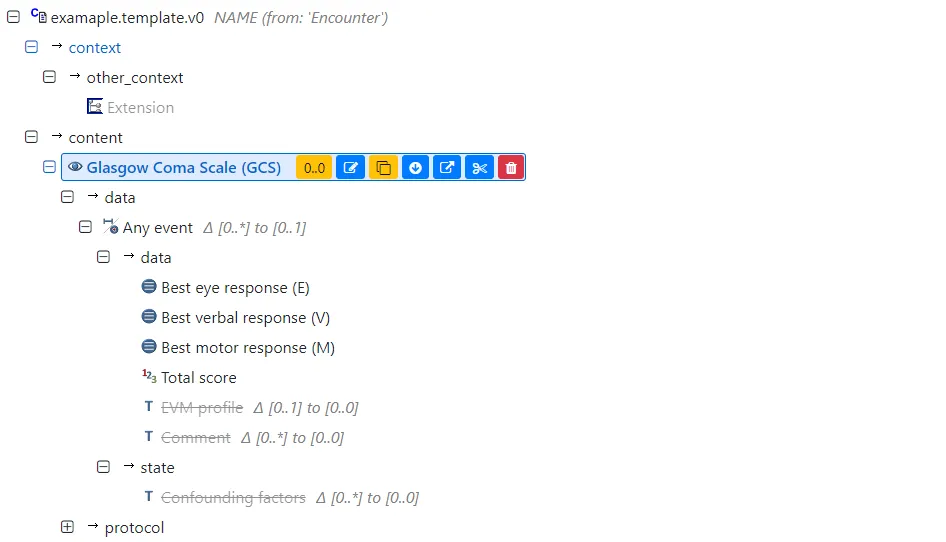
Next, click on “content” and add the Glasgow coma scale and Pulse archetypes to the composition. We’ll be excluding most of the attributes, but a few like so for GCS:
And for the pulse archetype like so:
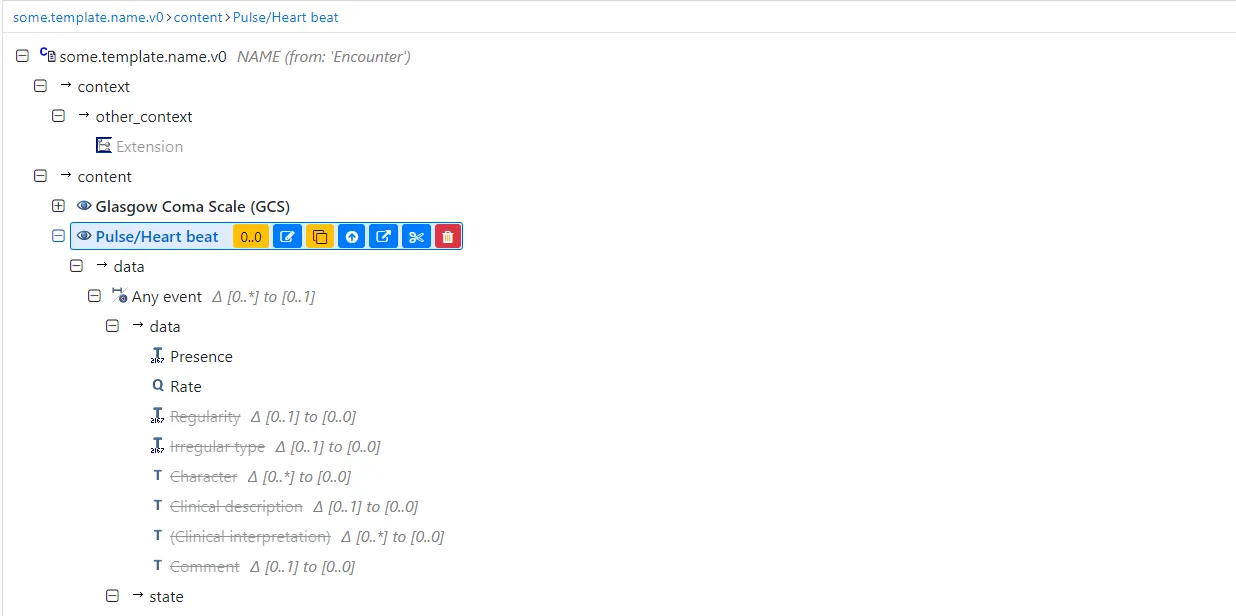
Rename the template to your liking. Now, you can click on Export and download the file as a web template.
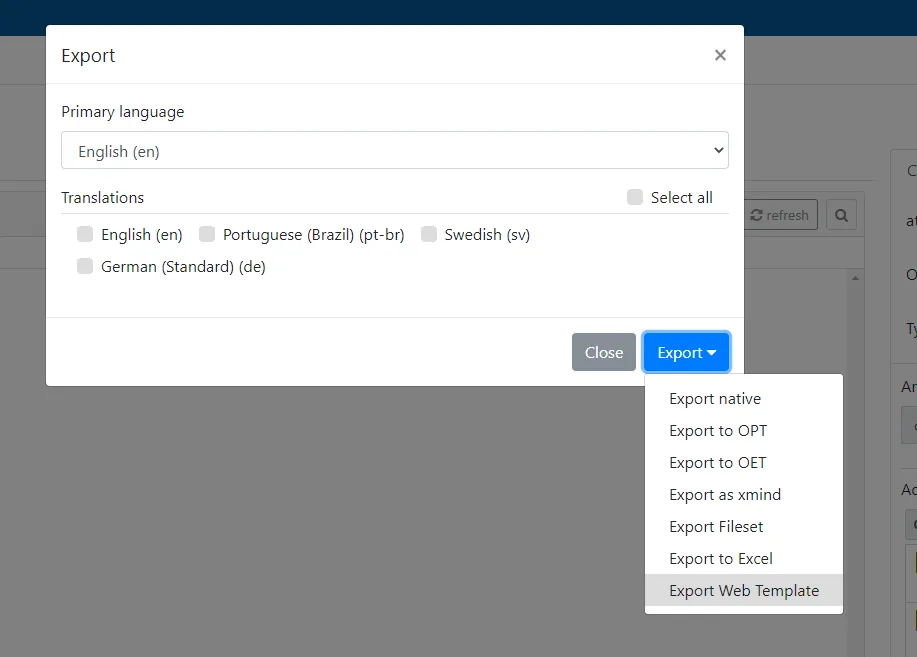
Be sure to also export as OPT for publishing the template to am openEHR Clinical Data Repository.
- Upload web template
Once the web template is ready, open the Medblocks UI website(not live). Navigate to Settings and click on the Add template button and upload the web template that you just got from the previous step. You can also download the web template that I made.
If all goes well, your template should show up like so:

Click on Data entry at the top of the page. You can see that your template now shows up in the tab. Click on the “Initial assessment” tab, and you have an automatically generated form.
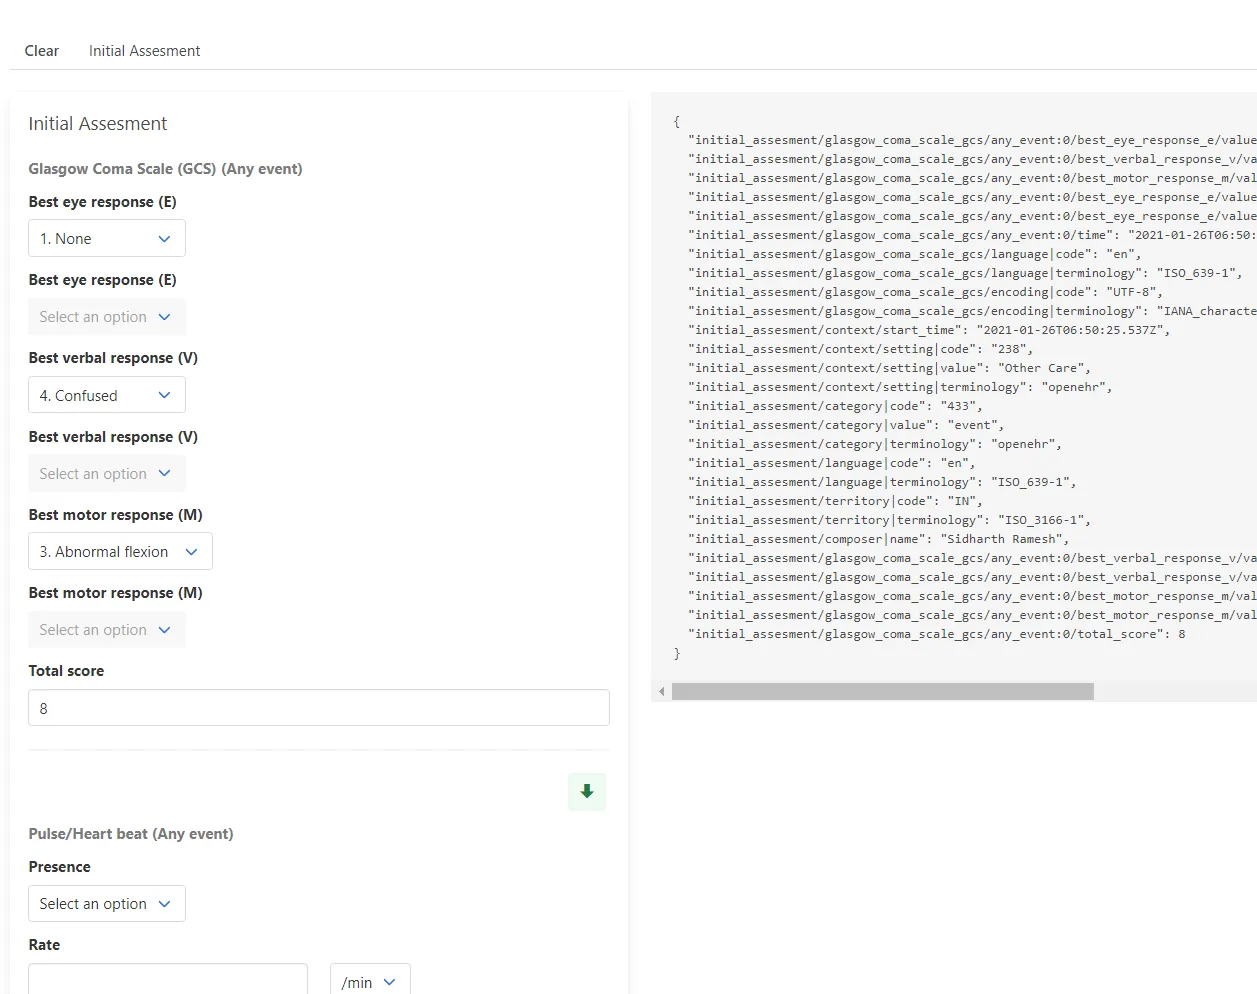
You can play around with the form on the left side, and you’ll see that they generate a composition on the right side. This composition can be committed to an openEHR CDR.
However, this is just the first step. You might have noticed that the form doesn’t look its best. Some redundant fields show up on the Glasgow Coma Scale. We may even want to automatically calculate the GCS score if the E, V and, M scores are present. We may also want the pulse rate to show up only if the pulse is present.
3. Customize
Let’s address these issues by customizing the auto-generated form.
In the settings, click on Customize.
Changing the Layout
Click on COMPOSITION. Let’s make the form render the contents horizontally instead of vertically. Click on the Layout and choose Horizontal.
Hiding elements
There are a few DV_CODED_TEXT elements that render in this form with the Glasgow Coma Scale. That’s because of how the Archetype designer handles null_flavors. Let’s hide those for now. Click on each DV_CODED_TEXT element and set render to false.
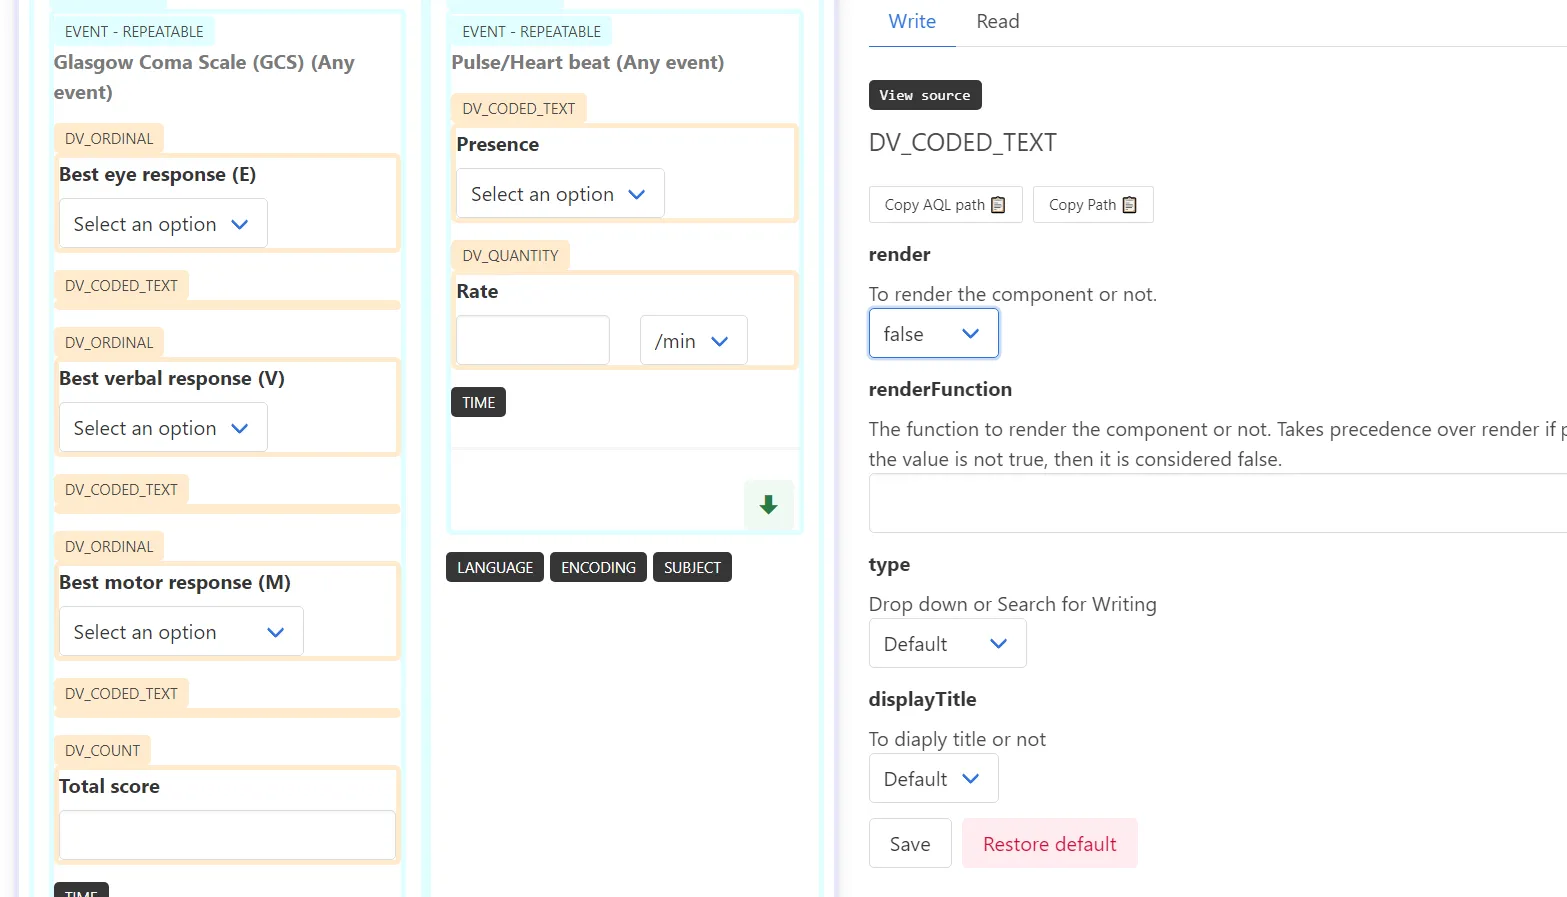
Click save to persist the customizations.
Conditional rendering
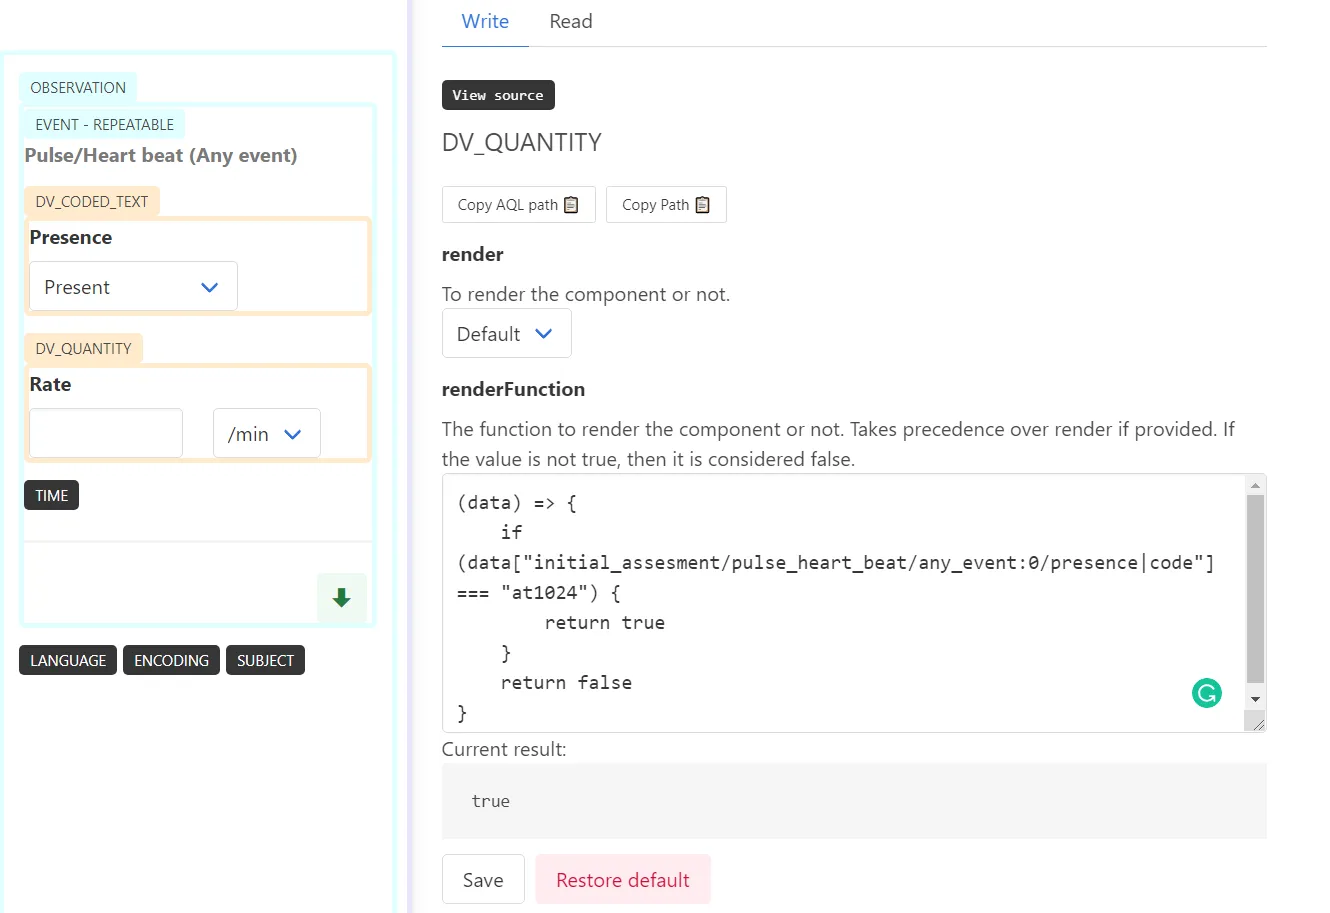
Now, we want to make the pulse rate show up only if the pulse is present. This can be done using a plain javascript function. First, select the Presence dropdown to Present. Next, click on view source on the top of the right column - this will show you the current state of the form. It will show something like so:
{
  "initial_assesment/pulse_heart_beat/presence|code": "at1024",
  "initial_assesment/pulse_heart_beat/presence|value": "Present",
  "initial_assesment/pulse_heart_beat/presence|terminology": "local",
  "initial_assesment/pulse_heart_beat/time": "2021-01-26T09:44:17.898Z",
  "initial_assesment/pulse_heart_beat/language|code": "en",
  "initial_assesment/pulse_heart_beat/language|terminology": "ISO_639-1",
  "initial_assesment/pulse_heart_beat/encoding|code": "UTF-8",
  "initial_assesment/pulse_heart_beat/encoding|terminology": "IANA_character-sets",
  "initial_assesment/context/start_time": "2021-01-26T09:44:17.898Z",
  "initial_assesment/context/setting|code": "238",
  "initial_assesment/context/setting|value": "Other Care",
  "initial_assesment/context/setting|terminology": "openehr",
  "initial_assesment/category|code": "433",
  "initial_assesment/category|value": "event",
  "initial_assesment/category|terminology": "openehr",
  "initial_assesment/language|code": "en",
  "initial_assesment/language|terminology": "ISO_639-1",
  "initial_assesment/territory|code": "IN",
  "initial_assesment/territory|terminology": "ISO_3166-1",
  "initial_assesment/composer|name": "Sidharth Ramesh"
}
At the moment, we are only interested in the initial_assesment/pulse_heart_beat/presence|code. We should render the pulse rate only when this value is equal to at1024.
Copy the path, close the source view and open up the customization options for Rate, which is a DV_QUANTITY. Under the renderFunction, copy-paste this javascript function:
(data) => {
    if (data["initial_assesment/pulse_heart_beat/presence|code"] === "at1024") {
        return true
    }
    return false
}Warning: The paths may vary depending on the name and id of your template. Always look at the source in your template to get accurate paths.
The result of the execution is displayed at the bottom. You can play around with the Presence and check if the function works properly.
Computed values
Next, we’ll try to automatically calculate the Glasgow Coma Scale if the E, V, and M components are present. This also uses a javascript function. Open up the Total Score which is a DV_COUNT and paste this into the computeFunction:
(data) => {
    if (
    data["initial_assesment/glasgow_coma_scale_gcs/best_eye_response_e/value|ordinal"]
    && data["initial_assesment/glasgow_coma_scale_gcs/best_verbal_response_v/value|ordinal"]
    && data["initial_assesment/glasgow_coma_scale_gcs/best_motor_response_m/value|ordinal"]) {
        return data["initial_assesment/glasgow_coma_scale_gcs/best_eye_response_e/value|ordinal"]
        + data["initial_assesment/glasgow_coma_scale_gcs/best_verbal_response_v/value|ordinal"]
        + data["initial_assesment/glasgow_coma_scale_gcs/best_motor_response_m/value|ordinal"]
    }
}
The result of your computed value should look like below. You can see that the total score of 7 is calculated from the other values on the fly.
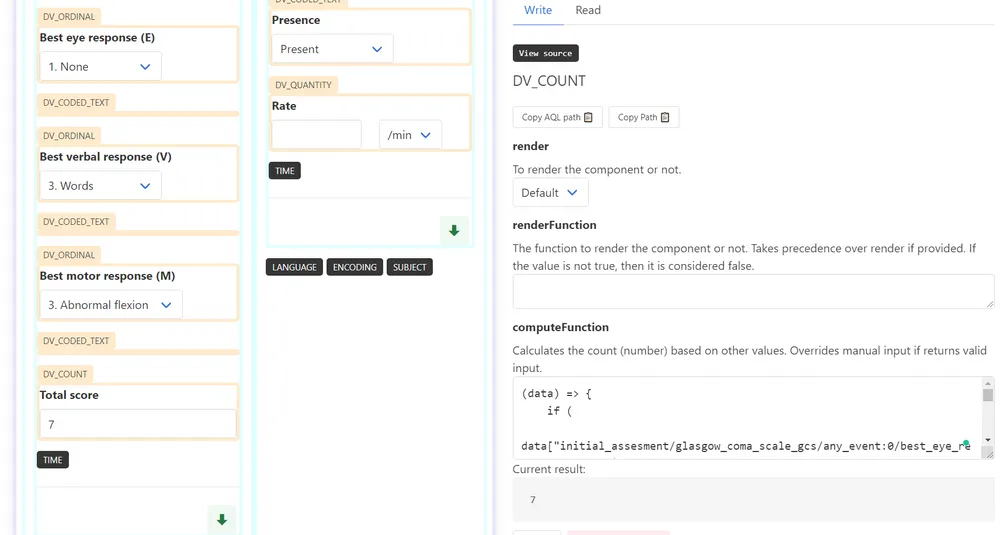
Note that this computation only runs when all three values of E, V and, M are present. And if the computation returns a value, the user cannot over-ride it with manual values. This is to avoid inconsistency while capturing data.
Warning: The paths may vary depending on the name and id of your template. Always look at the source in your template to get accurate paths.
Exporting and Importing
You can export this UI configuration by going to the settings and clicking on Export. The Web templates and configuration changes you made are exported into a JSON file.
You can import this using the Import button. Note that all your other configurations will be rewritten. The app currently uses local storage on your browser to persist the configuration, so you can use the export/import function to test the same configuration on multiple devices too.
Security Warning: The exported files may include functions that execute in your browser. If it is from an untrusted source, please verify the following functions - displayFunction, renderFunction, computeFunction yourself before importing it to avoid XSS attacks.
Future Direction
- Add support for more data types. Only a few are supported at the moment.
- Better support for elements with multiple cardinality.
- Integrated SNOMED CT terminology searches.
- Smoother animations.
- Compile into web components and publish to npm, with a guide for frontend frameworks like React, Angular, and Vue.
Feel free to raise an issue for bugs and feature requests.

