IHE XDS Explained: Registry, Repository & ITI Transactions
Understand IHE XDS federated architecture: Registry, Repository, ITI-41/42/43 transactions & SOAP. Run a working XDS exchange locally with the NIST toolkit.
August 23, 2024
Medblocks is primarily focused on providing the best clinical workflow experiences to doctors and other healthcare practitioners. We also pride ourselves in capturing and storing data that comply with world-recognized standards like FHIR and openEHR.
However, a fully functioning hospital or clinic chain’s requirements are not limited to this. They also require employee and patient management, appointment scheduling, sales, purchase, inventory and billing tools, insurance integration, customer relations management (CRM), etc. While some features like patient management and appointment scheduling, are easy to implement, others require significant development effort.
We initially tended to such clients with an in-house solution or used another vendor to cater to these needs. It was simply a matter of integrating with their platform using RESTful APIs or change data capture (CDC) tools like Kafka. However, we were missing out on business opportunities with clients who wanted a single solution for their healthcare enterprise. They preferred vendors that provide all-in-one solutions, even at the expense of optimized clinical workflows.
We concluded that in-house development of these features is unproductive, as there are many Enterprise Resource Planning (ERP) software solutions available in the market and a tight, end-to-end integration with one of them is the best way forward. We were assisted in this integration process with ERPNext by Atul-Kuruvilla Abraham, the founder and CEO of Tacten.co.
ERPNext is an open-source ERP solution built using the Frappe framework. Frappe is a low-code framework written using a combination of Python and JavaScript. It comes with all the built-in components needed to develop a full-fledged software application with minimal developer effort. The Frappe community maintains and updates apps as plugins for all your enterprise needs. It also has a dedicated healthcare module that covers most of a hospital’s standard operating procedures (SOPs). Being an open-source solution, we can modify and distribute the product without incurring significant costs to clients, such as licensing fees.
In this blog, we’ll first explore a demo of ERPNext Healthcare well integrated with a health data platform like Medblocks looks like.
Then we’ll dive into the details about how to deploy the same in production on Kubernetes.
A full demo with explanation by Atul
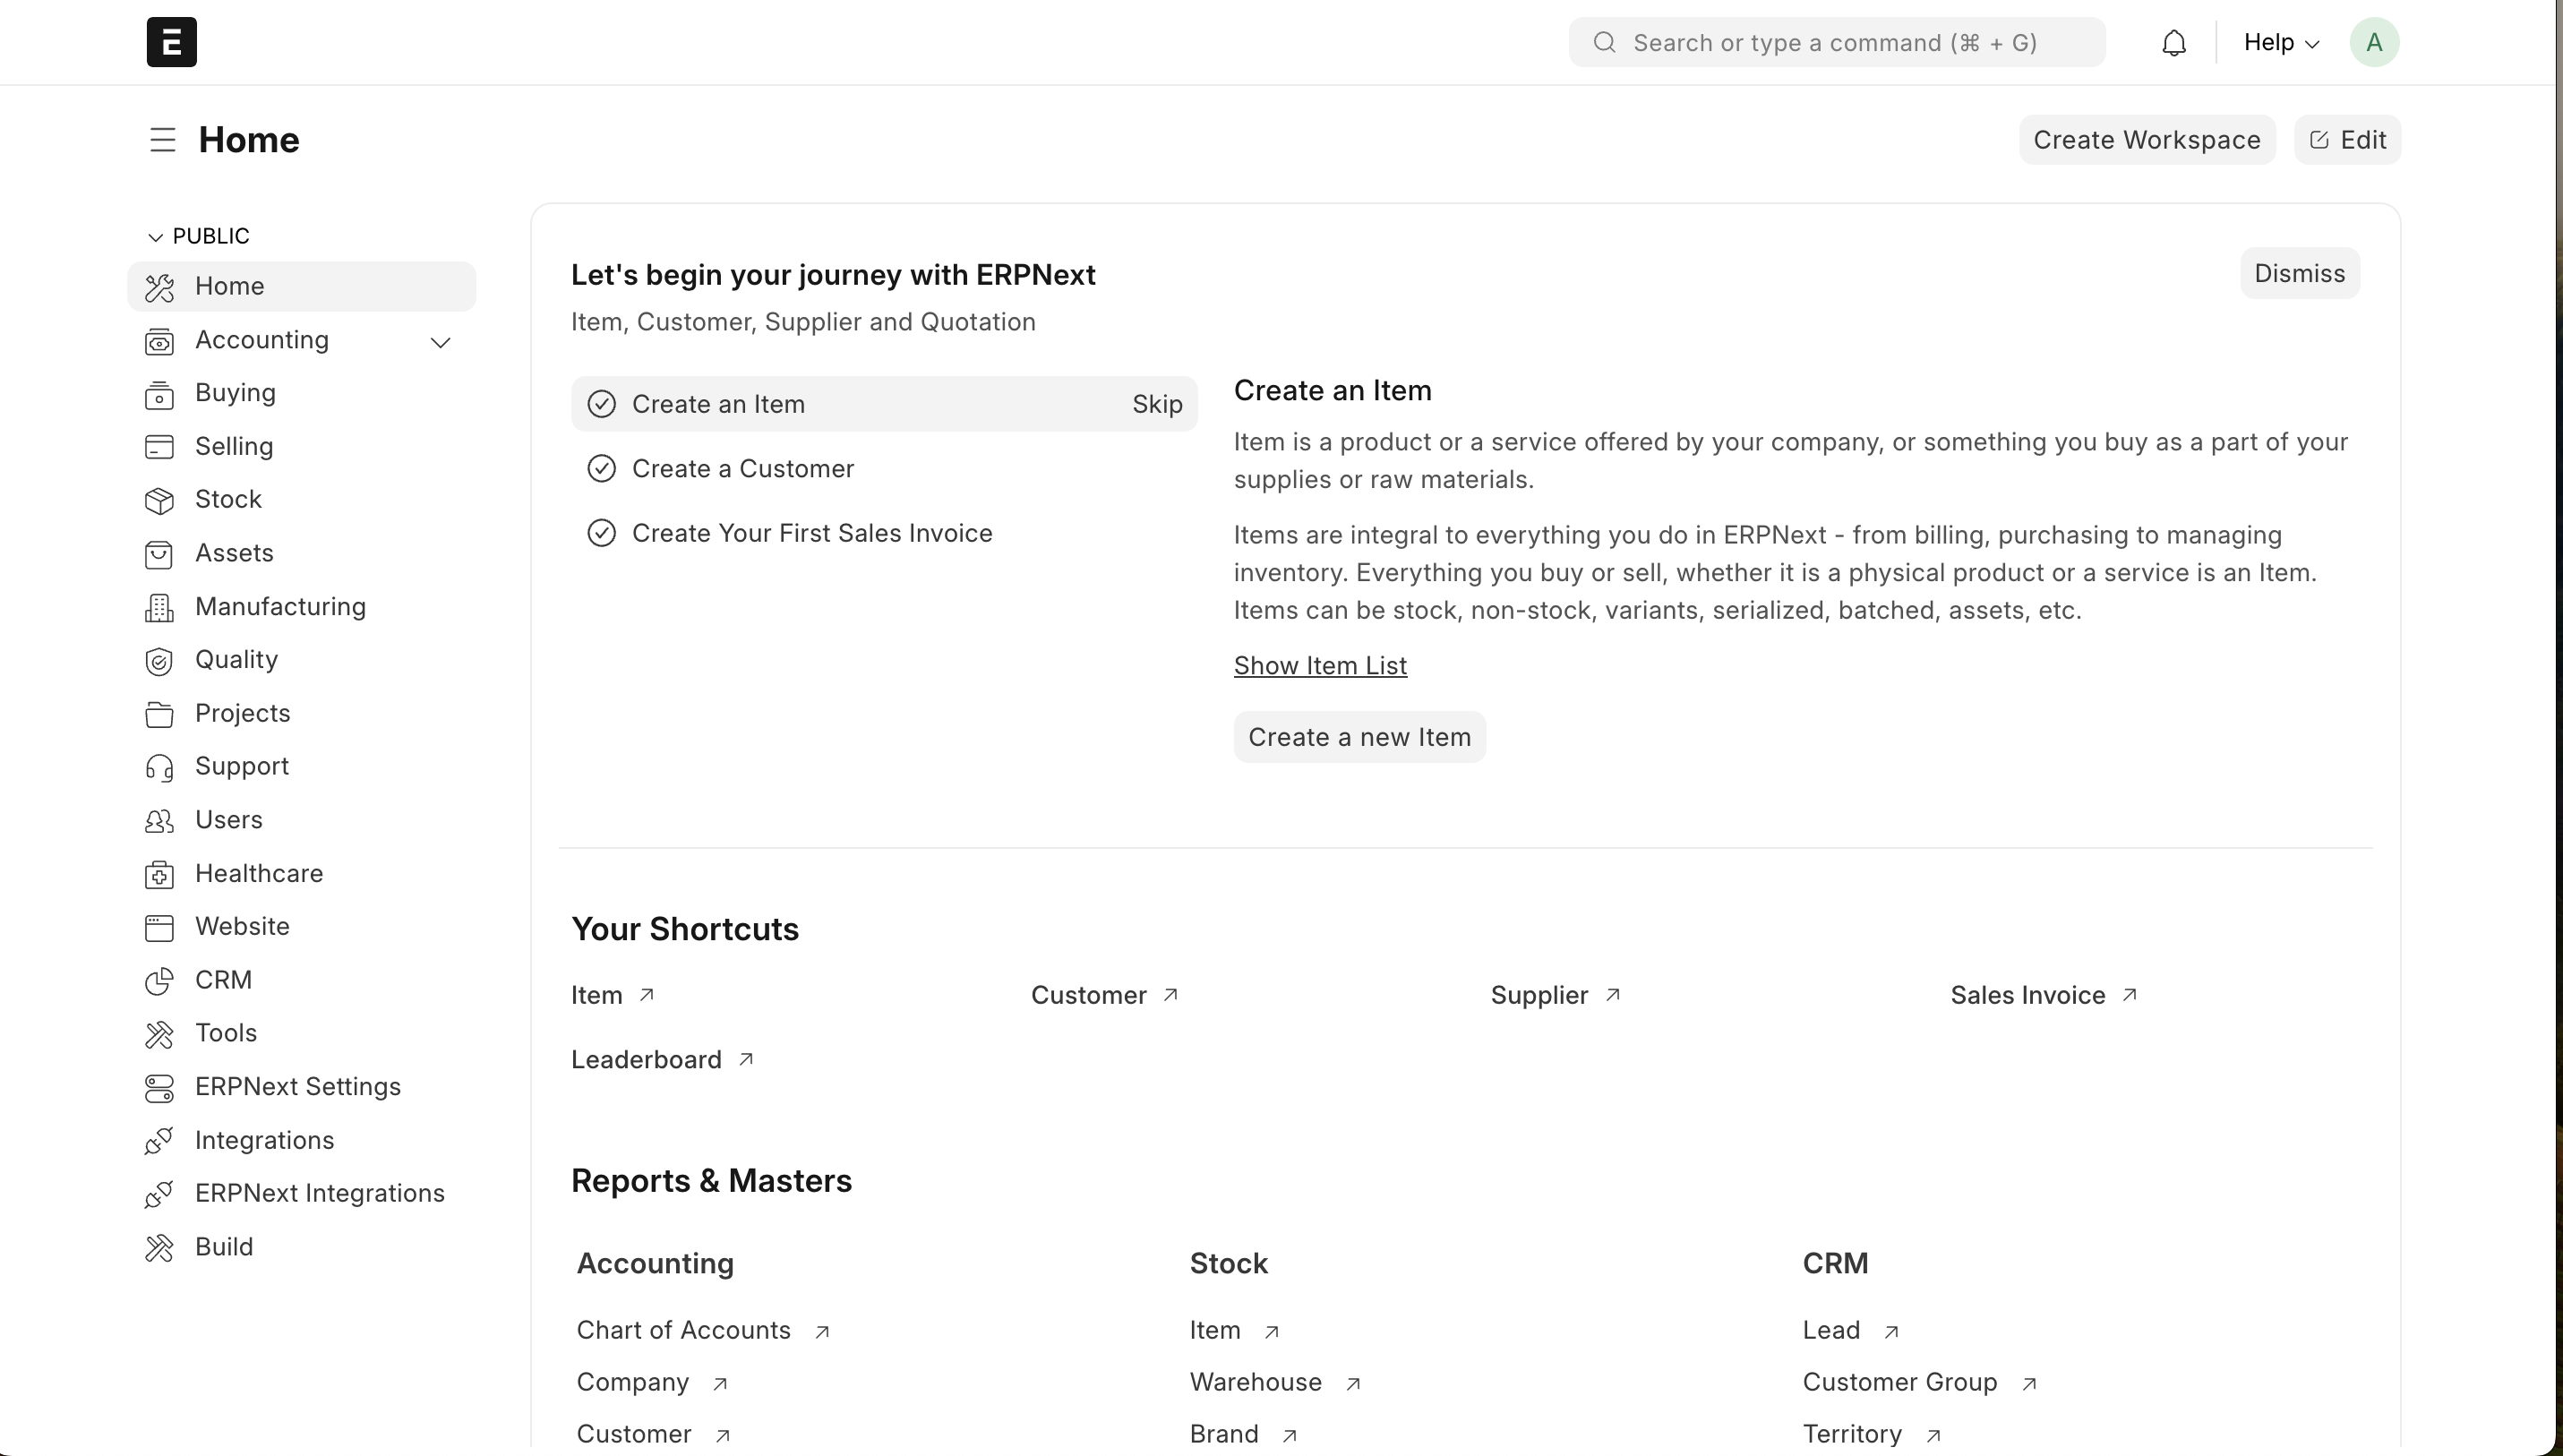
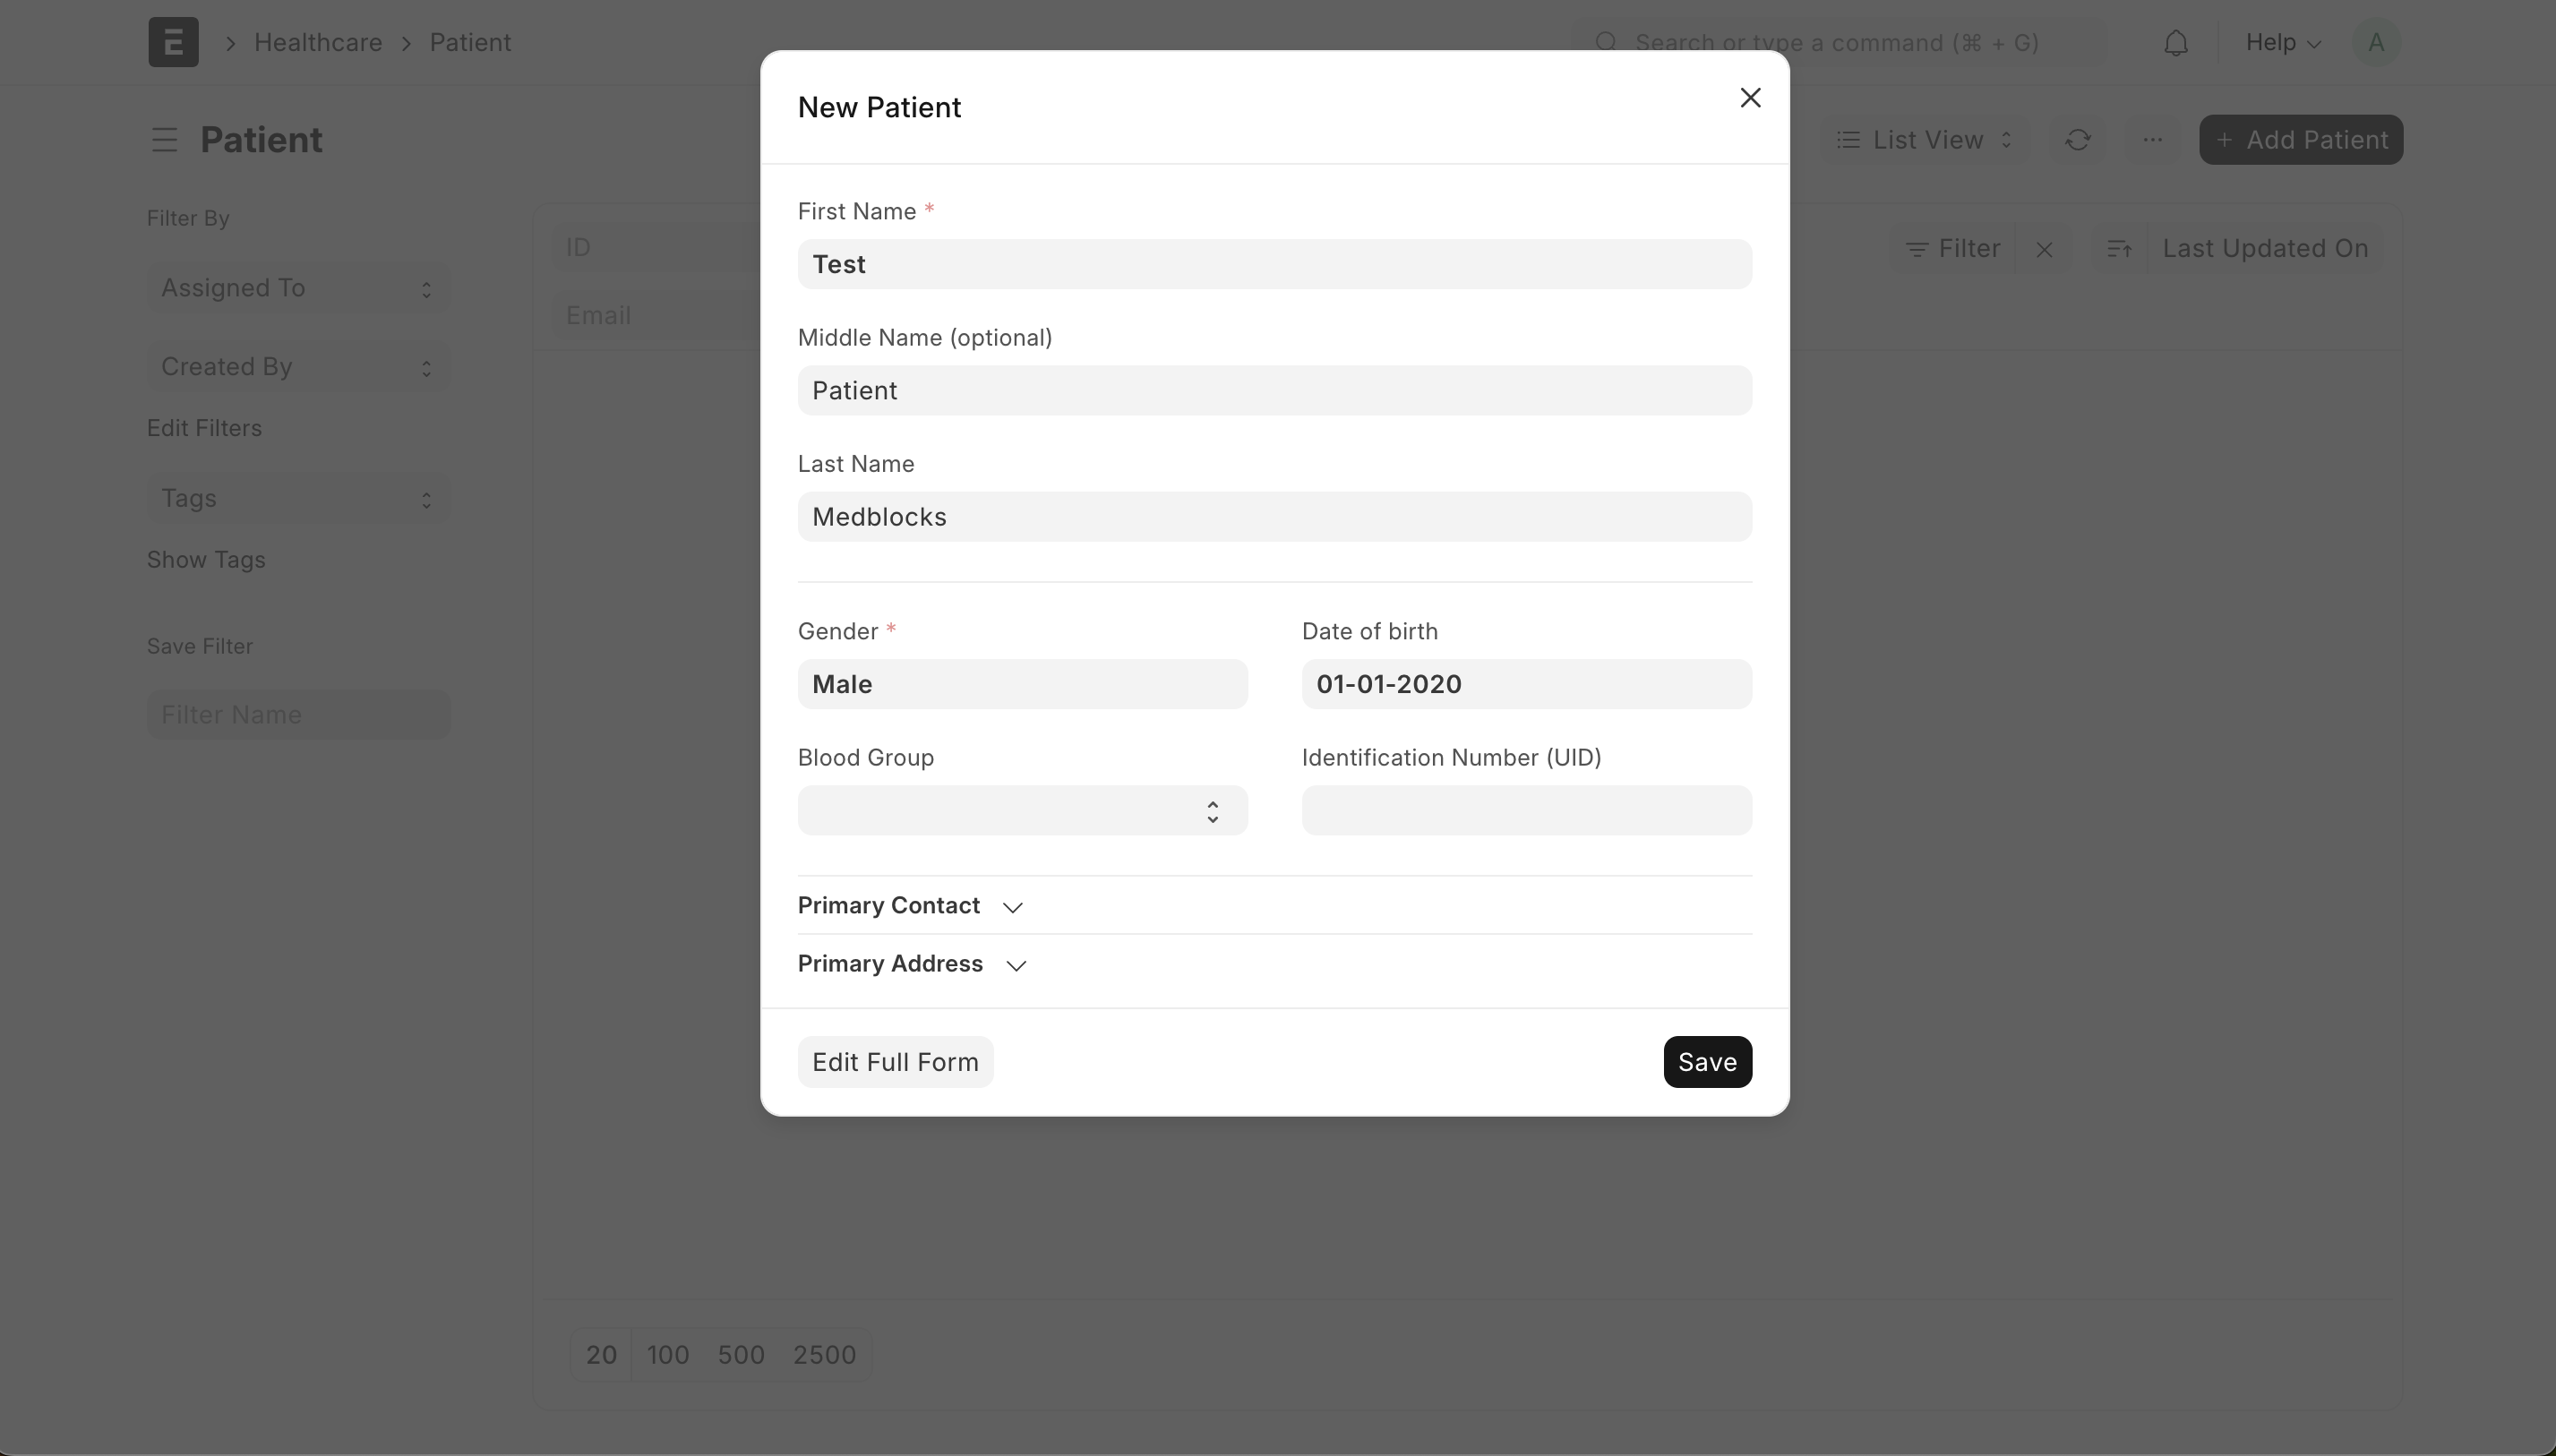
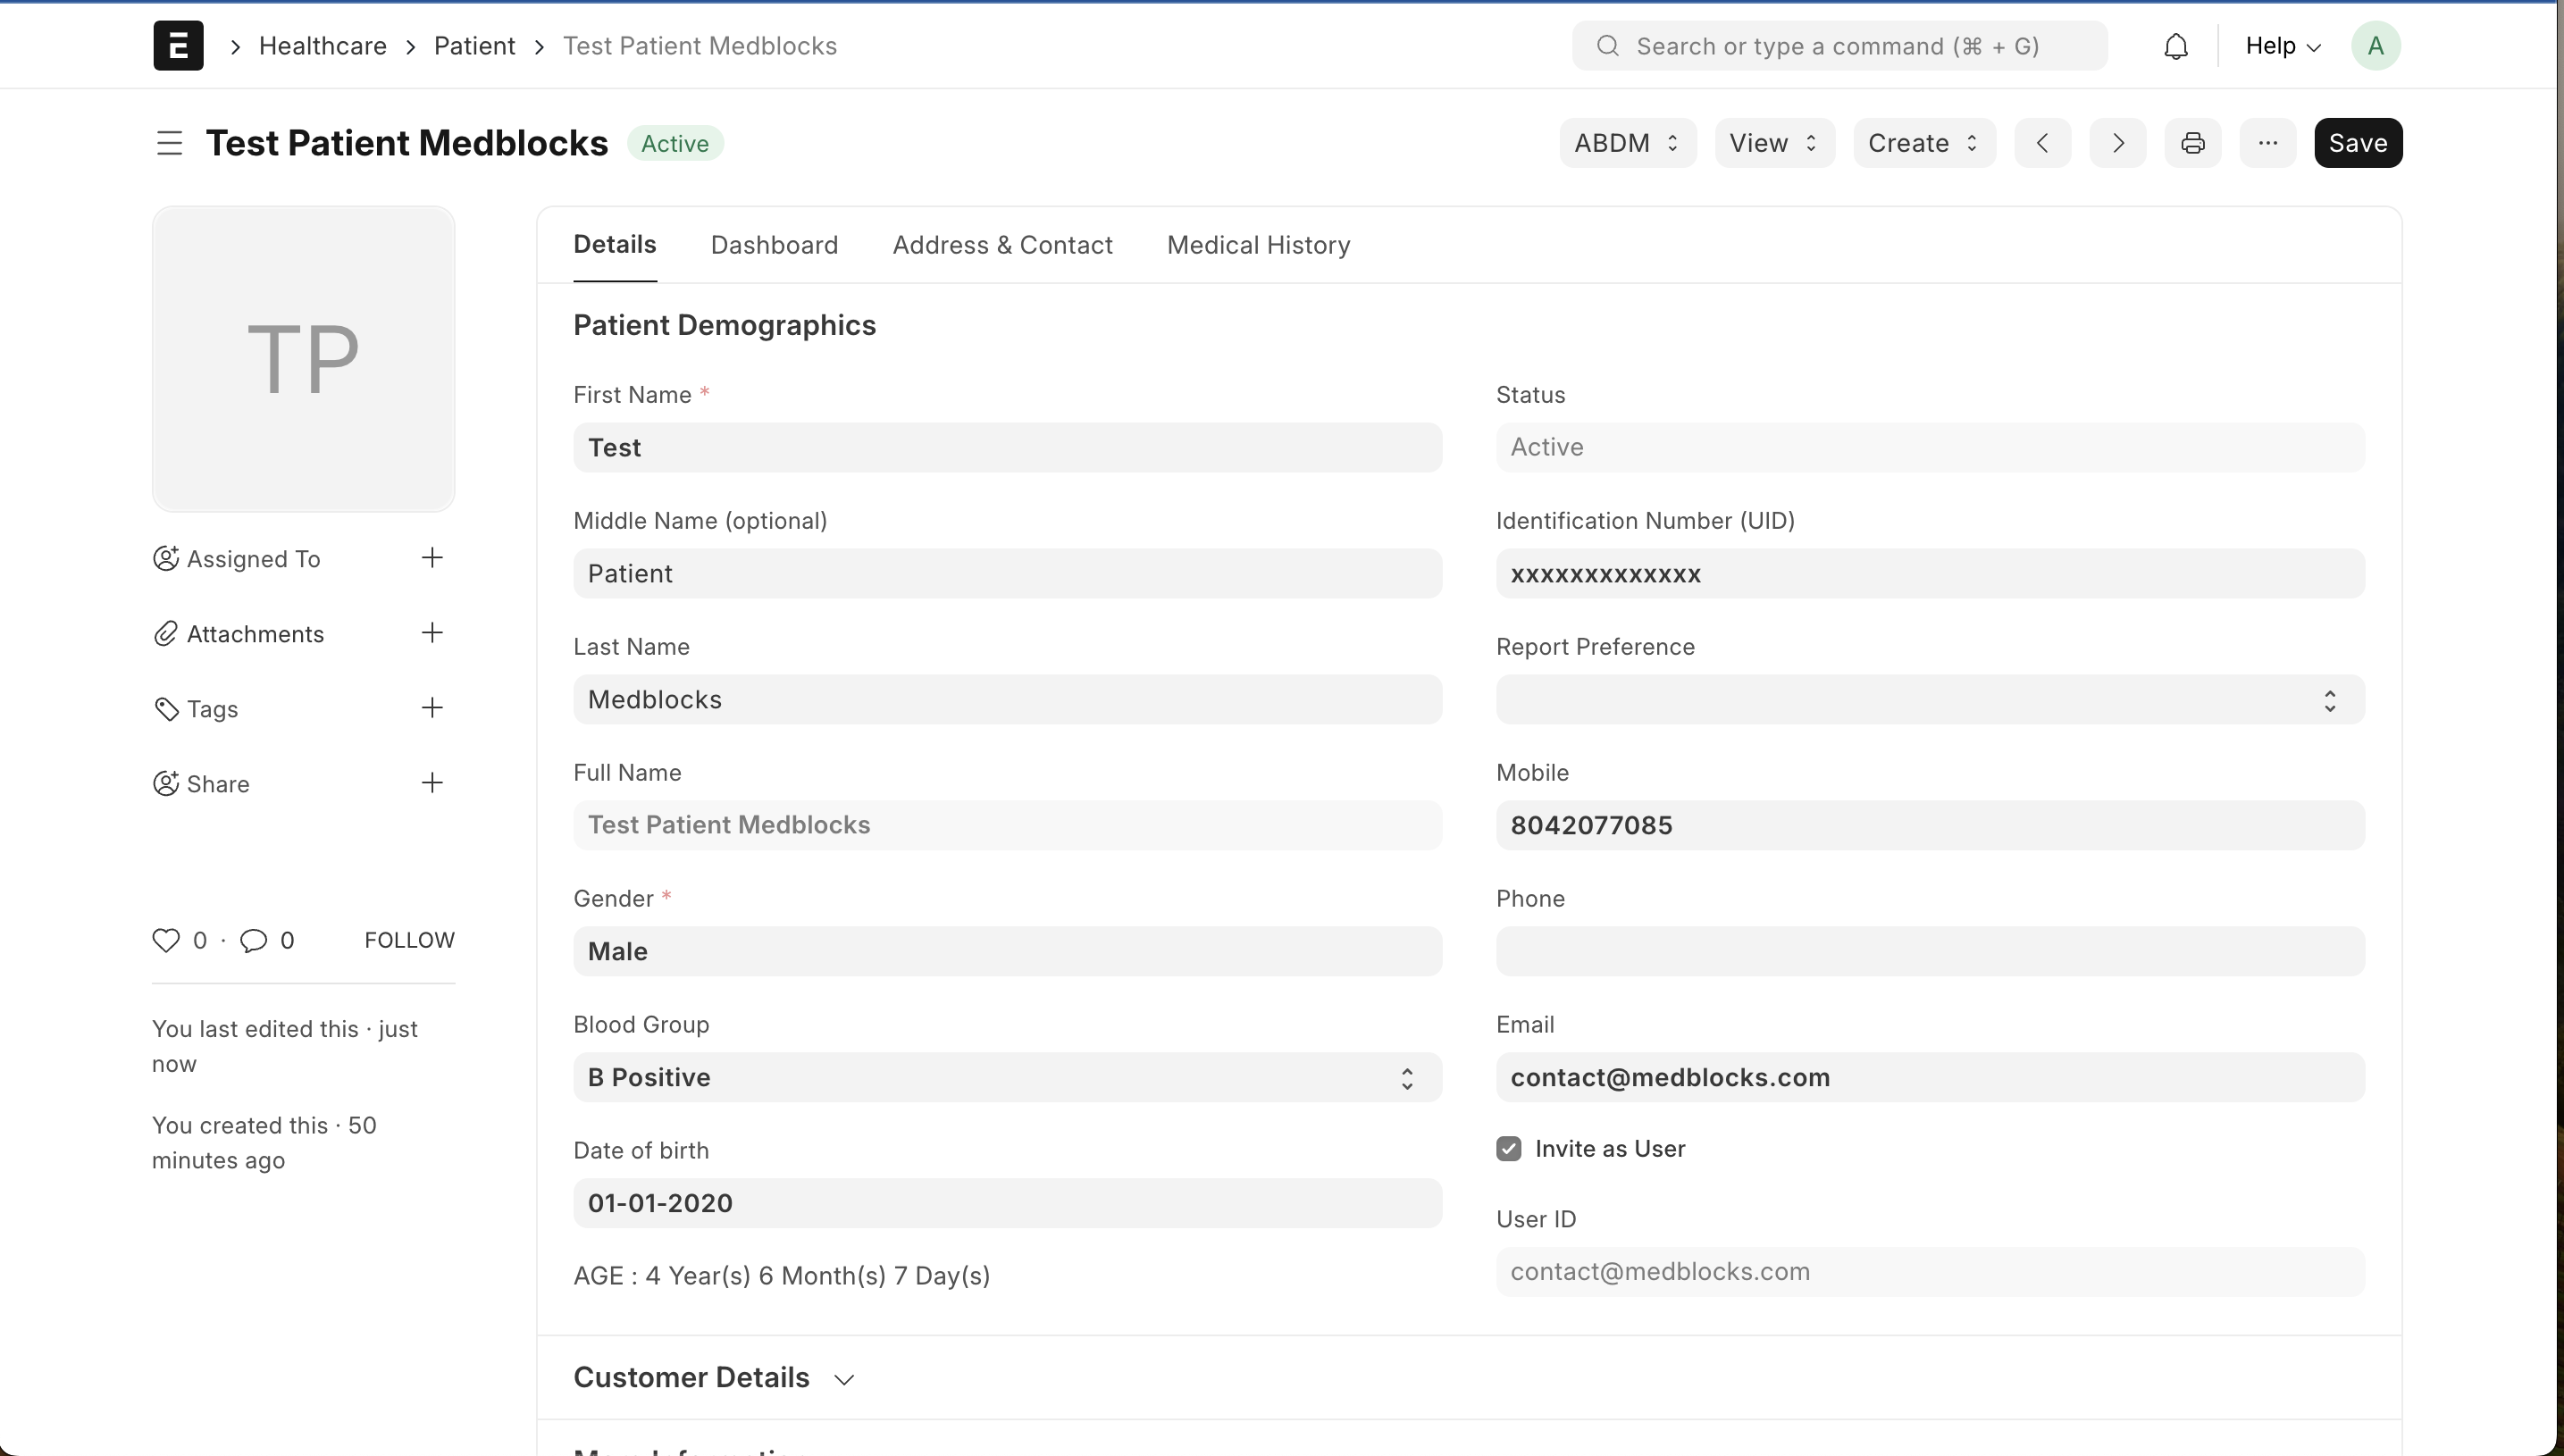
Go to Patient doctype by either going inside Healthcare module in the side bar or searching patient in search bar at the top. In search bar you will have two options, either you can directly choose New Patient or go to Patient list and click on Add Patient button. Fill the details in the popup and save. More details, if available, can be filled by clicking Edit Full Form or by going inside the patient for the Patient list view after saving.
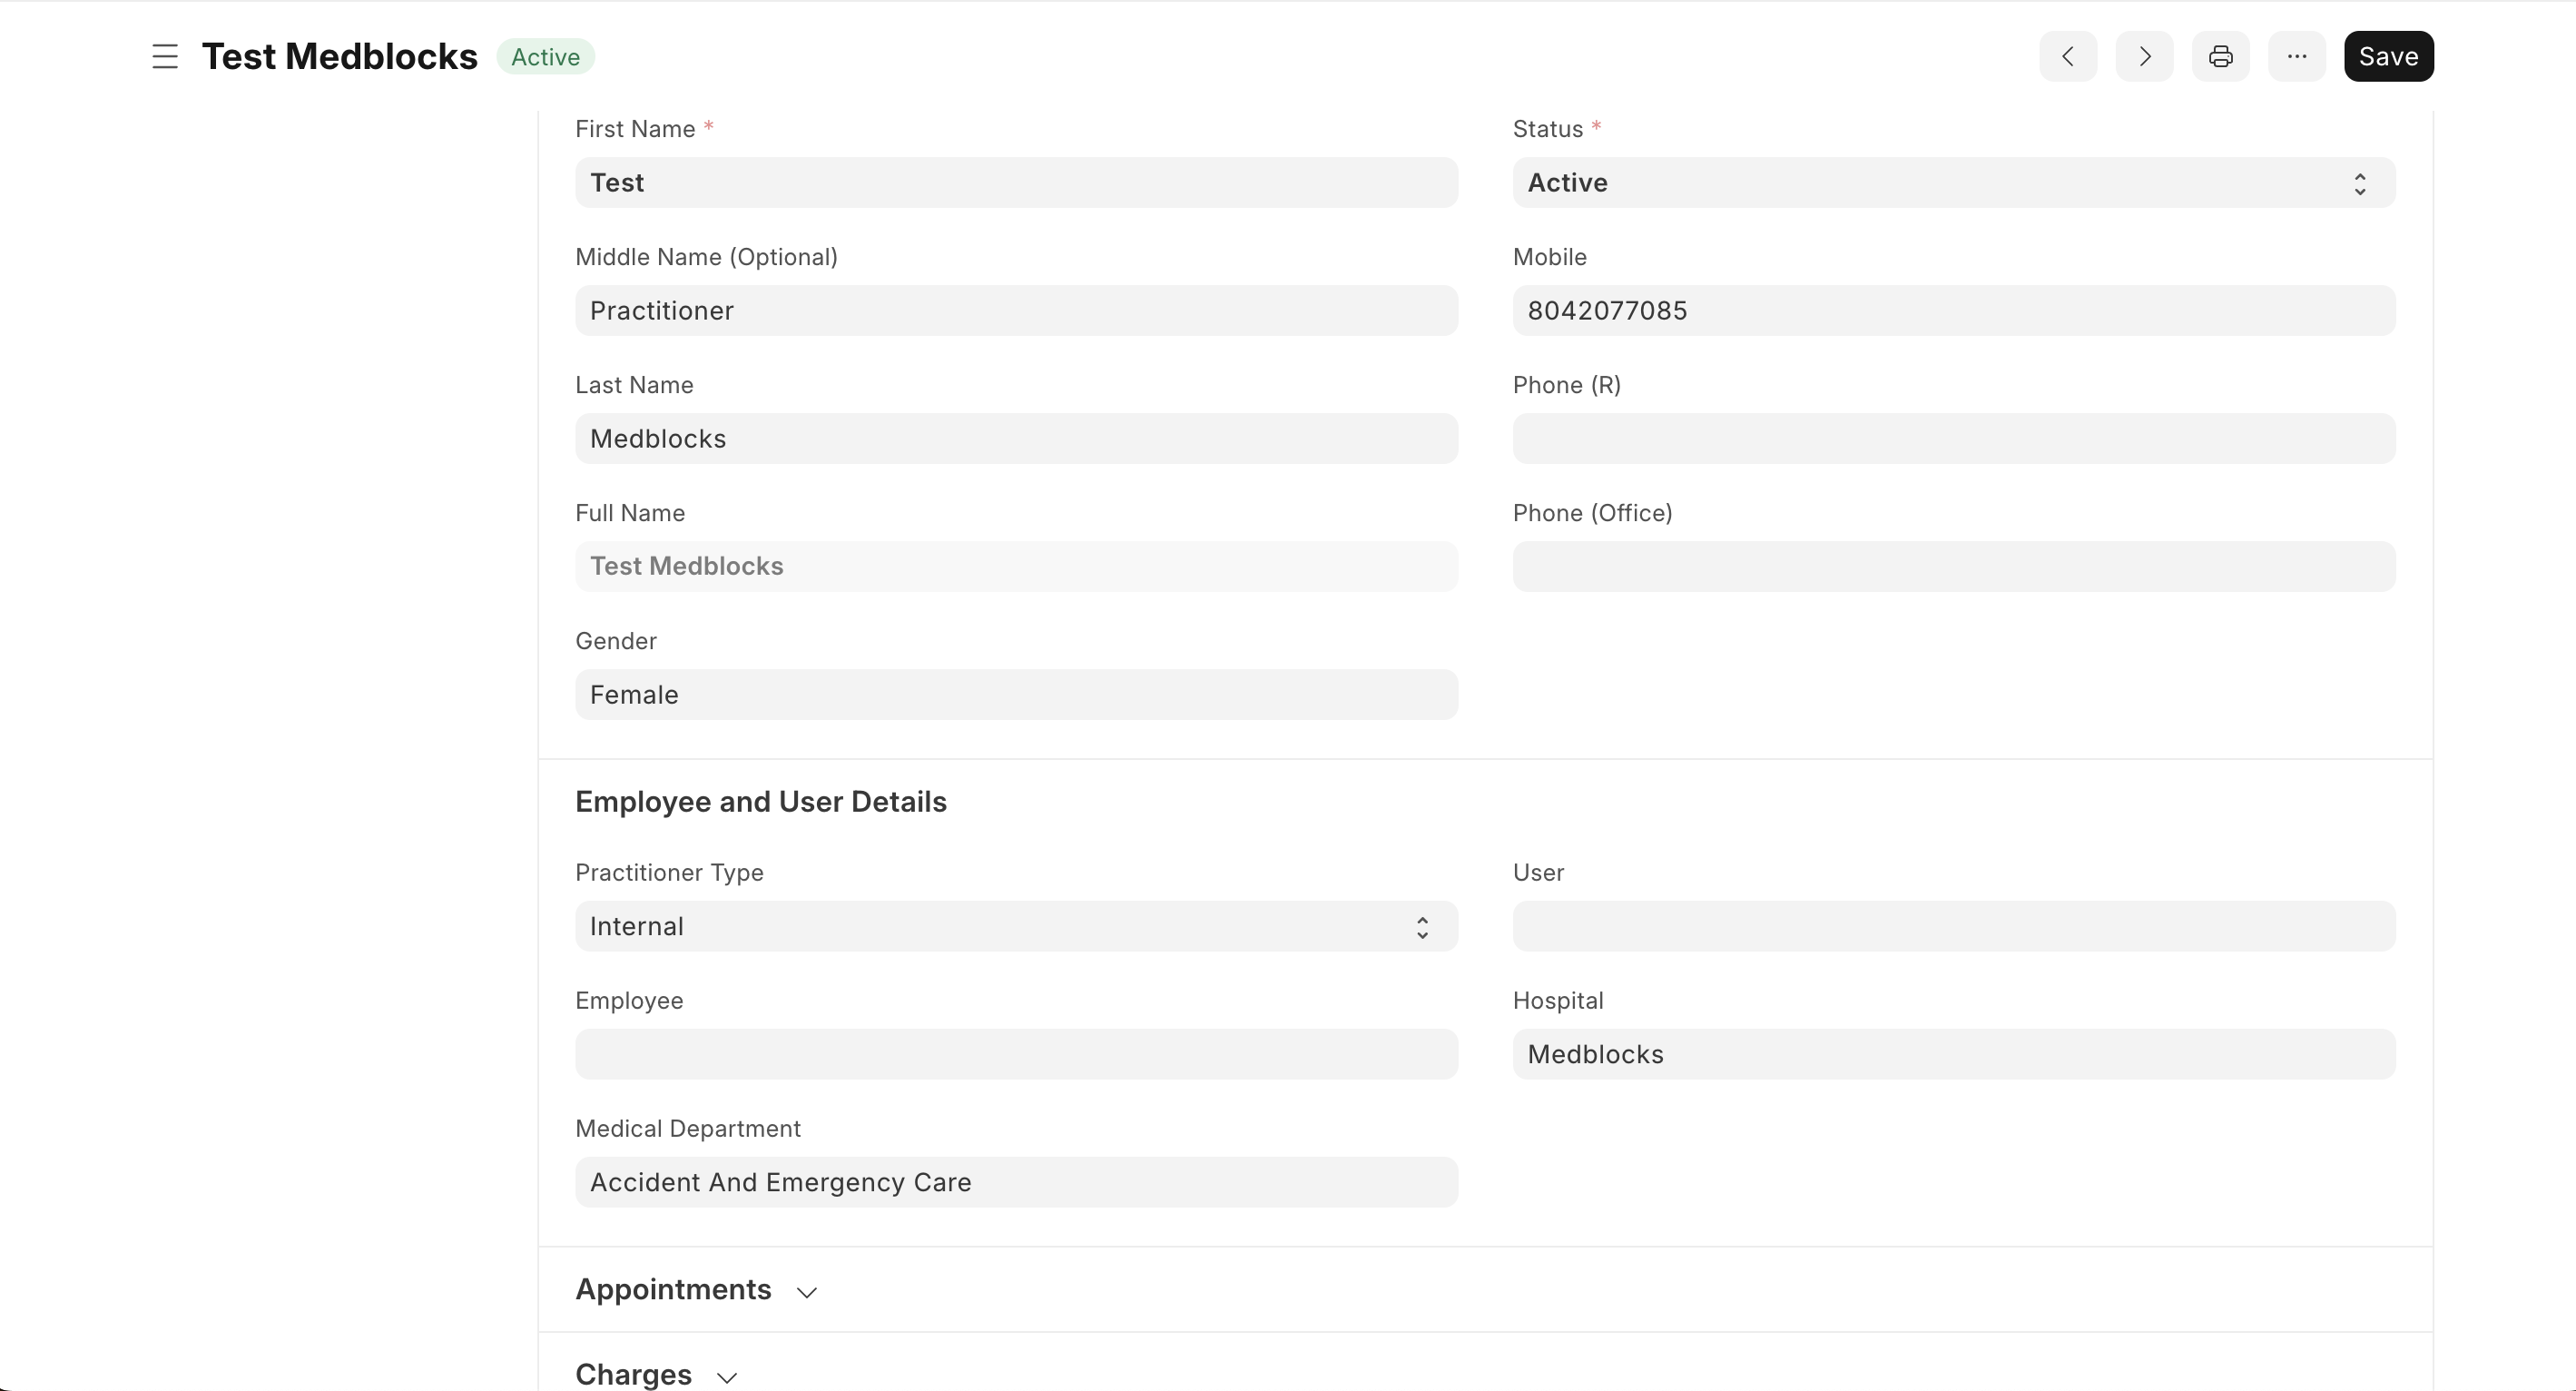
Another necessary docType to be created is Healthcare Practitioner.
Having both patient and practitioner let’s create an encounter for the patient with this practitioner.
Some versions of Healthcare module also supports Healthcare Service Unit, associated but not to be confused with Medical Department. For the current scope we won’t be discussing Practitioner scheduling and appointments. The encounter can be created in Patient Encounter docType and saved.

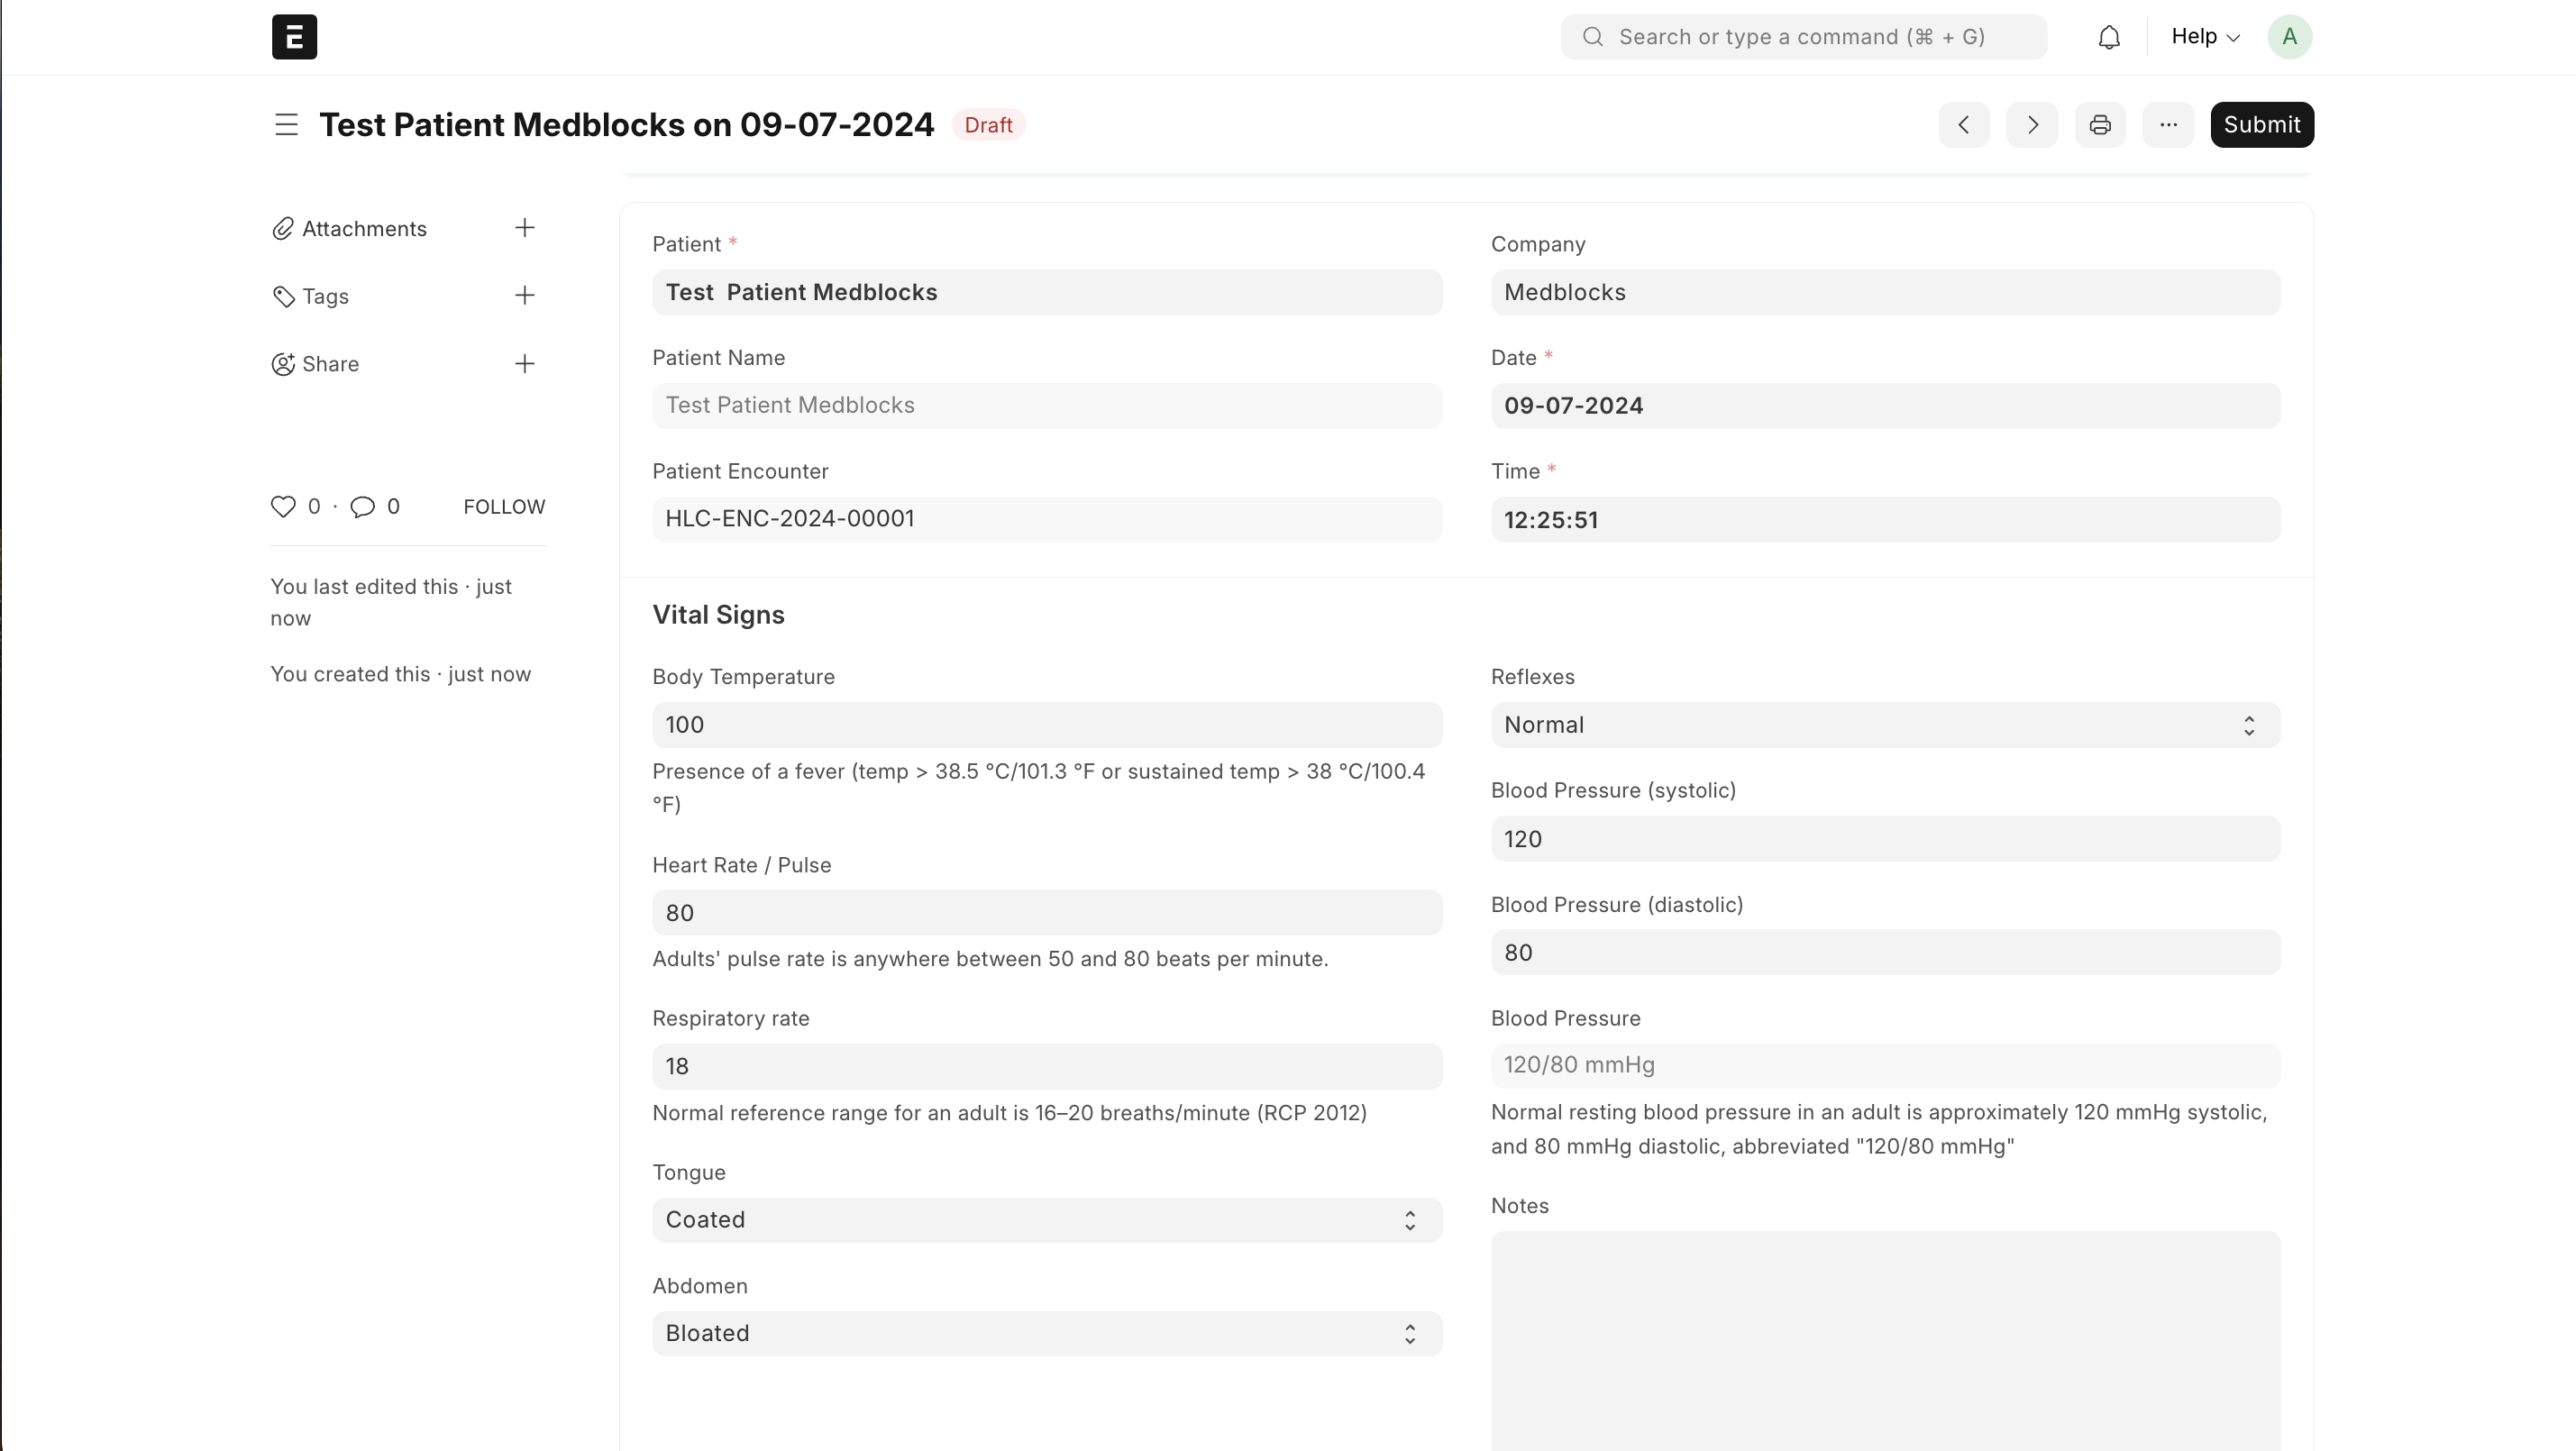
You can also create a Vital Signs document for the encounter.
Note: If using a data platform like Medblocks, you’ll want to ideally map this data entered in ERPNext to relevant openEHR archetypes and FHIR resources.
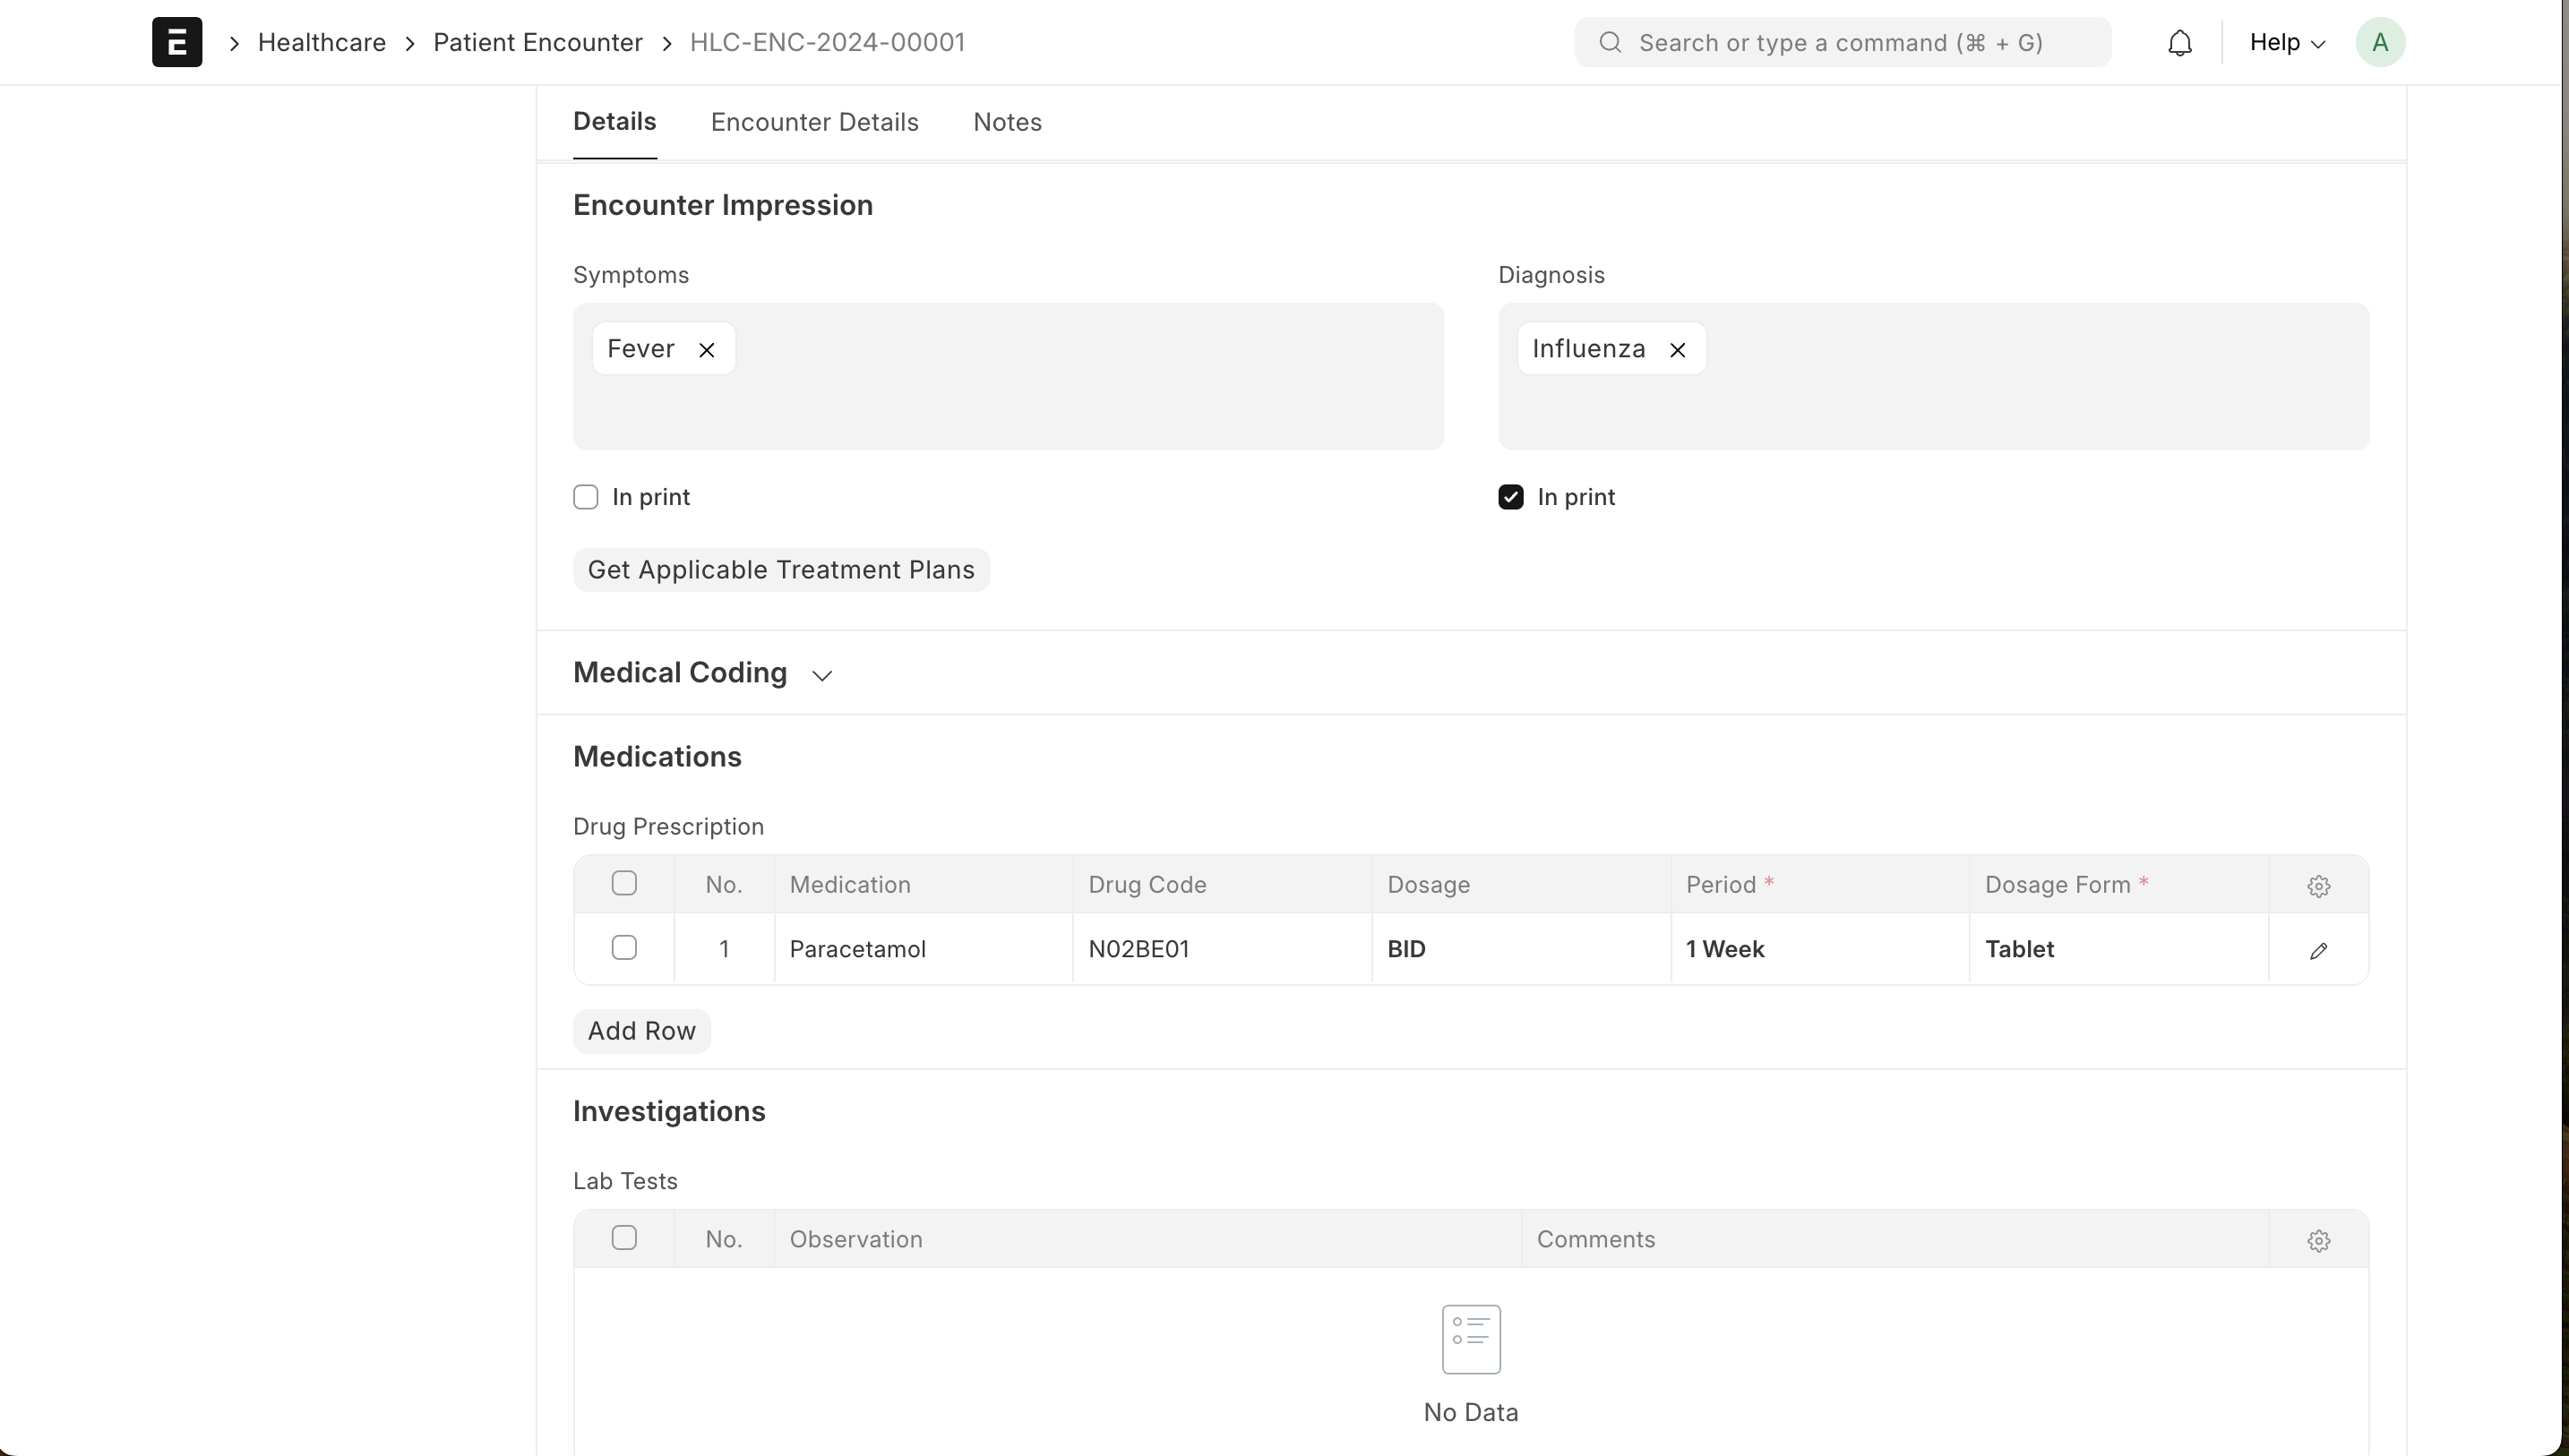
The Encounter also has fields to record symptoms and diagnosis. These can be selected from a dropdown and a new one can be created easily from the same page if necessary.
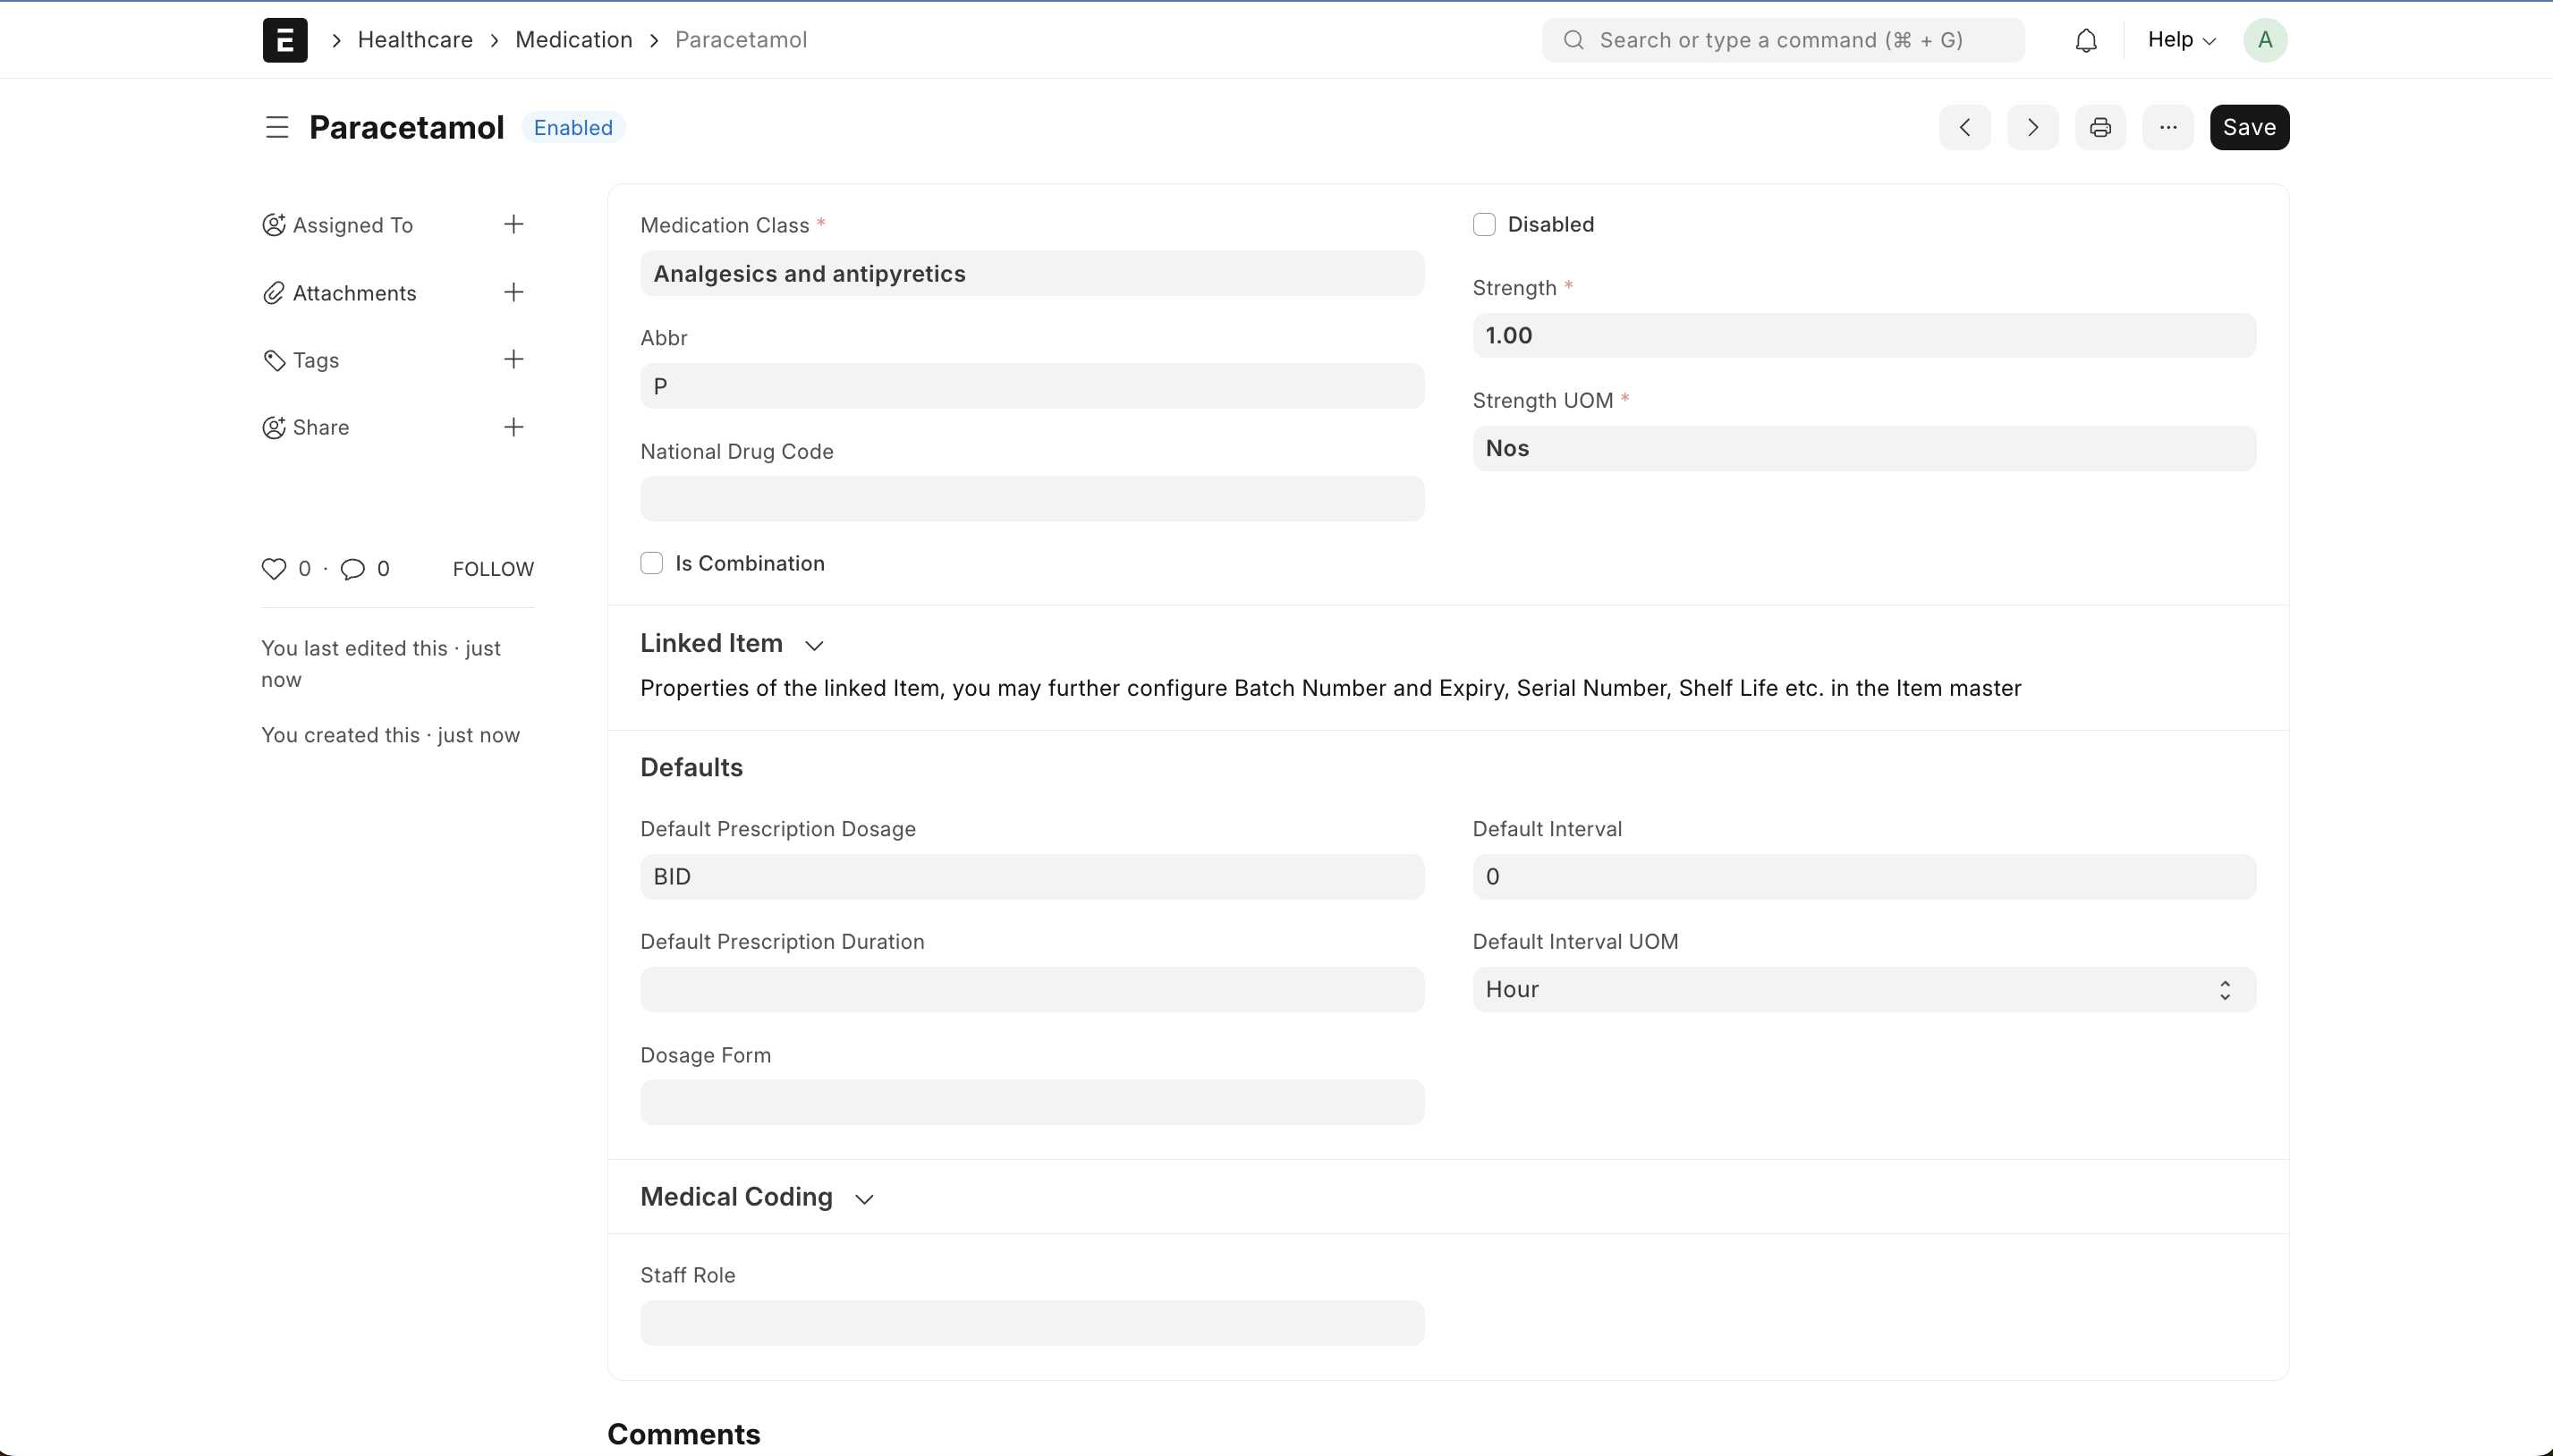
We will then add a medication, paracetamol, for a week. Create a new one in Medication docType.
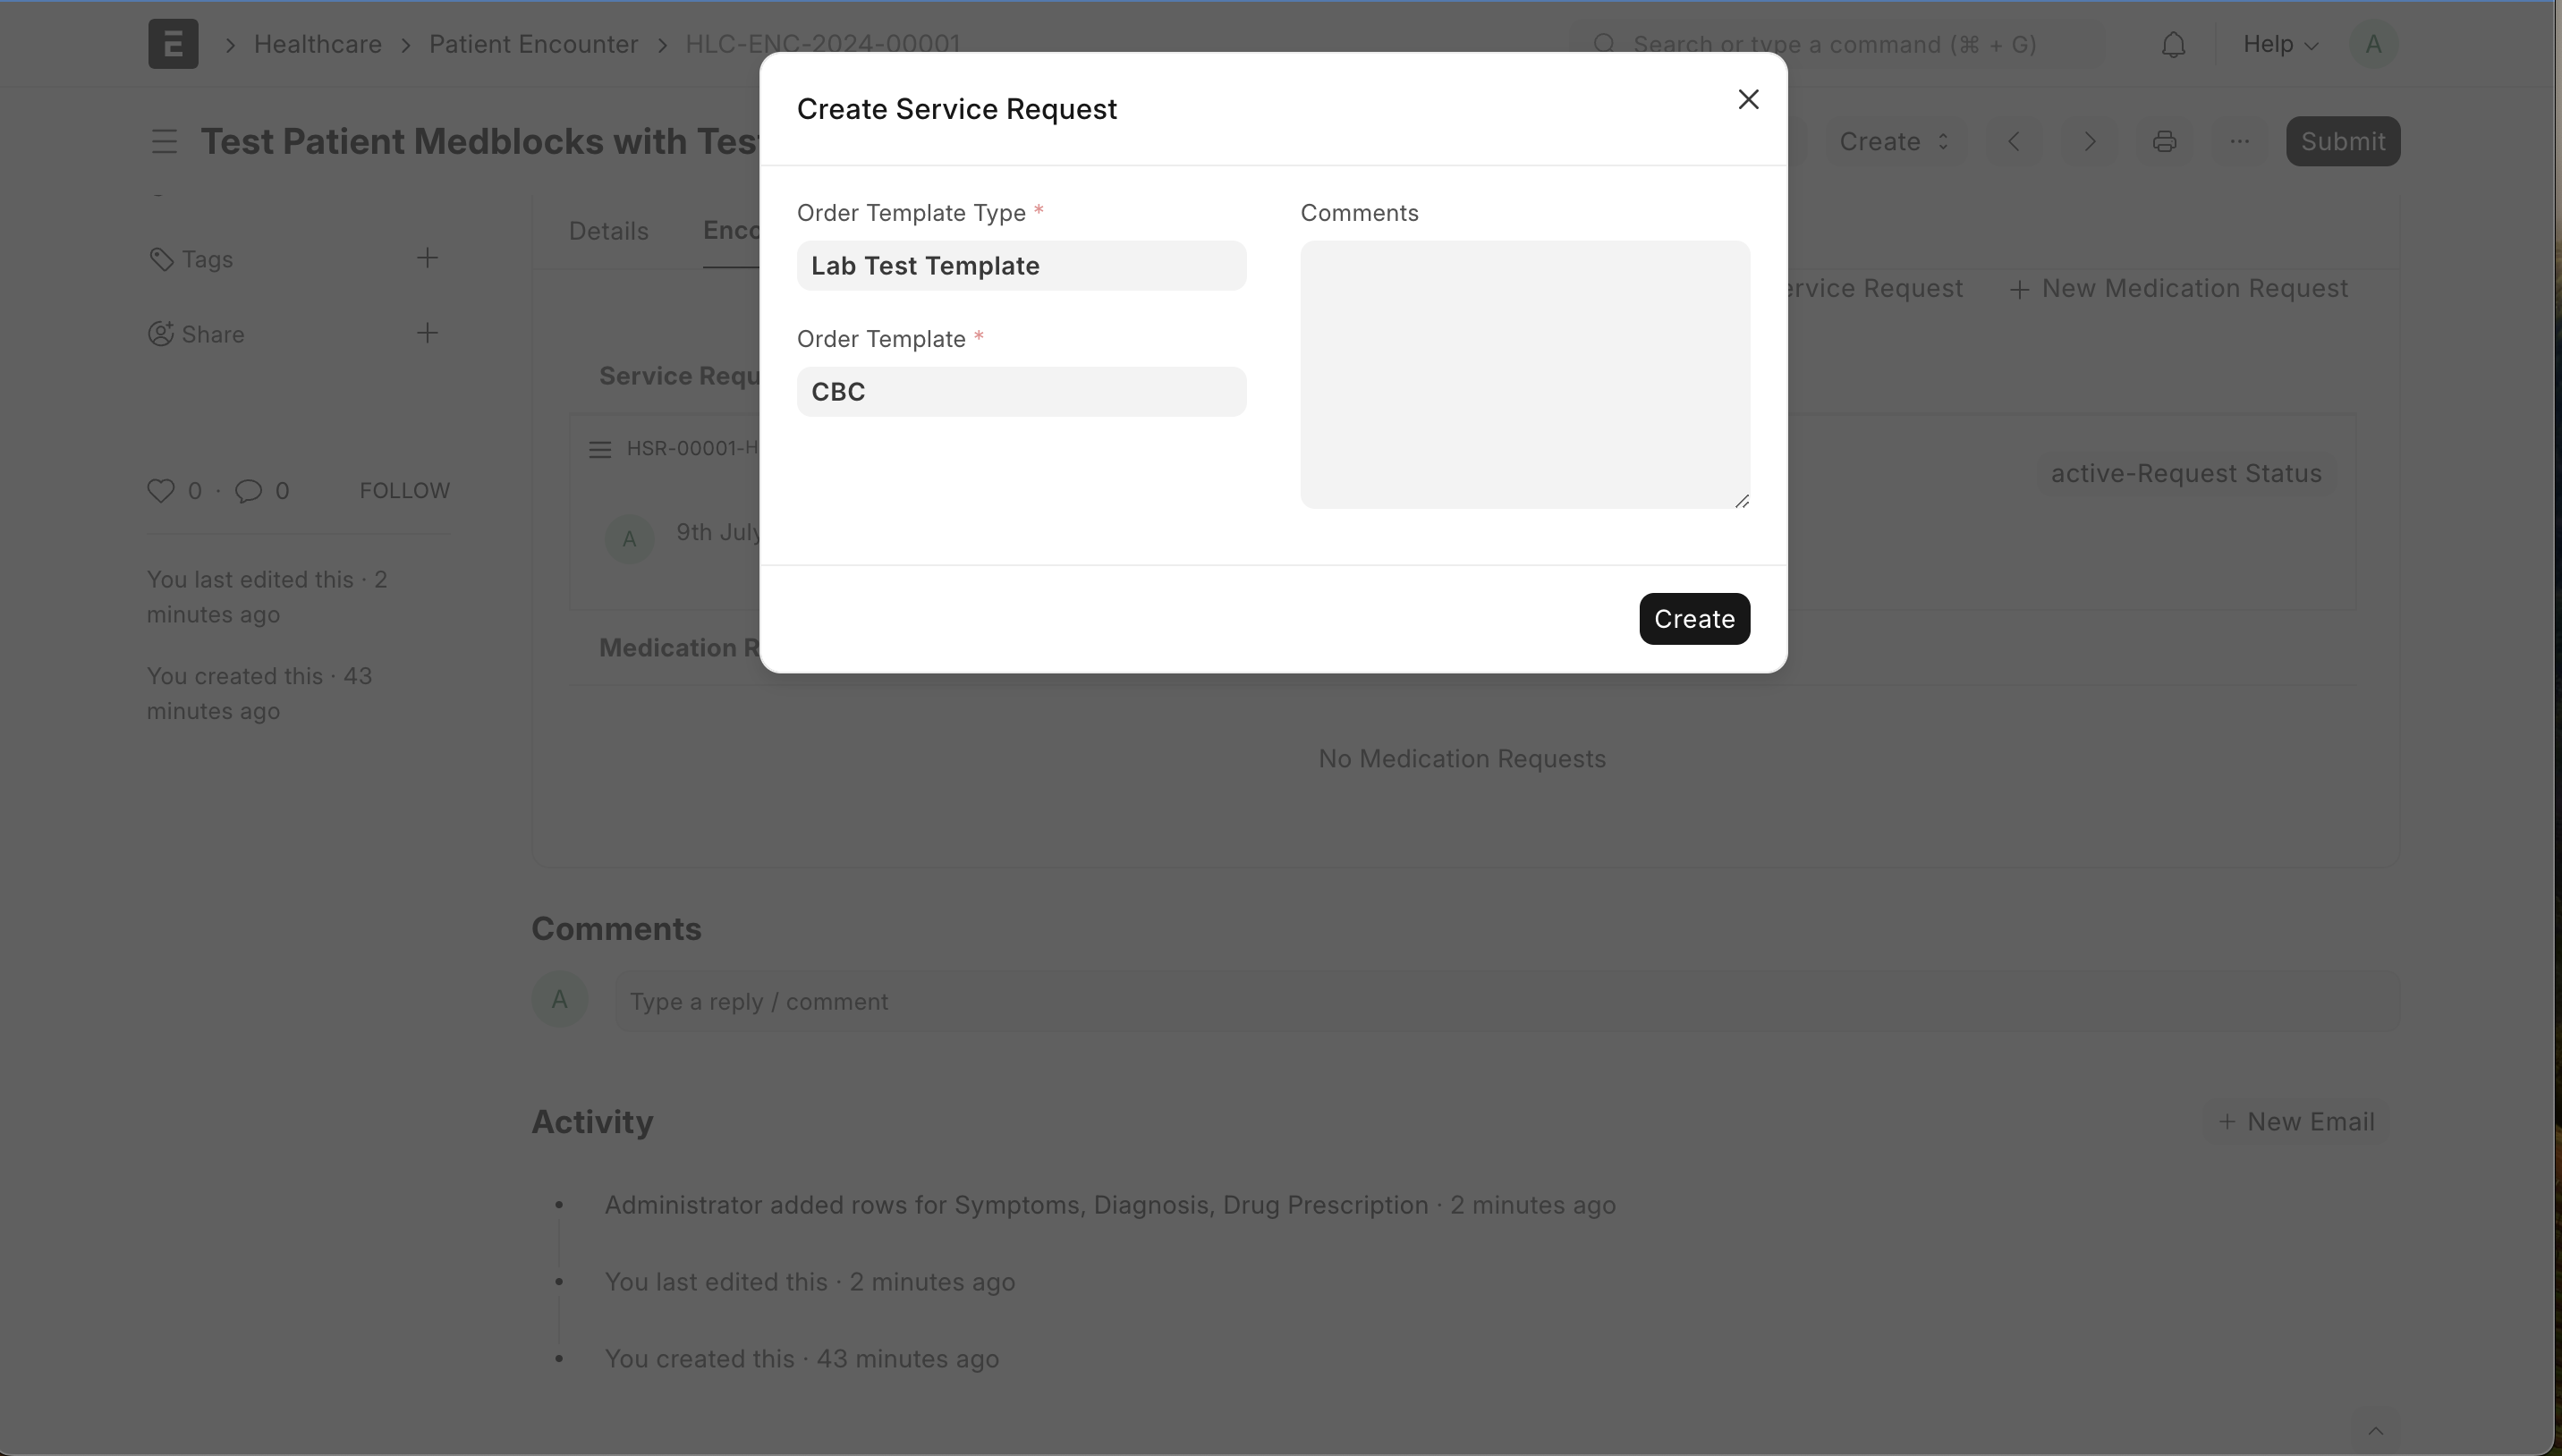
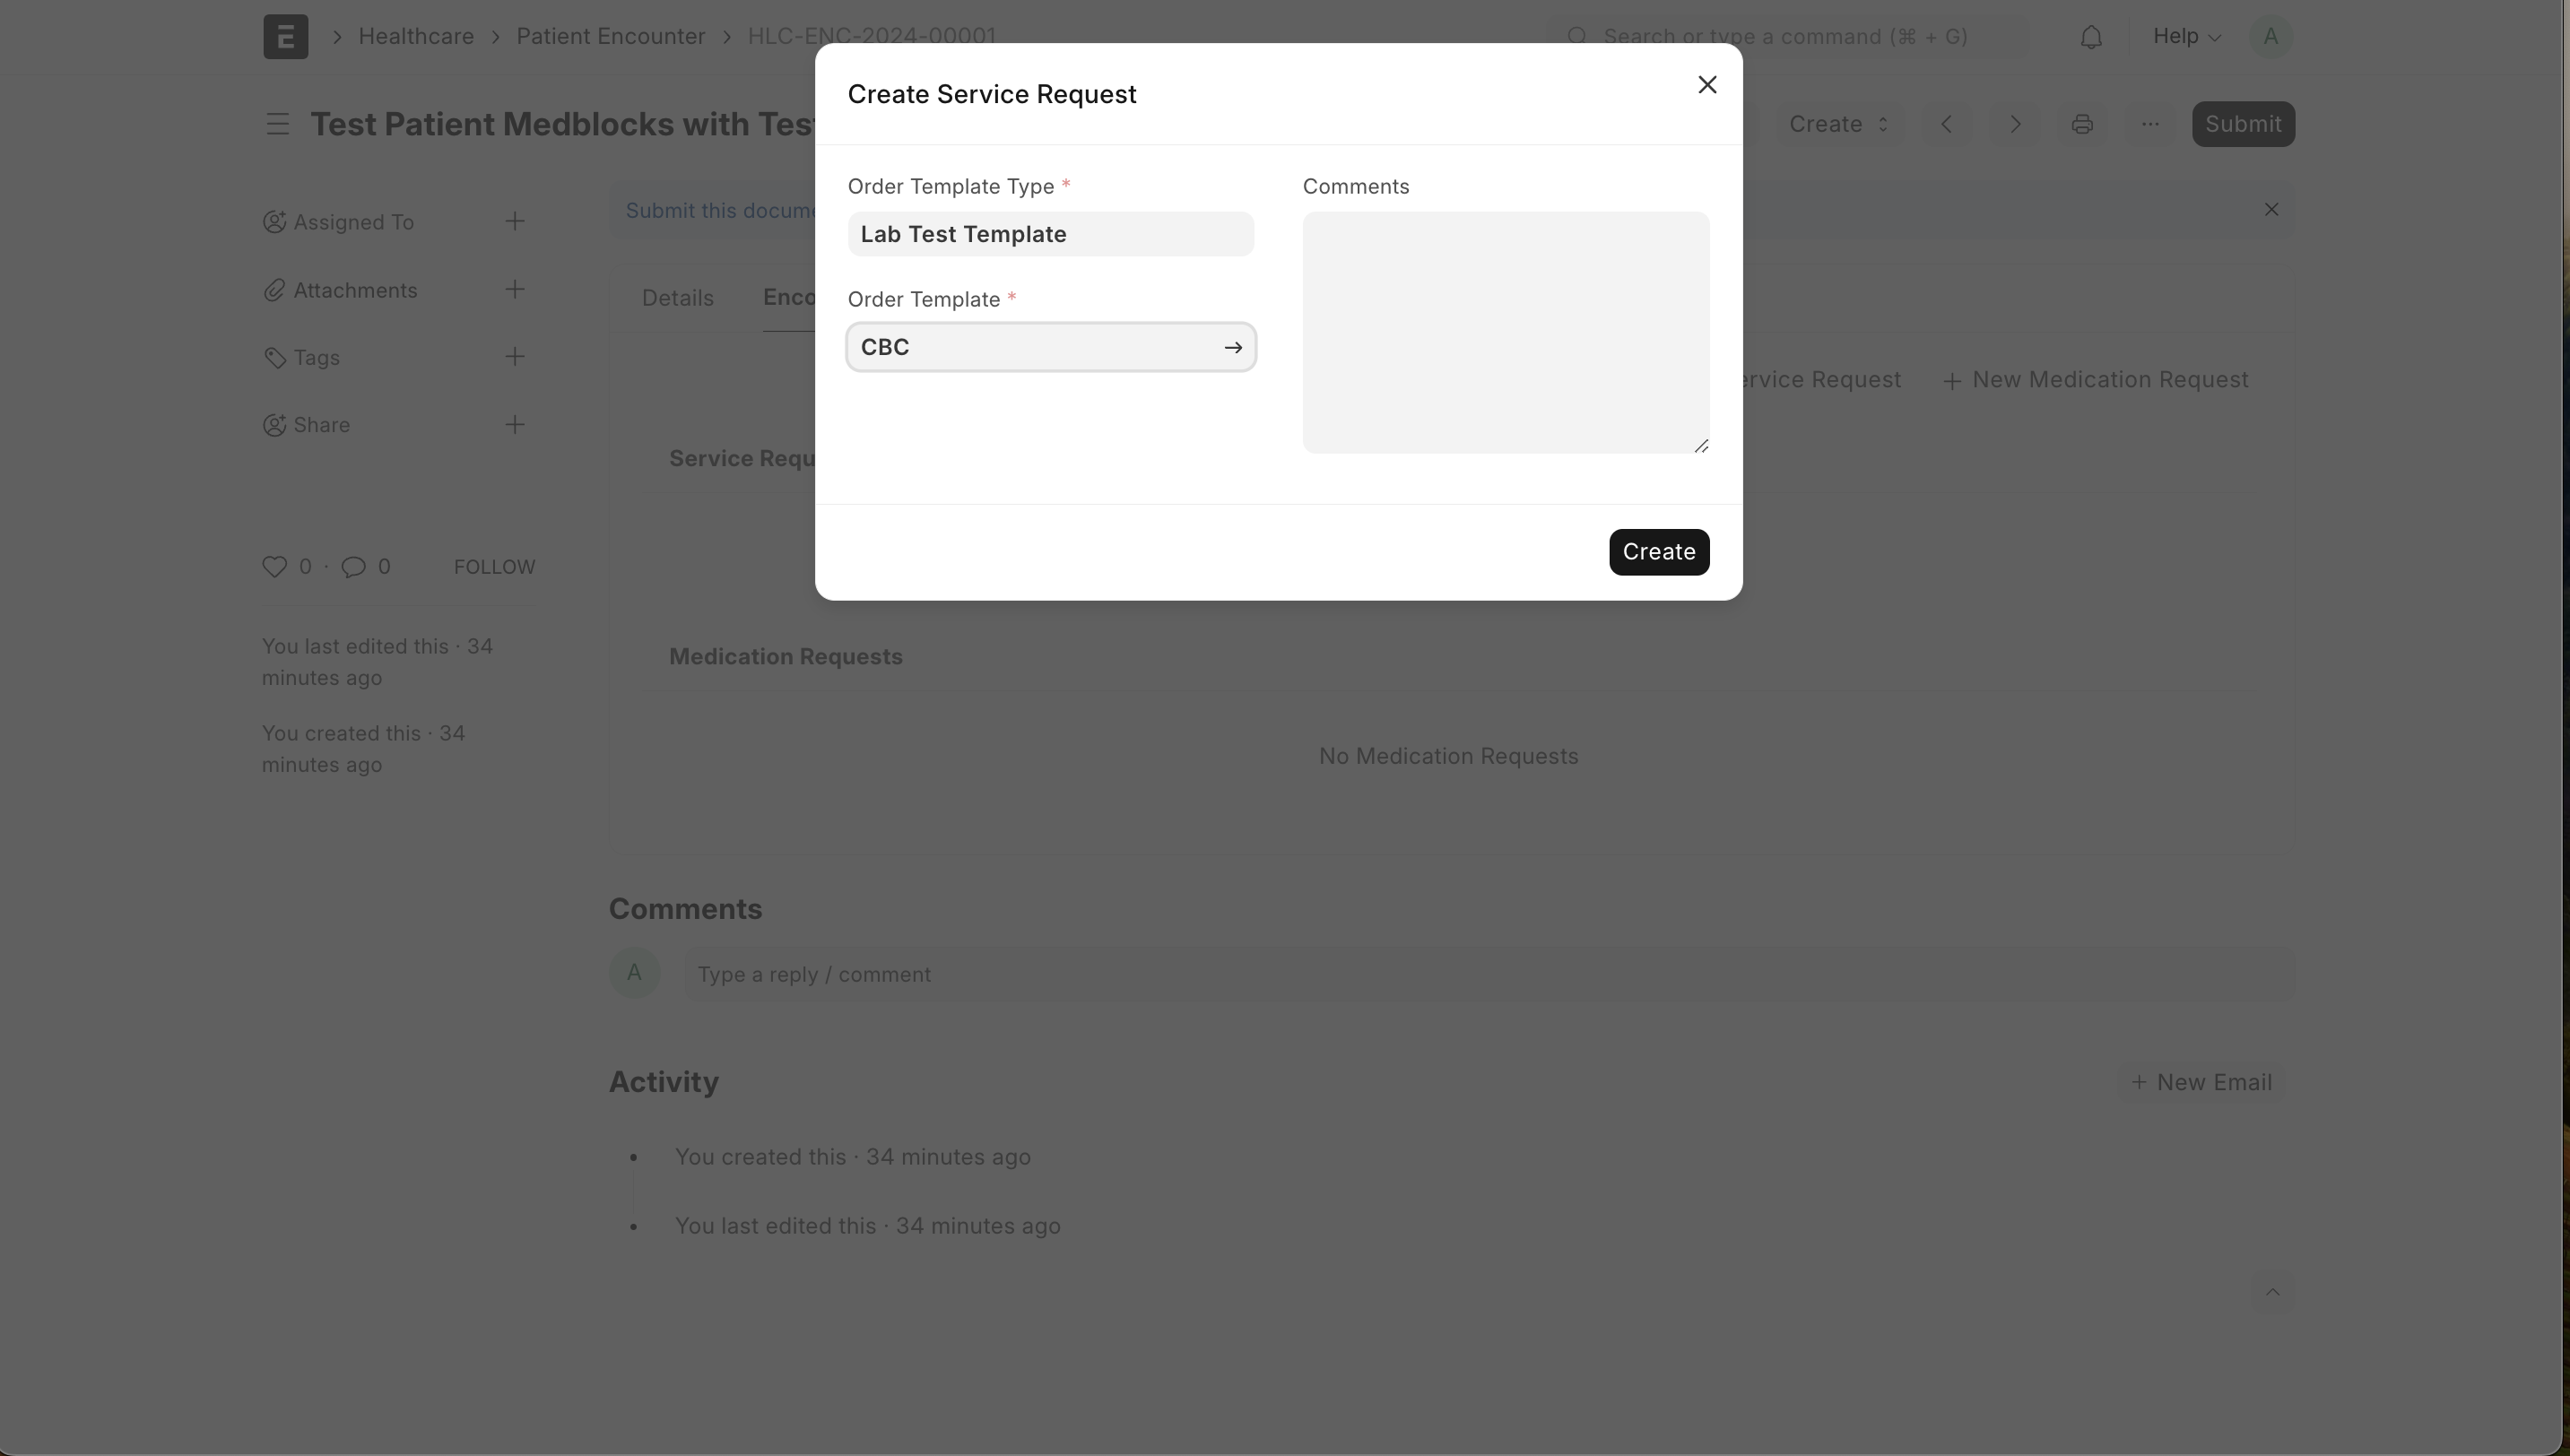
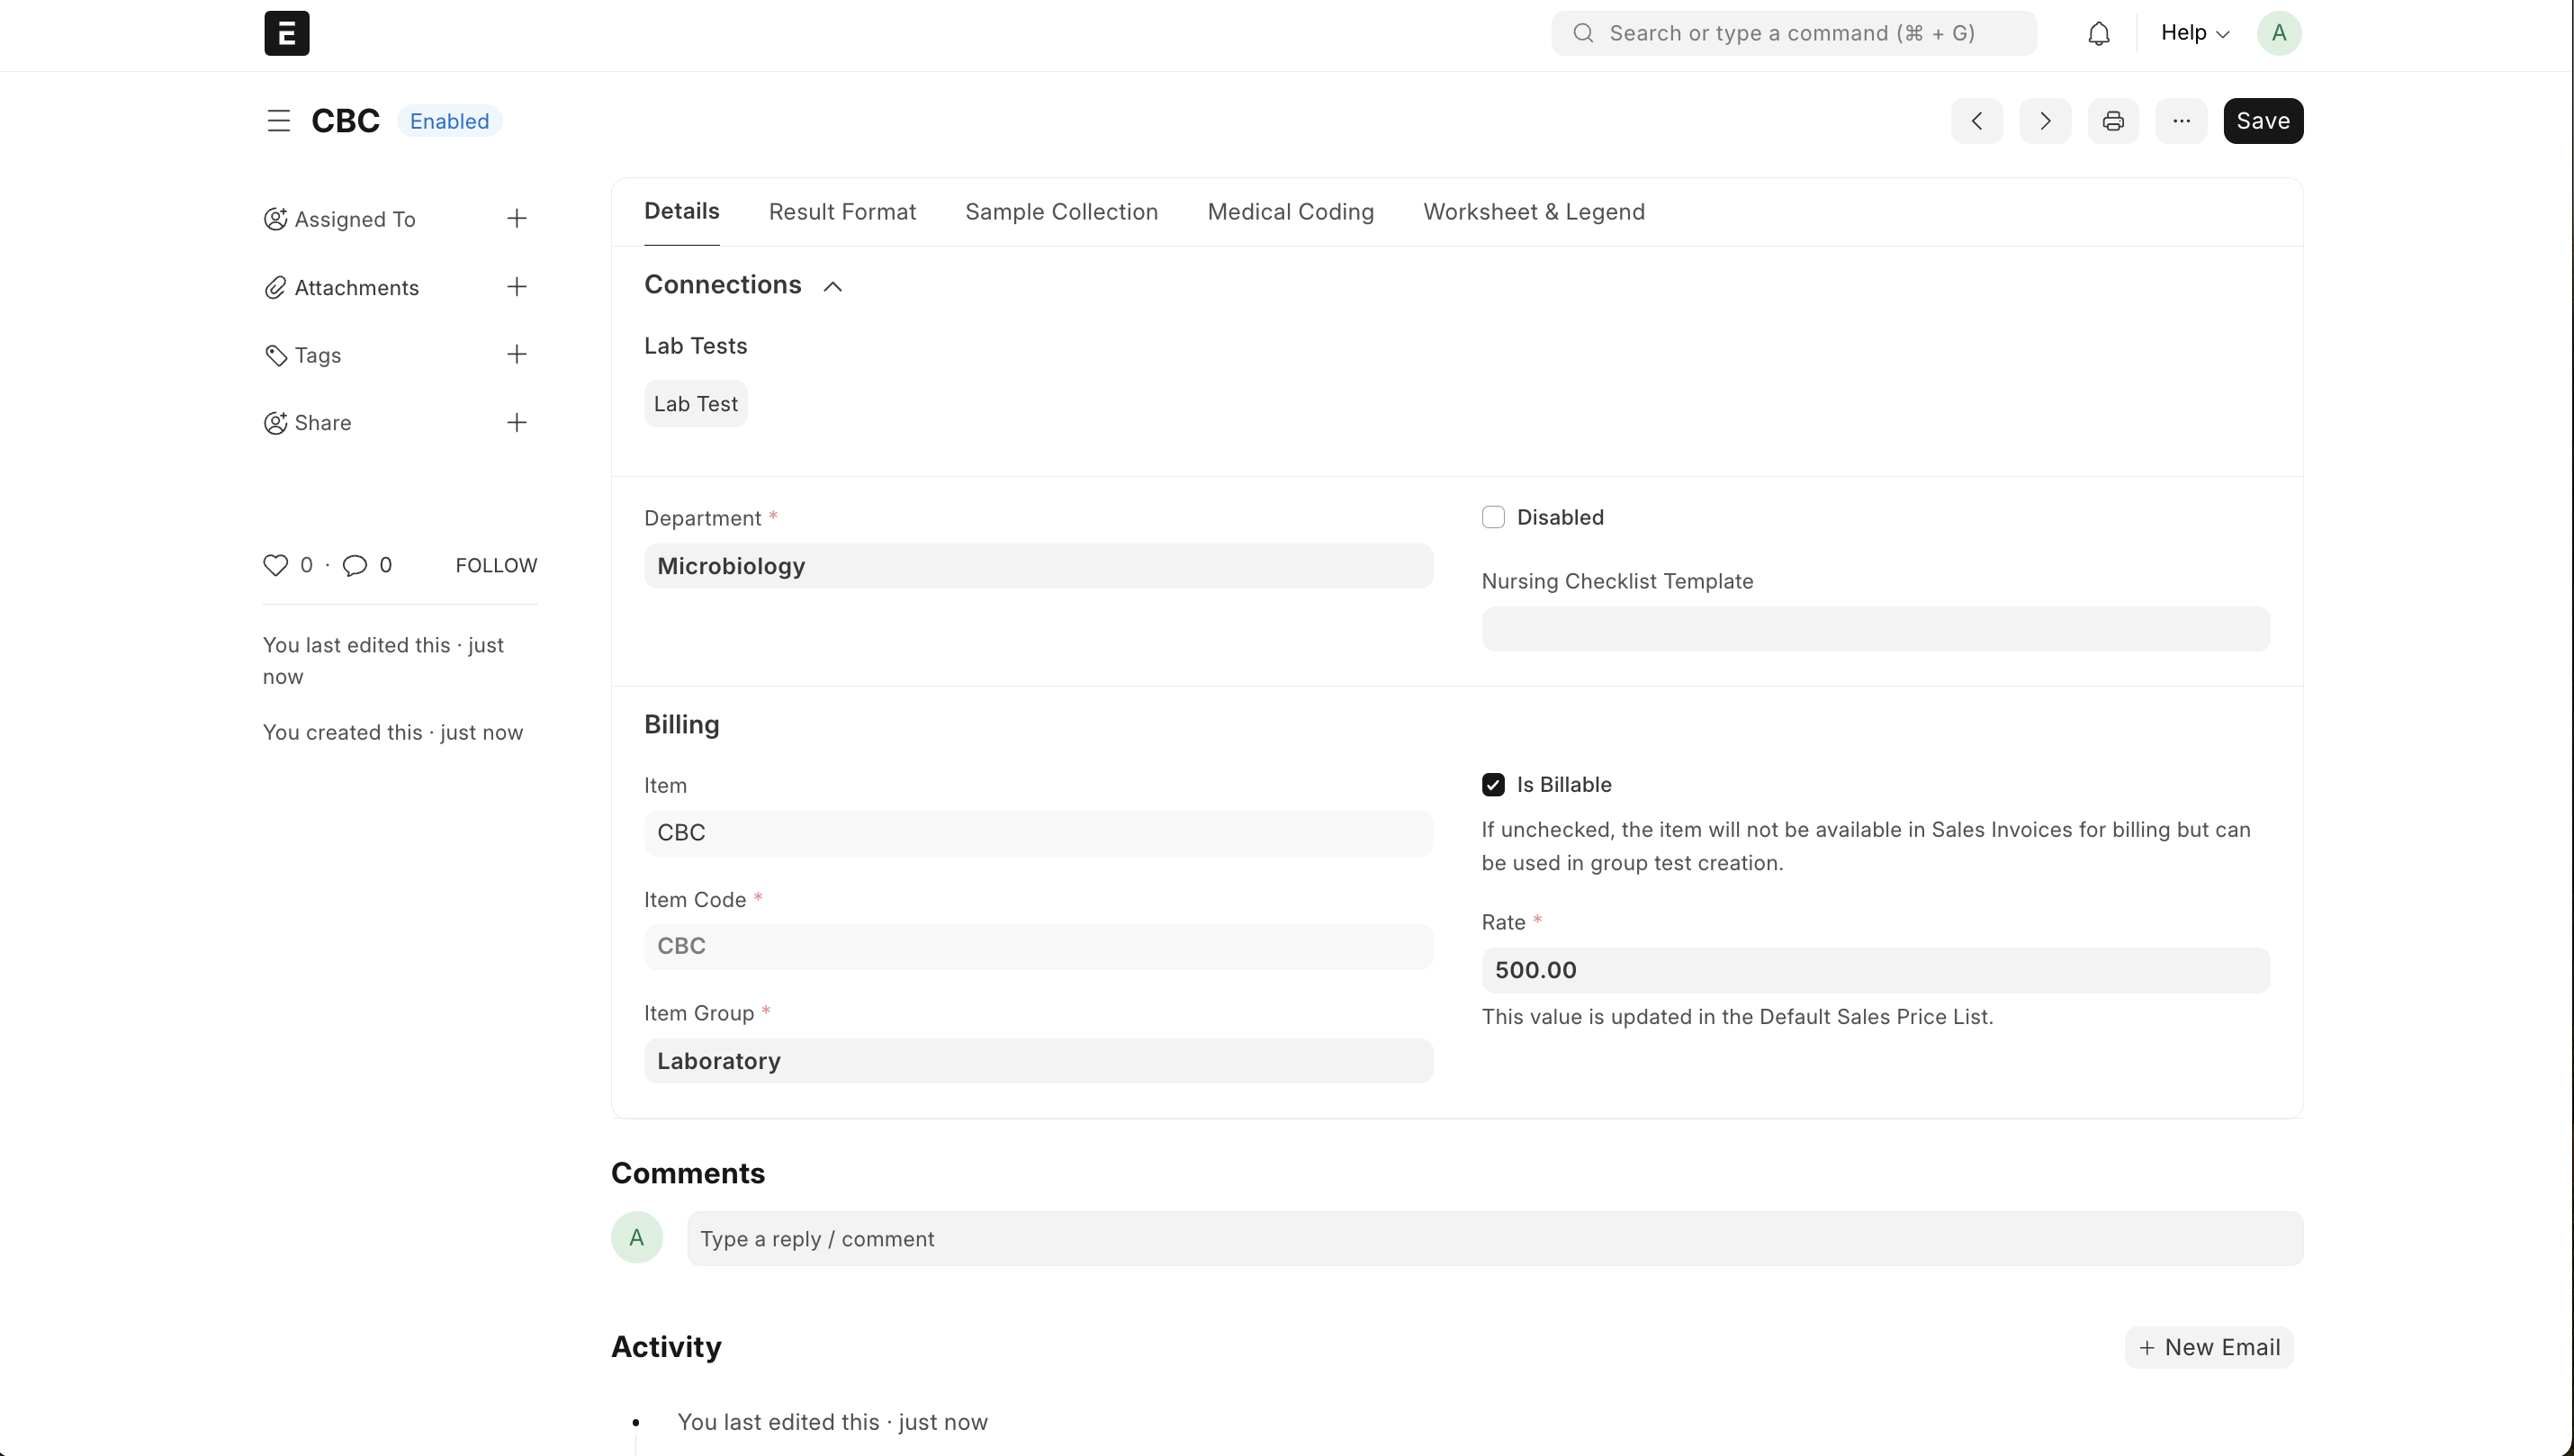
Also create a service request for a CBC lab test. Choose the order template for the test from the dropdown or create a new one.
The final encounter view will look something like this.
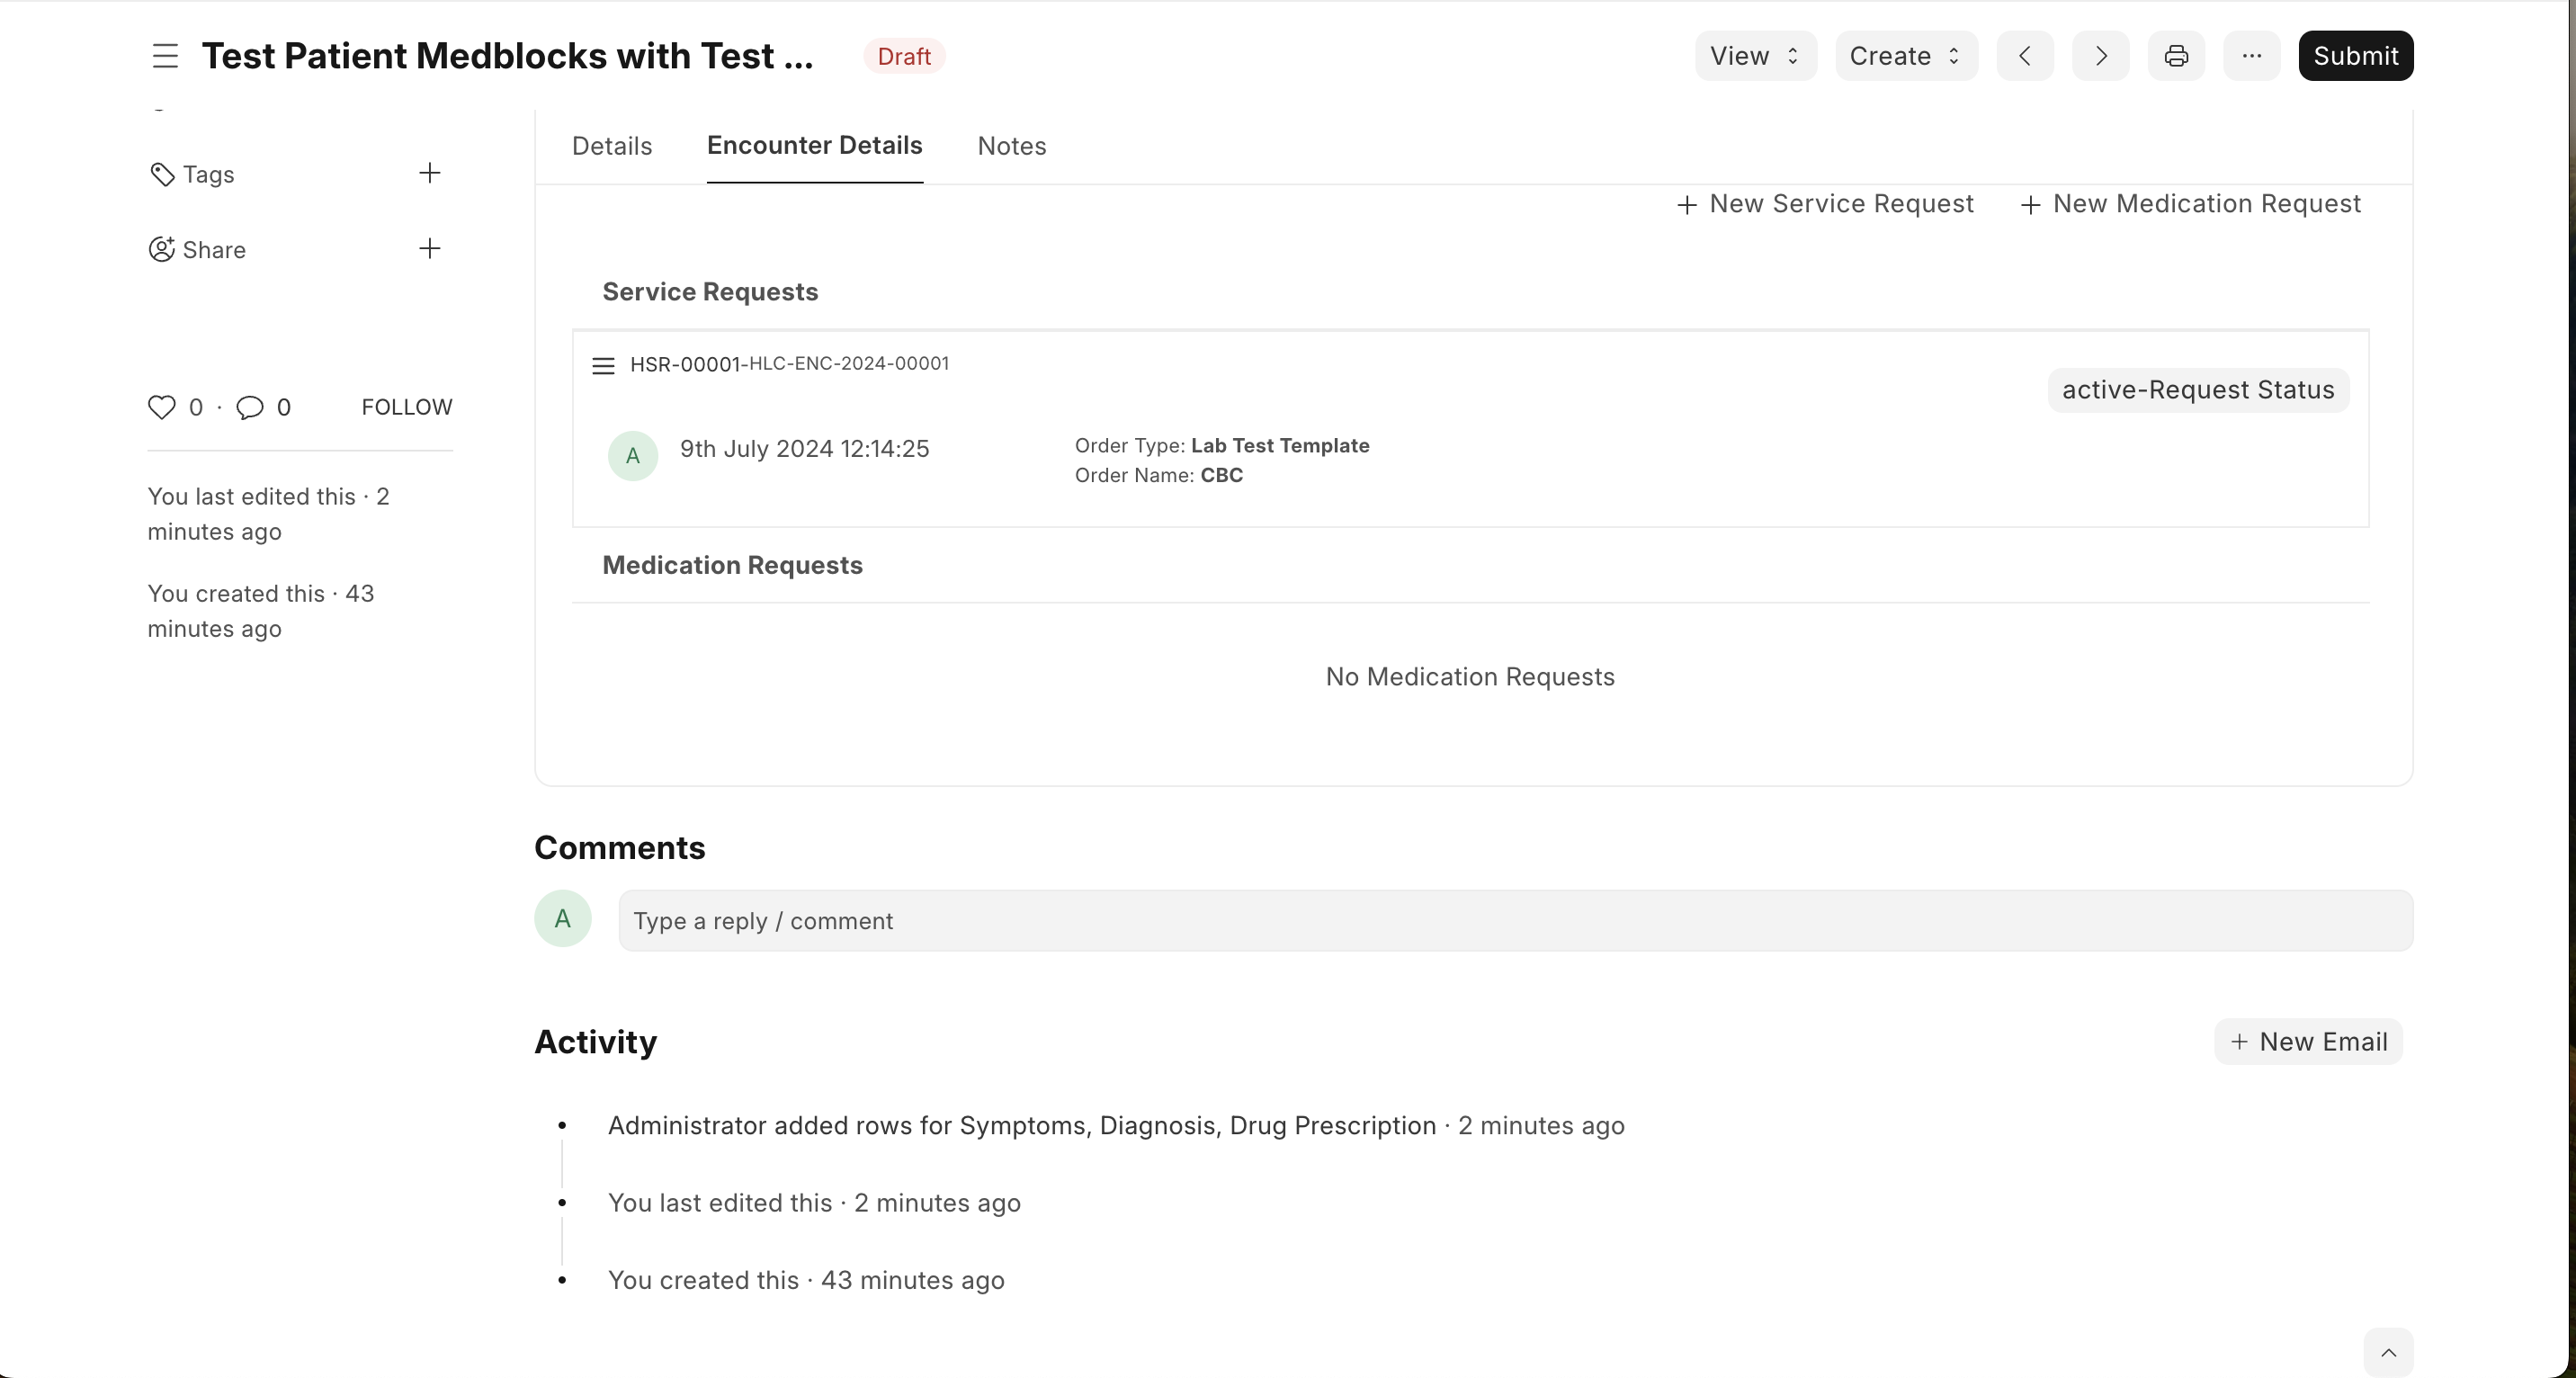
Verify all encounter details and click on final submit.
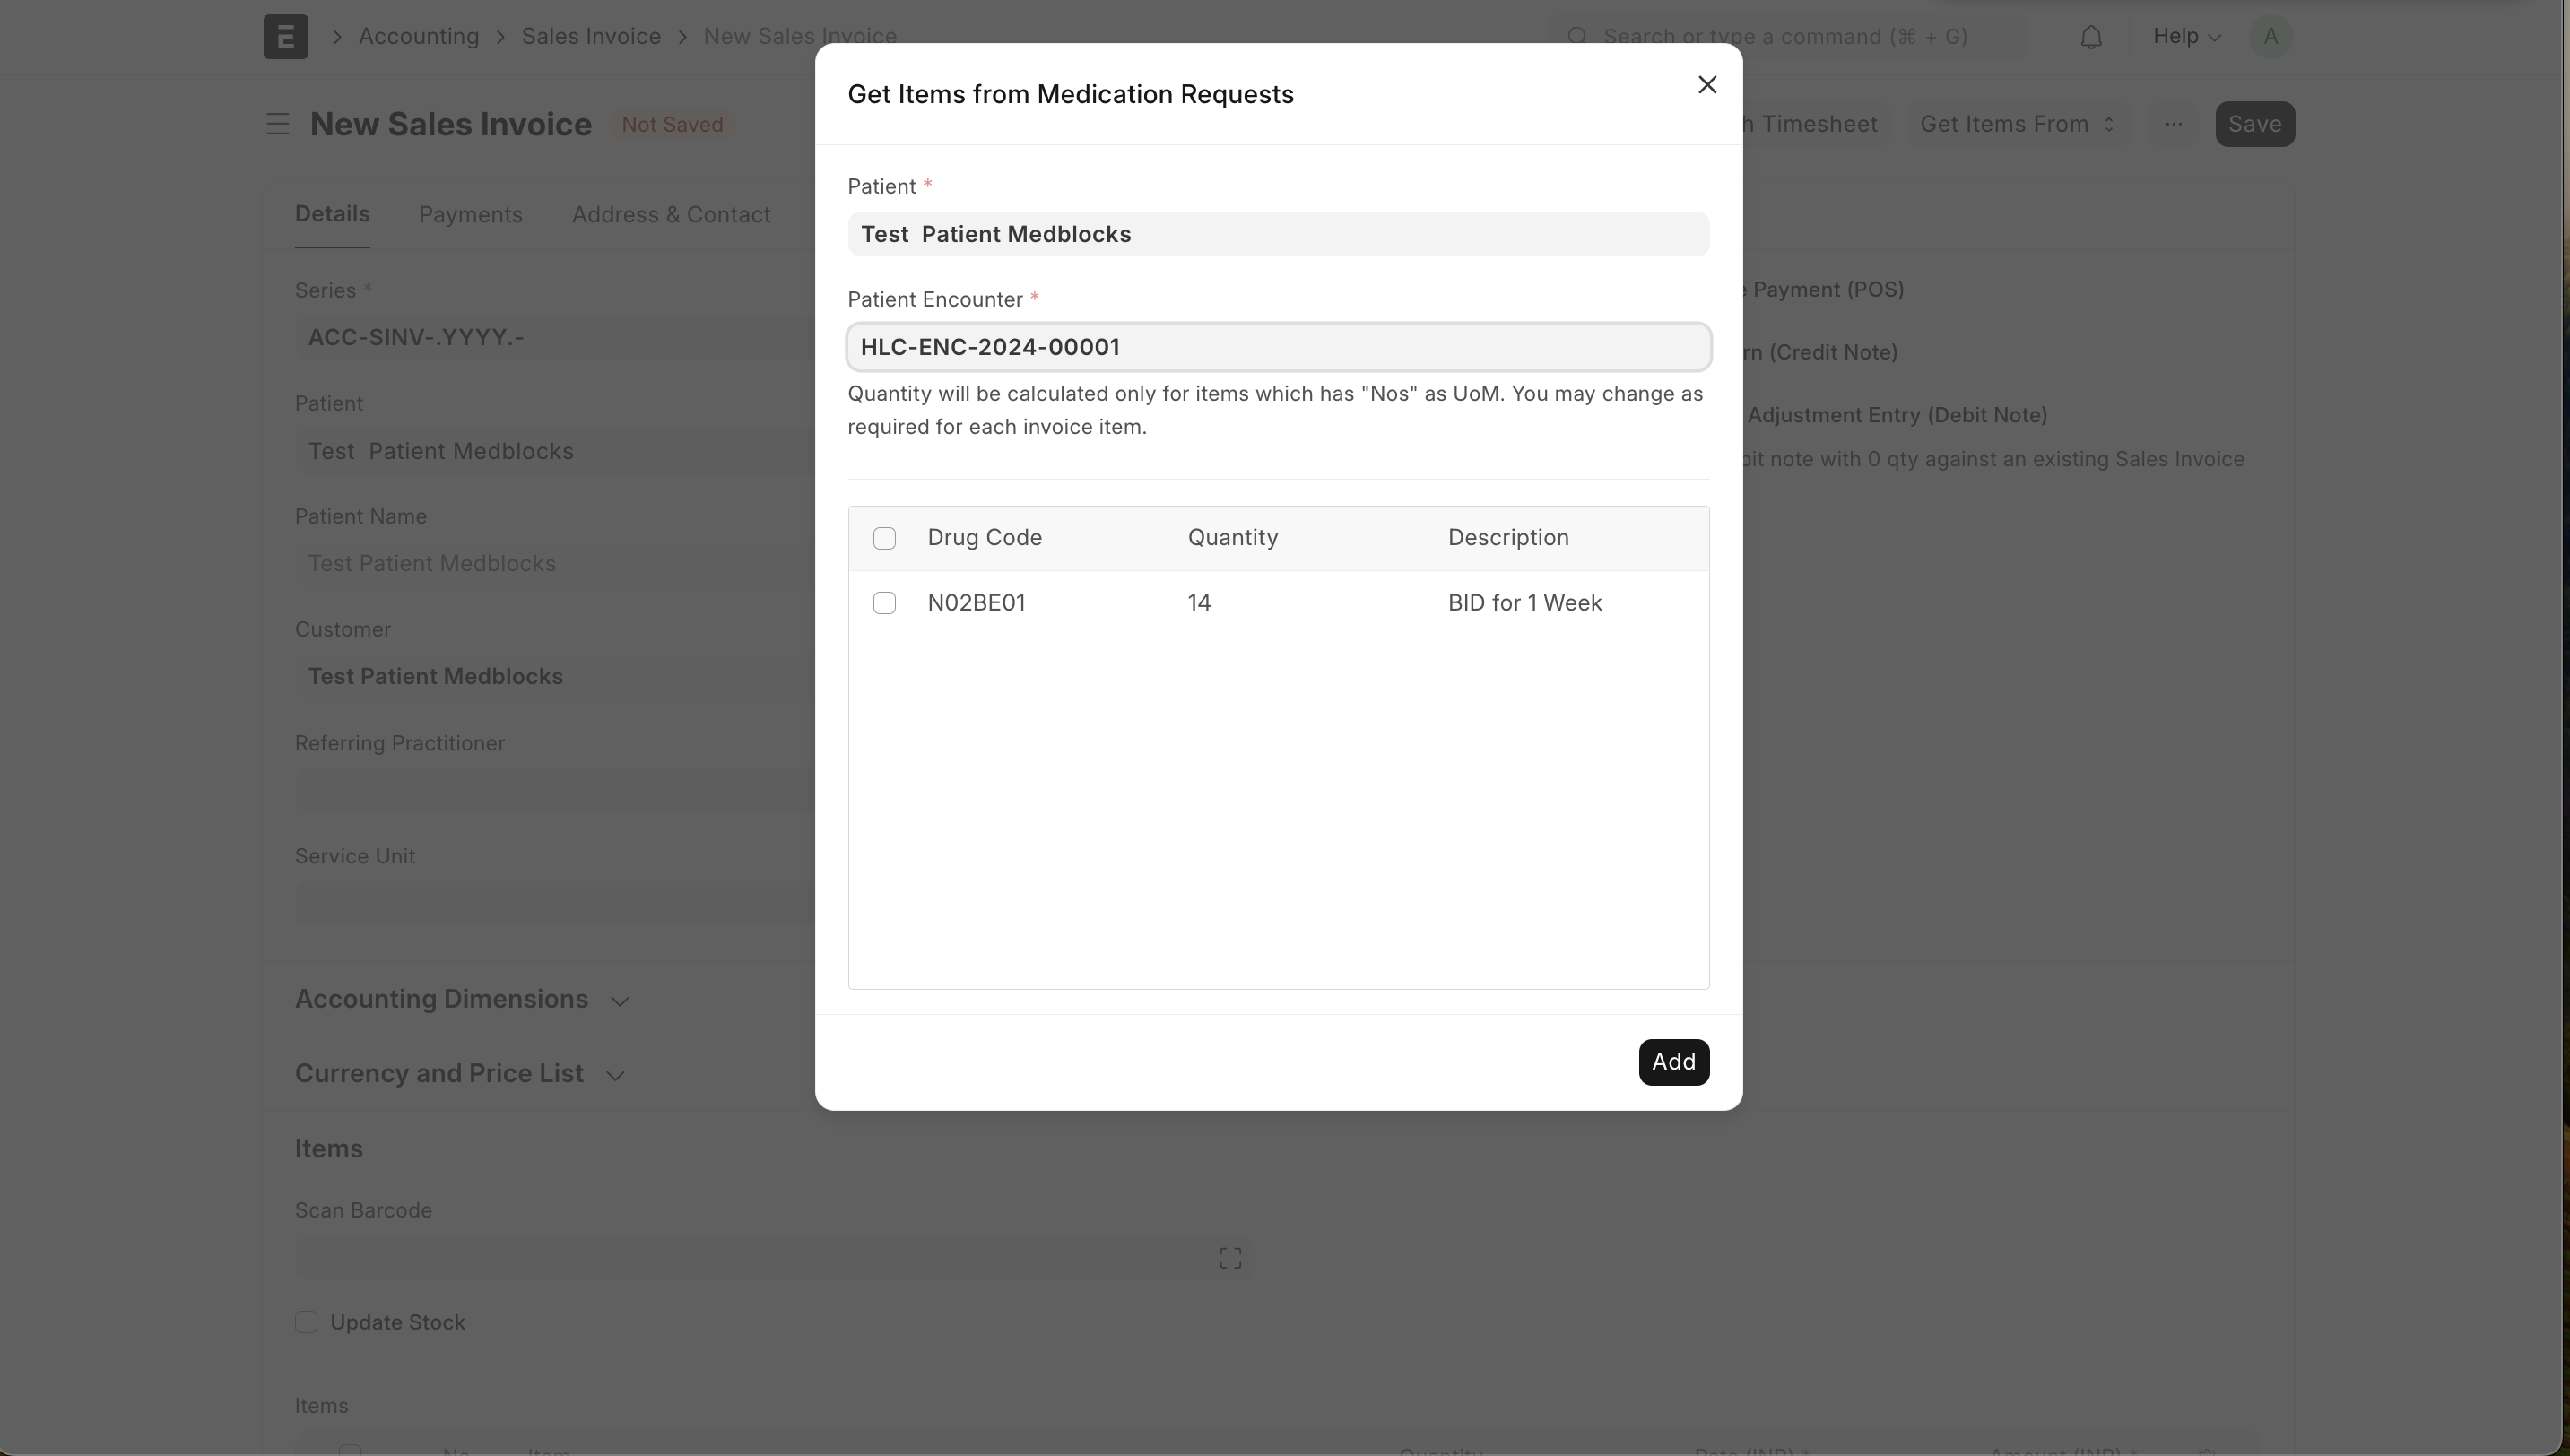
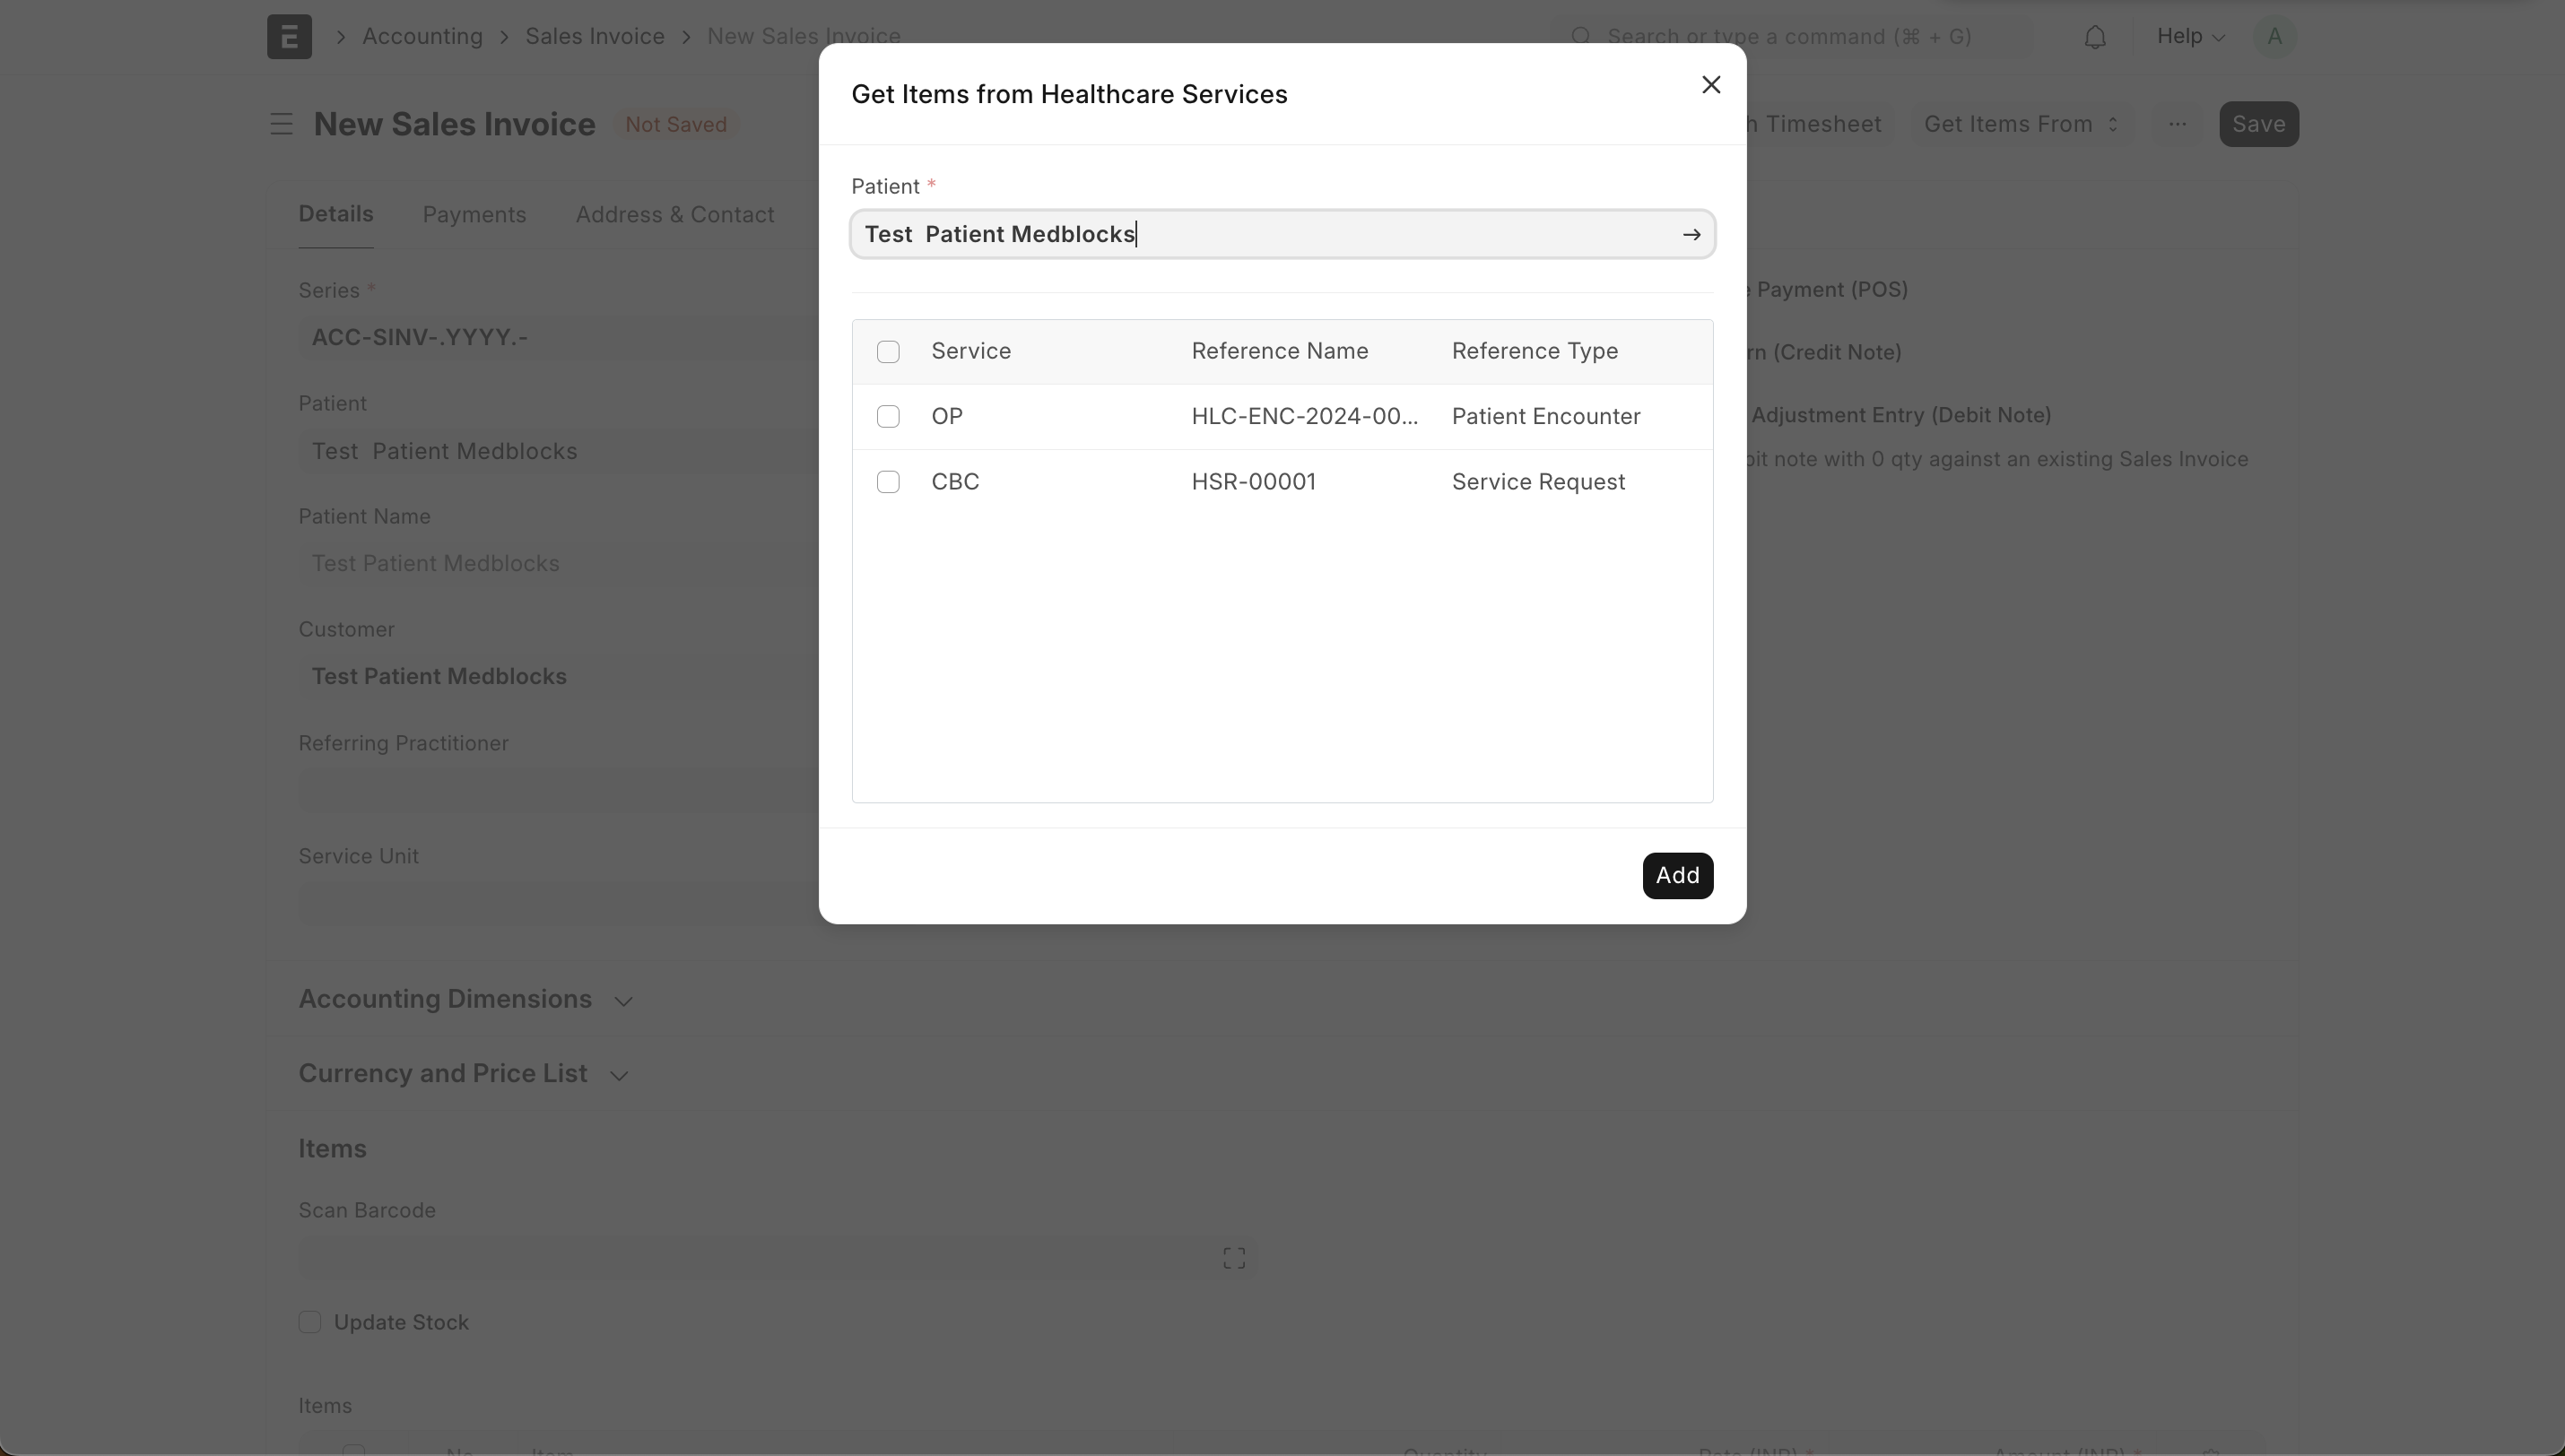
Once the encounter is finished, let’s create an invoice for the patient. The prescriptions can be fetched from Get Items From → Prescriptions . The service request from Get Items From → Healthcare Services .
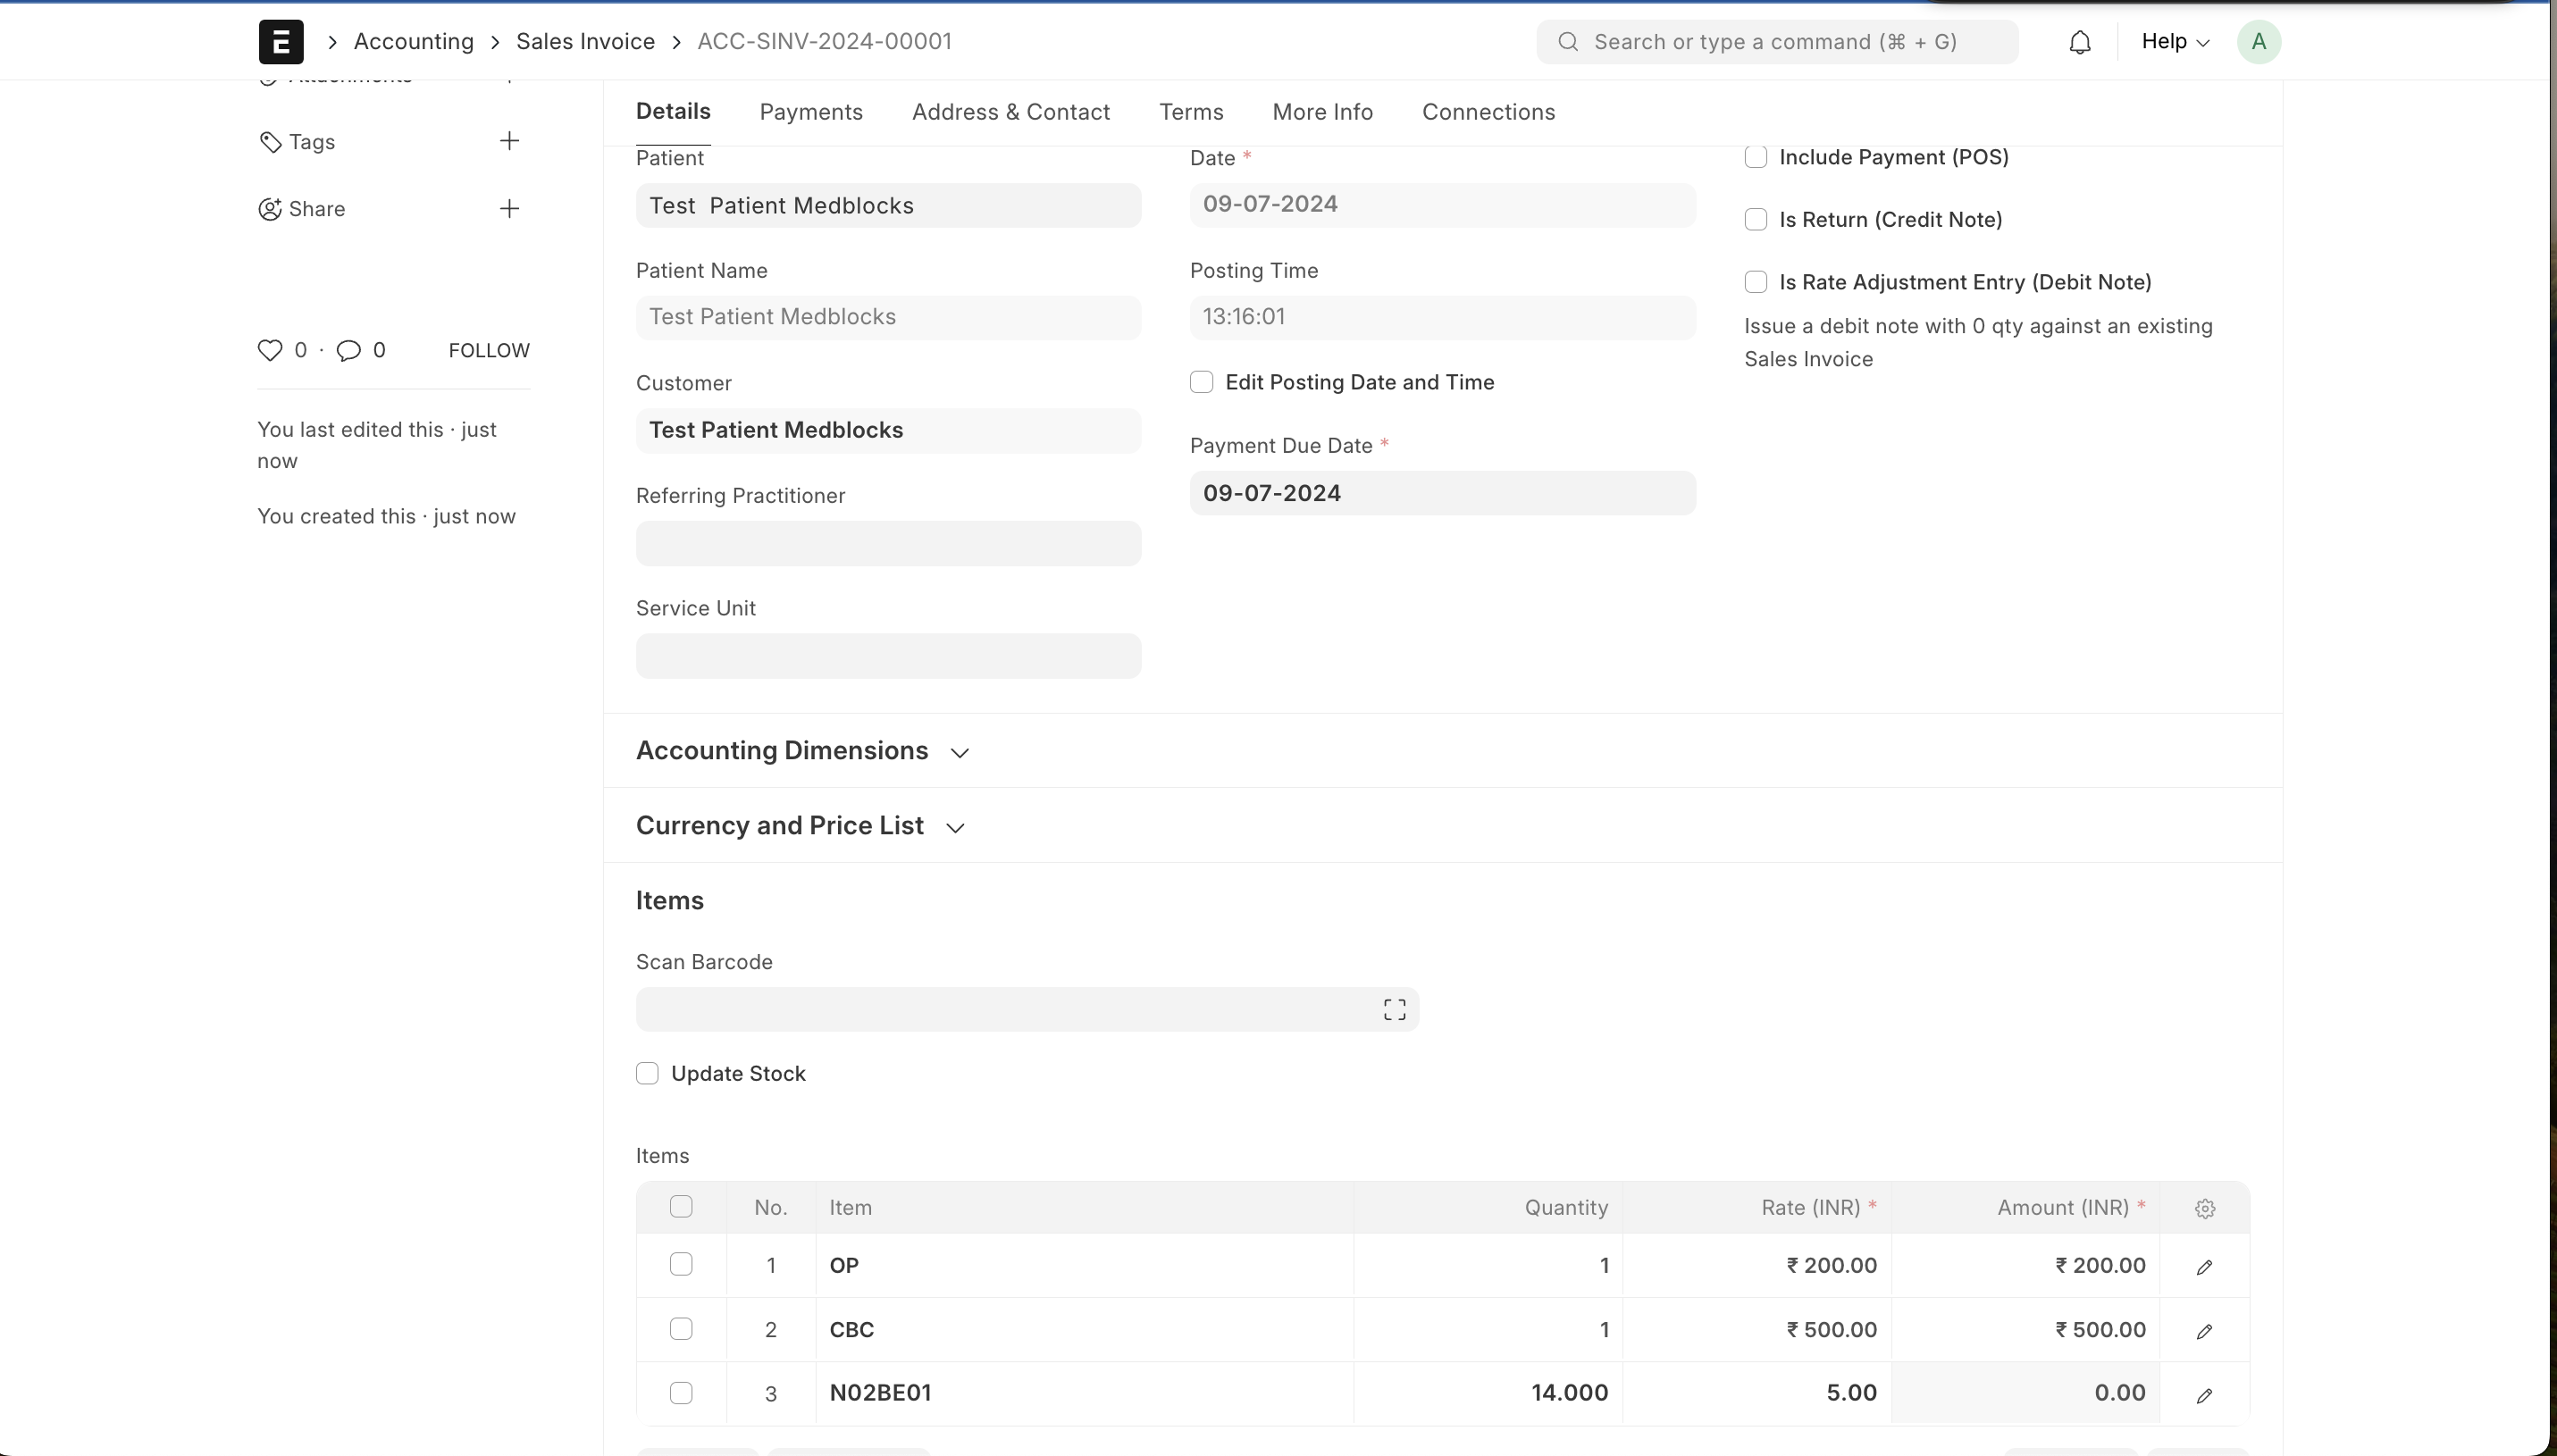
With all the charges pulled let’s save and submit the invoices.
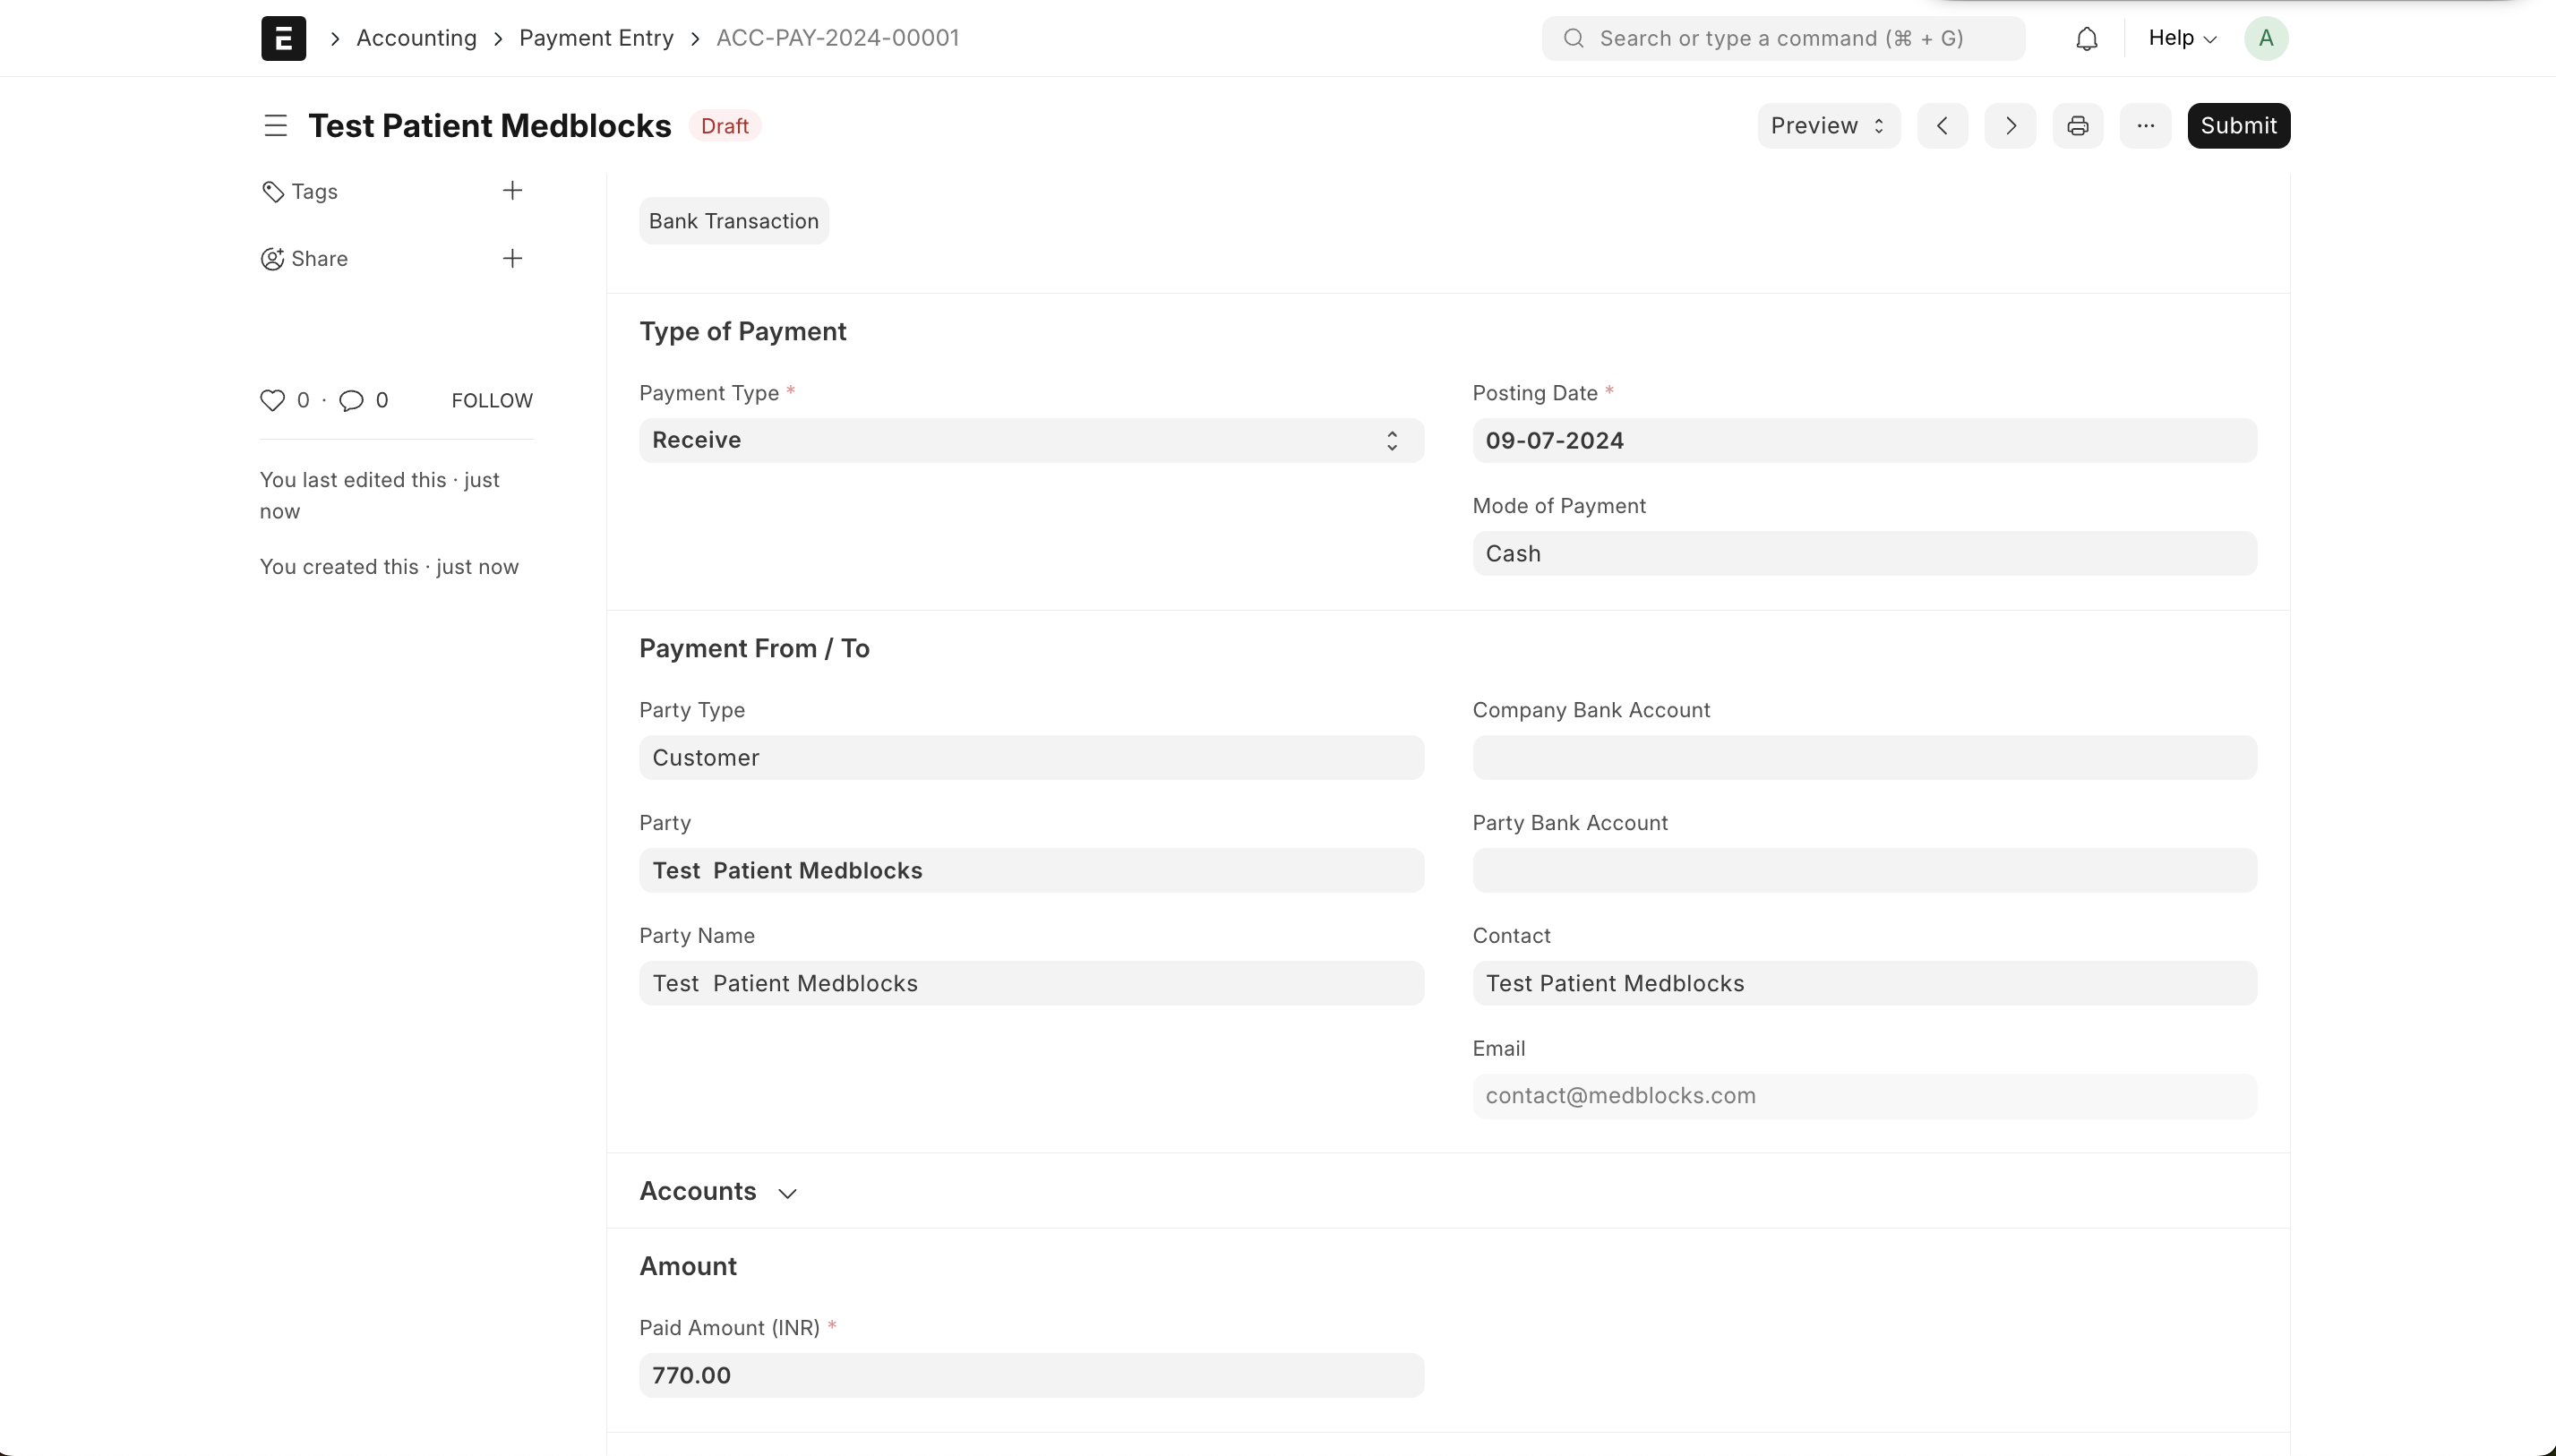
Now go to payments by selecting dropdown in Create button . You will navigate to Payment Entry docType. Review all the details then save and submit it to record successful payment.
We have now done an end to end demo of the out patient flow using ERPNext. As demonstrated above, ERPNext is capable of handling almost all requirements of your healthcare enterprise. And with the low-code, open-source nature of the platform you can easily suggest improvements or customise it for your needs.
In our early developmental phase, we used multiple Docker images and complex Helm charts to deploy the ERPNext application, which was tedious work. We then had a brilliant idea of consolidating it into a single Docker image and utilizing straightforward Kustomization files. This approach streamlined our deployment, making it more efficient and manageable.
Following are the insights and experiences that we gained. Let’s get straight into it.
Create a docker container with all the Frappe apps we want installed. Then pull the official ERPNext image. This will have both the Frappe bench and ERPNext installed on it.
Add the healthcare module to the bench. Let’s call this image ERPNEXT_HEALTHCARE_IMAGE.
FROM frappe/erpnext:v15.26.0
ARG APP_NAME=frontend
RUN bench get-app healthcare
CMD [ \
  "/home/frappe/frappe-bench/env/bin/gunicorn", \
  "--chdir=/home/frappe/frappe-bench/sites", \
  "--bind=0.0.0.0:8000", \
  "--threads=4", \
  "--workers=2", \
  "--worker-class=gthread", \
  "--worker-tmp-dir=/dev/shm", \
  "--timeout=120", \
  "--preload", \
  "frappe.app:application" \
]
Set up the associated services required for Frappe, which includes the database, Redis, Gunicorn, and Nginx. Both Gunicorn and Nginx will be included in the Dockerfile as the frontend and backend dependencies. Although Frappe can work with both PostgreSQL and MariaDB, ERPNext does not fully support PostgreSQL, so we will use MariaDB as our database.
We have to add MariaDB as a StatefulSet using the mariadb:10.6 image. We will mount an init script, attach a persistent volume, and set a root password for the database.
Note: If you’re using a managed database provider like AWS RDS or Google’s Cloud SQL solutions, you don’t need to deploy a MariaDB instance within Kubernetes.
apiVersion: apps/v1
kind: StatefulSet
metadata:
  name: mariadb-erpnext
spec:
  selector:
    matchLabels:
      app: mariadb-erpnext
  serviceName: mariadb-erpnext
  replicas: 1
  template:
    metadata:
      labels:
        app: mariadb-erpnext
    spec:
      containers:
      - name: mariadb
        image: mariadb:10.6
        args: ["--character-set-server=utf8mb4", "--collation-server=utf8mb4_unicode_ci", "--skip-character-set-client-handshake", "--skip-innodb-read-only-compressed"]
        ports:
          - containerPort: 3306
        env:
          - name: MARIADB_ROOT_PASSWORD
            value: mariadb_password
        volumeMounts:
          - mountPath: /var/lib/mysql
            name: mariadb-storage
          - name: mariadb-init
            mountPath: /docker-entrypoint-initdb.d
      volumes:
        - name: mariadb-storage
          persistentVolumeClaim:
            claimName: mariadb-erpnext-storage
        - name: mariadb-init
          configMap:
            name: mariadb-init
            items:
              - key: init.sql
                path: init.sql
  volumeClaimTemplates:
    - metadata:
        name: mariadb-erpnext-storage
      spec:
        accessModes: ["ReadWriteOnce"]
        storageClassName: standard
        resources:
          requests:
storage: 5Gimariadb-erpnext-storage. In this particular example, we are using Google Cloud, so we will utilise Google’s dynamically provisioned persistent volume.---
apiVersion: v1
kind: PersistentVolumeClaim
metadata:
name: mariadb-erpnext-storage
spec:
resources:
requests:
storage: 5Gi
accessModes:
- ReadWriteOnce---
apiVersion: v1
kind: Service
metadata:
name: mariadb-erpnext
spec:
selector:
app: mariadb-erpnext
ports:
- port: 3306
targetPort: 3306
type: ClusterIPkustomization.yaml .resources:
- maria.yaml
configMapGenerator:
- name: mariadb-init
files:
- init.sqlinit.sql file used creates a user and db frappe.create user if not exists 'frappe'@'localhost' identified by 'frappe';
grant all privileges on *.* to 'frappe'@'localhost' with grant option;
create database if not exists `frappe`;valkey/valkey:7.2 .redis-cache
apiVersion: apps/v1
kind: Deployment
metadata:
  name: redis-cache
  namespace: erpnext
spec:
  replicas: 1
  selector:
    matchLabels:
      app: redis-cache
  template:
    metadata:
      labels:
        app: redis-cache
    spec:
      containers:
      - name: valkey-cache
        image: valkey/valkey:7.2
        command: ["valkey-server", "/etc/conf.d/redis.conf"]
        resources:
          limits:
            memory: "500Mi"
            cpu: "500m"
        ports:
        - containerPort: 6379
        volumeMounts:
        - name: redis-config
          mountPath: /etc/conf.d
      volumes:
        - name: redis-config
          configMap:
            name: redis-config
            items:
              - key: redis.conf
                path: redis.conf
---
apiVersion: v1
kind: Service
metadata:
  name: redis-cache
spec:
  selector:
    app: redis-cache
  ports:
  - port: 6379
    targetPort: 6379
redis-queue
---
apiVersion: apps/v1
kind: Deployment
metadata:
  name: redis-queue
  namespace: erpnext
spec:
  replicas: 1
  selector:
    matchLabels:
      app: redis-queue
  template:
    metadata:
      labels:
        app: redis-queue
    spec:
      containers:
      - name: valkey-queue
        image: valkey/valkey:7.2
        command: ["valkey-server", "/etc/conf.d/redis-queue.conf"]
        resources:
          limits:
            memory: "500Mi"
            cpu: "500m"
        ports:
          - containerPort: 6379
        volumeMounts:
          - name: redis-queue-config
            mountPath: /etc/conf.d
      volumes:
        - name: redis-queue-config
          configMap:
            name: redis-queue-config
            items:
              - key: queue.conf
                path: redis-queue.conf
---
apiVersion: v1
kind: Service
metadata:
  name: redis-queue
spec:
  selector:
    app: redis-queue
  ports:
  - port: 6379
    targetPort: 6379
redis-socketio
---
apiVersion: apps/v1
kind: Deployment
metadata:
  name: redis-socketio
  namespace: erpnext
spec:
  replicas: 1
  selector:
    matchLabels:
      app: redis-socketio
  template:
    metadata:
      labels:
        app: redis-socketio
    spec:
      containers:
      - name: valkey-queue
        image: valkey/valkey:7.2
        resources:
          limits:
            memory: "500Mi"
            cpu: "500m"
        ports:
          - containerPort: 6379
---
apiVersion: v1
kind: Service
metadata:
  name: redis-socketio
spec:
  selector:
    app: redis-socketio
  ports:
  - port: 6379
targetPort: 6379resources:
- redis.yaml
configMapGenerator:
- name: redis-config
namespace: erpnext
files:
- redis.conf
- name: redis-queue-config
namespace: erpnext
files:
- queue.confThe redis.conf file used.
bind 0.0.0.0
port 6379
loglevel notice
maxmemory-policy allkeys-lru
The queue.conf file used.
bind 0.0.0.0
port 6379
loglevel notice
Now that we have all the microservices needed let’s deploy the main app. We will approach this by creating a stateful application for frontend and backend and deploying them as services.
The backend will have 5 containers - the main backend app, the socketio app, long and short queues and a scheduler. Of these, expose the main backend container and the socketio as services.
apiVersion: apps/v1
kind: StatefulSet
metadata:
  name: erpnext-backend
spec:
  selector:
    matchLabels:
      app: erpnext-backend
  serviceName: erpnext-backend
  template:
    metadata:
      labels:
        app: erpnext-backend
    spec:
      containers:
        - name: erpnext-socketio
          image: ERPNEXT_HEALTHCARE_IMAGE
          command: ["/bin/sh", "-c"]
          args:
            - |
              node /home/frappe/frappe-bench/apps/frappe/socketio.js
          ports:
            - containerPort: 9000
          volumeMounts:
            - mountPath: /home/frappe/frappe-bench/sites
              name: erpnext-storage
        - name: erpnext-backend
          image: ERPNEXT_HEALTHCARE_IMAGE
          ports:
            - containerPort: 8000
          volumeMounts:
            - mountPath: /home/frappe/frappe-bench/sites
              name: erpnext-storage
        - name: queue-long
          image: ERPNEXT_HEALTHCARE_IMAGE
          command: ["/bin/sh", "-c"]
          args:
            - |
              bench worker --queue long,default,short
          volumeMounts:
            - mountPath: /home/frappe/frappe-bench/sites
              name: erpnext-storage
        - name: queue-short
          image: ERPNEXT_HEALTHCARE_IMAGE
          command: ["/bin/sh", "-c"]
          args:
            - |
              bench worker --queue short,default
          volumeMounts:
            - mountPath: /home/frappe/frappe-bench/sites
              name: erpnext-storage
        - name: scheduler
          image: ERPNEXT_HEALTHCARE_IMAGE
          command: ["/bin/sh", "-c"]
          args:
            - |
              bench schedule
          volumeMounts:
            - mountPath: /home/frappe/frappe-bench/sites
              name: erpnext-storage
      volumes:
        - name: erpnext-site
          configMap:
            name: erpnext-config
            items:
              - key: common_site_config.json
                path: common_site_config.json
        - name: erpnext-storage
          persistentVolumeClaim:
            claimName: erpnext-storage
        - name: erpnext-logs
          emptyDir: {}
  volumeClaimTemplates:
    - metadata:
        name: erpnext-storage
      spec:
        accessModes: ["ReadWriteOnce"]
        resources:
          requests:
            storage: 8Gi
---
apiVersion: v1
kind: Service
metadata:
  name: erpnext-backend
spec:
  selector:
    app: erpnext-backend
  ports:
    - port: 8000
      targetPort: 8000
      name: backend
    - port: 9000
      targetPort: 9000
      name: socketio
type: ClusterIP---
apiVersion: apps/v1
kind: StatefulSet
metadata:
name: erpnext-frontend
spec:
selector:
matchLabels:
app: erpnext-frontend
serviceName: erpnext-frontend
template:
metadata:
labels:
app: erpnext-frontend
spec:
containers:
- name: erpnext-frontend
image: ERPNEXT_HEALTHCARE_IMAGE
command:
- nginx-entrypoint.sh
env:
- name: BACKEND
value: "erpnext-backend.erpnext.svc.cluster.local:8000"
- name: SOCKETIO
value: "erpnext-backend.erpnext.svc.cluster.local:9000"
- name: FRAPPE_SITE_NAME_HEADER
value: "frontend"
- name: UPSTREAM_REAL_IP_ADDRESS
value: "127.0.0.1"
- name: UPSTREAM_REAL_IP_HEADER
value: "X-Forwarded-For"
- name: UPSTREAM_REAL_IP_RECURSIVE
value: "off"
- name: PROXY_READ_TIMEOUT
value: "120"
- name: CLIENT_MAX_BODY_SIZE
value: "50m"
ports:
- containerPort: 8080
volumeMounts:
- mountPath: /home/frappe/frappe-bench/sites
name: erpnext-storage
volumes:
- name: erpnext-site
configMap:
name: erpnext-config
items:
- key: common_site_config.json
path: common_site_config.json
- name: erpnext-storage
persistentVolumeClaim:
claimName: erpnext-storage
- name: erpnext-logs
emptyDir: {}
volumeClaimTemplates:
- metadata:
name: erpnext-storage
spec:
accessModes: ["ReadWriteOnce"]
resources:
requests:
storage: 8Gi
---
apiVersion: v1
kind: Service
metadata:
name: erpnext
spec:
selector:
app: erpnext-frontend
ports:
- port: 8080
targetPort: 8080
name: frontend
type: ClusterIP
---
apiVersion: batch/v1
kind: Job
metadata:
  name: migrate-install-app
spec:
  template:
    spec:
      restartPolicy: Never
      containers:
        - name: erpnext-init-modify-files
          image: ERPNEXT_HEALTHCARE_IMAGE
          command: ["/bin/sh", "-c"]
          args:
            - |
              cp -f /home/frappe/common_site_config.json /home/frappe/frappe-bench/sites/common_site_config.json && \
              cat /home/frappe/frappe-bench/sites/common_site_config.json
          volumeMounts:
            - mountPath: /home/frappe
              name: erpnext-site
            - mountPath: /home/frappe/frappe-bench/sites
              name: erpnext-storage
            - mountPath: /home/frappe/frappe-bench/logs
              name: erpnext-logs
        - name: erpnext-init-install
          image: ERPNEXT_HEALTHCARE_IMAGE
          command: ["/bin/sh", "-c"]
          args:
            - |
              ls -1 apps > /home/frappe/frappe-bench/sites/apps.txt && \
              bench new-site --no-mariadb-socket --admin-password=changeMePlease --db-root-password=mariadb_password --install-app erpnext --set-default erpnext-frontend --force && \
              bench --site erpnext-frontend install-app healthcare
          volumeMounts:
            - mountPath: /home/frappe/frappe-bench/sites
              name: erpnext-storage
            - mountPath: /home/frappe/frappe-bench/logs
              name: erpnext-logs
      volumes:
        - name: erpnext-site
          configMap:
            name: erpnext-config
            items:
              - key: common_site_config.json
                path: common_site_config.json
        - name: erpnext-storage
          persistentVolumeClaim:
            claimName: erpnext-storage-v8
        - name: erpnext-logs
emptyDir: {}---
apiVersion: v1
kind: PersistentVolumeClaim
metadata:
name: erpnext-storage
spec:
accessModes:
- ReadWriteOnce
resources:
requests:
storage: 6GiapiVersion: v1
kind: Namespace
metadata:
name: erpnextcommon_site_config.json .resources:
- namespace.yaml
- ./redis
- ./maria
- svc.yaml
configMapGenerator:
- name: erpnext-config
files:
- ./common_site_config.jsonThe common_site_config.json will look similar to:
{
    "db_host": "mariadb-erpnext.erpnext.svc.cluster.local",
    "db_port": 3306,
    "db_name": "frappe",
    "db_user": "frappe",
    "db_password": "mariadb_password",
    "redis_cache": "redis://redis-cache.erpnext.svc.cluster.local:6379",
    "redis_queue": "redis://redis-queue.erpnext.svc.cluster.local:6379",
    "redis_socketio": "redis://redis-socketio.erpnext.svc.cluster.local:6379",
    "http_port": "8080",
    "frappe_user": "frappe",
    "admin_password": "changeMePlease",
    "socketio_port": "9000",
    "enable_frappe_logger": true,
    "monitor": true,
}
This is the final folder structure.
├── erpnet
		├── maria
				├── db.yaml
				├── init.sql
				├── kustomization.yaml
		├── redis
	      ├── redis.yaml
				├── redis.conf
				├── queue.conf
				├── kustomization.yaml
		├── svc.yaml
		├── namespace.yaml
		├── common_site_config.json
		├── kustomization.yaml
With all the services configured and running, use any proxy to set up the frontend erpnext service on the domain of your choosing. Visit the configured URL and complete the initial setup to have a fully functional ERP solution with the healthcare module on your system.
Push it all to your Kubernetes a kubectl apply -k . command, or by using a GitOps solutions like ArgoCD or Flux.
In summary, the integration of ERPNext with a health data platform like Medblocks offers a well-rounded solution for healthcare providers. ERPNext’s customizable open-source platform efficiently manages patient care, inventory, billing, and the entire revenue cycle. Health data platforms built on standards like FHIR and openEHR are then well suited for capturing and storing clinical data. By deploying it on Kubernetes, Medblocks ensures the system is both scalable and easy to manage. This solution enables healthcare institutions to streamline their operations and enhance patient care effectively while maintaining data standards.
If you’re interested in setting up ERPNext or Health data platforms for your next healthcare venture, click on the link below to contact us.
Understand IHE XDS federated architecture: Registry, Repository, ITI-41/42/43 transactions & SOAP. Run a working XDS exchange locally with the NIST toolkit.
Catalonia wanted an openEHR Clinical Data Repository for 8 million people. Medblocks worked with IBM and vitagroup to design the sync layer for hospitals.
We walk you through building a FHIR server on top of Couchbase's NoSQL database, covering challenges, technical decisions, architecture, and local setup.
No comments yet. Be the first to comment!