
SMART on FHIR: How It Works and How to Build Apps That Launch Inside EHRs
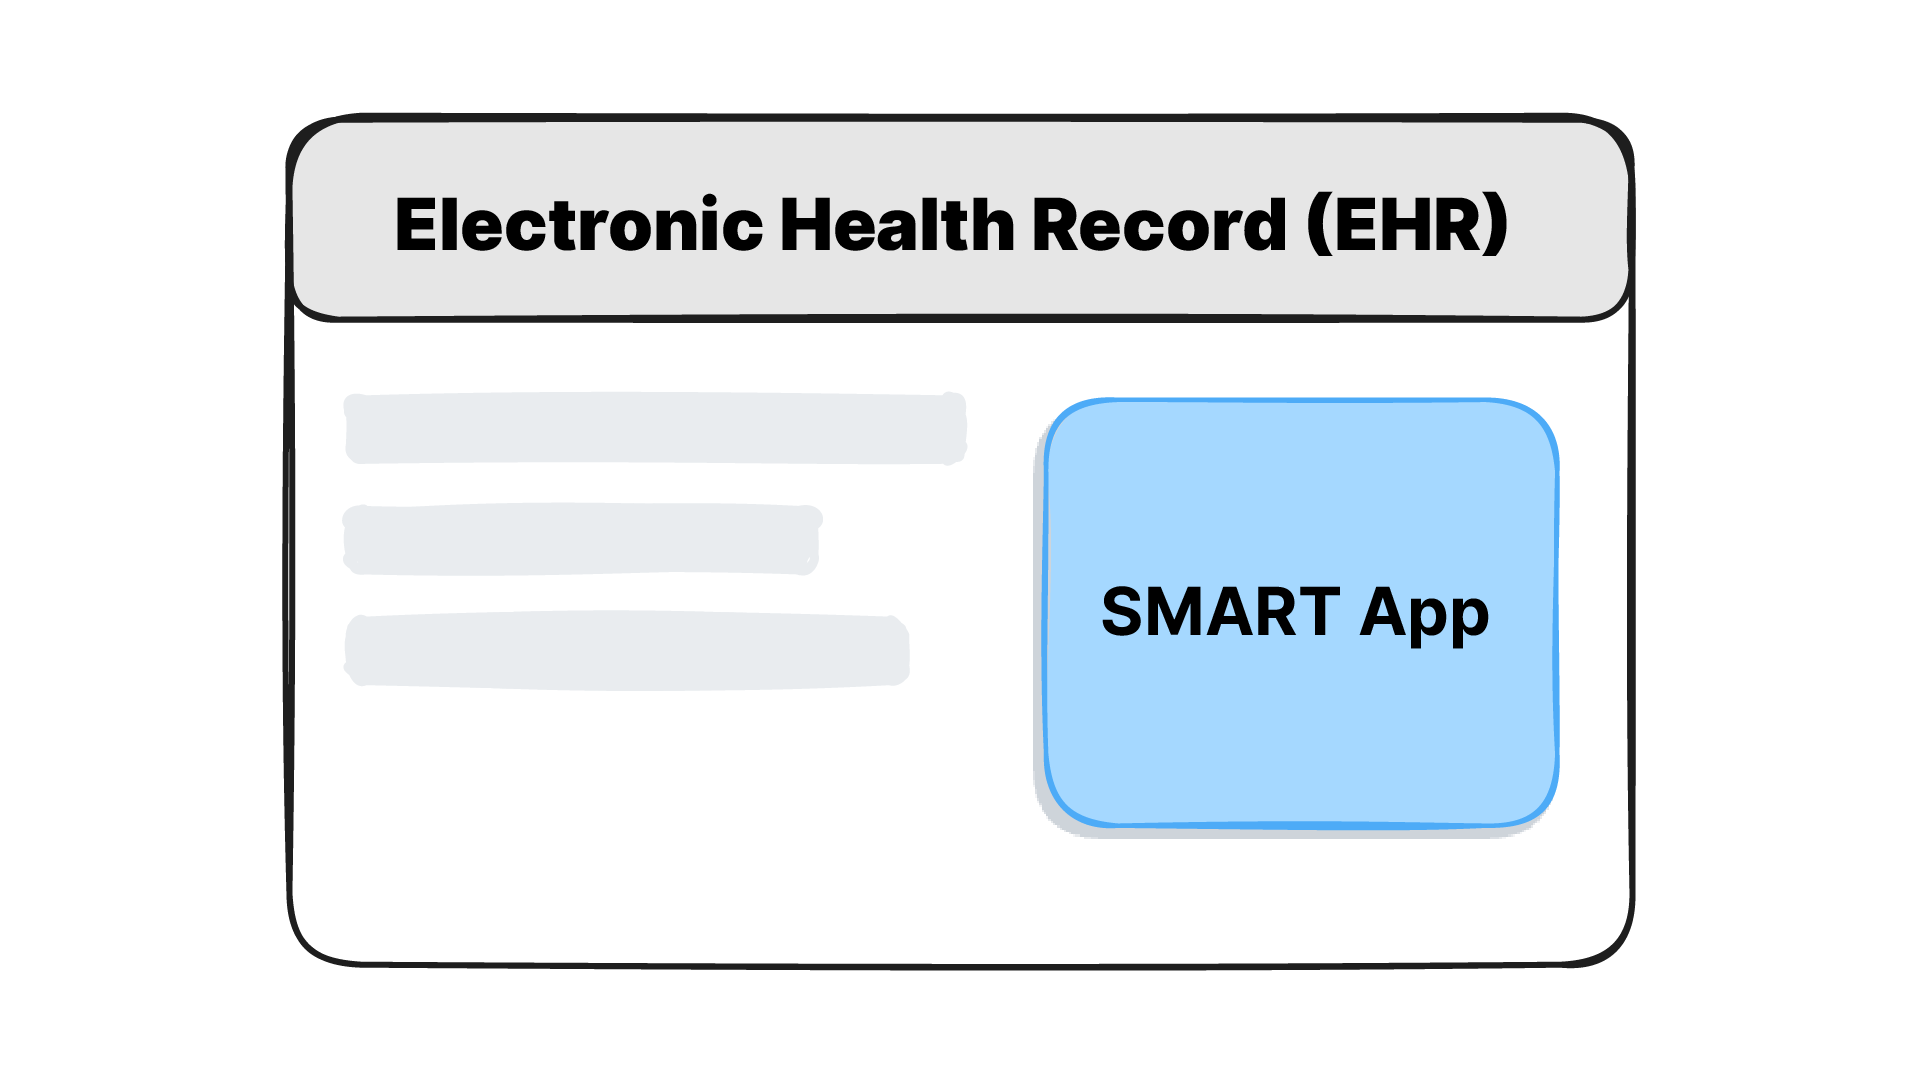
Learn how SMART on FHIR connects apps to EHRs using FHIR APIs and OAuth2. Covers launch flows, scopes, Epic and Cerner setup, SMART v2, and building your first app.
May 9, 2025
You know Java. Now learn FHIR. This guide will get you creating, updating and querying real FHIR resources in no time.
Open standards like HL7 FHIR are an essential step towards designing future-proof, interoperable healthcare data systems. In this tutorial, we will explore how to use Java to create a FHIR resource and interact with FHIR REST APIs. Java is a widely used, platform independent, object oriented programming language and the HAPI FHIR library makes it easier to implement the HL7 FHIR standard. HAPI FHIR is built and supported by Smile CDR.
In this tutorial we will,
As a prerequisite, ensure that you have Java 11+ and Maven 3.6+ installed. To check, you can run the following commands in your terminal.
javac -version
mvn -v
We’ll be using Maven - an open-source build automation and project management tool - in order to manage our dependencies. It uses a Project Object Model or POM file (usually pom.xml) in order to store project information such as dependencies, plugins and build configurations.
We are using FHIR R4, and the HAPI FHIR documentation provides instructions on how to add the necessary dependencies for it. Add the following block of code to your pom.xml file in order to get started. Replace ${project.version} with the HAPI FHIR version you are using, we’ll be replacing it with 8.0.0.
<dependencies>
  <dependency>
    <groupId>ca.uhn.hapi.fhir</groupId>
    <artifactId>hapi-fhir-structures-r4</artifactId>
    <version>${project.version}</version>
  </dependency>
</dependencies>First, let us create a patient object using the HAPI FHIR library in Java. Here are the patient details we’ll be using,
To create a patient, we’ll use the classes available in HAPI FHIR, where each resource type defined by FHIR has a corresponding class. This class contains getters and setters for all its basic properties which can also be chained, resulting in simpler code. There are many convenience methods we can use in order to make populating objects easier.
Additionally, closed ValueSets that are defined in the FHIR specification are defined as special typesafe Enums in order to ensure compliance with the specification, e.g. Patient.gender
In the below code snippet, we create a Patient, and populate it with the details we defined earlier.
package com.medblocks;
import org.hl7.fhir.r4.model.Patient;

public final class App {
  private App(){
  }

  @param args

  public static void main(String[] args) {

    Patient patient = new Patient();

    patient.addName().addGiven("Jay").setFamily("Doe");
    patient.setActive(true);
    patient.setGender(Enumerations.AdministrativeGender.OTHER);

patient.addTelecom().setSystem(ContactPointSystem.EMAIL).setValue(value:"jdoe@example.com");
    }
}
Congratulations! You have successfully created a FHIR Patient object using Java and the HAPI FHIR library. But how can you print or view this in a readable JSON format?
If you try to print the patient object,
System.out.println(patient);The output would look something like this,
org.hl7.r4.model.Patient@1a86f2f1For this, we will need to use the parsing and serializing support available in HAPI FHIR, namely Parser. Parsing begins with a FhirContext object which provides context about the FHIR version being used, in our case R4. To do this, we add the following snippet to our code.
    FhirContext ctx = FhirContext.forR4();

    String jsonPatient = ctx.newJsonParser().encodeResourceToString(patient);

    System.out.println(jsonPatient);
Now the output looks more familiar and contains a readable JSON object.
{"resourceType": "Patient","active":true,"name":[{"family":"Doe","given":["Jay"]}],"telecom":[{"system":"email","value":"jdoe@example.com"}],"gender":"other"}Next we’ll look at how to interact with a FHIR server through REST APIs when using Java.
The HAPI FHIR library provides built-in mechanisms for connecting to FHIR REST servers, and we’ll be using the Generic (Fluent) client. The fluent interface allows the chaining of method calls resulting in highly readable code. It also enables code completion in most modern IDEs. This fluent interface is originally inspired by the .NET FHIR API implementation.
Before we begin, you will need to add the following dependency to the pom.xml file. Replace 8.0.0 with the HAPI FHIR version you are using, in case of any changes.
<dependency>
    <groupId>ca.uhn.hapi.fhir</groupId>
    <artifactId>hapi-fhir-client</artifactId>
    <version>8.0.0</version>
</dependency>Let us use the same patient we created earlier, and attempt to write it to the FHIR Server. We’ll be using the Medblocks student server available at https://fhir-bootcamp.medblocks.com/fhir.
FhirContext ctx = FhirContext.forR4();
String baseUrl = "https://fhir-bootcamp.medblocks.com/fhir";

// Create a patient object and populate it with details
Patient patient = new Patient();
patient.addName().addGiven("Jay").setFamily("Doe");
patient.setActive(true);
patient.setGender(AdministrativeGender.OTHER);
patient.addTelecom().setSystem(ContactPointSystem.EMAIL).setValue("jdoe@example.com");

// Connect to the server at baseUrl
IGenericClient client = ctx.newRestfulGenericClient(baseUrl);

// Invoking the create method
MethodOutcome outcome = client.create()
        .resource(patient)
        .prettyPrint()
        .encodedJson()
        .execute();

// View the created resource
System.out.println(ctx.newJsonParser().encodeResourceToString(outcome.getResource()));
This generates the following output,
{"resourceType": "Patient","id":"ab8861d5-7ef9-4013-a011-cef4196affce","meta":{"versionId":"1","lastUpdated":"2025-04-29T09:43:30.898+00:00"},"text":{"status":"generated","div":"<div xmlns=\"http://www.w3.org/1999/xhtml\"><div class=\"hapiHeaderText\">Jay<b>DOE</b></div><table class=\"hapiPropertyTable\"><tbody/></table></div>"},"active":true,"name":[{"family":"Doe","given":["Jay"]}],"telecom":[{"system":"email","value":"jdoe@example.com"}],"gender":"other"}There are also methods available for “conditional create” where a new resource is created only if no existing resource matches a provided set of search parameters. Here is an example of this,
MethodOutcome outcome = client.create()
        .resource(patient)
        .conditional()
        .where(Patient.IDENTIFIER.exactly().systemAndIdentifier(“system”,”00001”))
        .execute();
More examples of conditional create are available in the HAPI FHIR documentation.
To retrieve the latest version of a resource from a FHIR server, we use the read() method.
Patient patientRead = client.read()
	.resource(Patient.class)
	.withId("ab8861d5-7ef9-4013-a011-cef4196affce")
	.execute();
System.out.println(ctx.newJsonParser().encodeResourceToString(patientRead));
This gives the output below,
{"resourceType": "Patient","id":"ab8861d5-7ef9-4013-a011-cef4196affce","meta":{"versionId":"1","lastUpdated":"2025-04-29T09:43:30.898+00:00"},"text":{"status":"generated","div":"<div xmlns=\"http://www.w3.org/1999/xhtml\"><div class=\"hapiHeaderText\">Jay<b>DOE</b></div><table class=\"hapiPropertyTable\"><tbody/></table></div>"},"active":true,"name":[{"family":"Doe","given":["Jay"]}],"telecom":[{"system":"email","value":"jdoe@example.com"}],"gender":"other"}It is also possible to read a specific version of a resource by adding a version string.
Patient patient = client.read()
      .resource(Patient.class)
      .withIdAndVersion("ab8861d5-7ef9-4013-a011-cef4196affce", "2")
      .execute();
Another way to retrieve a resource is by providing its absolute URL,
Patient patient = client.read().resource(Patient.class).withUrl(“https://example.com/fhir/Patient/123”).execute();To update a patient on the FHIR server, you must provide the ID that can be used to locate the resource instance. Here is an example where we will change the first name of our sample patient to ‘John’. Do remember to replace the ID with the value corresponding to the resource instance you created.
patient.addName().addGiven("John");
patient.setId("ab8861d5-7ef9-4013-a011-cef4196affce");
MethodOutcome outcome = client.update().resource(patient).execute();
You can view the updated resource on the URL or by performing a read operation. In this case, the resource now looks like this,
{"resourceType":"Patient","id":"ab8861d5-7ef9-4013-a011-cef4196affce","meta":{"versionId":2,"lastUpdated":"2025-04-29T09:43:30.898+00:00"},"text":{"status":"generated","div":"<div xmlns=\"http://www.w3.org/1999/xhtml\"><div class=\"hapiHeaderText\">John<b>DOE</b></div><table class=\"hapiPropertyTable\"><tbody/></table></div>"},"active":true,"name":[{"family":"Doe","given":["John"]}],"telecom":[{"system":"email","value":"jdoe@example.com"}],"gender":"other"}To delete a patient from the FHIR Server, we use the client.delete() method. Below is a code snippet that shows you how.
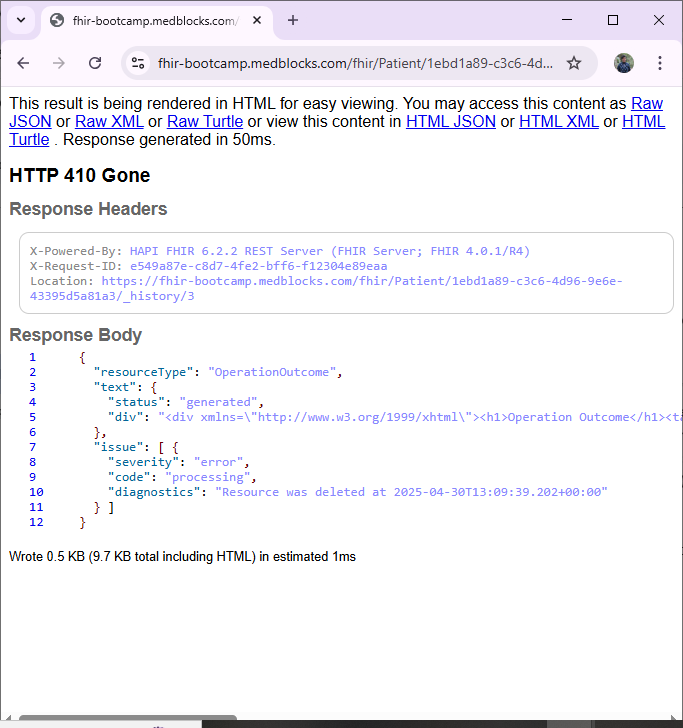
MethodOutcome outcome = client.delete().resourceById("Patient", "ab8861d5-7ef9-4013-a011-cef4196affce").execute();On viewing the resource via browser, it looks like this.
Searching for patients is a common requirement for building FHIR applications. The search operation in FHIR requires specifying a URL with predefined search parameters. It returns a Bundle with zero or more resource instances that match the search criteria.
Lets start with a simple query that will retrieve all patients from the FHIR server.
IBaseBundle responseBundle = client.search().forResource(Patient.class).execute();

//Print all search results
System.out.println(ctx.newJsonParser().setPrettyPrint(true).encodeResourceToString(responseBundle));
Here’s an example query that filters patients by birth date.
IBaseBundle responseBundle = client.search()
      .forResource(Patient.class)
      .where(Patient.BIRTHDATE.beforeOrEquals().day("2000-01-01"))
      .returnBundle(Bundle.class)
      .execute();
And here is an example that uses multiple parameters. Here Patient Family will be matched according to ANY/OR, whereas both the Family and birth date conditions will need to be met (ALL/AND).
IBaseBundle responseBundle = client.search()
      .forResource(Patient.class)
      .where(Patient.BIRTHDATE.beforeOrEquals().day("2000-01-01"))
      .and(Patient.FAMILY.matches().values(“Doe”,”Deer”))
      .returnBundle(Bundle.class)
.execute();In this article we looked at how Java developers can get started with healthcare data interoperability with FHIR. We did this using the HAPI FHIR library, a powerful and flexible toolset that simplifies working with FHIR resources in Java by offering classes and methods aligned with FHIR specifications. First, we set up a basic Java project and used Maven to add the necessary dependencies. If you’re from a general Java development background, this brings you a step closer towards creating your own healthcare-specific applications.
Next, we created a patient resource and populated individual fields like name, birthdate and gender. This is an essential first step towards working with FHIR, understanding how data is represented and structured in a resource. We also saw how to interact with a FHIR server using Java and REST APIs by going over essential CRUD operations - creating a new patient record on the server, retrieving patient data by ID or different fields through search, modifying existing patient data, and deleting a patient resource instance when it is no longer needed. In this process, we also saw how HAPI FHIR’s generic fluent client makes it easier to write readable, clean code.
If you’ve made it this far, congratulations! You now have a working understanding of building FHIR-based applications in Java, from creating resources to interacting with servers. While we used the Patient resource in our tutorial, these operations can be extended to other resource types as well - such as Observations, Encounters or Conditions.
Try it yourself with the full starter code on GitHub.
If you’re ready to take your skills to the next level, join our free FHIR Fundamentals course, where we’ll give you everything you need to get started.
Learn how SMART on FHIR connects apps to EHRs using FHIR APIs and OAuth2. Covers launch flows, scopes, Epic and Cerner setup, SMART v2, and building your first app.
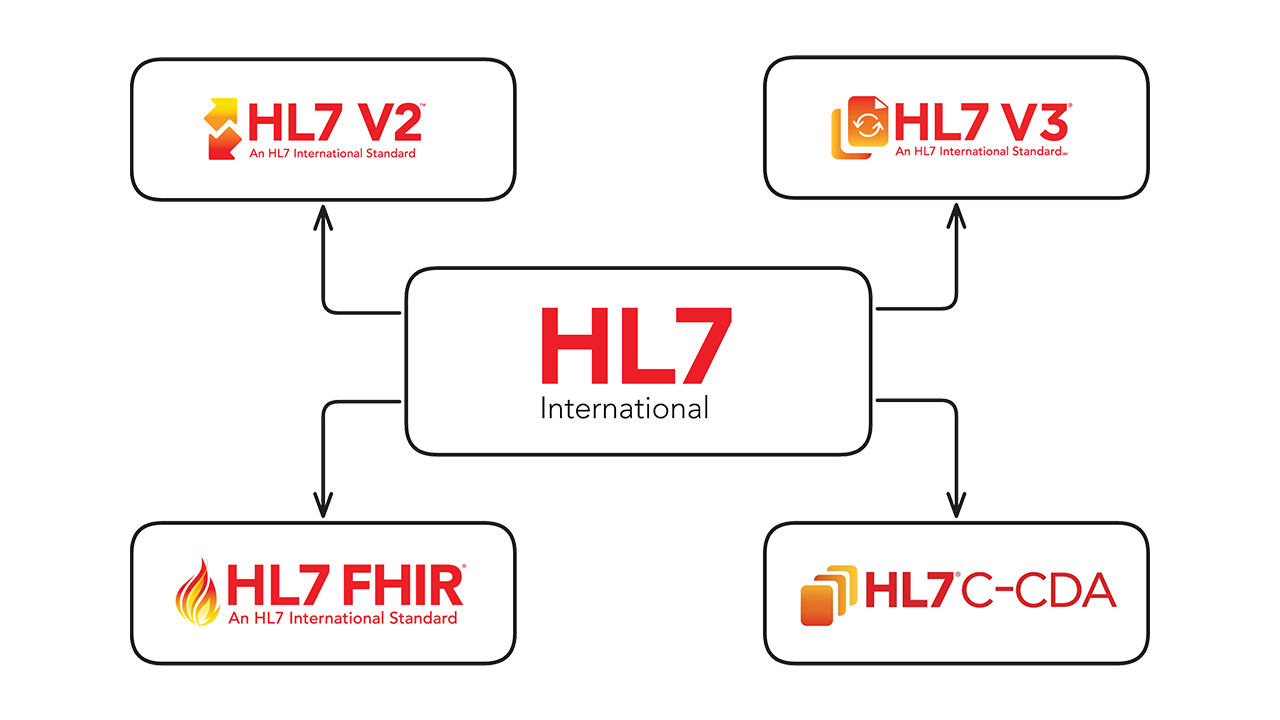
This article details HL7's role in healthcare data exchange since 1987. It explores the standards family including legacy v2, CDA, and modern FHIR APIs highlighting their necessity for interoperability, regulatory compliance, and system integration.

The complete guide to FHIR (Fast Healthcare Interoperability Resources). Learn FHIR resources, R4, Profiles and Implementation Guides, SMART on FHIR, HL7 history, and how to start.
No comments yet. Be the first to comment!