

Create a FHIR Resource in Python: fhir.resources Tutorial
Beginner-friendly tutorial to use Python's fhir.resources package to build & validate a Patient resource. Covers JSON output, virtual env setup & real FHIR server ops. With video walkthrough.
April 30, 2025
Learn to communicate with FHIR servers in under 20 lines of Python code.
If you’re looking to learn how to interact with a FHIR Server, this guide is for you. We’ll explore how to perform real-world operations like creating, reading, updating and deleting patient data using FHIR REST APIs and Python. If you’re new to FHIR, this comprehensive introduction to FHIR might be a good place to start. You can also explore how to create a FHIR resource in Python with this tutorial.
In this guide, we will interact with the Medblocks students FHIR server which is publicly accessible. We’ll also be using the requests library in Python to send HTTP requests. Let’s get started.
A key component of the FHIR ecosystem are the FHIR RESTful APIs. Each FHIR resource can be managed using the same set of defined interactions. Servers can choose which interactions they support, and must provide a Capability Statement that specifies it.
Interactions are defined as follows,
VERB [base]/[type]/[id] {?_format=[mime-type]}Where,
base: The FHIR server URL, in our case, https://fhir-bootcamp.medblocks.com/fhirtype: The resource name, e.g. “Patient”id: The logical identifier of a resourcemime-type: The media type of a resource, e.g. application/fhir+xml, application/fhir+json or application/fhir+turtleWe’ll be using the Medblocks students’ FHIR server at https://fhir-bootcamp.medblocks.com/fhir.
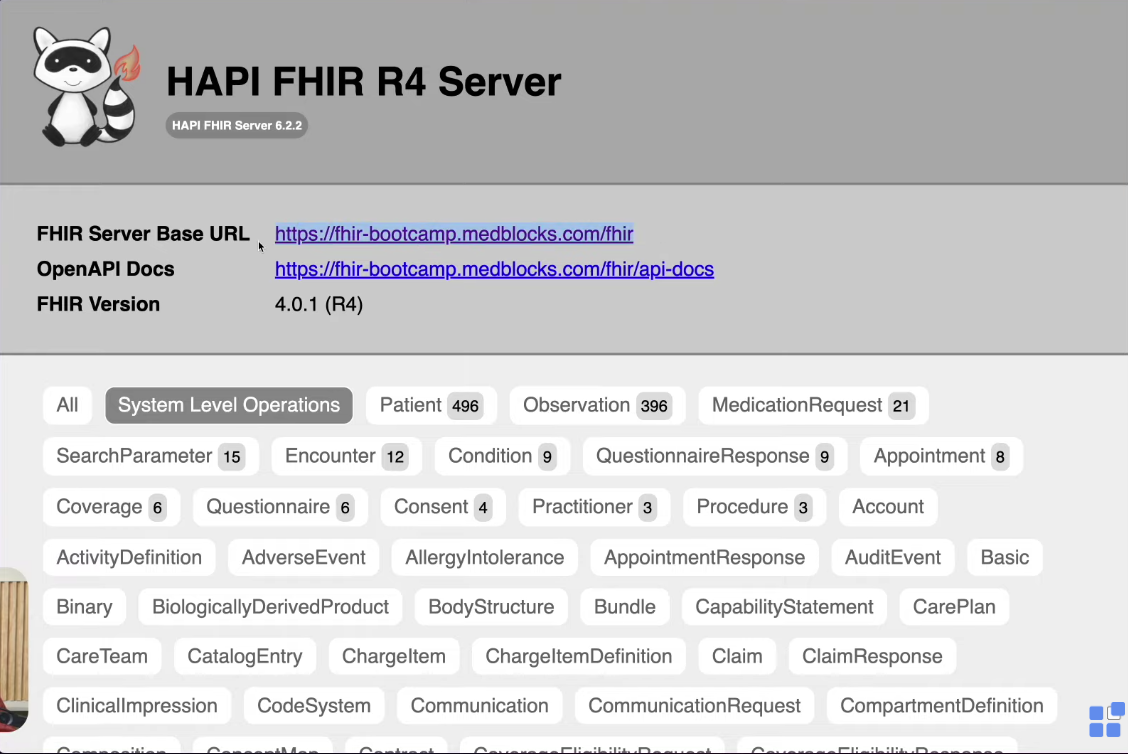
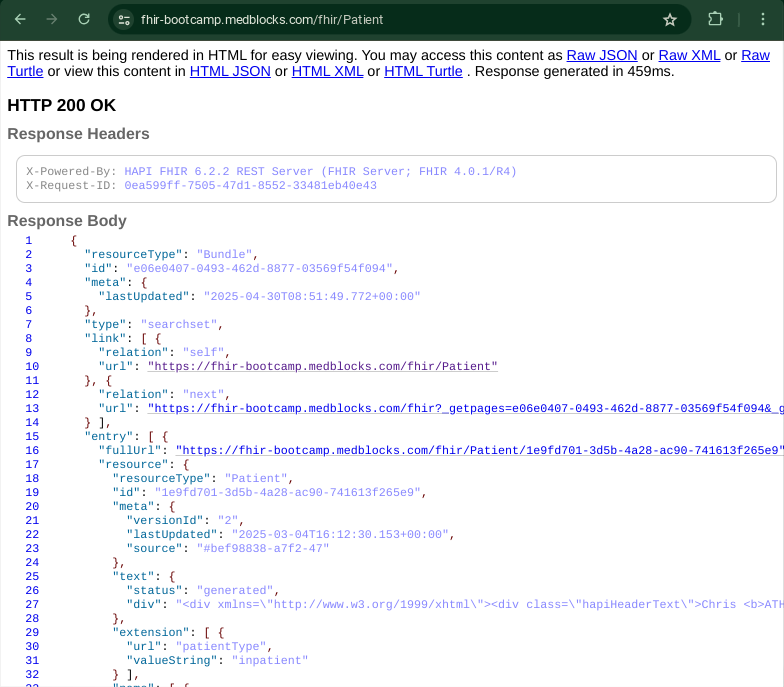
For example, to view all patients on the FHIR server, you can visit the same URL with ‘/Patient/’ appended, https://fhir-bootcamp.medblocks.com/fhir/Patient/.
As an API call you can use the below command to get the same result.
GET https://fhir-bootcamp.medblocks.com/fhir/Patientrequests libraryThe requests library in Python allows you to run HTTP requests very easily. Let’s begin by installing it.
pip3 install requestsNext we must import the library by adding the following line of code to the imports section
import requestsbase_urlLet’s also declare a variable named base_url and set its value as the URL to the Medblocks FHIR server.
base_url = “https://fhir-bootcamp.medblocks.com/fhir”First, we must create a patient locally as we did in the previous article, Create Your First FHIR Resource in Python. Once patient is created, you can then prepare to post it to the FHIR server.
# where ‘patient’ is the FHIR Patient resource created
patient_object = patient.model_dump()

response = requests.post(base_url + “/Patient”, json=patient_object)

print(“Status:” + str(response.status_code))
print(response.content)
The output you get on running this code will look something like this,
Status: 201
b'{\n  "resourceType": "Patient",\n  "id": "1ebd1a89-c3c6-4d96-9e6e-43395d5a81a3",\n  "meta": {\n    "versionId": "1",\n    "lastUpdated": "2025-04-30T12:43:23.819+00:00"\n  },\n  "text": {\n    "status": "generated",\n    "div": "<div xmlns=\\"http://www.w3.org/1999/xhtml\\"><div class=\\"hapiHeaderText\\">John <b>DOE </b></div><table class=\\"hapiPropertyTable\\"><tbody/></table></div>"\n  },\n  "name": [ {\n    "family": "Doe",\n    "given": [ "John" ]\n  } ],\n  "telecom": [ {\n    "system": "email",\n    "value": "example@abc.com"\n  } ],\n  "gender": "male"\n}'
The id returned can be used to retrieve this patient’s details from the server, and that’s what we’ll do next.
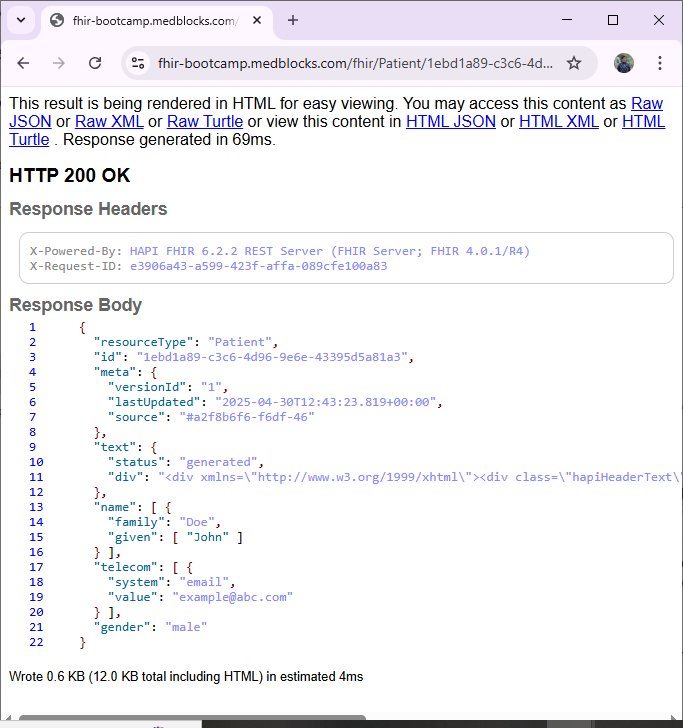
To view the patient you just created on your browser, you can visit the following URL appended by the patient id returned in POST, https://fhir-bootcamp.medblocks.com/fhir/Patient/
To execute this in Python, you can use requests.get() as depicted in the following line of code. Also print the status and contents of the response.
response = requests.get(base_url + “/Patient/” + id)  # where ID is the identifier assigned to the resource as a string

print(“Status: “ + str(response.status_code))
print(response.content)
Using the ID of the example patient created in the previous section, this is the output generated on running the above code snippet.
Status: 200
b'{\n  "resourceType": "Patient",\n  "id": "1ebd1a89-c3c6-4d96-9e6e-43395d5a81a3",\n  "meta": {\n    "versionId": "1",\n    "lastUpdated": "2025-04-30T12:43:23.819+00:00",\n    "source": "#a2f8b6f6-f6df-46"\n  },\n  "text": {\n    "status": "generated",\n    "div": "<div xmlns=\\"http://www.w3.org/1999/xhtml\\"><div class=\\"hapiHeaderText\\">John <b>DOE </b></div><table class=\\"hapiPropertyTable\\"><tbody/></table></div>"\n  },\n  "name": [ {\n    "family": "Doe",\n    "given": [ "John" ]\n
 } ],\n  "telecom": [ {\n    "system": "email",\n    "value": "example@abc.com"\n  } ],\n  "gender": "male"\n}'
You can also assign the parsed patient to a variable and use it for future operations,
parsed_patient = Patient.model_validate_json(response.content)
print(parsed_patient.id)If instead of a particular patient, you want to retrieve all patients on the FHIR server, you can use the below line of code.
response = requests.get(base_url + “/Patient”)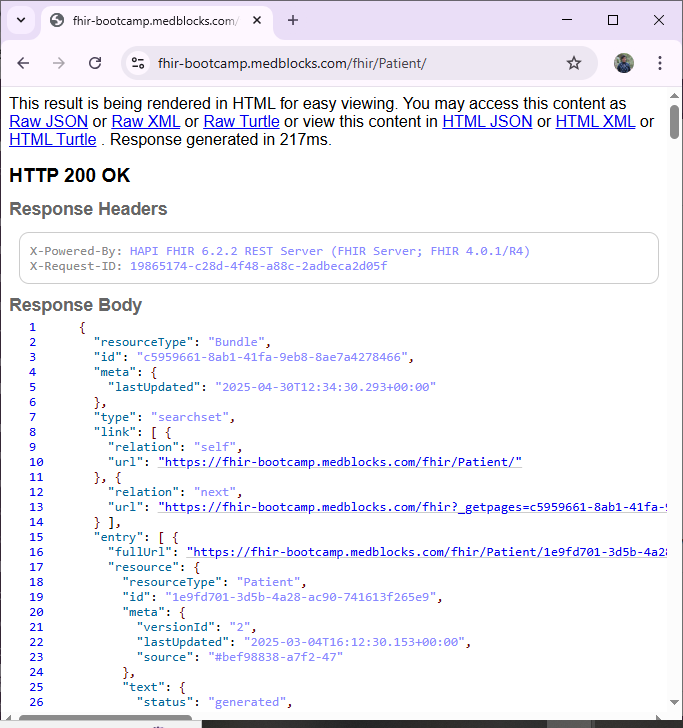
To update a patient on the FHIR server, the HTTP verb PUT is used. The code statement would look like this,
response = requests.put(base_url + “/Patient/” + id, json = updated_patient_object)In the example patient used above, let’s update the given name to ‘James’ from ‘John’. This is the output generated,
Status: 200
b'{\n  "resourceType": "Patient",\n  "id": "1ebd1a89-c3c6-4d96-9e6e-43395d5a81a3",\n  "meta": {\n    "versionId": "2",\n    "lastUpdated": "2025-04-30T13:03:19.409+00:00"\n  },\n  "text": {\n    "status": "generated",\n    "div": "<div xmlns=\\"http://www.w3.org/1999/xhtml\\"><div class=\\"hapiHeaderText\\">James <b>DOE </b></div><table class=\\"hapiPropertyTable\\"><tbody/></table></div>"\n  },\n  "name": [ {\n    "family": "Doe",\n    "given": [ "James" ]\n  } ],\n  "telecom": [ {\n    "system": "email",\n    "value": "example@abc.com"\n  } ],\n  "gender": "male"\n}'
You’ll notice that the given name has changed to James, and the versionId is now updated to ‘2’.
This is how the updated patient looks on accessing it through the browser (which is equivalent to a simple GET request).
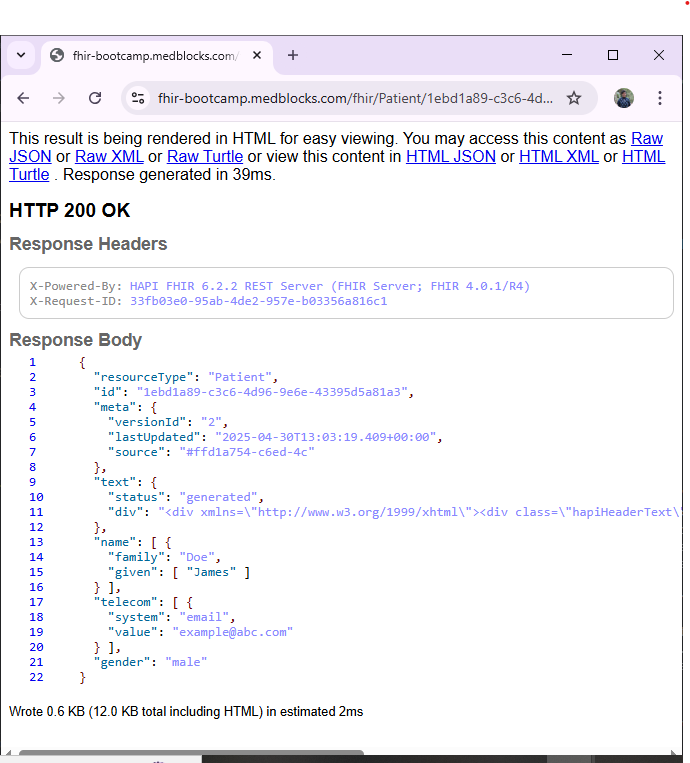
To delete a patient from the FHIR server, you can use the requests.delete() function.
response = requests.delete(base_url + “/Patient/” + id)
print(“Status: “ + response.status_code)
print(response.content)
And on deleting the test patient we created, this response is generated,
Status: 200
b'{\n  "resourceType": "OperationOutcome",\n  "text": {\n    "status": "generated",\n    "div": "<div xmlns=\\"http://www.w3.org/1999/xhtml\\"><h1>Operation Outcome</h1><table border=\\"0\\"><tr><td style=\\"font-weight: bold;\\">INFORMATION</td><td>[]</td><td><pre>Successfully deleted 1 resource(s) in 7ms</pre></td>\\n\\t\\t\\t</tr>\\n\\t\\t</table>\\n\\t</div>"\n  },\n  "issue": [ {\n    "severity": "information",\n    "code": "informational",\n    "diagnostics": "Successfully deleted 1 resource(s) in 7ms"\n  } ]\n}'
On attempting to access the same patient via browser, this is the output received,
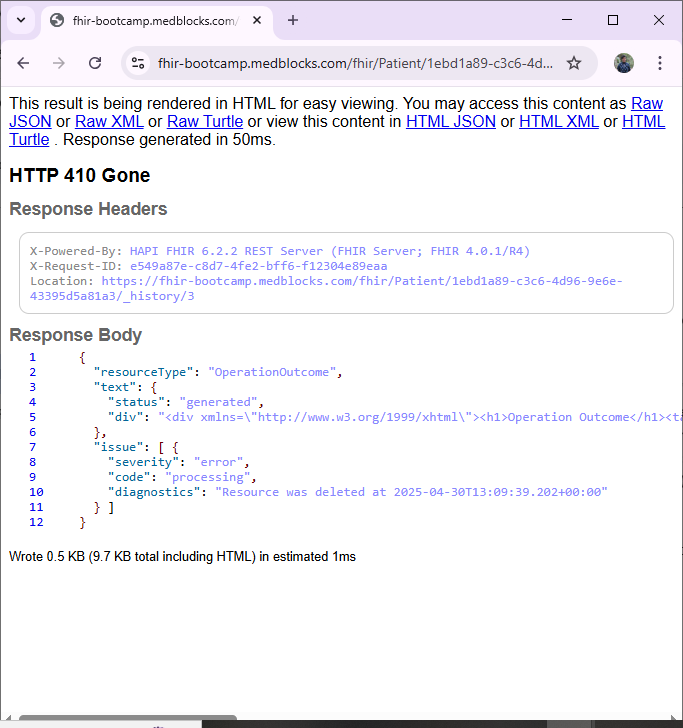
The best way we’ve found to truly learn FHIR is to experiment with it hands-on. This and previous tutorials can help you create your own FHIR resources using Python and learn as you do. In the last tutorial, we learnt how to locally create a FHIR-compliant Patient resource. This time, we learnt how to send this information to a FHIR server, and perform basic CRUD operations (Create, Read, Update, Delete). The requests library in python is a simple HTTP library that allows you to perform HTTP requests very easily. You can use the Medblocks Students Test FHIR server to test out these new commands.
If you’re looking for a jumpstart to your FHIR learning, we recommend learning from experts. Attending our free FHIR fundamentals course by Dr. Sidharth Ramesh is a great way to understand how FHIR is changing the health tech landscape, register now!
Beginner-friendly tutorial to use Python's fhir.resources package to build & validate a Patient resource. Covers JSON output, virtual env setup & real FHIR server ops. With video walkthrough.
We walk you through building a FHIR server on top of Couchbase's NoSQL database, covering challenges, technical decisions, architecture, and local setup.

Stop drowning in FHIR docs. From HAPI FHIR & Simplifier to Inferno & validators - 10 tools that save hours. Covers servers, testing & profiling. Updated 2026.
No comments yet. Be the first to comment!