
CMS Blue Button
Guide to integrate with the CMS Blue Button 2.0 Medicare claims API.
CMS Blue Button 2.0 is the federal Medicare claims API. Any Medicare enrollee can authorize a third-party app to retrieve their Patient, Coverage, and Explanation of Benefit data over OAuth 2.0 / SMART on FHIR. Integrate with CMS Blue Button to enhance care coordination for Medicare beneficiaries.
This is a step-by-step guide to registering a patient-facing app on the CMS Blue Button developer sandbox, testing against CMS’s synthetic beneficiaries, and submitting for production access. Unlike Epic or Cerner where each health system registers the app, CMS Blue Button is app-global: one client_id serves every Medicare beneficiary nationwide once production access is granted.
Setup Guide
Prerequisites
If you’re serious about serving US Medicare beneficiaries, having a US company will help with the production-access review. Stripe Atlas and StartFleet can get you a registered US entity with a real address in minutes.
For a US phone number, Tello gives you a virtual SIM with a real number, CMS asks for a customer support phone on the production application. Grab a domain on Namecheap and set up a business email with Google Workspace. If you’re using the Medblocks Platform, you can use app.medblocks.com as your domain and skip the domain setup entirely.
Since you’ll be serving US Medicare enrollees, you’ll need US infrastructure anyway. Set up a VM in a US cloud region, install Tailscale, and use it as your exit node, this gives you a clean, stable US IP for development and testing.
You’ll also need:
- A publicly accessible domain with HTTPS for your redirect URI, or use
app.medblocks.comif you’re on the Medblocks Platform - A server-side backend that can handle the OAuth callback and store tokens securely (the client secret must never reach the browser)
- A privacy policy and terms of service published at a stable URL, CMS reviews both before granting production access
Create a Developer Account
- Go to the CMS Blue Button Sandbox and sign up with a business email.
- CMS sends a verification link, confirm it before proceeding.
- Sign in and you’ll land on the Developer Dashboard.
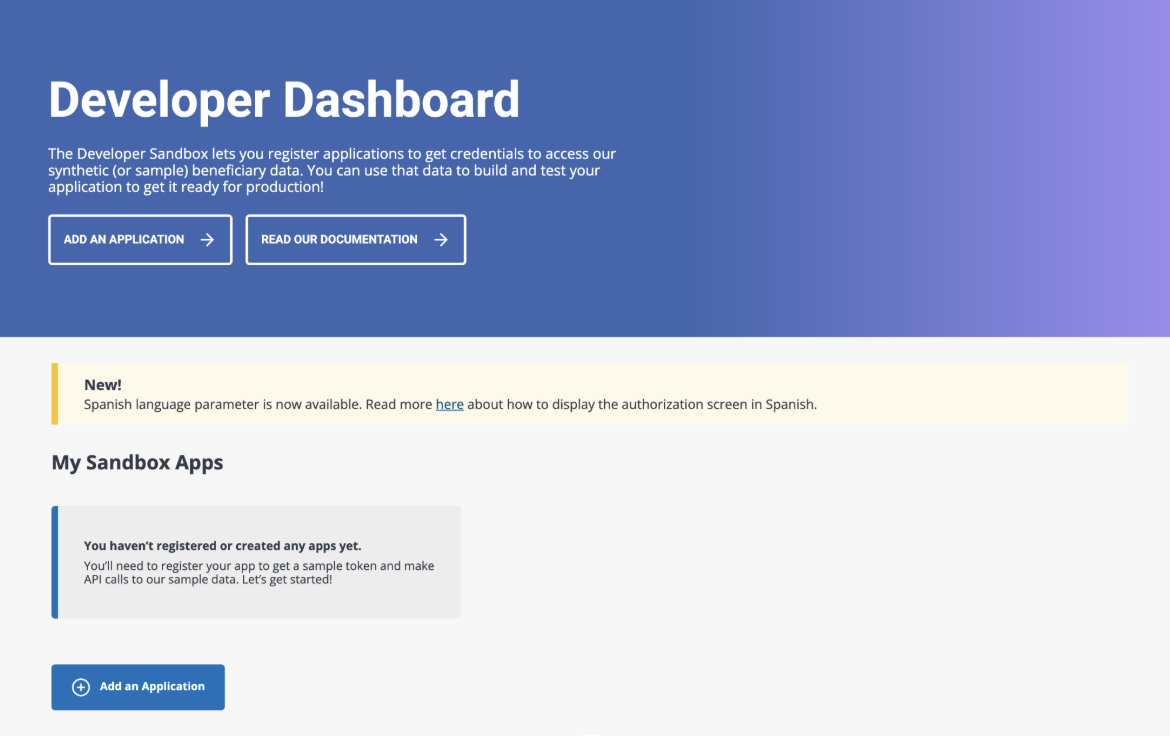
Register a Sandbox Application
- From the Developer Dashboard, click Add an Application (or the ADD AN APPLICATION button in the hero).
- You land on the Register a New Application form.
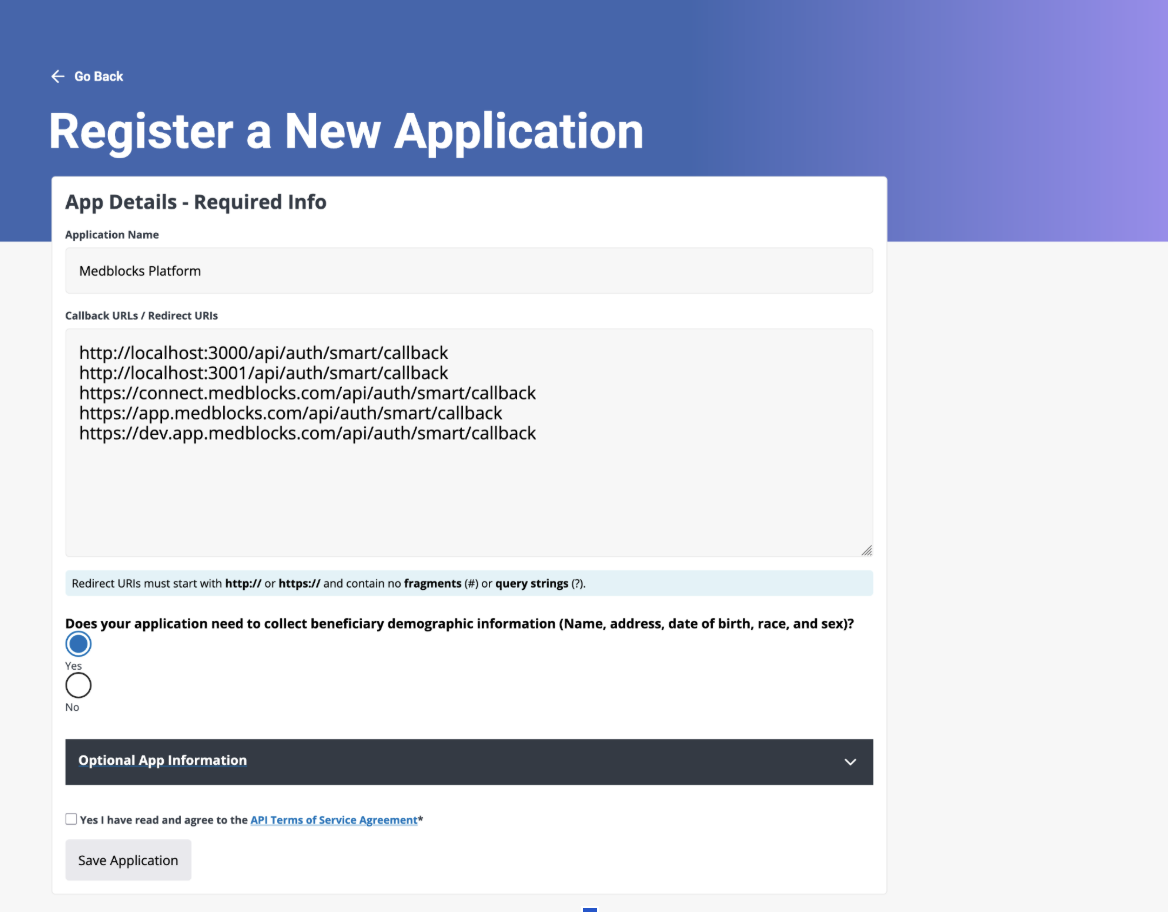
- Fill in App Details, Required Info:
- Application Name, your product’s user-facing name. This is what beneficiaries see on the CMS consent screen and on medicare.gov’s “My Connected Apps”.
- Callback URLs / Redirect URIs, one per line. Must start with
http://orhttps://and contain no fragments (#) or query strings (?). - Does your application need to collect beneficiary demographic information?, Yes if you need name, address, date of birth, race, sex. Selecting Yes means the CMS consent screen surfaces a
Personal Informationtoggle the beneficiary can uncheck.
Register every redirect URI you’ll use end-to-end, local dev, staging, and production:
- http://localhost:3000/api/auth/smart/callback
- https://staging.yourdomain.com/api/auth/smart/callback
- https://app.yourdomain.com/api/auth/smart/callback
If you’re on the Medblocks Platform, your backend already exposes /api/auth/smart/callback, just register the hostnames you deploy to, including https://app.medblocks.com/api/auth/smart/callback.
Optional App Information
This section is technically optional for sandbox, but filling it in now is required for production access, and it simulates what real Medicare beneficiaries will see on the consent screen, so it’s worth doing right the first time.
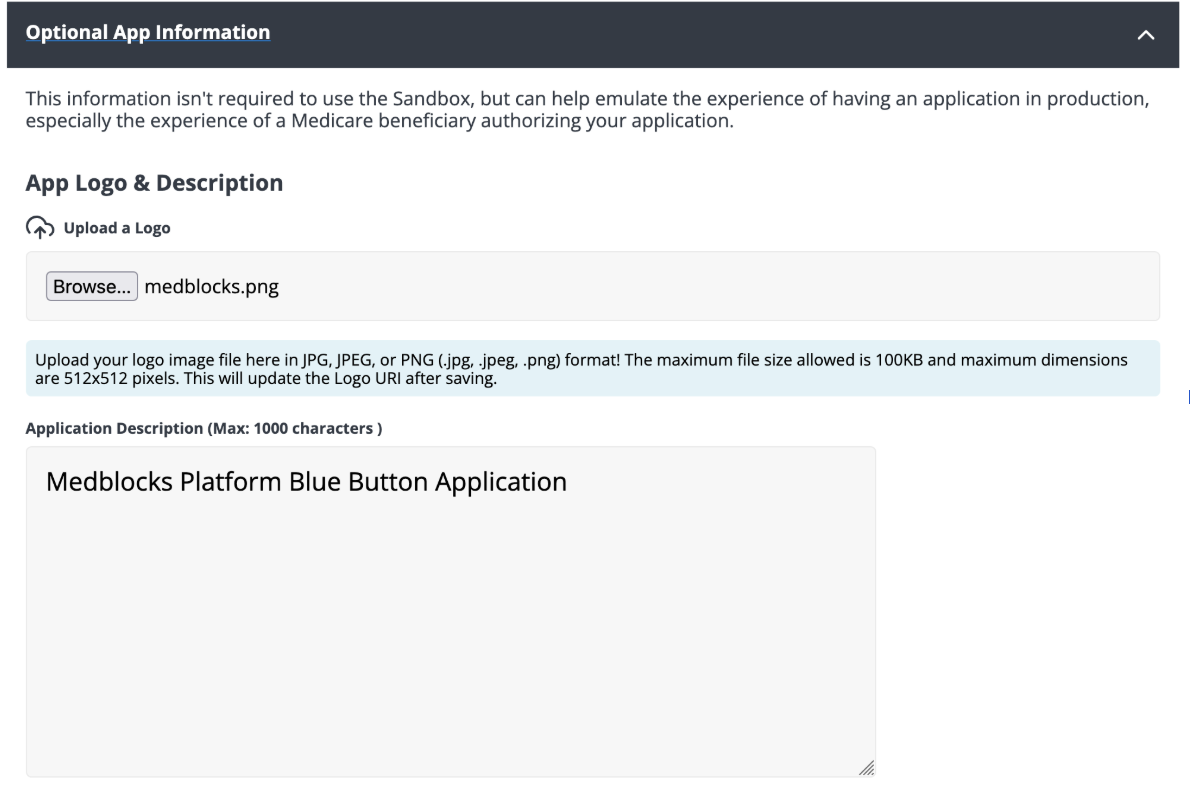
- Upload a Logo, JPG, JPEG, or PNG, max 100 KB, max 512×512 px. This appears next to your app name on the consent screen and in the beneficiary’s connected-apps list. Use the same logo you publish elsewhere.
- Application Description, up to 1000 characters. Plain-English description of what your app does with Medicare data. Cover what data you pull, who sees it, and the purpose. Keep it patient-readable, this is the description CMS reviewers will compare to your actual user-facing screens during the production demo.
Organization & Policy Info
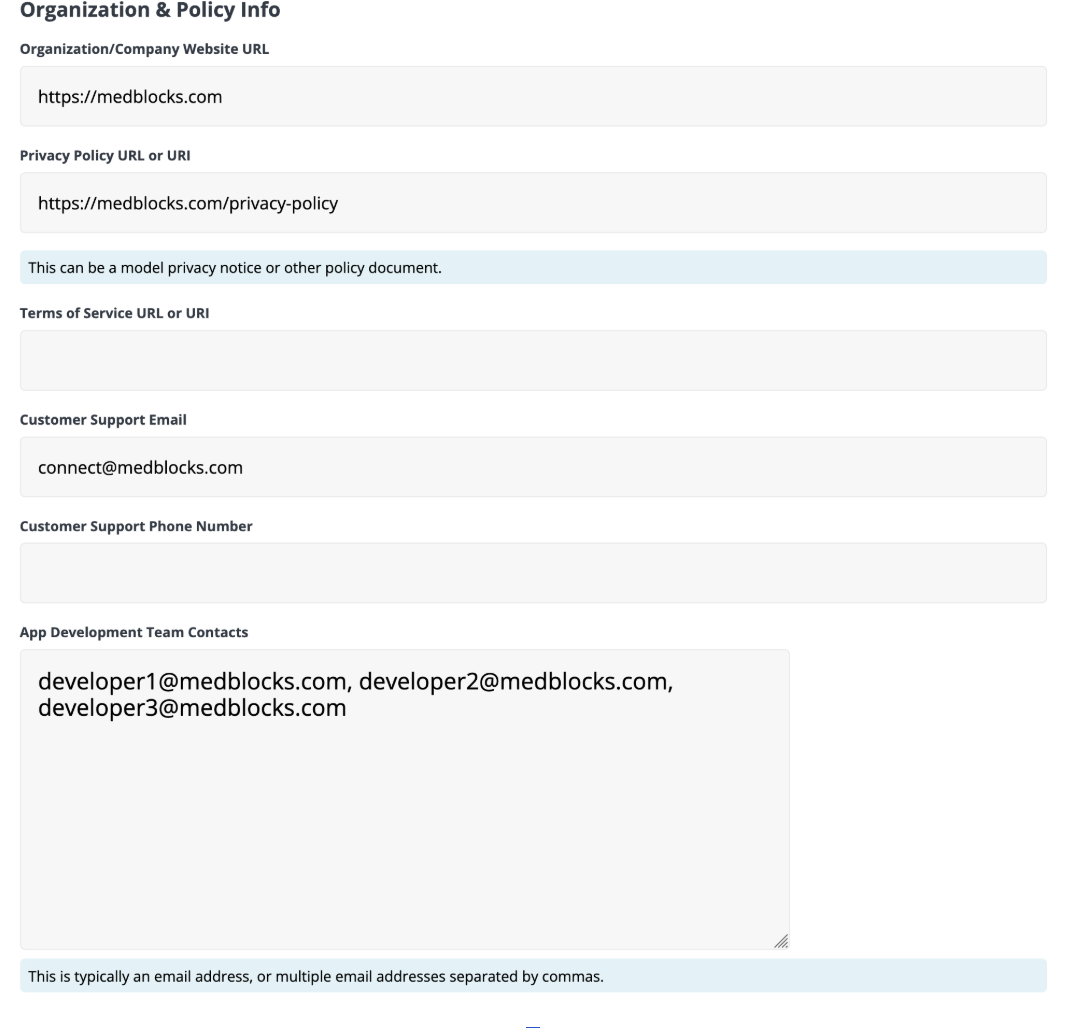
Fill in:
- Organization / Company Website URL, your company’s marketing site.
- Privacy Policy URL, a live page covering the CMS-required sections: collection, use, sharing, retention after revocation, dormant-account handling, breach notification, and data handling on company sale. If you’re on the Medblocks Platform,
docs/medblocks-privacy-policy.mdin the connect-web repo is a starting template. - Terms of Service URL, leave blank for sandbox; required for production, point it at your hosted ToS.
- Customer Support Email, a monitored inbox. CMS uses this address for sandbox notifications and review correspondence.
- Customer Support Phone Number, optional for sandbox; strongly recommended for production, CMS reviewers may try to call.
- App Development Team Contacts, comma-separated list of 2–4 engineers CMS can reach for technical issues.
Accept the Agreement and Save

- Tick Yes I have read and agree to the API Terms of Service Agreement, read it; it covers attribution requirements (the “not endorsed by CMS” disclaimer) and prohibited uses (no advertising, no profiling, no sale of data).
- Click Save Application.
You’re redirected to the application detail page.
Save your Client ID and Client Secret
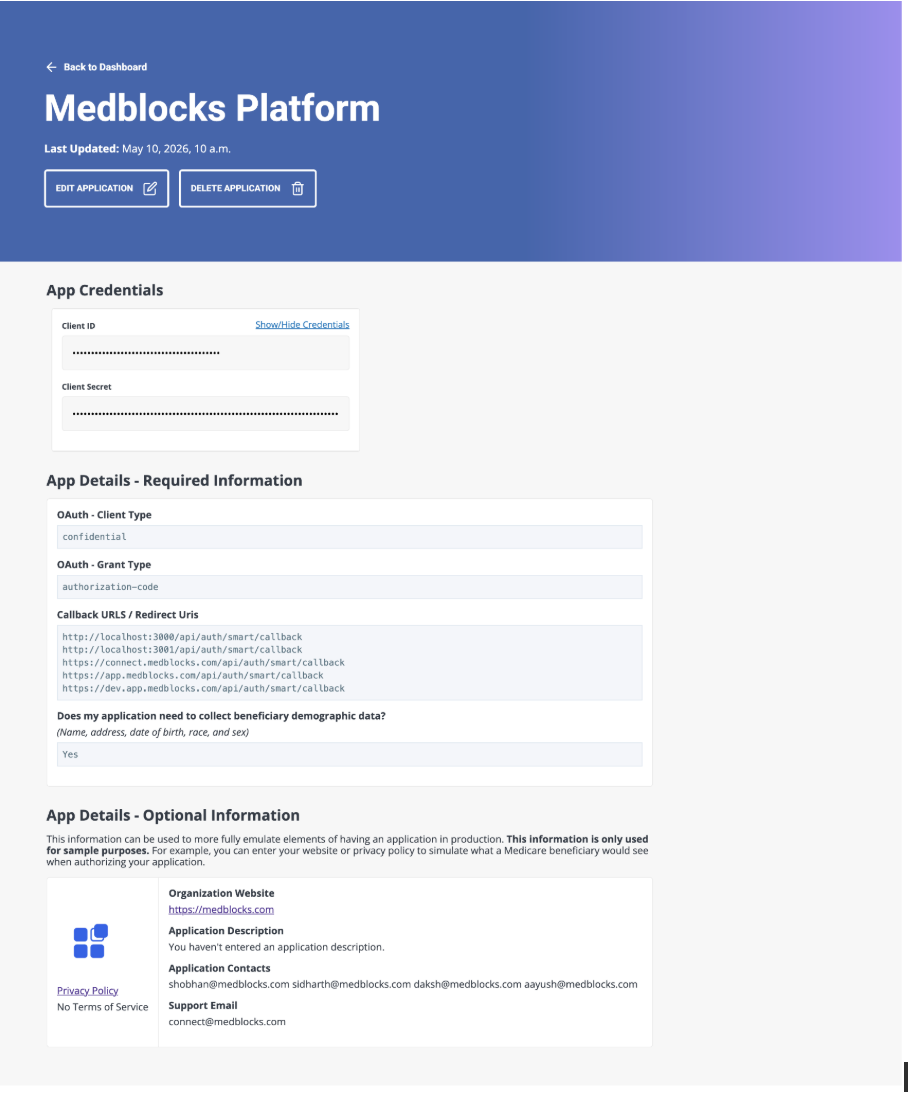
- In App Credentials, click Show/Hide Credentials to reveal the Client ID and Client Secret. Copy both into your secret manager immediately, a leaked secret means re-registering the app.
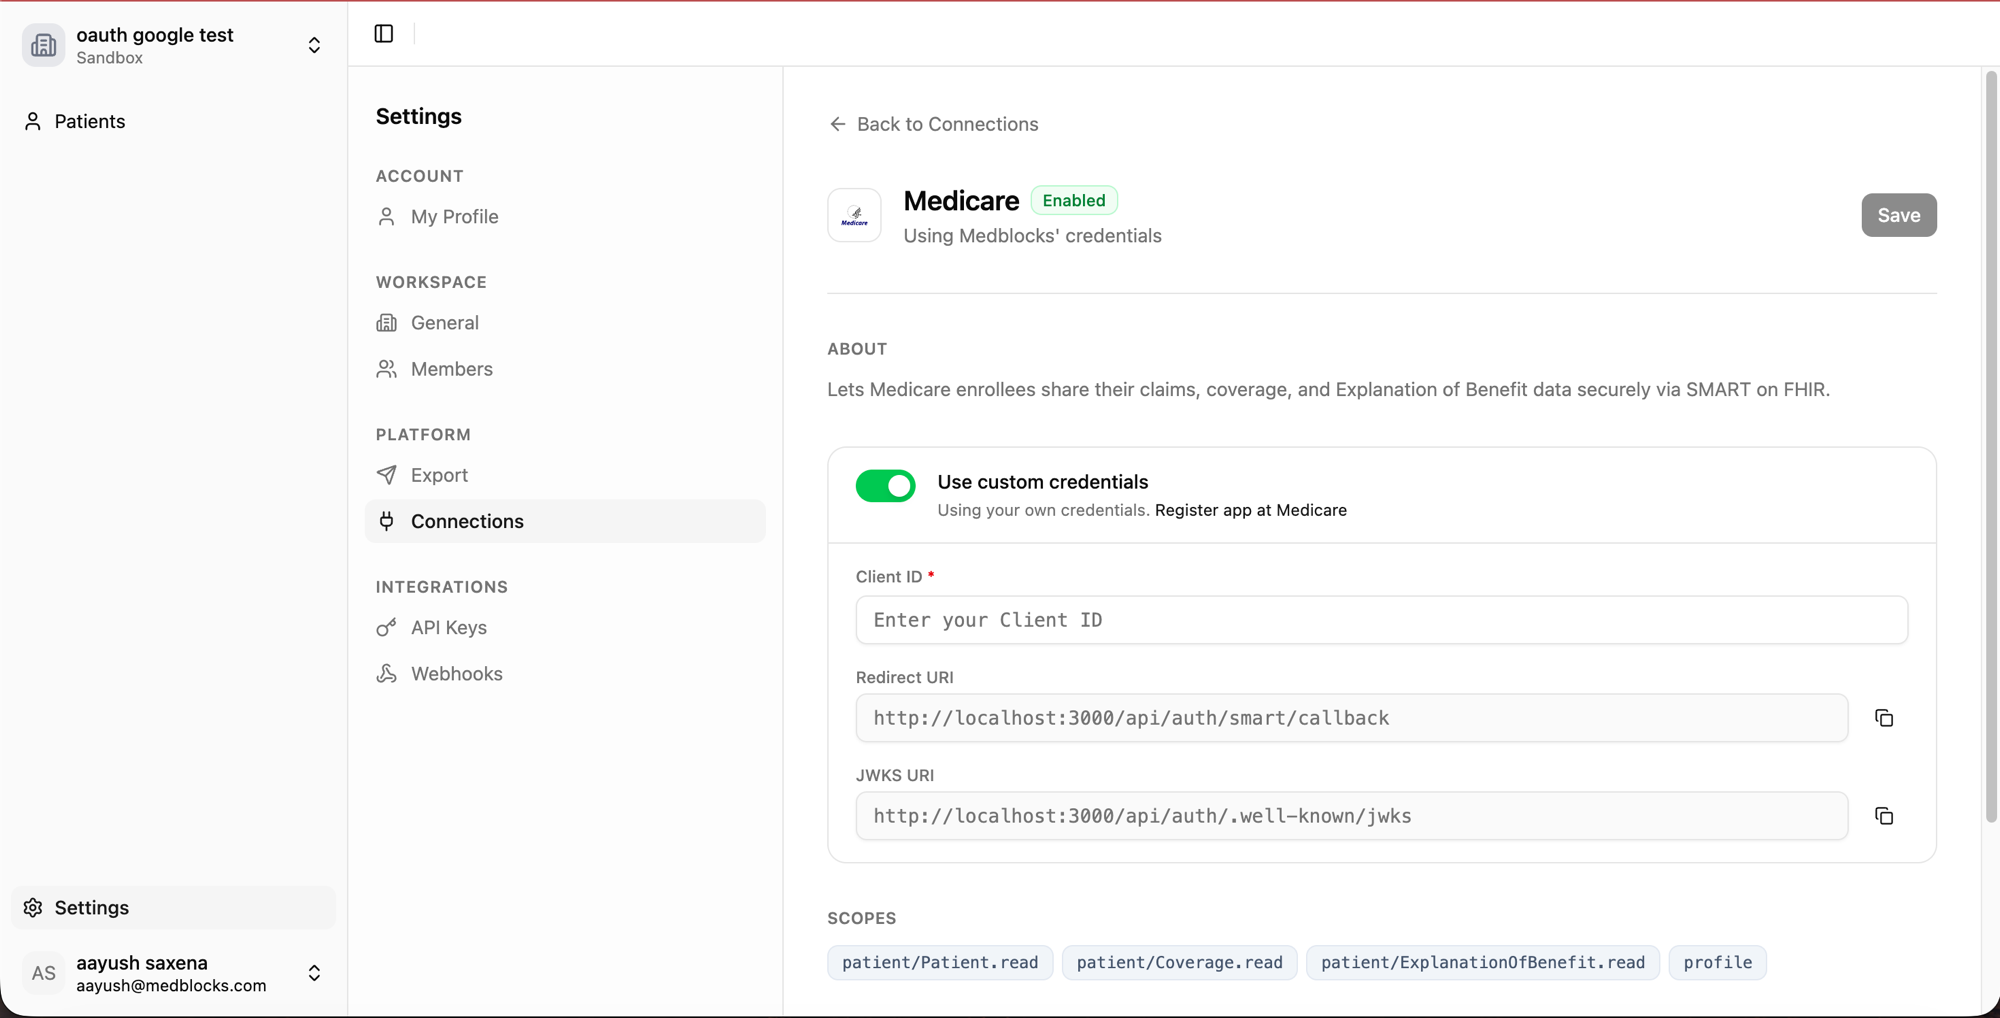
- Plug the credentials into Medblocks:
- Go to Settings.
- Select Connections.
- Find Medicare and open it.
- Toggle Use custom credentials, paste your Client ID and Client Secret, and Save.
- The App Details panel on the CMS dashboard confirms the configuration:
- OAuth Client Type,
confidential(because we registered a secret) - OAuth Grant Type,
authorization-code - All callback URIs we registered
- Demographic data flag, Yes
Test with Sandbox Synthetic Users
CMS provides ~30 synthetic Medicare beneficiaries (BBUser00000 through BBUser00029, passwords PW00000! through PW00029!) with pre-populated claims. No real Medicare account is required, synthetic credentials are accepted by the CMS BB sandbox login flow.
Sandbox endpoints:
Test flow:
- From your app, trigger a Medicare connect.
- The browser redirects to
sandbox.bluebutton.cms.gov/v2/o/authorize/?...&aud=https://sandbox.bluebutton.cms.gov/v2/fhir/. - CMS BB redirects to
medicare.gov/account/loginfor SSO. - Sign in as a synthetic user, e.g.
BBUser00001/PW00001!. - On the CMS BB consent screen, click Connect.
- CMS redirects to your registered callback with
?code=...&state=.... - Your backend exchanges the code for tokens, Basic auth header with
client_id:client_secret, pluscode_verifierfrom PKCE. - Token response includes
access_token,refresh_token,patient(synthetic beneficiary id, e.g.-10000010254647),scope. Noid_token, fetch/v2/connect/userinfowith the access token to resolve identity. - Fetch
Patient/{id},Coverage?beneficiary=Patient/{id},ExplanationOfBenefit?patient={id}. Synthetic users have 30+ EOB records each.
Known sandbox quirks:
- Rate limits are tighter than production (~10 req/s/app). The worker must handle
429withRetry-After-aware backoff or you’ll see “Assembly Rate Limit exceeded” errors. - No
id_token, CMS BB does not issue id_tokens. Use the/v2/connect/userinfoendpoint instead, or use thepatientclaim from the token response and fetchPatient/{id}directly.
Apply for Production Access
CMS reviews every app individually before granting production credentials. The review takes 2–4 weeks and includes a live demo of the user journey.
Before contacting CMS, verify:
- Sandbox integration works end-to-end, at least one successful Patient + Coverage + EOB pull.
- Privacy policy is published at a stable URL and covers all CMS-required sections.
- Terms of service is published at a stable URL.
- Consent screen shows the inviting organization name (
Shared with: <org>). - Beneficiary can revoke access, either an in-app disconnect button or a documented email path (e.g.
privacy@yourdomain.com) with a documented 30-day deletion SLA. - Disconnect / revocation triggers
/v2/o/revoke_token/server-side and deletes locally retrieved Medicare data. - CMS attribution disclaimer (“not endorsed by CMS”) is shown on the connect screen.
Send a production access request to BlueButtonAPI@cms.hhs.gov from the customer support email you registered on the sandbox app. CMS replies within a few business days with a request form and a link to schedule a demo.
At minimum include your sandbox client_id, your privacy policy URL, your terms of service URL, the list of production redirect URIs, and a one-paragraph description of what your application does with Medicare data. Anything else CMS needs they’ll ask for via the request form.
After approval, CMS schedules a 30–45 minute Zoom demo. Have ready: a live walkthrough of beneficiary signup, consent dialog, Medicare connection, data display, and revocation; your privacy policy and ToS open in another tab; your security writeup. CMS may request follow-ups on retention, the unlink workflow, or data sharing, respond within 48 hours.
Once approved, CMS issues a production client_id and client_secret via secure file transfer. In your Medblocks dashboard, go to Settings → Connections → Medicare, switch to Custom credentials, and paste the production values. The platform repoints the FHIR endpoints to production (https://api.bluebutton.cms.gov/v2/...) automatically.
Common Errors and Fixes
invalid_clienton token exchange, client secret mismatch, or PKCE verifier missing/wrong. Confirm the Client Secret in Settings → Connections → Medicare matches the CMS dashboard, and that you’re sending PKCEcode_verifieralongside the secret.invalid_granton token exchange, authorization code already used, orredirect_uridoes not exactly match the one used on/authorize. Codes are single-use. Make sure the callback URL passed to token exchange is byte-identical to the one on the authorize URL (case, trailing slash).429 Too Many Requests/Assembly Rate Limit exceeded, sandbox rate limits. ImplementRetry-After-aware backoff. Cap concurrency per worker.404 No resources match requested URIonPatient/{id}, wrong base URL (e.g. hitting the production base while connected to sandbox). Verify the configured FHIR source matches the environment that issued the token.401on FHIR fetch after months of success, either access token expired (refresh it) or the 13-month consent window lapsed. Refresh first; if refresh also 401s, prompt the beneficiary to re-connect Medicare.- Consent screen shows app name “BlueButton Client (Test - Internal Use Only)” instead of yours, using CMS’s default test app credentials, not your own. In Settings → Connections → Medicare, confirm Custom credentials is selected and the Client ID matches your sandbox app’s.