Your own UI
Build connection search into your own app, then send the patient straight to the facility they chose.
Open in
Show prompt text
You are an AI coding agent helping integrate Medblocks Patient Access into the codebase that is currently open. Treat the live Medblocks docs and generated API reference as the source of truth. If you are running inside a local repo that contains openapi/medblocks.json, read it too. Do not rely on endpoint names, SDK calls, response fields, or code snippets from memory.

Before changing code, read the current docs directly.

- Patient Access overview https://medblocks.com/docs/patient-access/overview
- Find connections https://medblocks.com/docs/patient-access/find-connections
- Create patients https://medblocks.com/docs/patient-access/create-patients
- Create a patient session https://medblocks.com/docs/patient-access/create-patient-session
- Medblocks-hosted page https://medblocks.com/docs/patient-access/create-patient-session/medblocks-hosted-page
- Your own UI https://medblocks.com/docs/patient-access/create-patient-session/your-own-ui
- Handle the return https://medblocks.com/docs/patient-access/handle-the-return
- After connection https://medblocks.com/docs/patient-access/after-connection
- Get the data https://medblocks.com/docs/patient-access/get-the-data
- API conventions https://medblocks.com/docs/reference/conventions
- API reference https://medblocks.com/docs/reference/api

Use the page I copied this from as the immediate task context, then use the rest of the Build pages to understand the full flow.

Work in this order.

1. Inspect this codebase first. Identify the app framework, server boundary, environment variable pattern, existing API client pattern, current patient or user identity model, logging style, and test runner.
2. Read the generated API reference before naming any route, field, enum, header, error code, or SDK method. If your tool has local filesystem access and this repo has openapi/medblocks.json, read that too. If the docs and reference disagree, stop and ask the user which source to follow.
3. Decide whether this app should use the Medblocks-hosted page, your own UI, or both. Ask the user if the answer is not obvious from the product.
4. Keep the Medblocks API key server-side. Never expose it through public environment variable prefixes, frontend bundles, browser logs, or client-side fetches.
5. Implement the smallest complete path for the selected page. Follow existing project conventions for file locations, naming, validation, errors, loading states, and tests.
6. After a patient returns from authorization, verify the result from the server using the latest documented Patient Access status flow. Do not trust query string values as the final source of truth.
7. Preserve Medblocks request IDs and documented error details in logs and server responses where safe. Avoid logging PHI unless this codebase already has an approved pattern.
8. Run the relevant type checks and tests before reporting done. If a live smoke test needs credentials the repo does not have, explain the exact manual smoke test steps.

If any required detail is missing, ask concise questions before writing code. In a healthcare integration, a correct pause is better than an incorrect assumption.
After the patient has chosen a connection in your UI, start a session for that specific facility. Build connection search into your own app wherever it fits, an intake form, a trial-matching flow, an account settings page, or a dedicated search screen. The patient chooses a connection, you start a patient session for that connection, and they land directly on that facility’s patient portal to sign in. Reach for this when choosing a facility is part of your product experience, or when you want full control of the look and feel.
The rest of the flow is unchanged. The patient signs in to their hospital’s patient portal, approves access for your app through authorization, and returns to you. Medblocks then pulls their records in the background.
Find the connection
The patient chooses a connection in your UI, and you keep its connection ID, which looks like fhirsrc_01J9YR9N3X4VZ6P2K5RH7M3LMP. That ID is what you pass into the session below. Find connections covers searching the catalog and rendering the results, so this page picks up once the patient has chosen.
Start the session for that connection
When the patient chooses a connection, start a session for it. Your server calls mb.patientSession.init with the patient’s ID, the connection’s connection_id, and a return_url, and gets back a url. Your browser code then redirects the patient to that url, which sends them straight to the facility’s patient portal. Your API key is a secret that lives only on your server, so the browser calls a route on your server and never the Medblocks API directly.
Pass the connection_id of the connection the patient chose. That tells Medblocks which facility’s patient portal to send them to.
import { mb } from "../medblocks";

export async function startSession(input: {
  patientId: string;
  connectionId: string;
}) {
  const session = await mb.patientSession.init({
    patient_id: input.patientId,
    connection_id: input.connectionId,
    return_url: "https://app.example.com/connected",
  });

  return { url: session.url };
}patient_idstringrequiredYour stable identifier for this patient.
connection_idstringConnection ID from /connections. When present, the patient goes straight to that facility's patient portal. Mutually exclusive with recommended_connection_ids.
return_urlstringrequiredURL to redirect after the patient session.
patient_emailstringPatient email to store or update.
patient_namestringPatient display name to store or update.
metadataobjectAdditional metadata returned with the patient session.
AuthorizationBearer <token>requiredMedblocks API key for server-side requests.
VersionstringDate-pinned API version. If omitted, Medblocks uses the version pinned on your API key.
async function startSession(connection: { id: string; name: string }) {
  const response = await fetch("/api/patient-sessions", {
    method: "POST",
    headers: { "Content-Type": "application/json" },
    body: JSON.stringify({
      patientId: currentPatientId,
      connectionId: connection.id,
    }),
  });

  const { url } = await response.json();
  window.location.href = url;
}patient_idstringrequiredYour stable identifier for this patient.
connection_idstringConnection ID from /connections. When present, the patient goes straight to that facility's patient portal. Mutually exclusive with recommended_connection_ids.
return_urlstringrequiredURL to redirect after the patient session.
patient_emailstringPatient email to store or update.
patient_namestringPatient display name to store or update.
metadataobjectAdditional metadata returned with the patient session.
Handle success and failure
When your app sends the patient straight to one connection, the return_url includes success or failure details for that connection. Every return carries the patient ID (patient_id), the patient session ID (patient_session_id), and a success flag. On success the URL also carries the connection_id that connected. On failure it carries an error code and an error_description instead.
On success, the patient lands back on your app with the facility connected.
https://app.example.com/connected?patient_id=user_42&patient_session_id=ps_...&success=true&connection_id=fhirsrc_...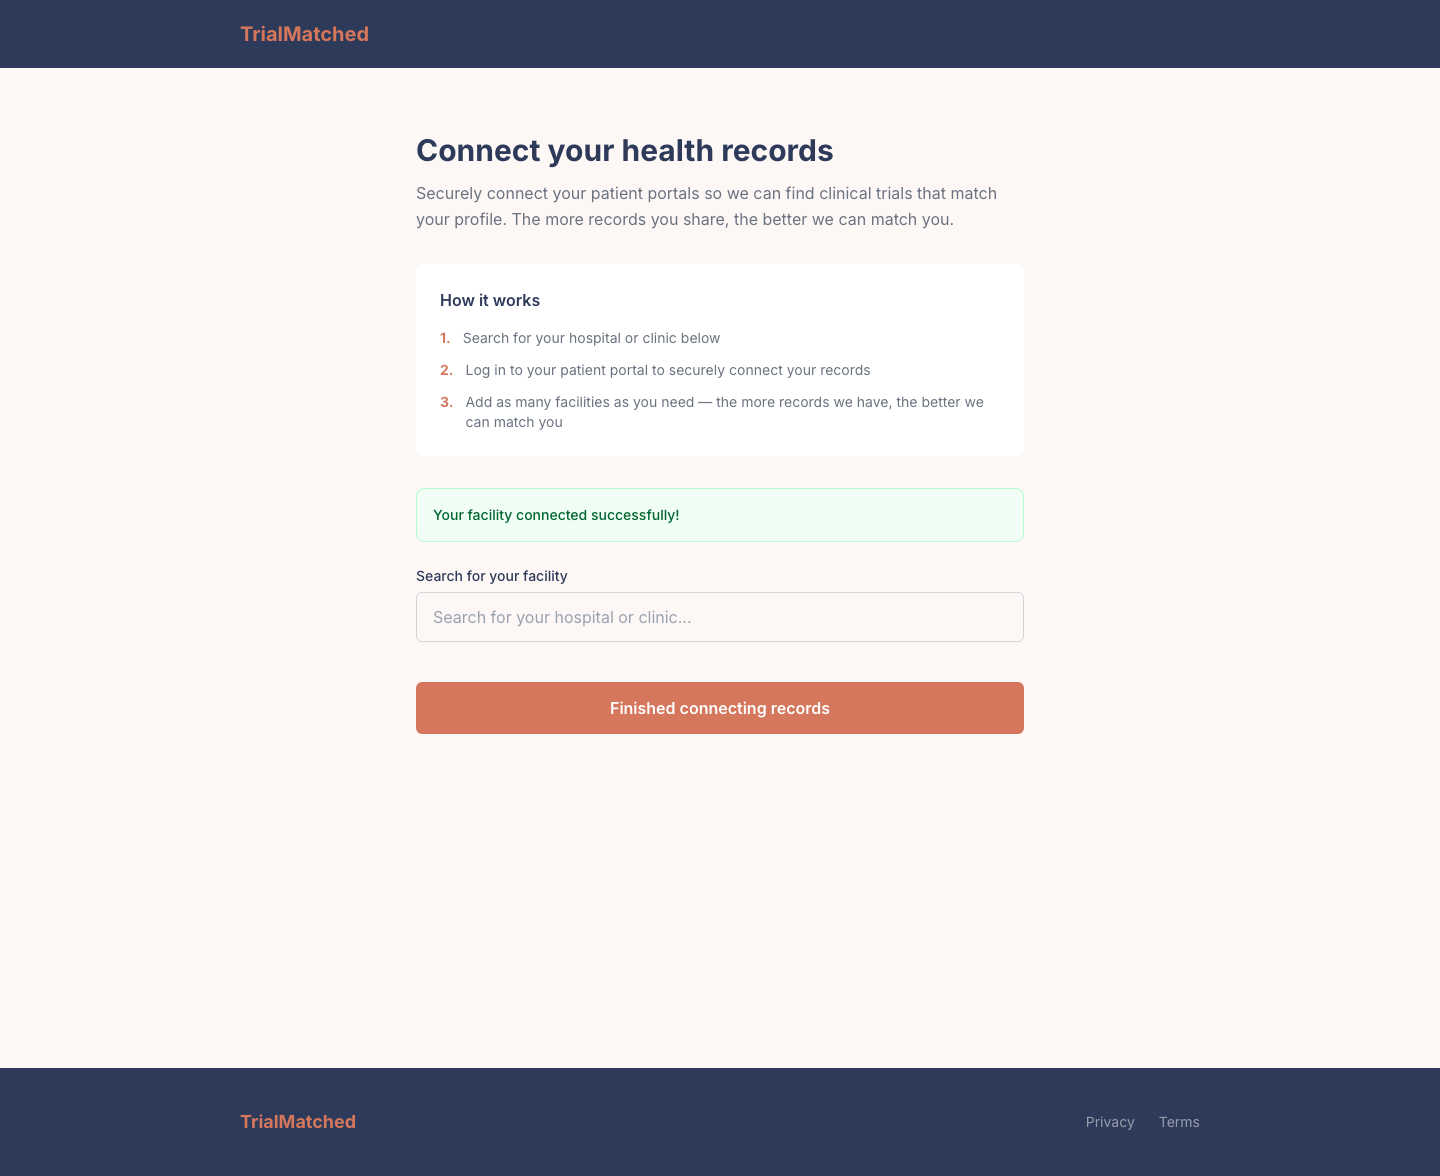
When the patient cancels or the portal rejects the attempt, the URL carries success=false with the error code and description, so you can show a retry path.
https://app.example.com/connected?patient_id=user_42&patient_session_id=ps_...&success=false&error=user_denied&error_description=Patient+canceled+the+connection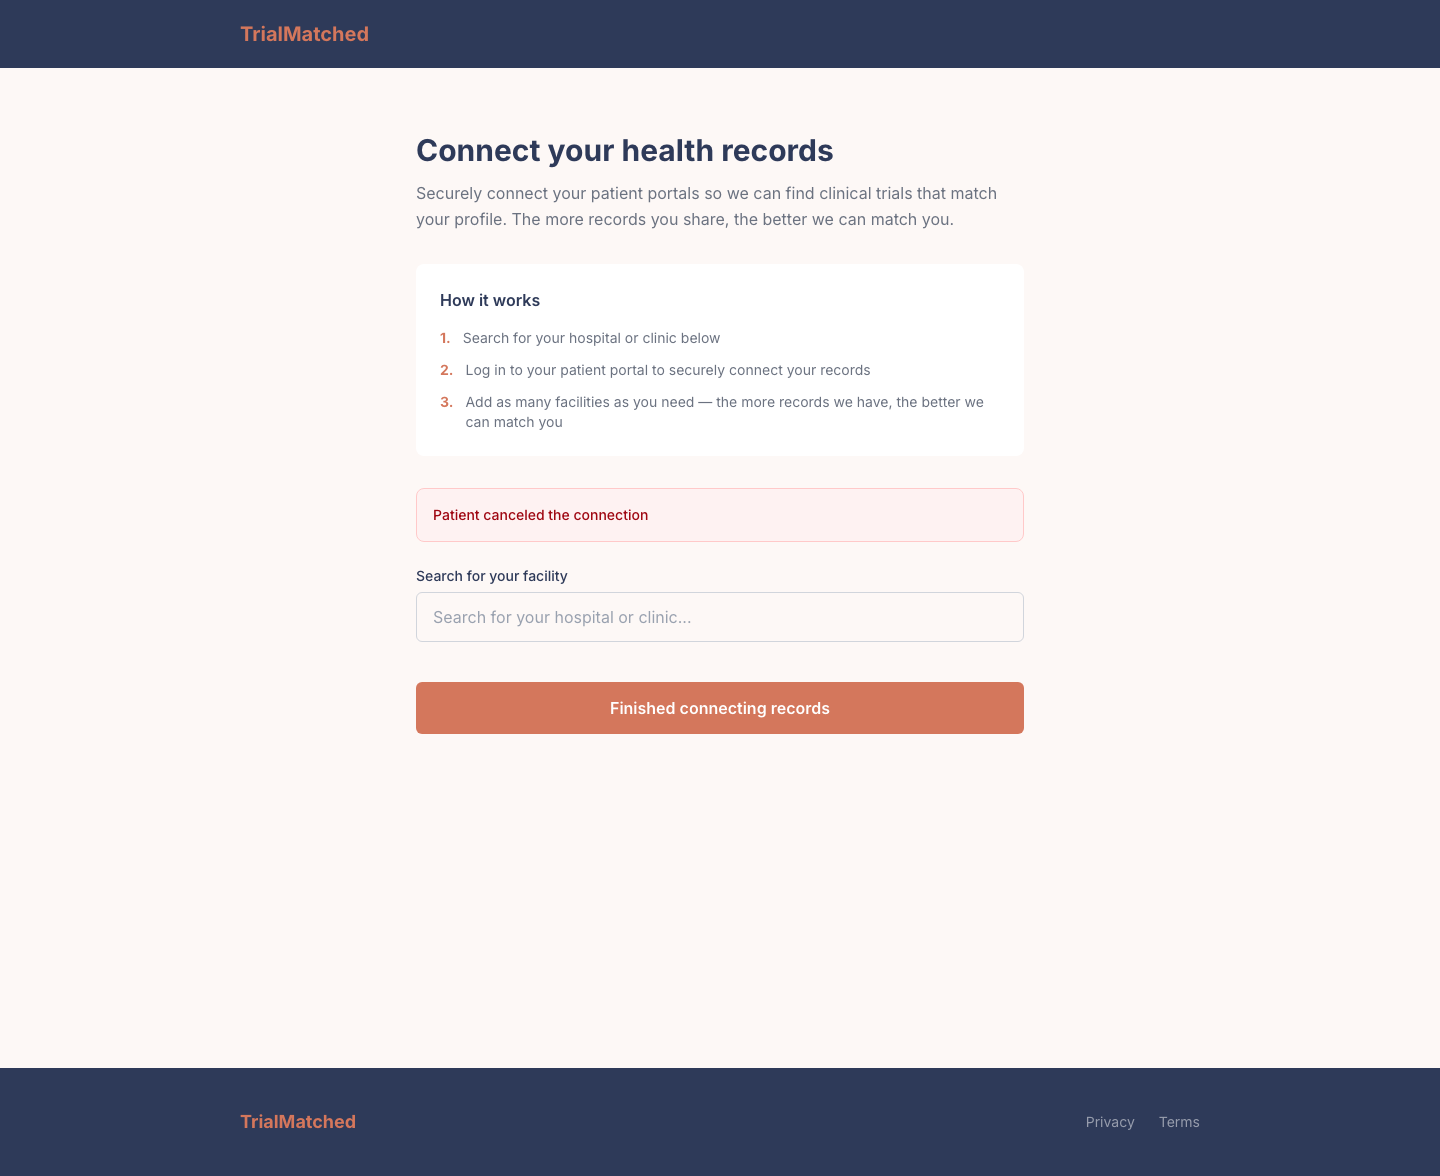
Continue to Handle the return for the landing-page code shared by the Medblocks-hosted page and your own UI.
Common errors
| Code | Meaning |
|---|---|
resource_not_found | The connection_id you passed does not exist or is not available. |
bad_request | connection_id is missing, or it conflicts with recommended_connection_ids. Pass one or the other, never both. |
oauth_error | The portal authorization failed upstream. |
token_exchange_failed | Medblocks could not exchange the OAuth code for tokens. |
Read the full envelope and code list in Errors.
See also
Need help?
Running into an issue? Get support from our team and we will get back to you.
How is this guide?