Reading Patient Data with Epic’s FHIR API
In the last lesson we got a live access token from Epic, and the patient’s FHIR ID came back in the token response.
Now we use that token. In this lesson we’ll call Epic’s FHIR APIs, pull the patient’s data, and use it to build Care Summary’s patient summary page.
What data can you get?
Before you call anything, you need to know what data is available. There are two places to look.
Build your first real FHIR app in 15 days
500+ builders have done it. Live kick-off, structured modules, Demo Day. $27.
Join the challengeUSCDI: the baseline every certified EHR must share
The first is USCDI, the United States Core Data for Interoperability. It’s a list of data that every certified EHR must make shareable. It includes demographics, problems and diagnoses, medications, labs, vitals, and a few more data classes.
ONC regulates this. EHRs like Epic, Oracle Health and Meditech have to expose all of these data points to stay certified. And it has teeth: hospitals that get paid by Medicare or Medicaid lose part of that funding if their EHR isn’t certified.
Epic’s API specifications
Epic exposes more than USCDI requires, and you can see every available API on its specification page on fhir.epic.com. The page also covers Epic’s proprietary APIs, but we’ll stick to the FHIR APIs because they’re free for patient-facing apps.
You’ll need to be logged in with your Epic on FHIR account to read the full specs.
How to read an Epic API spec
Let’s walk through the simplest example: reading a patient.
On the specifications page, there are three filters at the top: All, FHIR and Other. Select FHIR and search for Patient.Read.
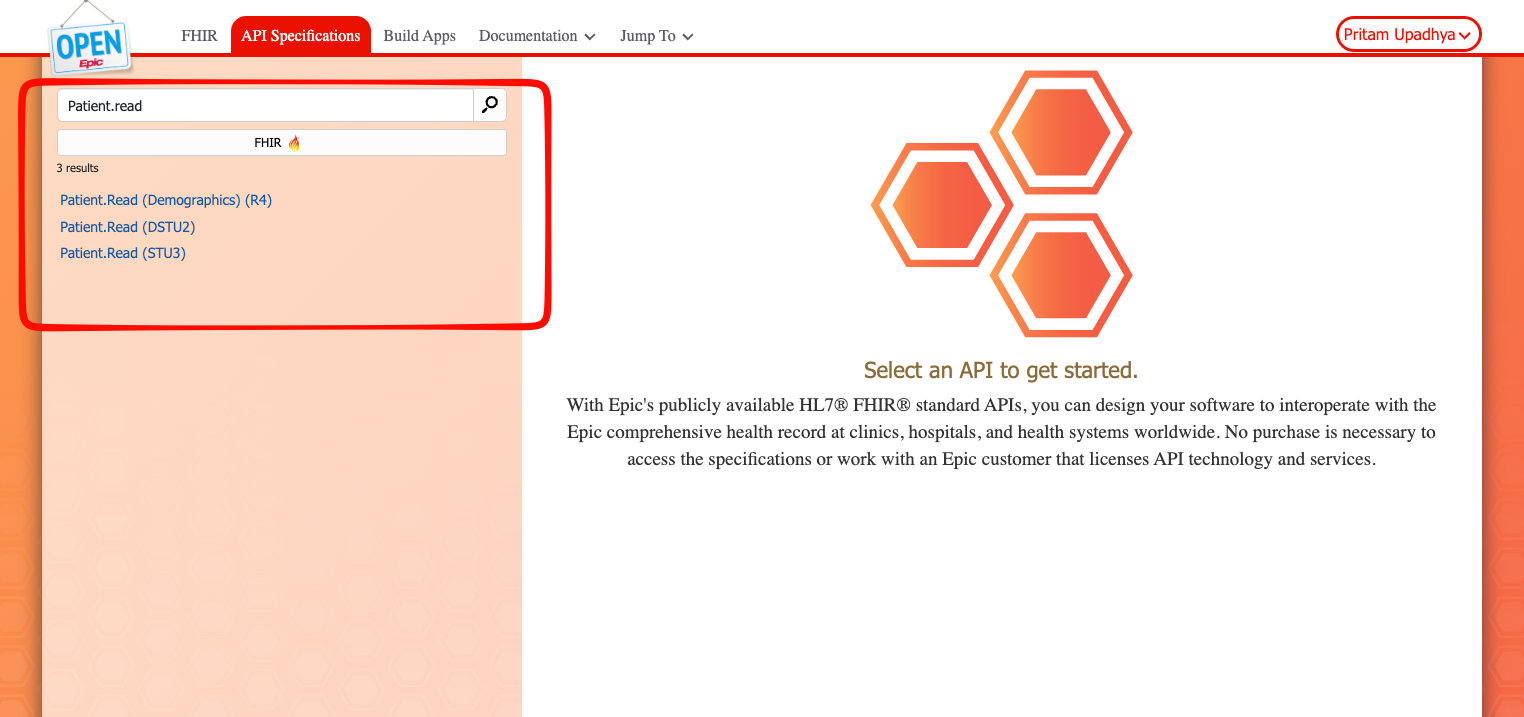
Pick R4
You’ll get three results, one for each FHIR version Epic supports: R4, DSTU2 and STU3.
We’ll use R4. It’s the stable version of FHIR and the most widely adopted today. Older systems may still support DSTU2 and STU3, but you don’t need them for a new app. R5 was published in 2023, but adoption is low, and a lot of the industry plans to move from R4 straight to R6.
What’s on the spec page
Each spec page follows the same layout:
- Method: for Patient.Read, it’s
GET. - URL template: this one ends in
/Patient/{ID}. - Supported OAuth user types: which workflows can use this API. Patient.Read supports backend, clinician and patient workflows. We only care about patient-consented access here.
- Description: what the resource is. For Patient, it’s demographics, care providers and other information about a person receiving care at a healthcare organization.
- Sample request and sample response: what you send and what you get back.
- Fields: every element in the resource, with its cardinality (whether it’s required, and whether it can repeat).
If you’ve already looked at the US Core FHIR spec, the field list will look familiar. Epic’s documentation is a subset of it.
Make the request
Now let’s make the request to Epic’s server. We already have what we need from Lesson 3:
- an access token
- the route to fetch a patient, from the spec
- the patient’s ID, from the token response
The FHIR base URL is also on the specifications page. We authenticated with a sandbox patient, so we’ll use the sandbox base URL:
GET https://fhir.epic.com/interconnect-fhir-oauth/api/FHIR/R4/Patient/{patient-id}
Authorization: Bearer <access_token>
Accept: application/json
Two headers:
Authorization carries the bearer token.
Accept: application/json asks for JSON. Without it, you may get XML by default. If you’re working in a Java application and like XML, that’s fine. But it’s better to be explicit, because not every system returns JSON by default. Some people use application/fhir+json to make it clear the content is FHIR. Plain application/json works with most FHIR servers.
Send it, and you get a FHIR Patient resource straight from Epic. It’s the patient we logged in as.
The same pattern works for the other resources Care Summary needs. Swap the resource type and filter by patient:
GET {base}/Condition?patient={patient-id}
GET {base}/MedicationRequest?patient={patient-id}
GET {base}/Observation?patient={patient-id}&category=vital-signs
Build the Care Summary app
You’ve seen the raw data in Postman. Now let’s put it in front of a patient.
You won’t code the app from scratch here. Instead, we’ll show you how to build it with an AI coding tool and a prompt, so you can get a working app whether you’re a developer or not. The complete code and the prompt is available in this Github Repo
Copy the prompt into an IDE or an online AI app builder like Lovable or Google AI Studio. Claude Code and Cursor work too. Use one that runs a recent model and can make web requests and read documentation. We recommend Lovable or Claude
It’ll take some time, and it may ask you a few questions along the way, usually about how you want the design to look or where the client ID should go. Tell it to keep a placeholder in your .env file. You’ll fill it in with your real client ID later.
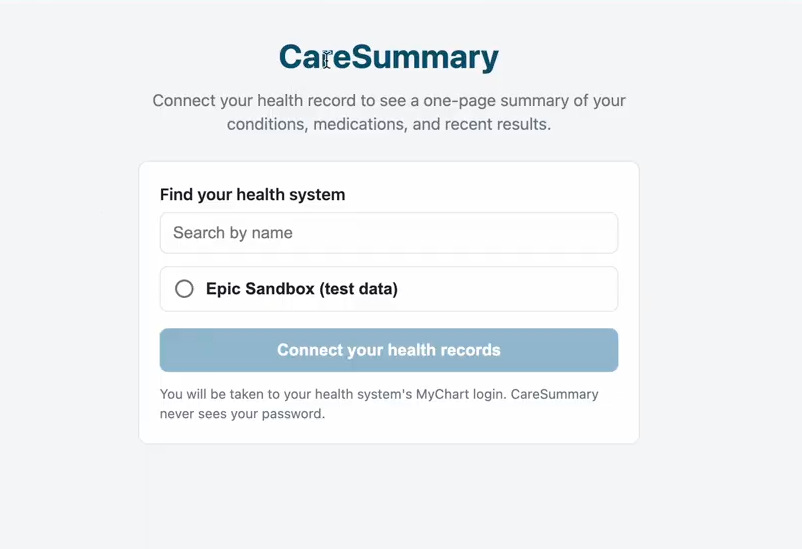
And once it’s done, you should be able to see a login screen similar to this.
The overview tab
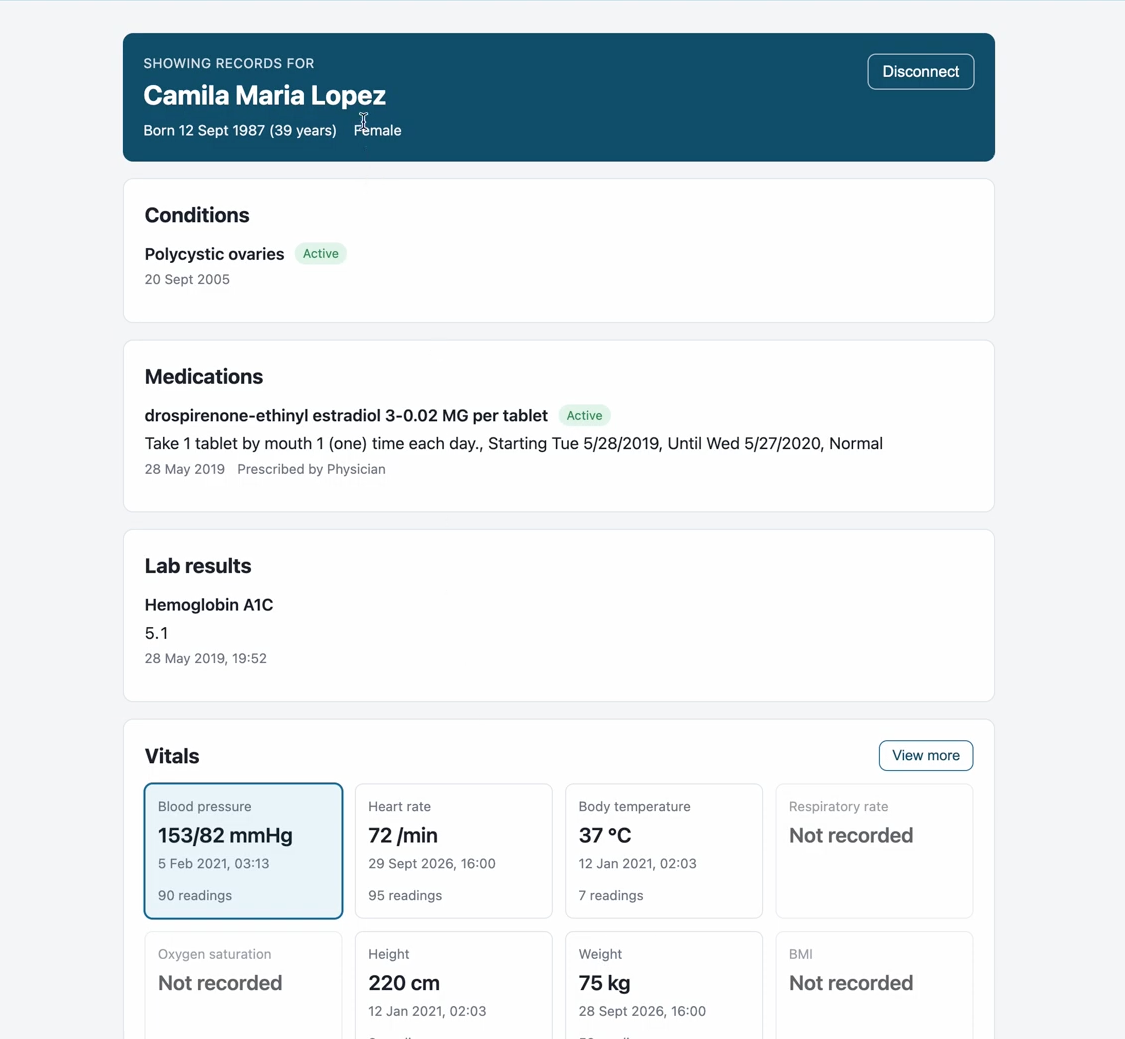
The UI is simple. Click Connect and you’re taken to Epic’s login page. Use the same sandbox credentials as before, allow the scopes, and you’ll see the patient, Camila, with her demographics: age, gender, phone, email and address.
All of this comes from the Patient resource we just saw in Postman.
The FHIR preview panel
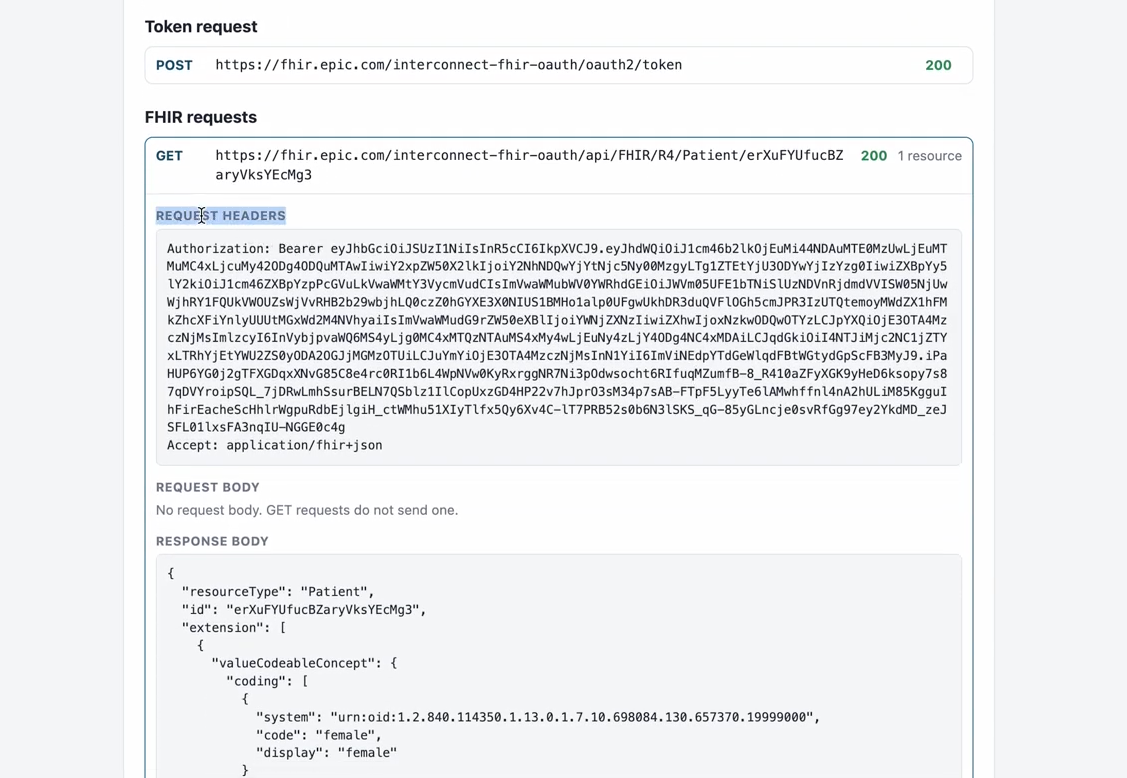
The app has a FHIR preview section to show how the data is fetched and what the response looks like.
For the patient details, you can see:
- the
GETrequest: the FHIR server URL, then/Patient/with the patient ID - the headers: the
Authorizationbearer token, generated through the same flow we ran in Postman but in code this time, and theAcceptheader asking for JSON - the response: the Patient resource returned by the FHIR server
The vitals tab
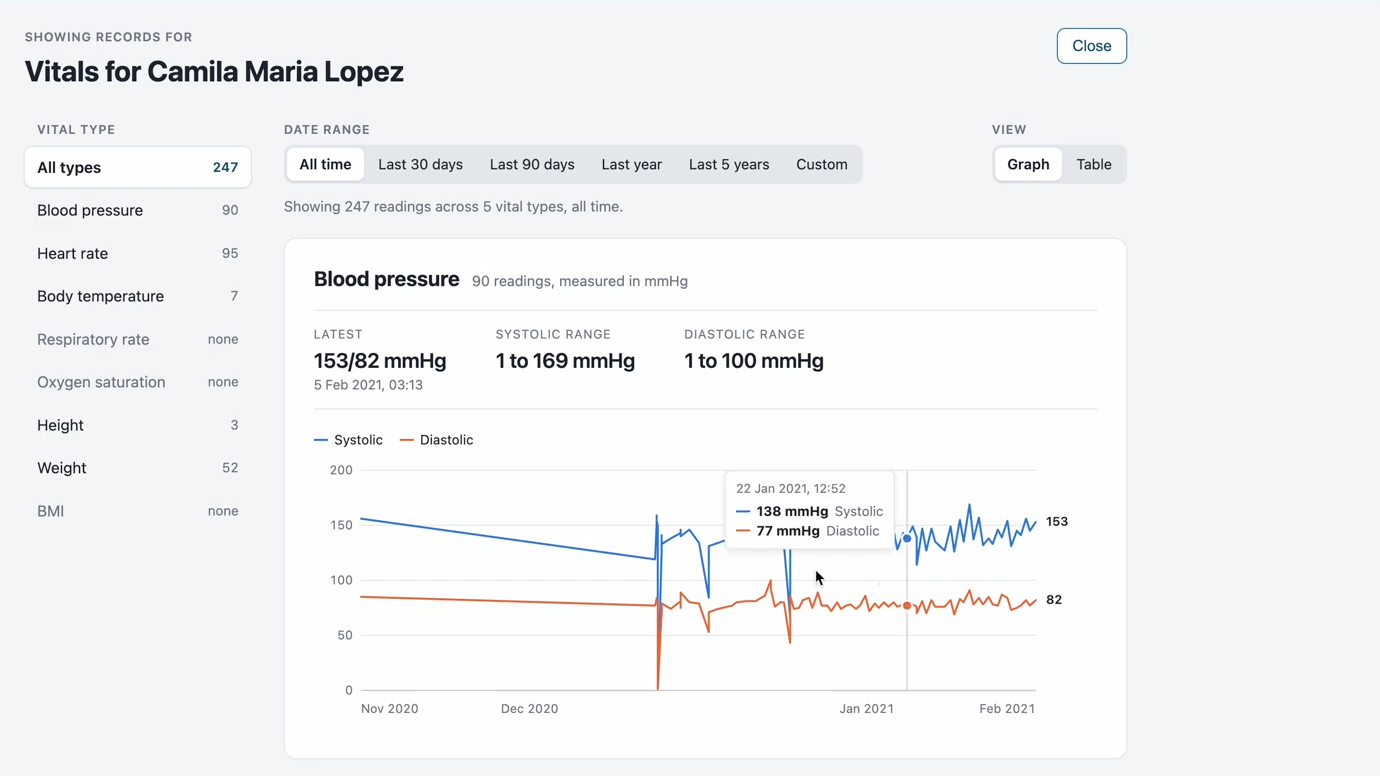
The vitals tab has a graph. Pick a vital sign and the graph shows its data if the patient has any.
There’s also a table view. Practitioners often prefer tables to graphs, and patients sometimes just want to see the numbers too.
The FHIR preview shows the request for this one too. It uses the Observation route, with the patient ID as a parameter.
According to Epic’s API spec, the patient parameter is mandatory. You can’t make a call to /Observation and get every observation on Epic’s server. Even if you leave the parameter off, Epic limits the results to the patient who’s logged in.
Observation also needs a mandatory category code. Here we use vital-signs, which returns all vital signs:
GET {base}/Observation?patient={patient-id}&category=vital-signsEpic’s documentation lists the other available categories, labs among them. Go through those, change the category, and you can pull the rest of the patient’s observation data.
What’s next
We now have a test patient who can log in, fetch their records, and see their information and vitals in Care Summary.
So far this has all run against the sandbox. In the next lesson, we go live: what you need to put Care Summary in front of real patients logging in to real hospitals. If your build runs into problems, share the error in the comments.