How to Register a Provider App on fhir.epic.com
In Module 2 we registered Care Summary on fhir.epic.com. In this lesson we register VitalCheck on the same portal.
Create a Clinician App on Epic
Go to fhir.epic.com and sign in with the Epic on FHIR account you created in Module 1. If you don’t have one, create it now.
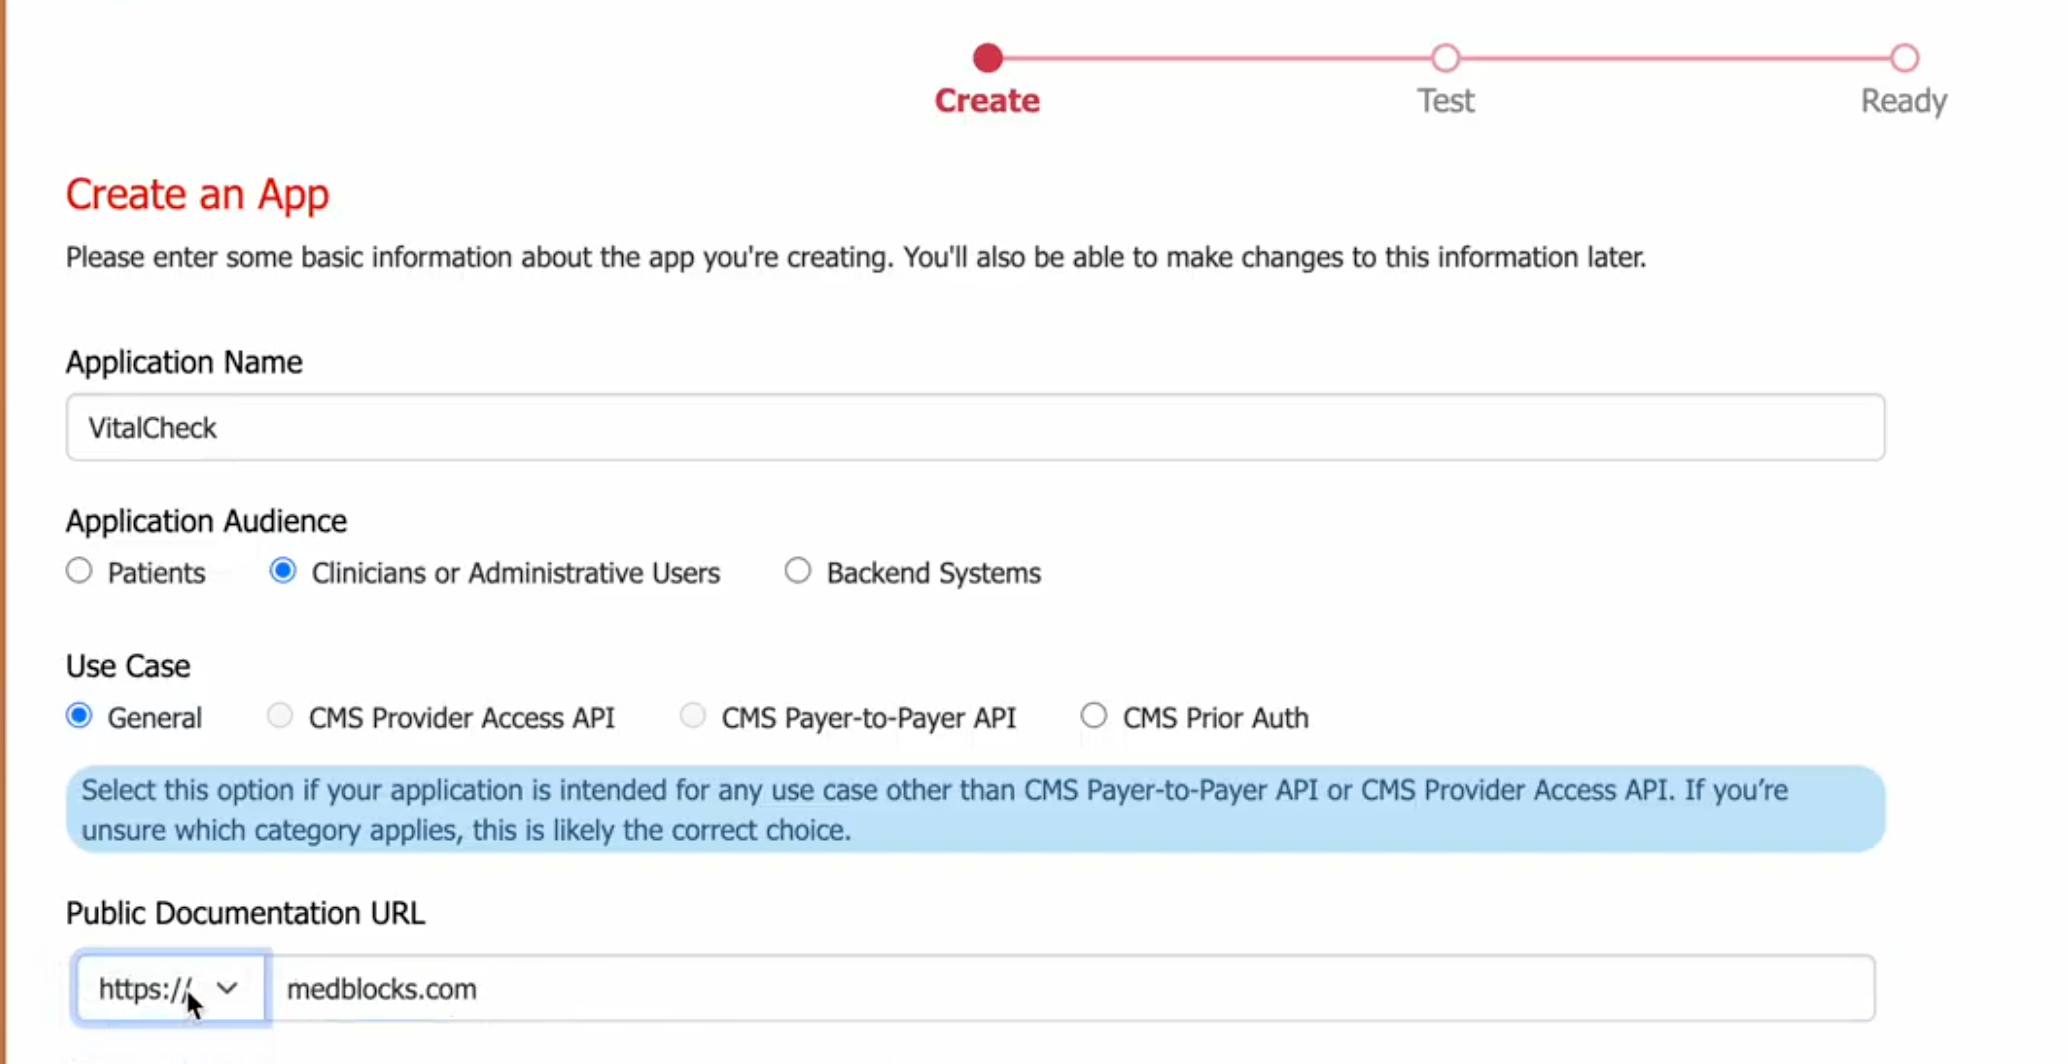
Go to Build Apps and click Create App. We’ll call ours VitalCheck.
Build your first real FHIR app in 15 days
500+ builders have done it. Live kick-off, structured modules, Demo Day. $27.
Join the challengeAudience
For Care Summary we picked Patients. VitalCheck is for the clinician, so pick Clinicians or Administrative Users.
The third option, Backend Systems, is for apps where no user is logged in. That’s the backend pattern and we cover it in Module 4.
Public Documentation URL
Ideally you should add a proper documentation URL because if the hospitals want to check what your app does, they should get a pretty clear idea by going to your documentation URL.
There is no automatic client distribution
When you selected the patient audience in Module 2, an Automatic Client Distribution section appeared. With the right scopes, Epic distributes a patient app to its customers without you contacting any of them.
That section doesn’t appear for a clinician app. A provider app has to be installed into each hospital’s Epic instance before anyone there can launch it, and the hospital decides whether to install it. You go to one hospital at a time. The install itself is not difficult once a hospital agrees, and we cover the full process in Lesson 6.
For decision makers: a patient app can reach real data at many hospitals as soon as it’s distributed. A provider app only runs at the hospitals that have installed it. The sales work comes before the technical work.
For a provider app, the registration page may be the only thing a hospital administrator sees before deciding whether to install your app. Put a real documentation URL here, one that shows what the app does and how it’s used.
Choose your scopes
VitalCheck reads the patient’s basic details, reads their vital signs, and writes new vitals back. The scopes we need are:
Patient.Read (R4)Observation.Create (Vitals) (R4)Observation.Read (Vitals) (R4)Observation.Read (Labs) (R4)Observation.Search (Vitals) (R4)Observation.Search (Labs) (R4)
We’re using the FHIR R4 APIs throughout this module.
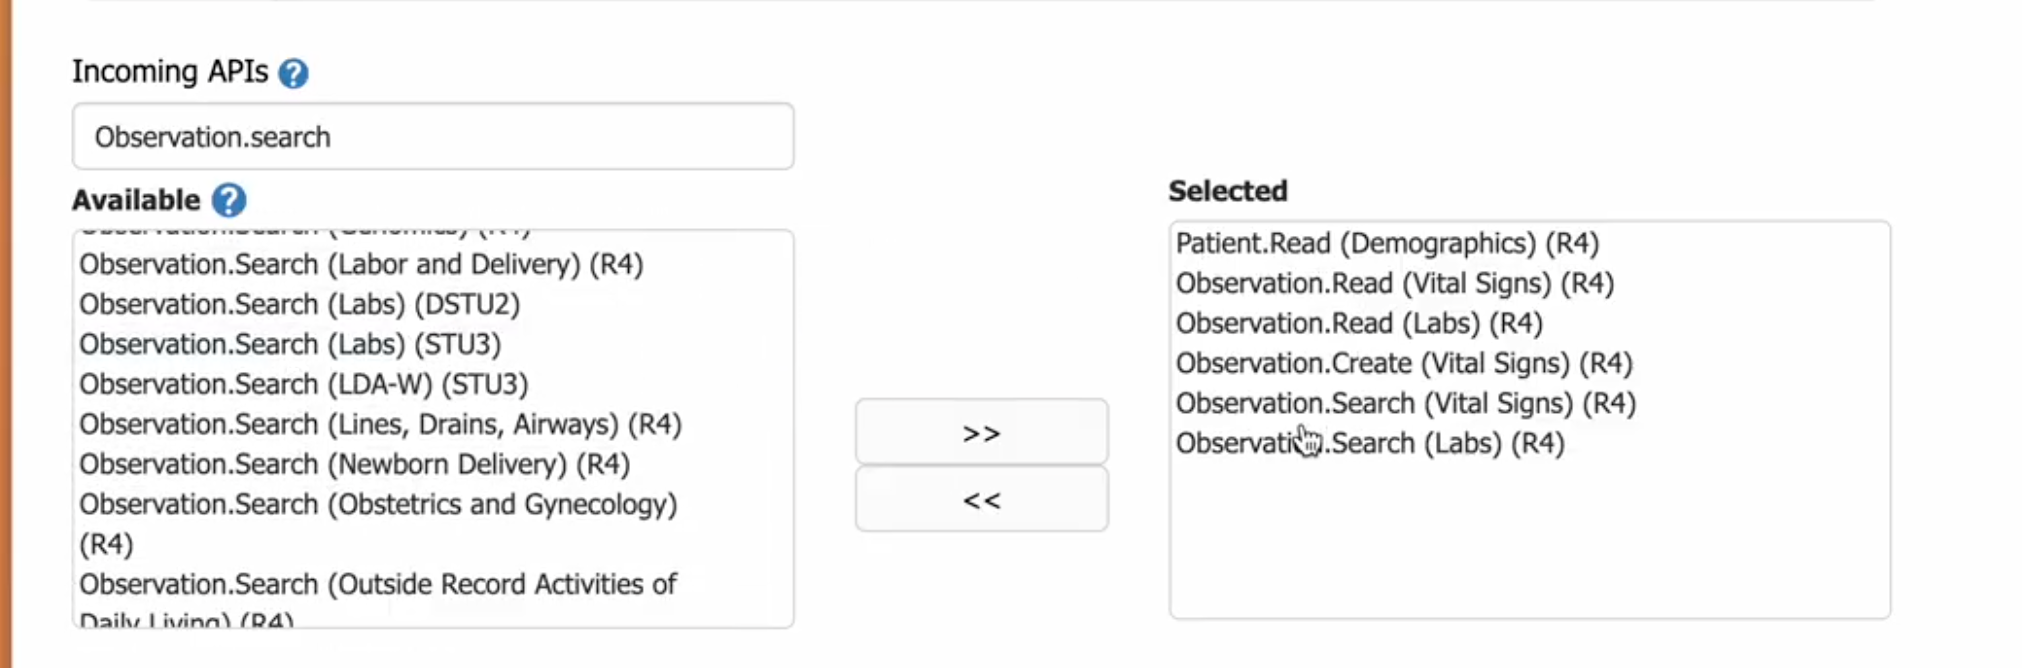
Use least privilege before production. When you take a provider app to production, someone at the hospital has to approve the scopes your app asks for. If they see every scope selected, they may reject the app and ask you to come back with a smaller set.
The scopes are locked once you mark the app ready for production. To change them you have to register a new app, get a new client ID, and go back to the hospital with that. We’ve seen a lot of people select everything, get rejected, and start over.
While you’re developing and testing in the sandbox, you can select whatever you want, you can also select all the scopes. But before production, cut it down to what the app uses.
Add your endpoint URI
The endpoint URI is where Epic sends the clinician after the launch. If you’re building locally, use a localhost URL:
http://localhost:3000If you’re building in Lovable or Google AI Studio, use the live URL the platform gives you.
Leave “dynamic client” and “confidential client” off
We don’t need dynamic client registration for this module, so leave it off.
Confidential client is for apps with a backend that can hold a secret. VitalCheck is a pure front-end app that uses PKCE, the same as Care Summary, so leave this off too.
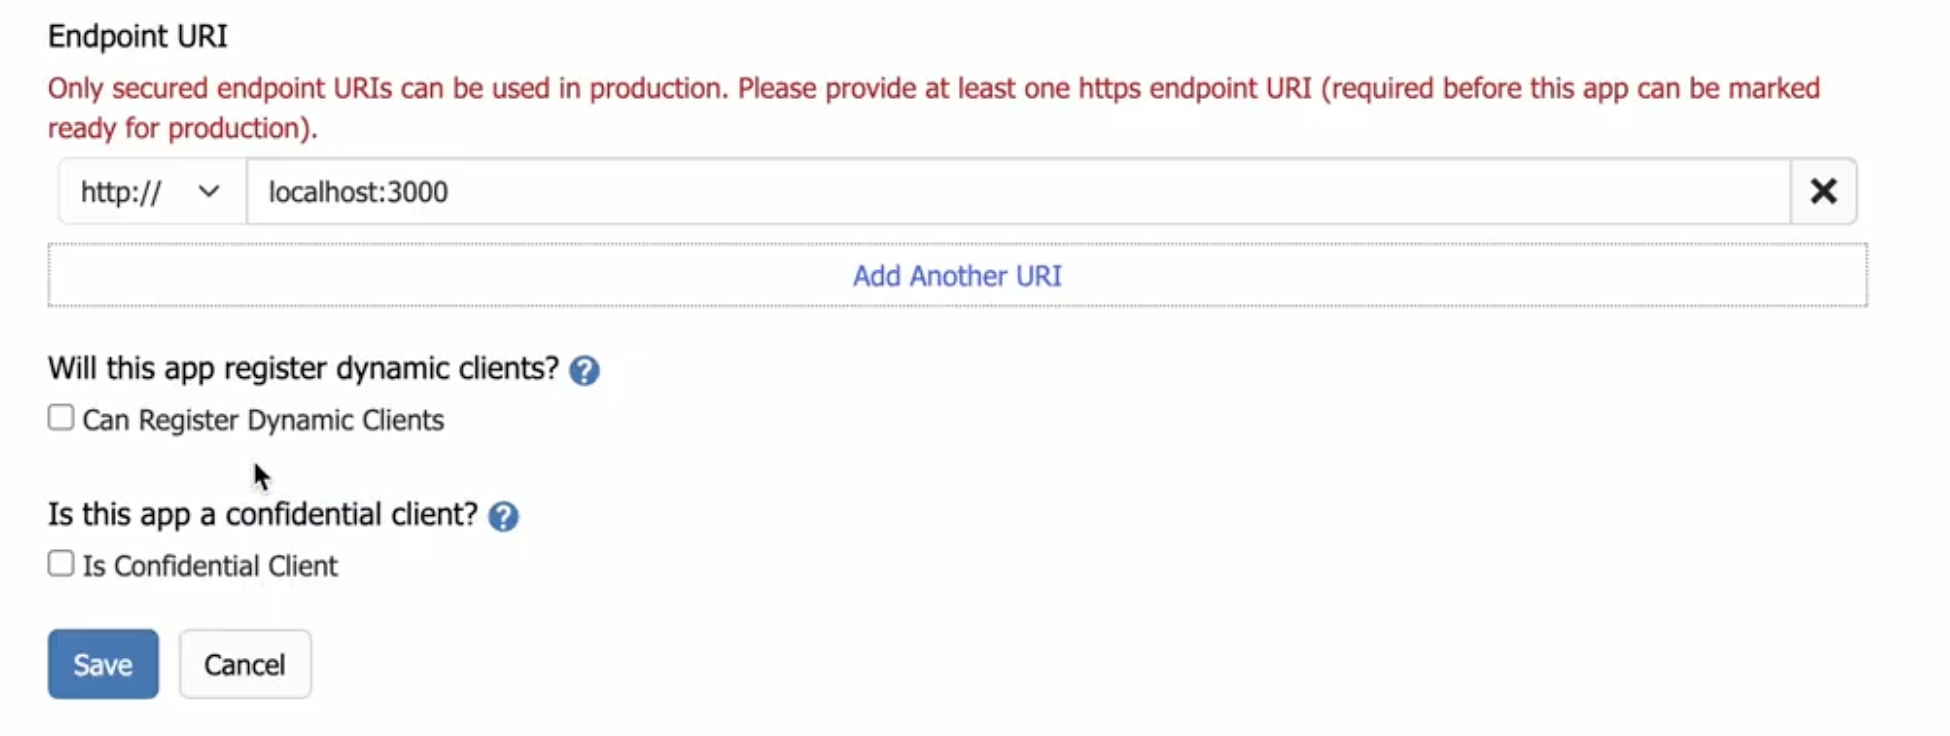
Click Save.
Fill in the second page
Saving takes you to a longer form.
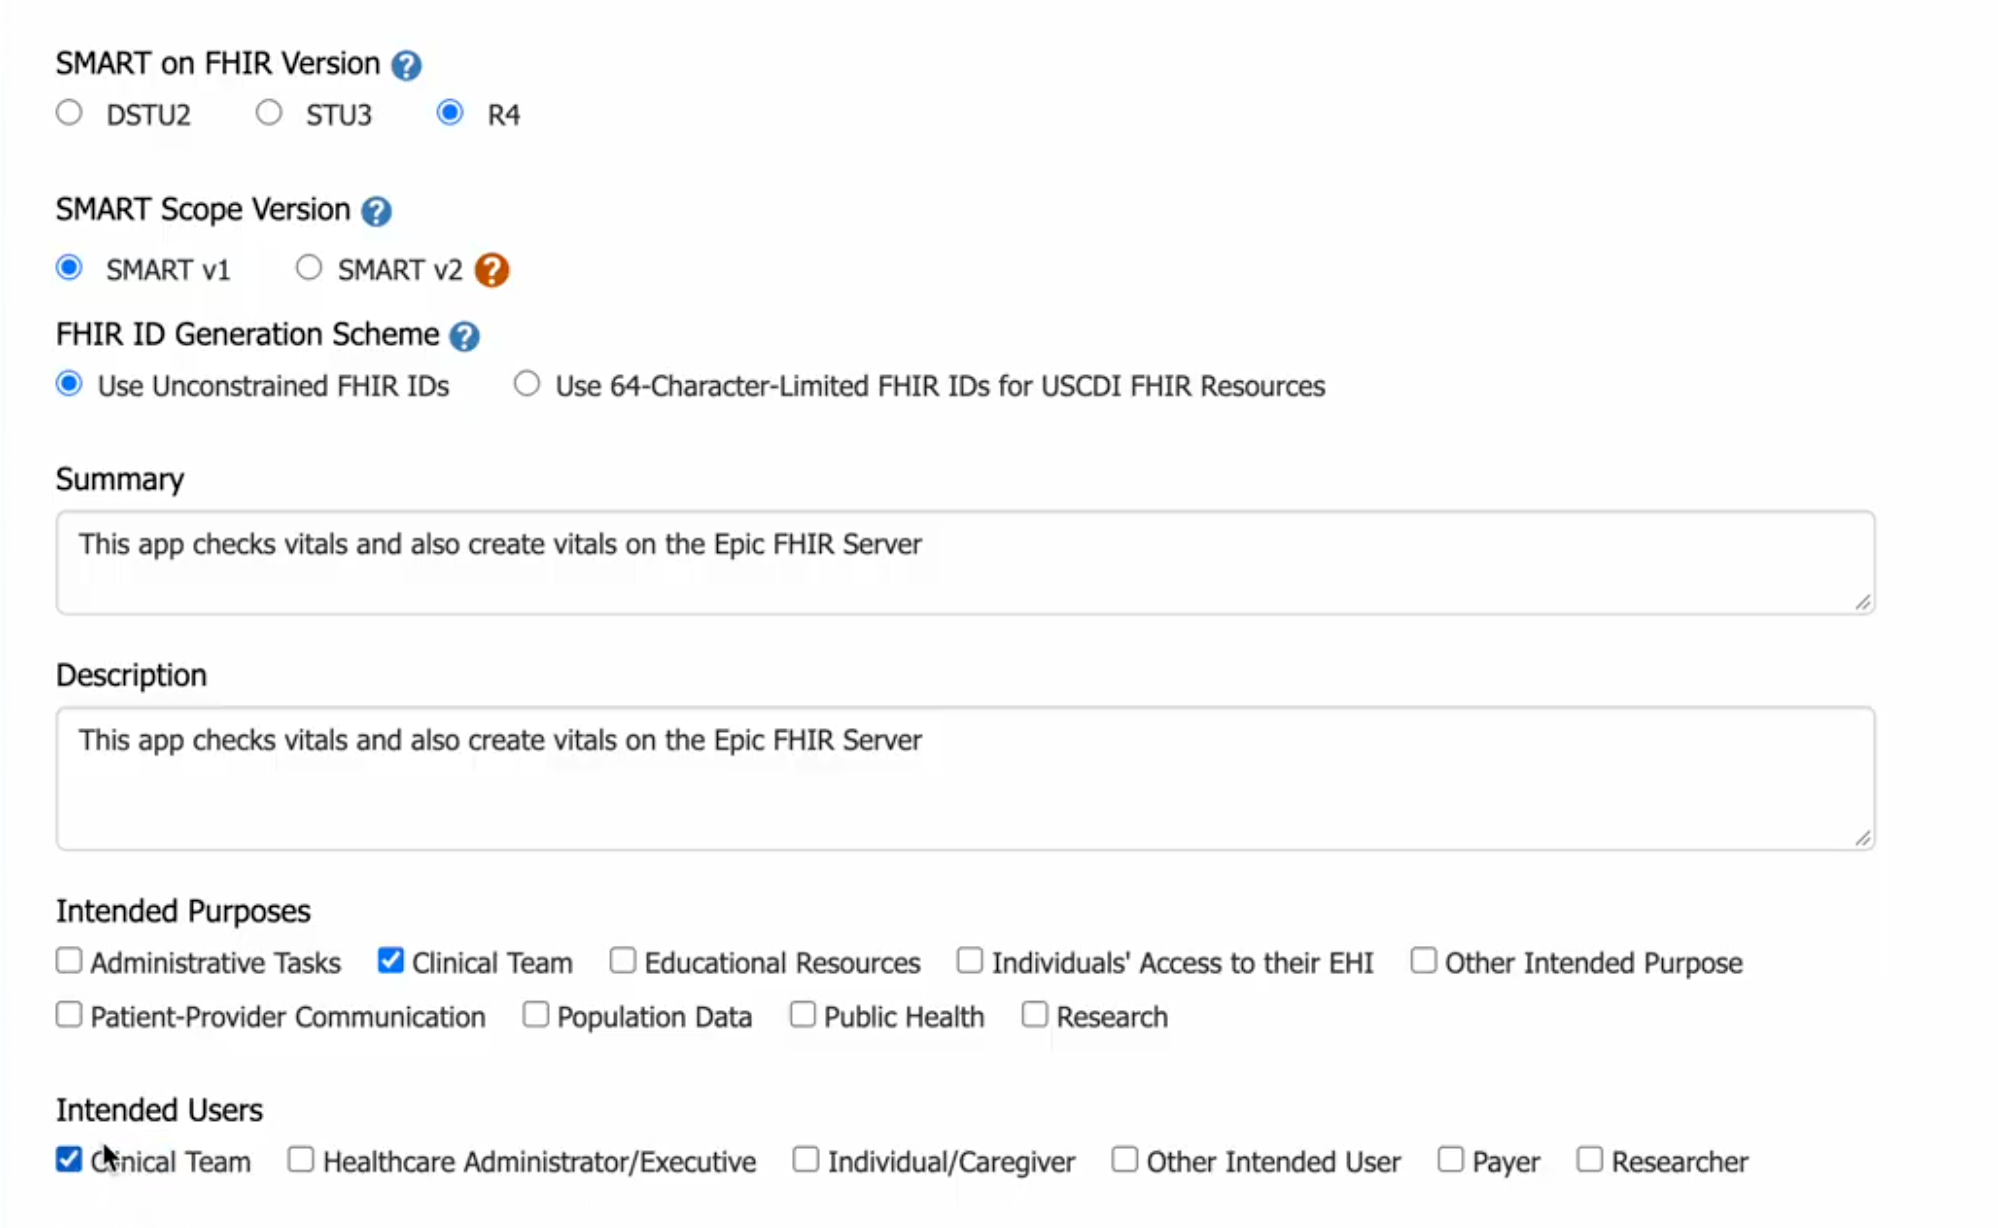
SMART on FHIR version stays at R4.
SMART scope version: pick v1. Some Epic instances support v2 scopes, but it isn’t standard across sites yet, so v1 is the safer choice.
Summary is required. For VitalCheck: an app that displays basic vital signs and writes vitals to the Epic FHIR server.
Description can stay empty for the sandbox. Before production, fill it in with what the app does and how it’s meant to be used. A hospital may read this before deciding.
Intended purpose: clinical team. Pick whatever fits your app.
Intended user: clinical team, or individual caregiver.
Accept the terms, then mark it ready for sandbox
At the bottom, accept the terms of use and click Ready for Sandbox.
Don’t skip the terms of use checkbox. Many of our students building practitioner apps have missed it and then spent time trying to work out why the client ID doesn’t work. If your app won’t launch, check this first.

The client ID can take up to 24 hours to become active
Saving doesn’t make the client ID active straight away. We’ve seen it take more than 24 hours.
If your app doesn’t work in the first few hours, leave it. Epic is still syncing the client ID and there’s nothing to fix on your side. If it still doesn’t work after 24 hours, something is probably wrong with the registration, which will require further debugging. You can also ask in the comments and we’ll help you work out what happened.
What’s next
VitalCheck is registered. You have a non-production client ID, an endpoint URI on the allow list, and a public client with no secrets.
In the next lesson we’ll take the client ID into Postman, run the EHR launch, exchange it for an access token, and use that token to read the patient’s vitals. If you got stuck anywhere in this lesson, post in the comments.