Building VitalCheck: Reading and Writing Vitals with Epic's FHIR API
In the last lesson you ran the EHR launch, got an access token, and pulled the patient data using the token. Most people get stuck somewhere in that stretch and quit, so if you made it here with a working token, you’ve gone through the difficult part.
In this lesson we build VitalCheck and use that token in a real app. The app does three things:
- It launches from inside Epic already knowing who the patient is.
- It reads the patient’s vitals and displays them.
- It lets a clinician add a new reading that gets written straight back into Epic.
Build the VitalCheck app
We won’t code this from scratch. Like Care Summary, we build it from a prompt with an AI coding tool, so you can get a working app whether you write code or not.
Paste the prompt into any IDE or online builder: Lovable, Google AI Studio, Claude Code, Cursor, whatever you’re comfortable with. It’ll take a while, and the tool may ask a couple of questions, usually about the design and the location of the client ID . If it asks about the client ID, tell it to leave a placeholder in the .env file. You’ll fill that in with your non-production client ID afterwards.
Build your first real FHIR app in 15 days
500+ builders have done it. Live kick-off, structured modules, Demo Day. $27.
Join the challengeLaunch it from the test launcher
Go back to the Try It launcher from the last lesson. Select VitalCheck, select a patient, enter your launch URL, and click Launch.
This mimics the clinician’s flow exactly. They already have a patient open, they click your app, and it opens. There’s no login and no consent screen, because the clinician is already logged in to Epic and the launch token carries the patient context.
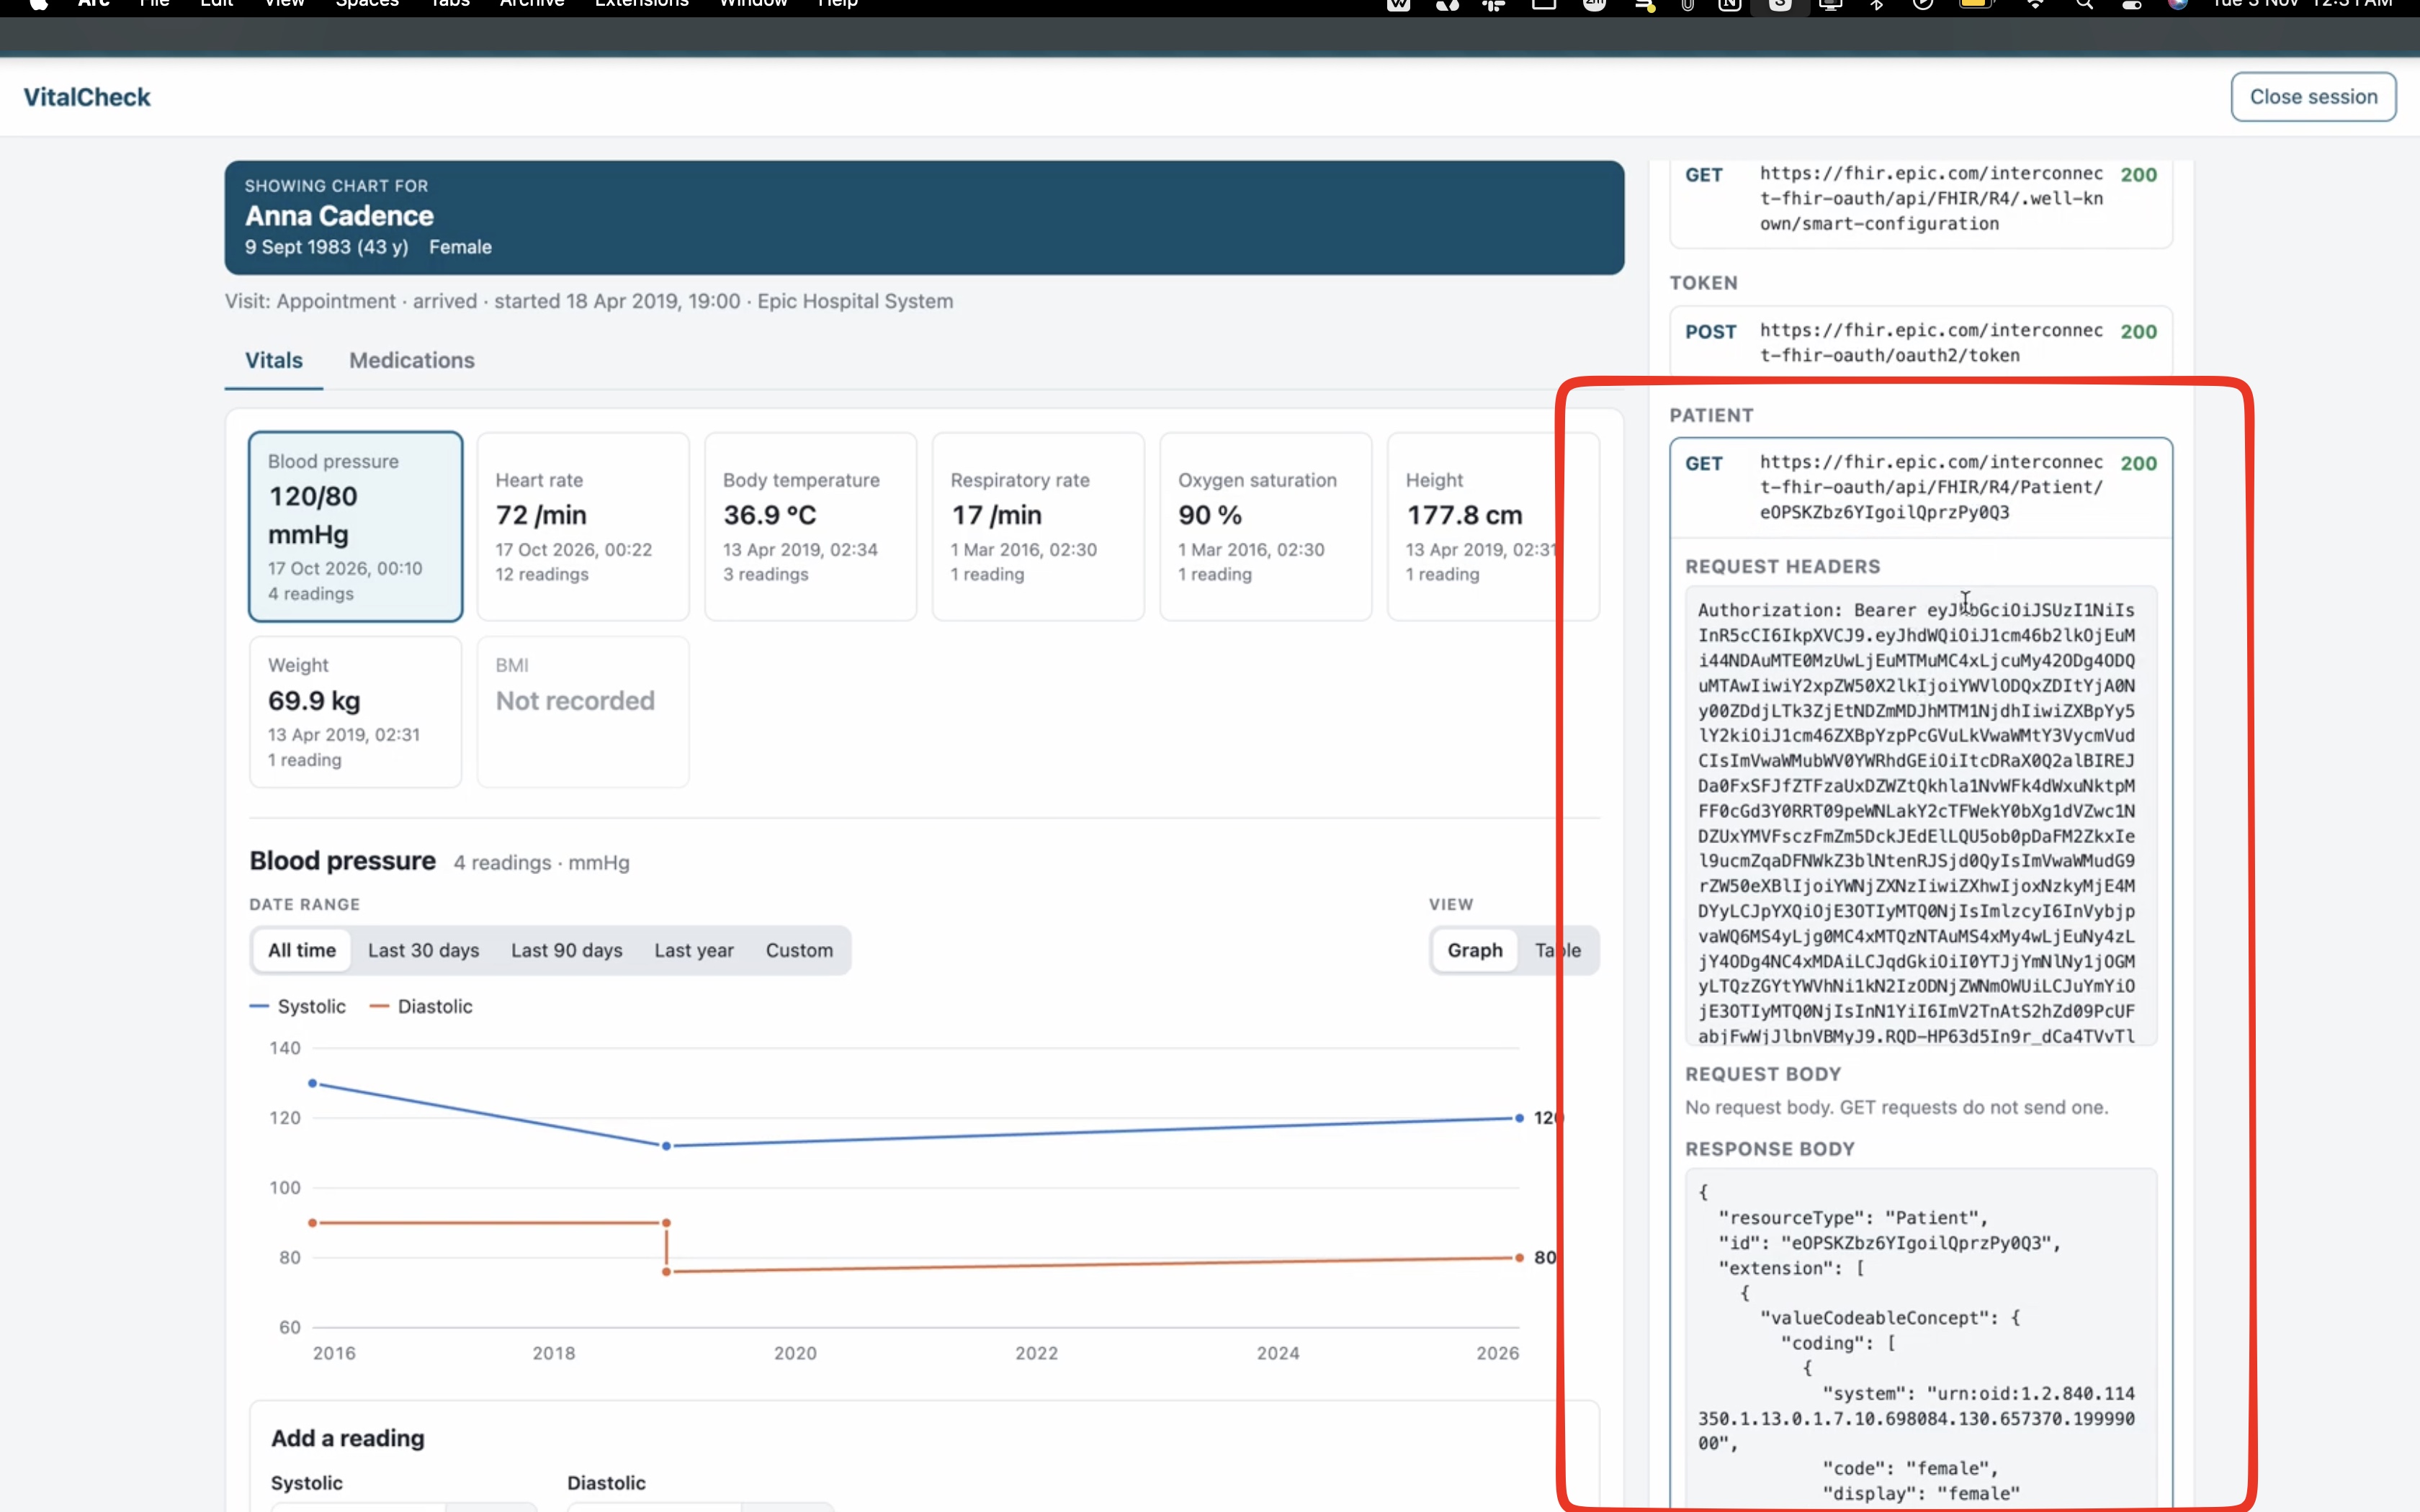
Epic redirects to the app, and VitalCheck loads with the patient’s name, age and details at the top.
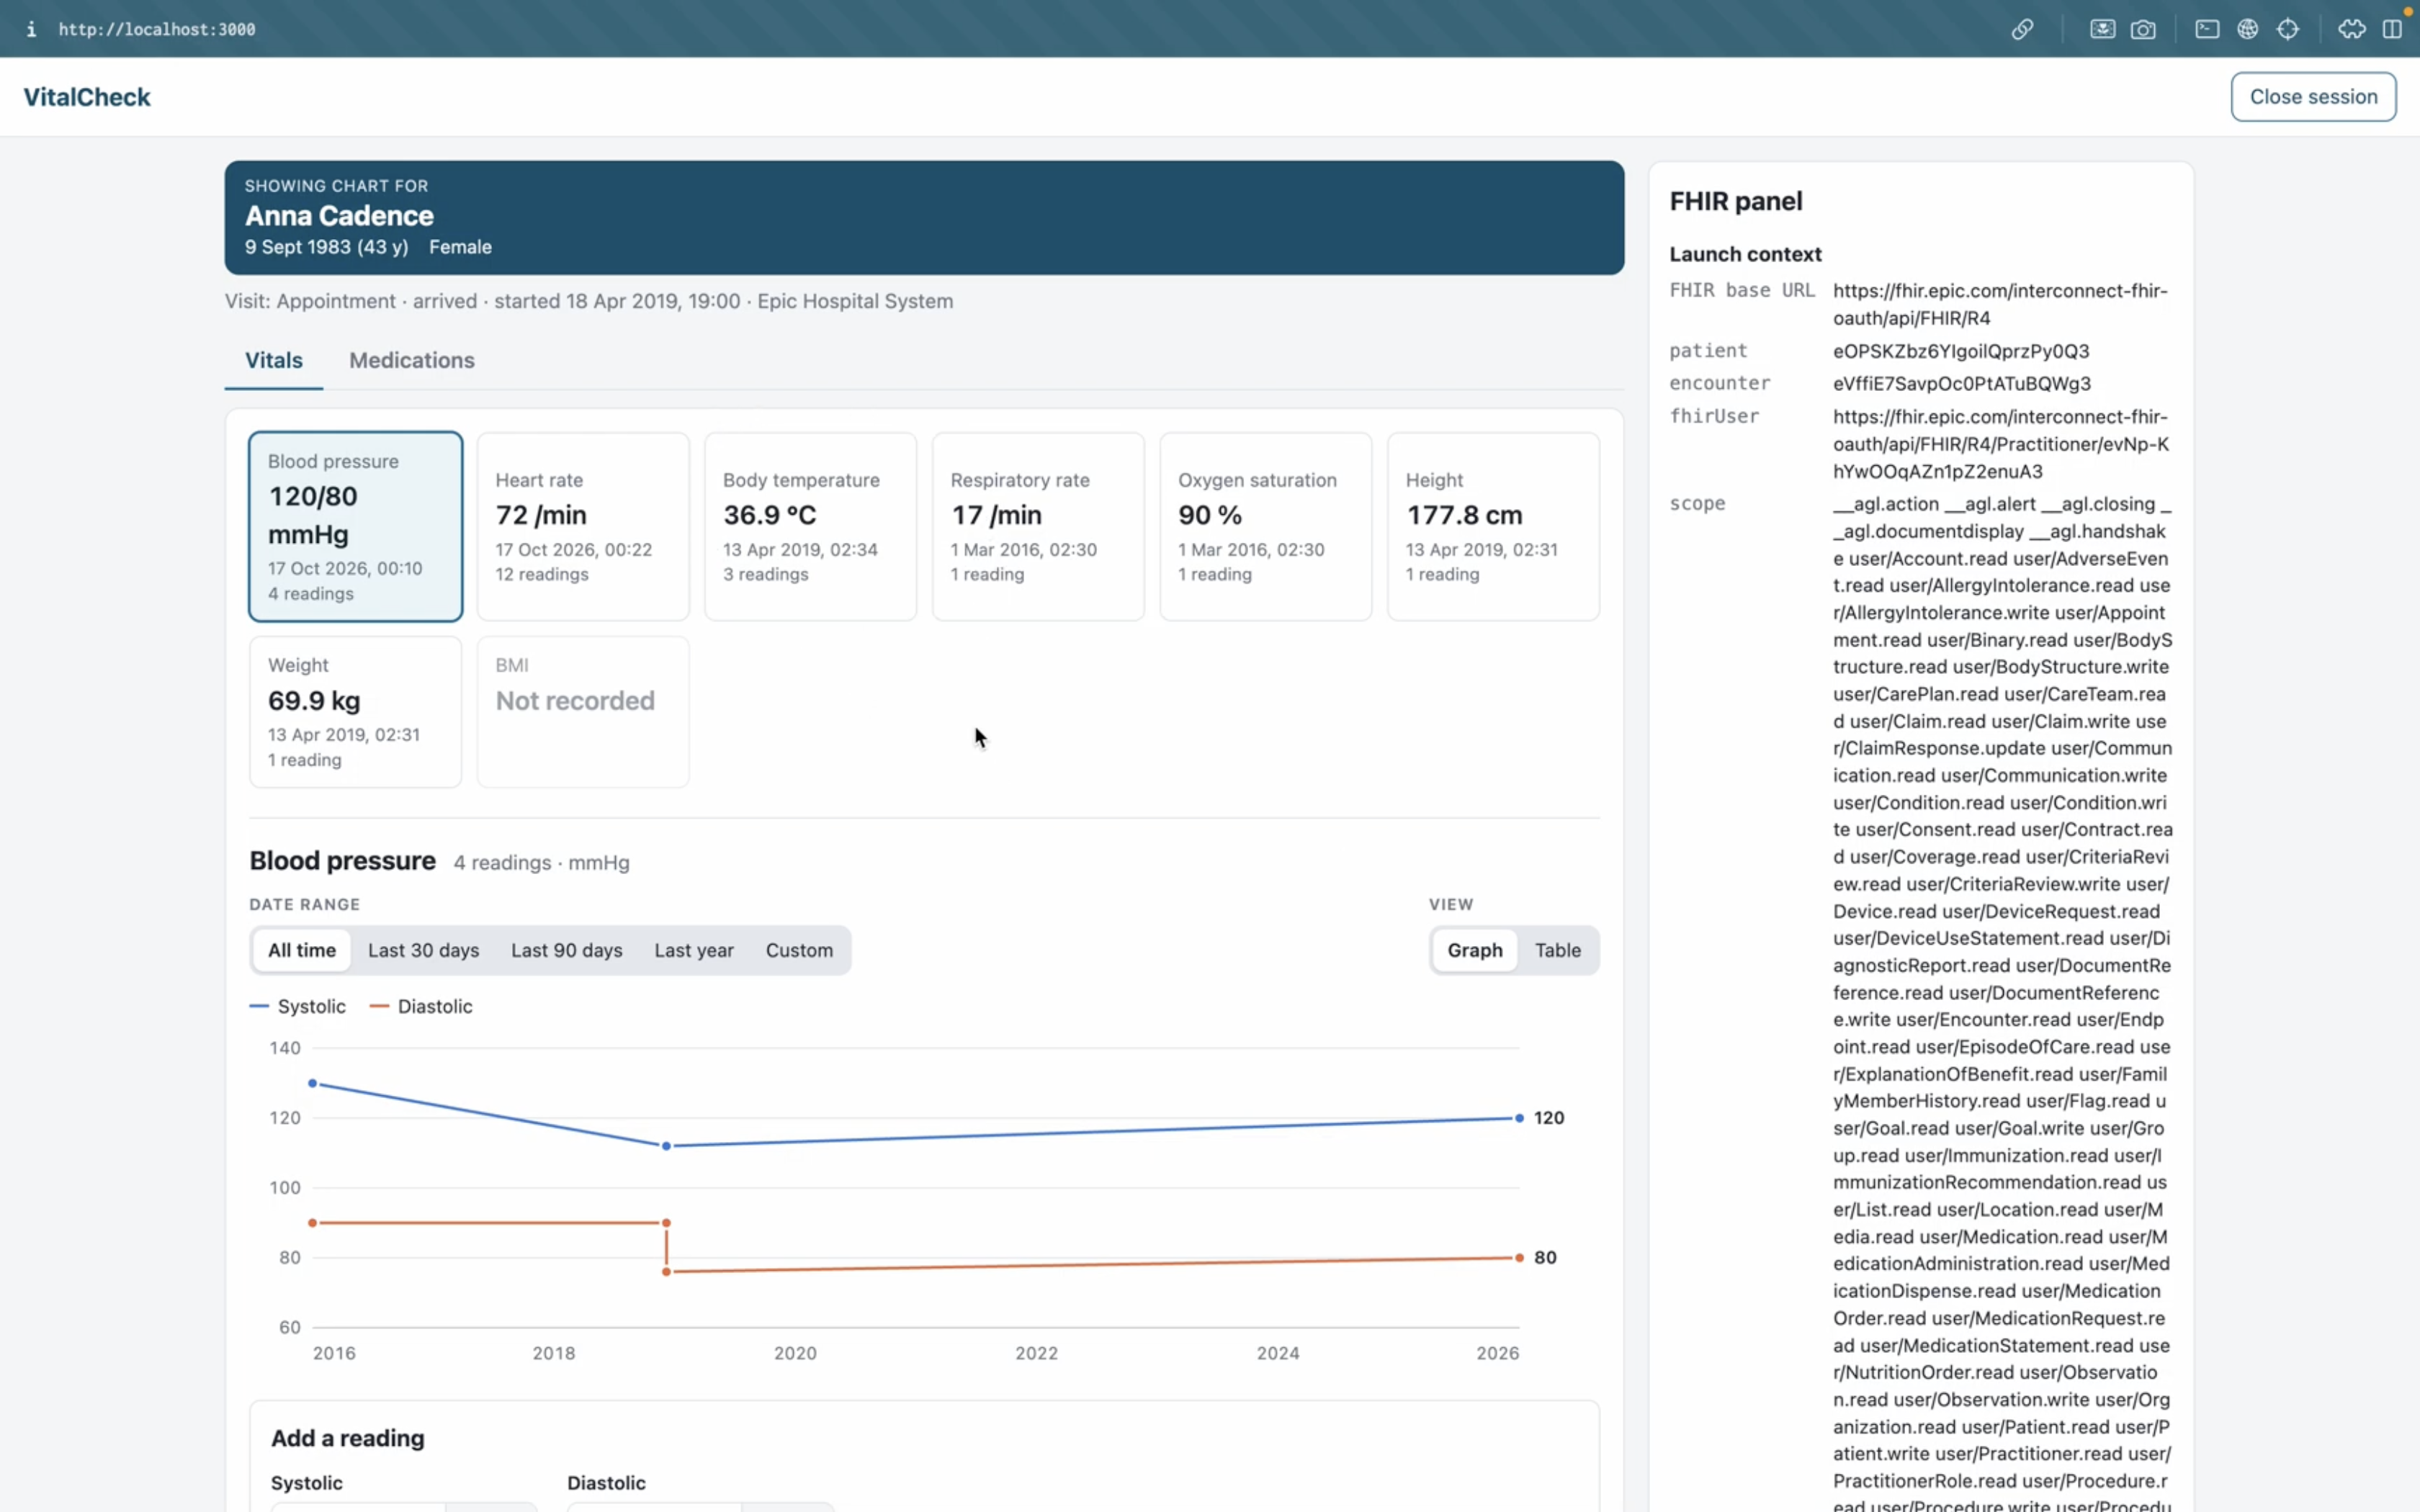
All of that comes from the same Patient resource we fetched in Postman.
The FHIR preview panel
VitalCheck has a FHIR preview panel on the side, the same as Care Summary. It shows what the app is doing under the hood, which you’d otherwise only see in the browser’s network tab. It makes it easier to follow what’s happening if you’re building in a tool like Lovable.
On the overview, the panel shows the request the app made:
GET {base}/Patient/{patient-id}, with the bearer token in theAuthorizationheader- the response, which is the full Patient resource
Compare it to your Postman request from the last lesson. It’s the same patient and the same JSON.
Reading the vitals
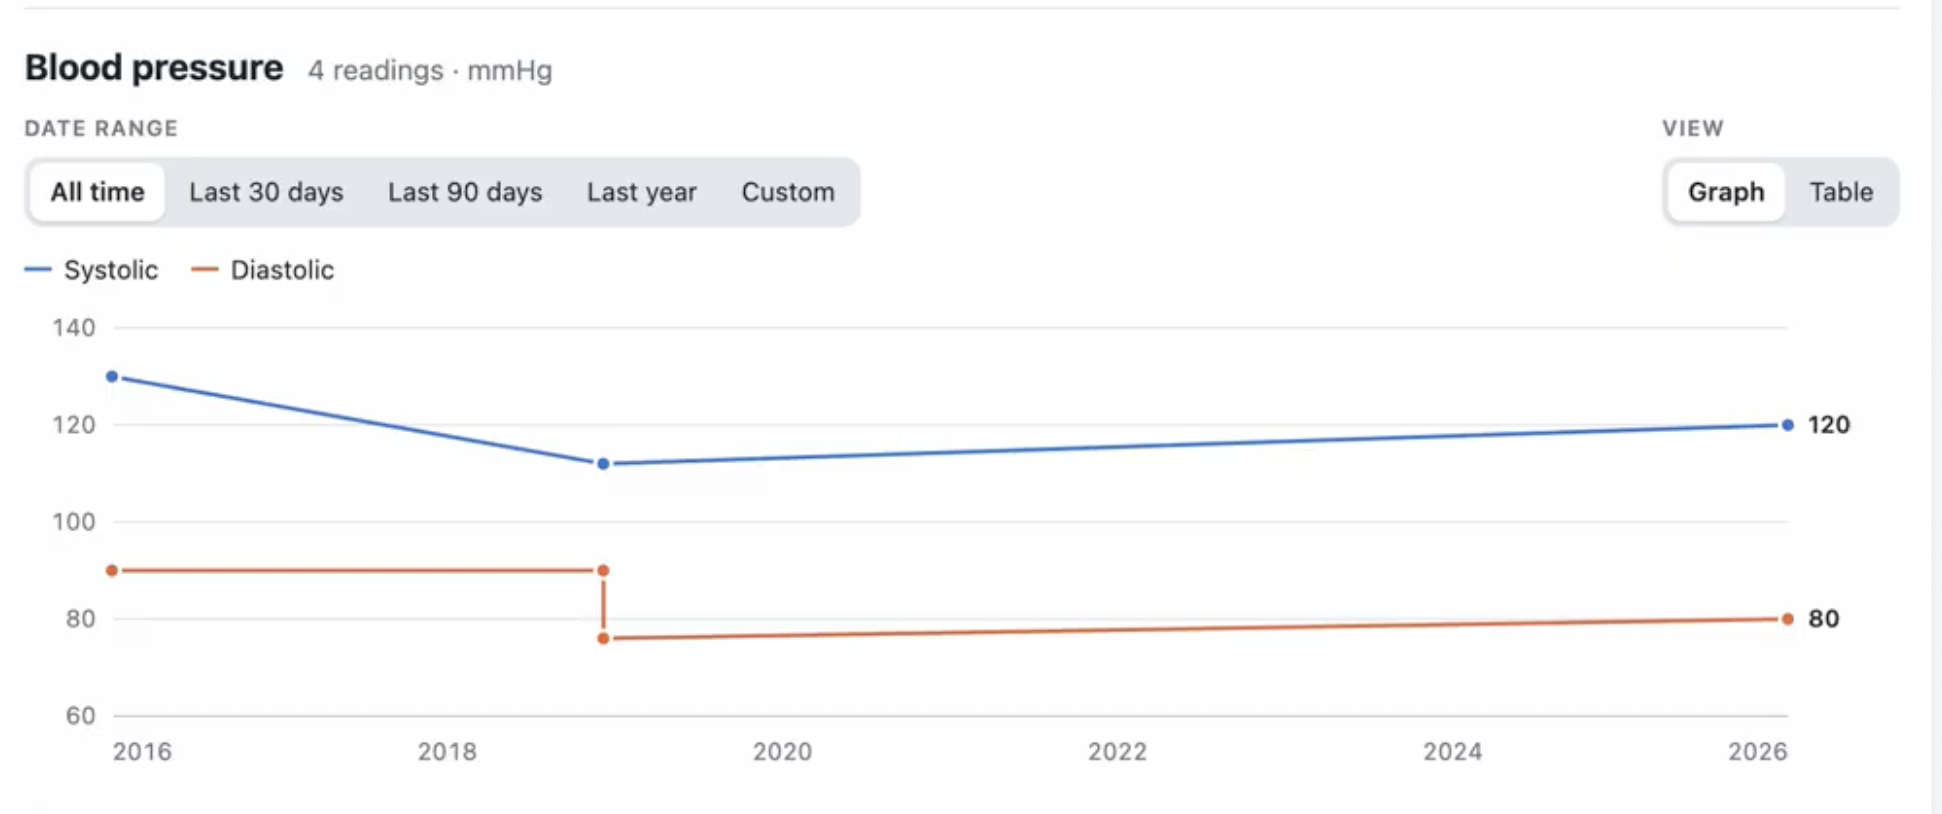
Open the Vitals tab. Pick a vital, say pulse rate, and you’ll see its readings over time, either as a chart or as a table.
In the preview panel you can see what the app fetched:
GET {base}/Observation
  ?patient={patient-id}
  &category=vital-signs
  &date=ge2024-01-01
  &_count=50
The patient and category parameters are required. Epic doesn’t let you search Observations without a category, the same as in Module 2. The date and count filters are there so the response doesn’t get too large.
Epic returns a Bundle of Observation resources. The app reads the readings out of the Bundle and plots them.
You can run this same search in Postman first if you want to see the raw JSON.
Writing a vital back to Epic
A clinician’s workflow isn’t only reading. There’s a common belief that apps inside Epic can only read data and never write it back. That isn’t true for vitals. Epic lets a practitioner write vitals back from any app of their choice, and VitalCheck can do it as well.
The Vitals tab has a Create Vital button. It’s a single number field. The unit is already set, because the app knows it from the readings it just pulled, so you don’t type units or codes. Enter a new pulse rate, say 72, and hit Save.
The new reading will show up on the graph. It’s now in Epic’s chart. A practitioner in Hyperspace will see it in the patient’s flowsheet.
What the write request looks like
Look at the preview panel again. There’s more going on here than the read.
POST {base}/Observation
Authorization: Bearer {access-token}
Content-Type: application/json
{
"resourceType": "Observation",
"status": "final",
"category": [{
"coding": [{
"system": "http://terminology.hl7.org/CodeSystem/observation-category",
"code": "vital-signs"
}]
}],
"code": {
"coding": [{
"system": "http://loinc.org",
"code": "8867-4",
"display": "Heart rate"
}]
},
"subject": { "reference": "Patient/{patient-id}" },
"encounter": { "reference": "Encounter/{encounter-id}" },
"effectiveDateTime": "2026-10-28T10:30:00Z",
"valueQuantity": {
"value": 72,
"unit": "beats/minute",
"system": "http://unitsofmeasure.org",
"code": "/min"
}
}Reading data from Epic is a lot simpler than writing data into Epic. Writing a vital means knowing exactly what Epic expects in the payload.
For example, Epic won’t accept a vital sign without knowing which visit it belongs to. The encounter field has to be there, and the encounter has to be open.
That’s because Epic isn’t a full FHIR server. It’s a facade on top of its Chronicles database, and it runs its own checks on anything you write. A plain FHIR server like HAPI FHIR would let you post an Observation under a patient with no encounter at all but Epic doesn’t.
In our case, the encounter ID came back in the token response from the launch context. That’s exactly what VitalCheck puts in the payload, and that’s why the write succeeds. If you launched without an encounter, or left this field out, you’d see an error here.
Epic accepts a specific set of codes for vitals. Pulse rate, blood pressure, and the other common vitals are in it. Go to Epic’s API specifications, open the Observation.Create (Vitals) spec, and you’ll find the list of codes it will take. Use those and the write works on any Epic instance.
Beyond that list, each Epic installation has its own flowsheet rows, and a hospital can configure codes that aren’t in the standard set. So it’s often possible to write more than the spec shows, but only at that site, and only after the hospital has configured it.
Continuous glucose monitoring is an example. Writing CGM readings into Epic means the hospital first sets up a flowsheet row and a code for it, and then your app writes with that code. It works, but you have to know who at the hospital to ask, and you have to know how their instance is configured.
For decision makers: write-back into Epic is possible for vitals and a few other resource types. Anything beyond the standard codes depends on the hospital’s configuration and needs their team involved.
What’s next
VitalCheck now launches inside Epic on the right patient, reads their vitals, and writes new readings back into the chart.
In the next lesson we’ll see what this looks like in a real Hyperspace instance, using a test environment that Epic provides and almost nobody writes about. If the build or the write-back is throwing errors, post them in the comments.