How to Register an App on Epic on FHIR
In the last lesson we went through the patient login flow: the MyChart login, the consent page, the OAuth handshake, the token response and PKCE.
In this lesson, we’ll register Care Summary on Epic’s developer site and get a client ID.
What registering gives you
Registering an app gives you three things.
A client ID. This is how Epic knows which app is asking for access. You send it when you redirect the patient to the login and consent page.
A set of scopes. You register the app for the data it needs. After that, the app can only ever request a subset of the scopes you registered. It can ask for fewer, never more.
Redirect URIs. This is where Epic sends the patient back after they consent. You can register several, for example one for local development, one for staging and one for production. Your app picks one when it sends the patient to the login page, and the patient comes back to that URL. But Epic only accepts a redirect URI that’s already on the list you registered.
For decision makers: this step is free and self-serve. You don’t need a contract or sign-off from Epic or from any hospital to register an app. There are checks before you go live, and we’ll cover those in Lesson 5.
Create a Patient App on Epic
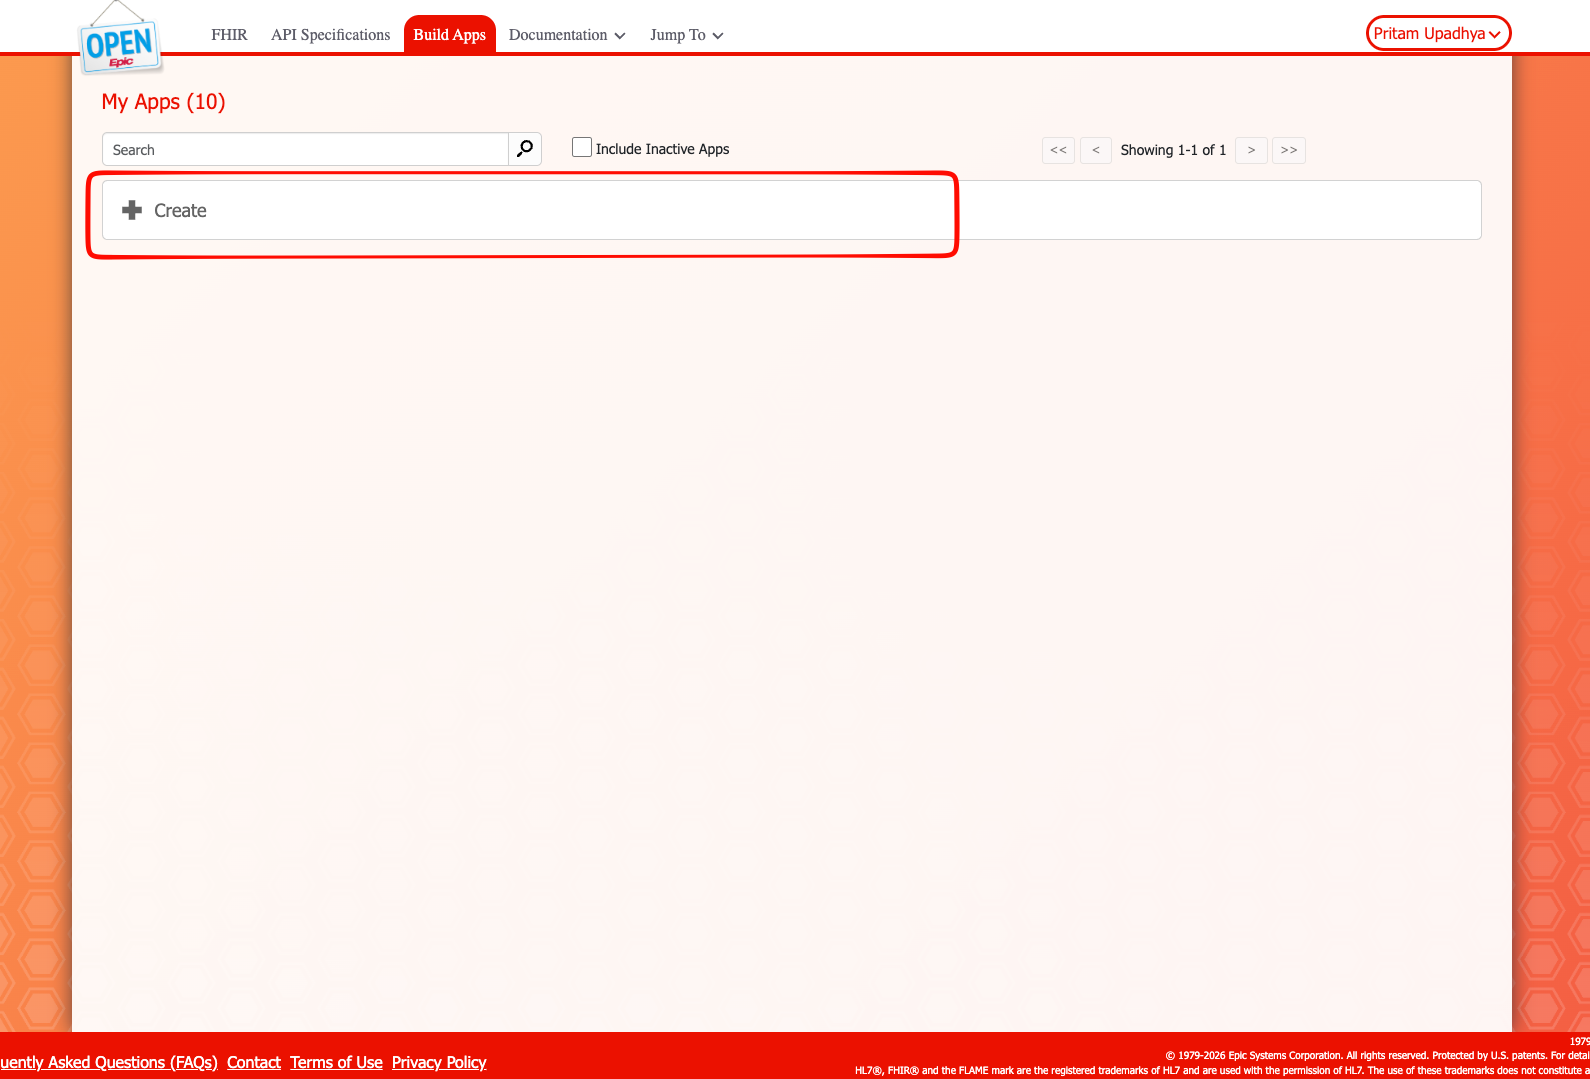
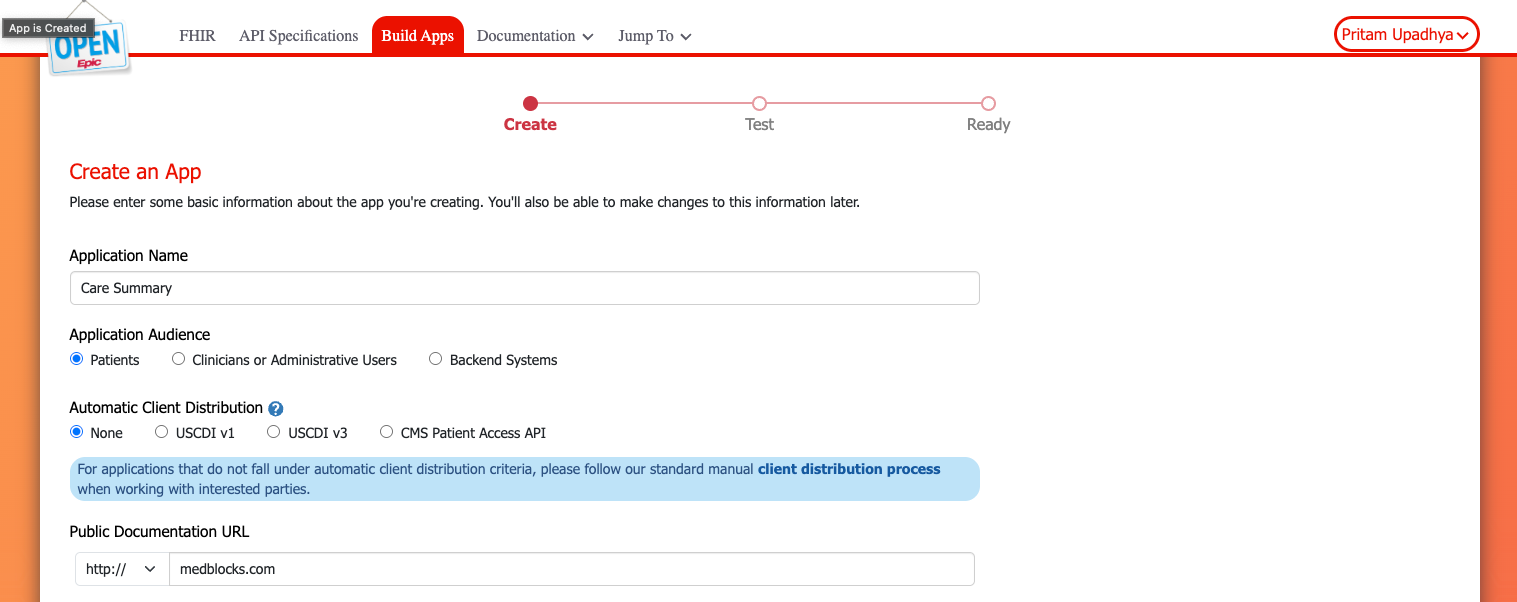
Sign in to fhir.epic.com with the Epic on FHIR account you created in Module 1. Go to Build Apps, then Create.
You may see older guides call this section App Orchard or My Apps.
Name and audience
Give the app a name. We’ll call ours Care Summary.
For Application Audience, select Patients. This is what makes it a patient-facing app.
Build your first real FHIR app in 15 days
500+ builders have done it. Live kick-off, structured modules, Demo Day. $27.
Join the challengeDocumentation URL
Epic asks for a documentation URL. For the sandbox, this can be any real page that describes what your app does.
Use a URL that actually loads. If you use invalid URLs here, the registration might get stuck so it’s not worth the risk.
Choose your scopes
Next, select the APIs your app will call. Epic turns your selection into a scope string and stores it against the app. From then on, the app can only request scopes from that list.
For Care Summary, we select the R4 read APIs for the data we show:
- Patient.Read (Demographics) (R4)
- MedicationRequest.Search (Signed Medication Order) (R4)
- Observation.Search (Labs) (R4)
- Observation.Search (Vital Signs) (R4)
- Observation.Read (Vital Signs) (R4)
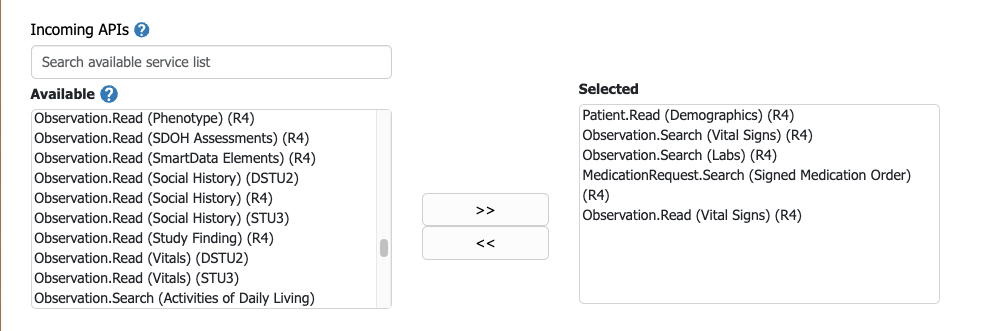
There are three things to note here.
Pick R4. Most APIs appear in more than one FHIR version (DSTU2, STU3 and R4). Select R4. That’s the most commonly used version of FHIR and all the FHIR API calls we make in this course will be based on this version.
Observations are split by category. Epic lists Observation separately for labs, vital signs and other categories. If Care Summary shows vitals, the vital signs category has to be in your selection, or those requests will fail later.
Use least privilege. Select only what your app needs, for the same reasons we covered in Lesson 1. There’s a second reason specific to this screen: Epic publishes a list of scopes that qualify for automatic distribution. If your app sticks to that list, it goes to every Epic hospital without anyone needing to grant permission. For a patient app, that’s what you want if you want to get into production fast. We’ll go through how distribution works in the final lesson.
Add your redirect URIs
The redirect URI is where Epic sends the patient after they log in and consent.
At minimum, add one for local development:
http://localhost:3000Add your staging and production URLs too, whatever your setup needs. You can register as many as you want.
Do this before you go to production. Once the app is marked ready for production, you can’t edit this list.

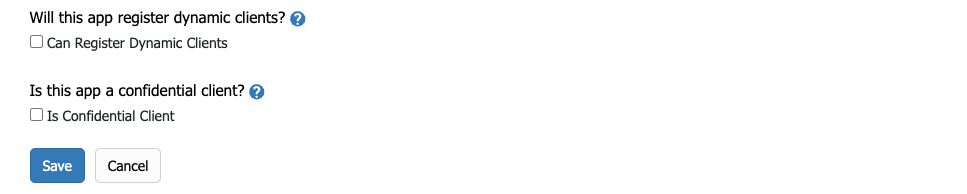
Leave “confidential client” off
There’s a toggle for Is Confidential Client. Leave it off.
Care Summary runs in the browser. As we covered in Lesson 1, a browser app has nowhere to hide a secret, so it can’t hold one. That makes it a public client, and it proves its identity with PKCE instead.
If your app has a backend and you want to use a client secret or a private key, this is the toggle that sets that up. For this module, leave it off.
Accept the terms, then mark it ready for sandbox
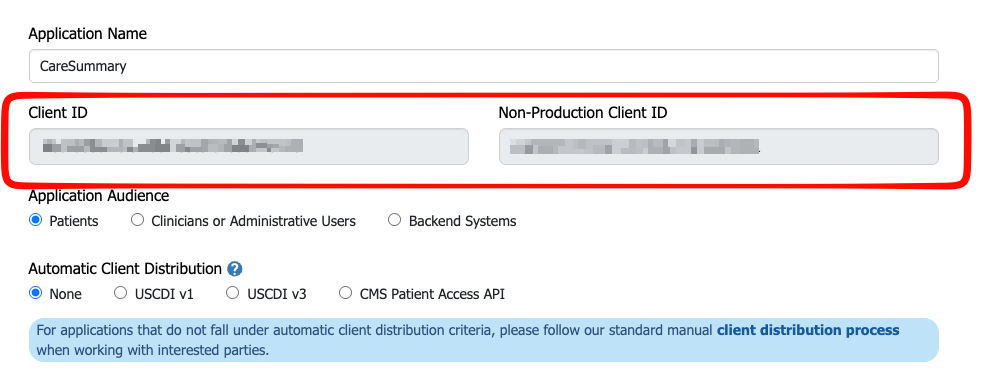
Click on Save and then, you will see the Client ID and the Non Production Client ID are visible now. Then you need to fill the Summary, Intended Purposes and Intended Users field based on your app.
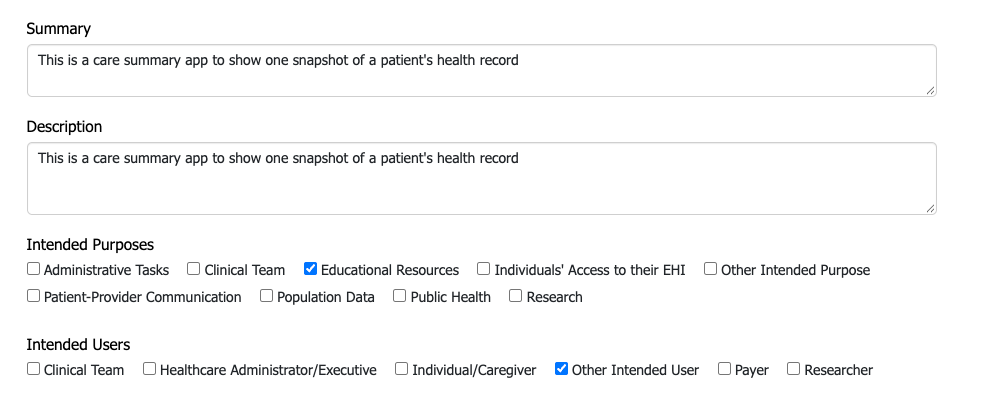
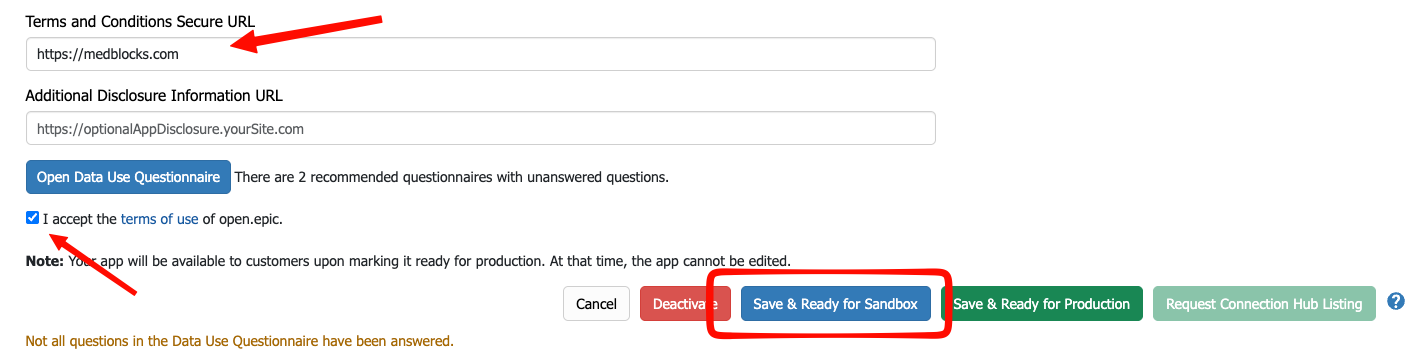
Tick the terms of use checkbox before you click Save & Ready for Sandbox.
If you miss it, your app may not work, and Epic won’t tell you clearly that this is why. It’s an easy step to skip and a hard one to debug.
Two Client IDs
Once the app is registered, Epic gives you two client IDs.
The non-production client ID points at Epic’s sandbox, which has fake test data. We’ll be using the non-production cleint ID in this module.
The production client ID stays unused for now. It is used when the app is ready to go live.
An Epic App can take upto 24 hours to become active.
Epic takes time to sync a new app across its systems. A newly created app can take an hour or two to become active. If you change something later, the change can take another hour or two, sometimes up to 24 hours, to take effect.
So if the login flow breaks right after you register or edit the app, wait a while before you start debugging. It will probably just work later.
What’s next
You now have a non-production client ID, a redirect URI on the allow list, and Care Summary registered as a public app.
In the next lesson, we’ll take that client ID into Postman and run the OAuth flow: log in as a sandbox patient, get the code back, and exchange it for an access token. If you get stuck registering your app, post in the comments about the problems you are facing.